Pumpkins, to the nutritionist, are some of the healthiest foods. To the general population, they’re a must-have during Halloween, where they’re curved and illuminated for the season’s decoration.
However, for us – artists, it’s a great subject to sketch and perfect our shading prowess. With a deep orange and bumpiness, we can practice enough to sharpen and keep our creative juices flowing.
As we approach the Halloween season, I thought it would be exciting to share how to draw a realistic pumpkin using graphite pencils.
Follow along:
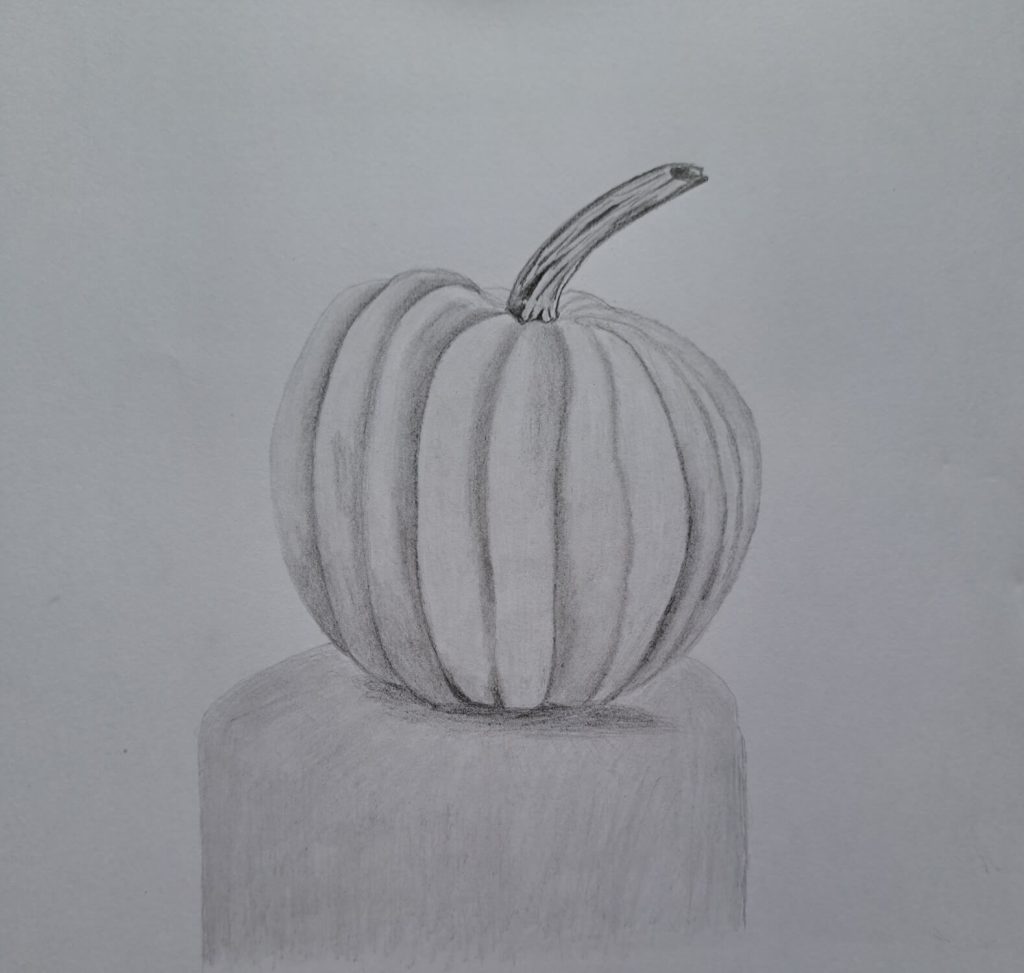
Sketch the general outline
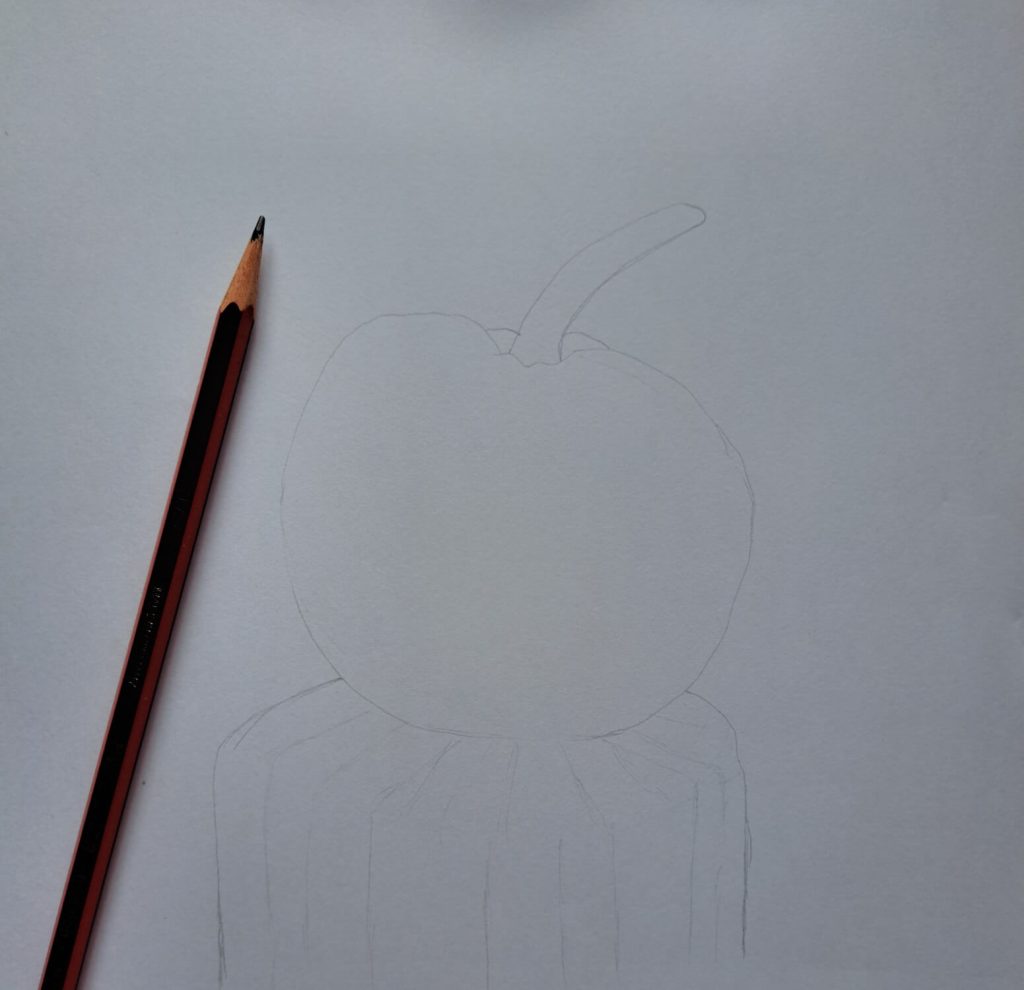
Most pumpkins have an oblate-like shape
The shape is somewhat irregular, but not always. That’s why having a reference photo will help sketch a believable shape rather than drawing from memory, especially if you’re a beginning artist.
In other words, the initial shape should look like an apple or a tomato. Lastly, don’t forget to draw a surface on which the pumpkin rests.
Bonus tip: I’ve included a tree stump that you can follow and replicate for your drawing.
Sketch the details comprising the rind.
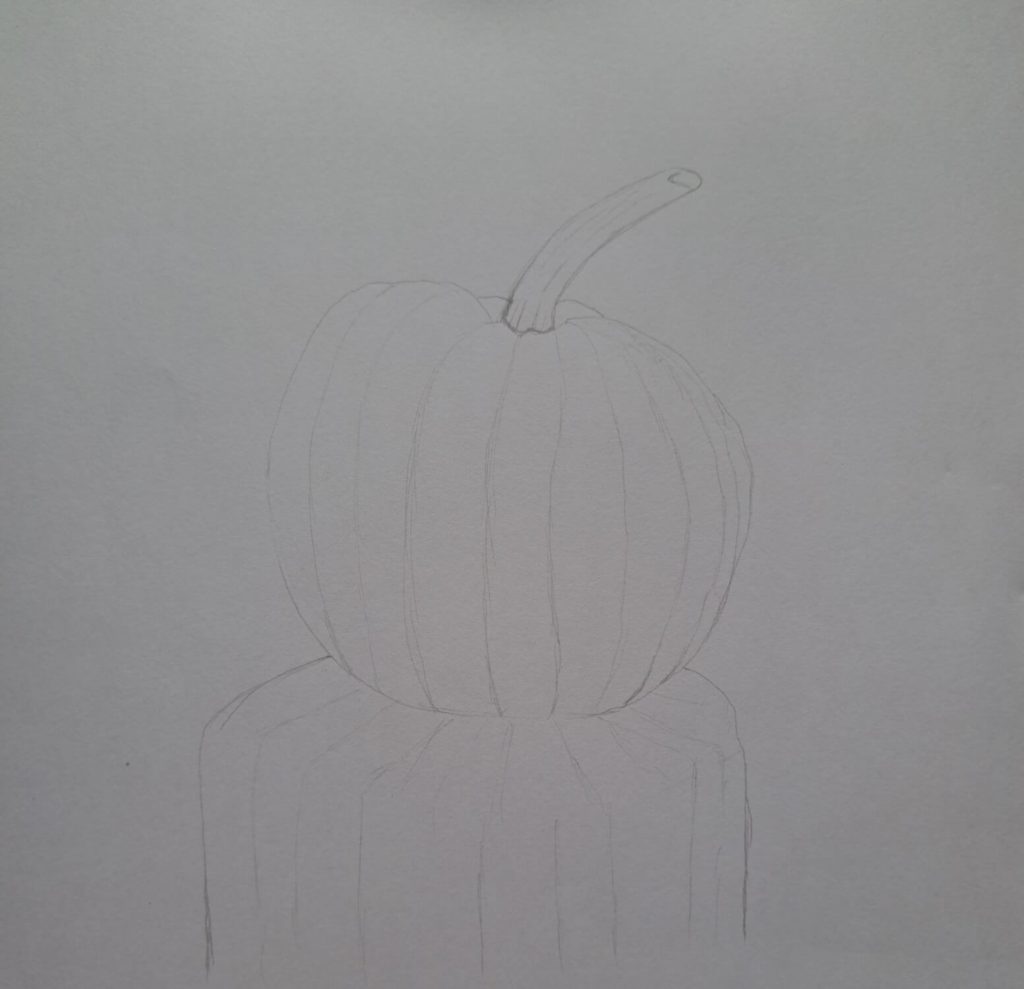
The next step is to observe the pumpkin’s surface. While some are relatively smooth, the majority are furrowed or ribbed.
Draw the lines where you want your furrows to be. Once you have filled in the furrows, the ribbed surface will fall into place.
Add a bit of detail to the stalk as well.
Bonus tip: Make sure the tree stump has lines indicating major cracks.
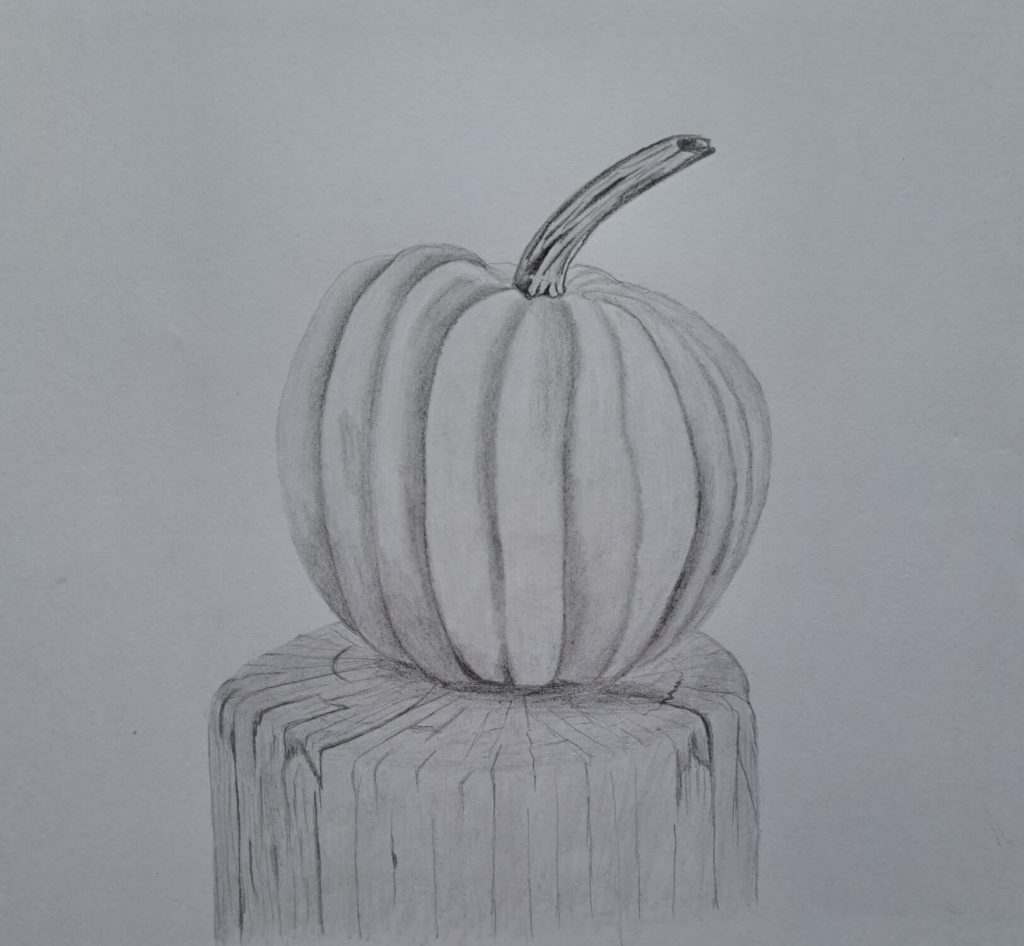
Initial Shading
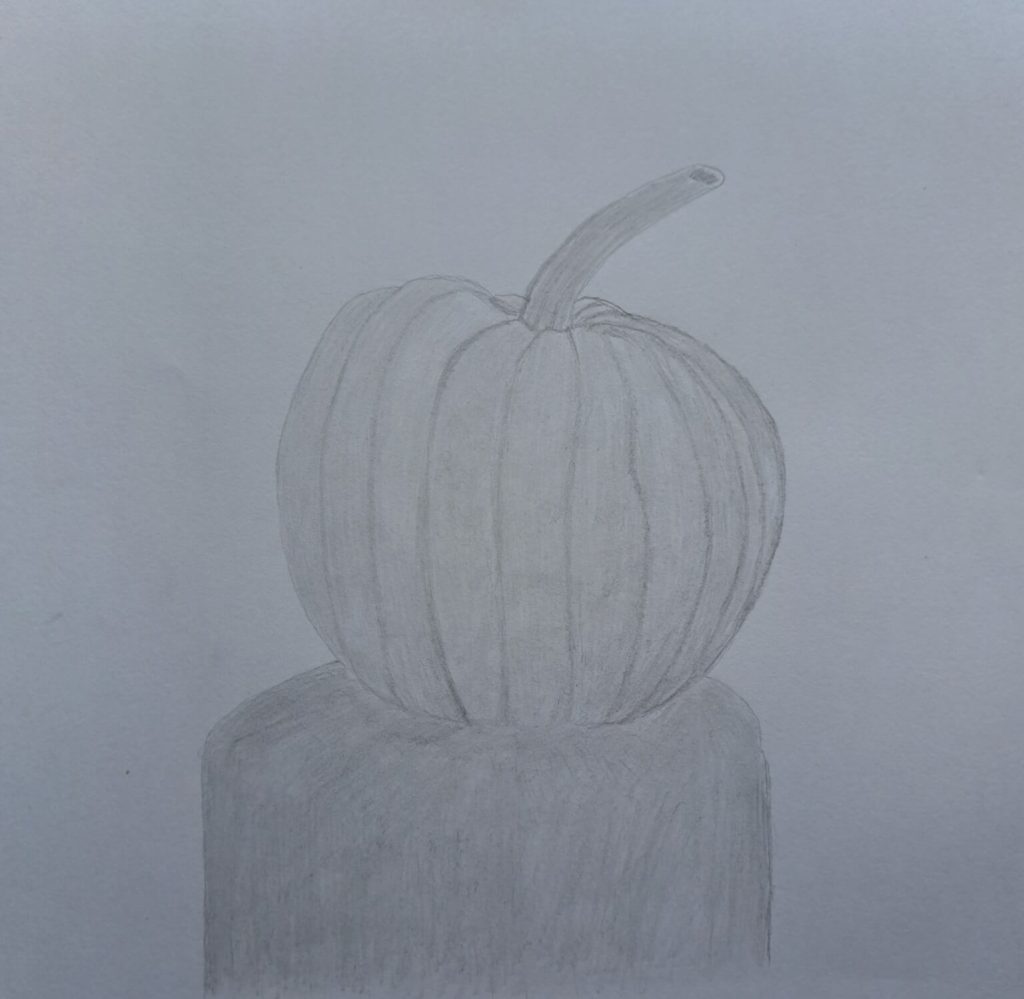
At this point, we need to give the sketch some form (meat). To do this, get a 2H pencil or H, depending on which pencil you used to sketch and shade the entire sketch.
It’s always advisable to start light. That way, you can easily erase anything that doesn’t look alright.
When shading, emphasize the furrow details so that you don’t lose them. Lastly, get a blending stump and lightly smudge the graphite to create a smooth finish (I used a Faber Castell blending stump). A Q-tip can also do the job.
Bonus: Do the same for the tree stump.
Finer Shading for a realistic look
To accomplish this step, you need to understand how light interacts with your subject, including its source, reflection, and shadows.
Since the furrows are deeper, they don’t get too much light and are, therefore, dark. I shaded them with a 3B pencil. Keep blending as you shade to avoid the drawing looking grainy.
As you shade further from the furrows, use a lighter pencil, preferably an HB, to create a smooth transition from dark to highlights.
For the stalk, I used a 6B pencil to create dark strips that create an illusion of dry and woody.
Tree Stump: If you observe keenly, the surface of the tree stump is filled with minute cracks rather than a smooth texture. Therefore, use a well-sharpened pencil to create thin strokes. Alternatively, use a 0.5mm lead mechanical pencil like I have done.
For wider cracks, use a 6B pencil to shade them.
Creating contrast for a sharper drawing
You’ve come a long way and probably have a realistic pumpkin drawing. The last thing we want is for the piece to look dull and blurry. This could happen for several reasons, including excessive blending or smudging with your palm.
To solve this problem, get a well-sharpened, softer pencil and sketch through the edges, furrows, cracks, and all other visible shadows. This time around, there is no more blending.
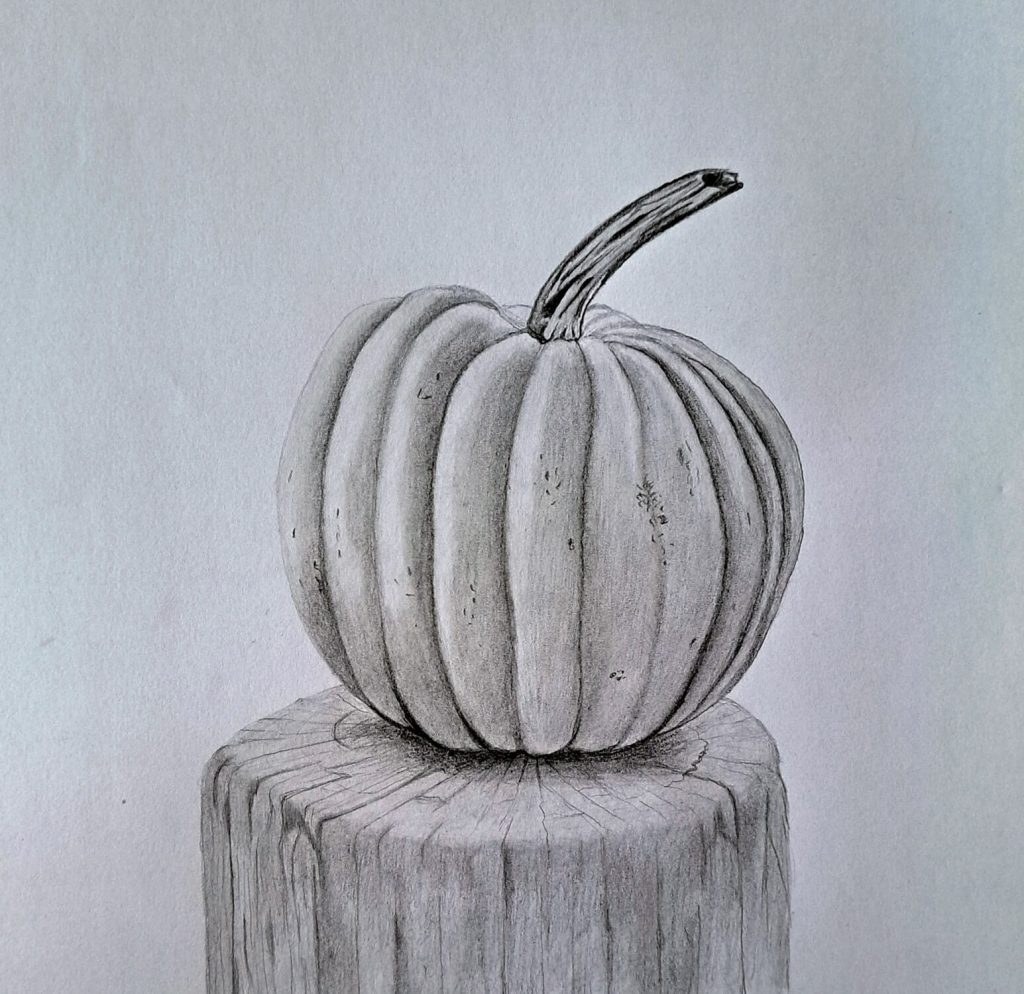
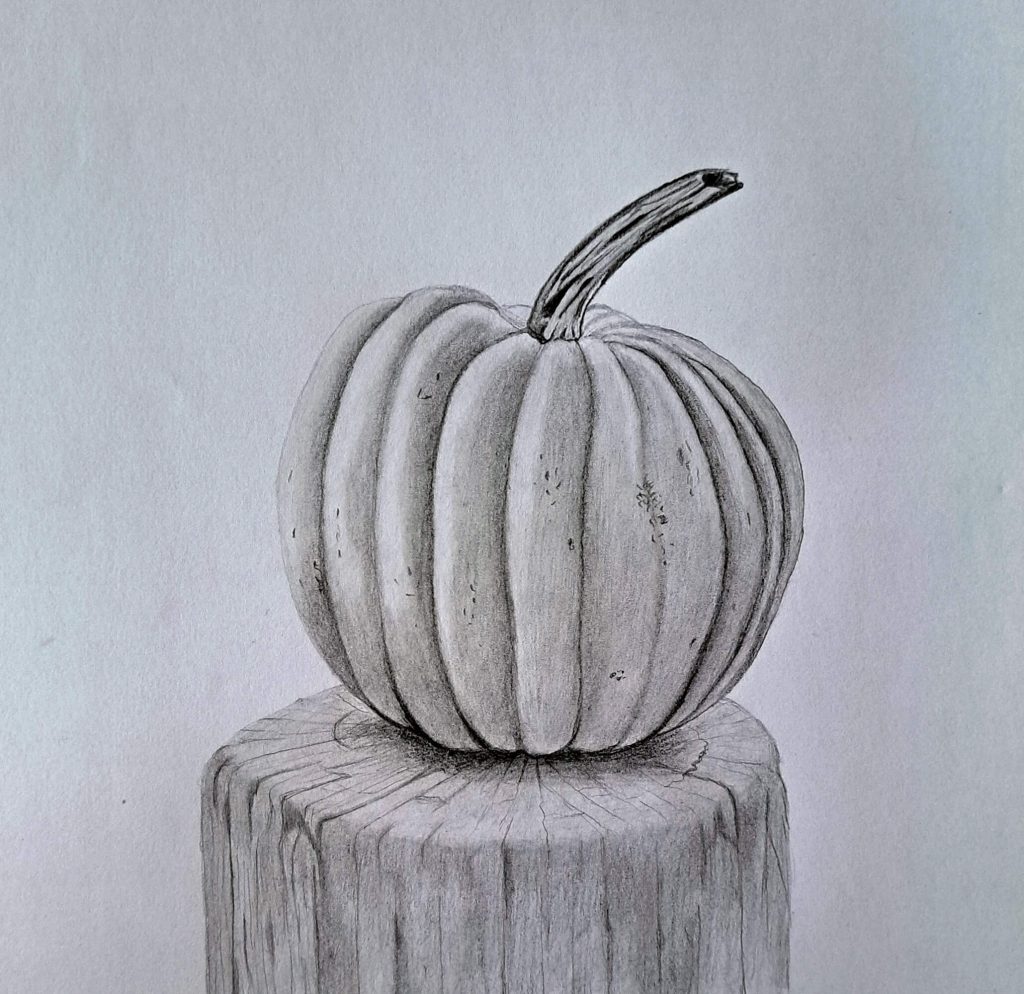
There, you have your final piece!
Final Thoughts
As a lifelong art student, I’ve learned that the only way to improve is to keep drawing. Still objects are ideal practice pieces.
I hope you’ve enjoyed today’s tutorial. I would love to see your results—feel free to share!