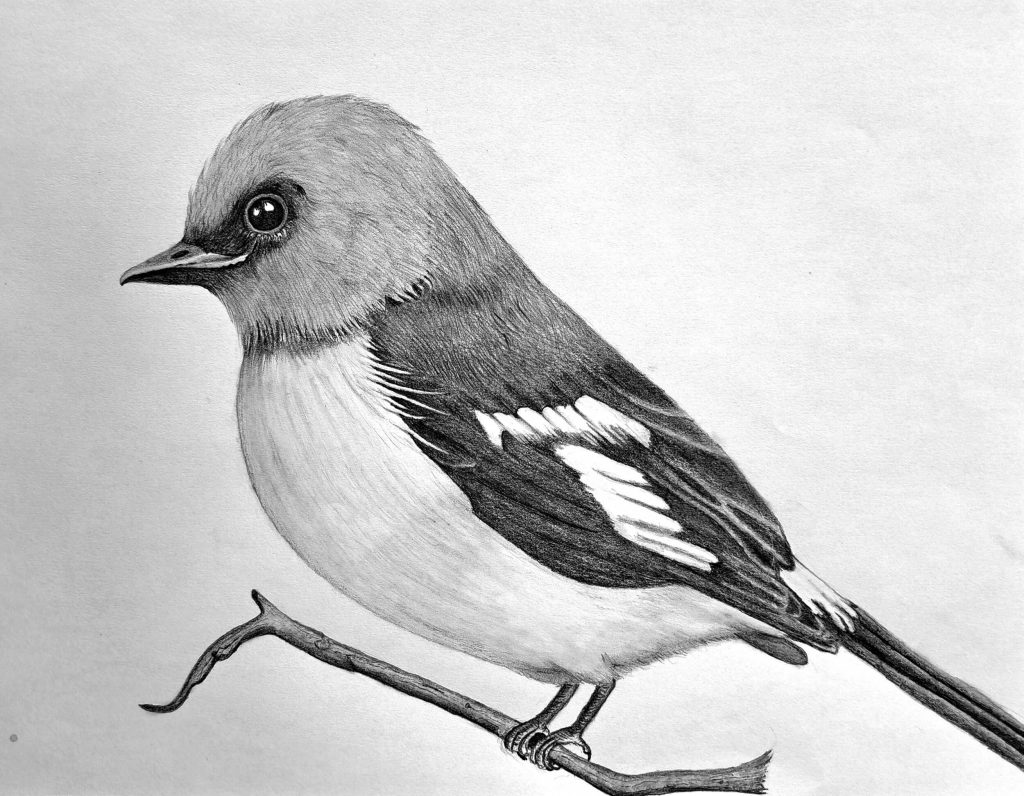
One of the things I love about art is the ability to explore different topics and interests without limitations. In our pursuit of learning to draw various things, we’re able to connect with them.
Birdwatching is a real-life treasure hunt for most birders that brings bursts of color and melody into their lives. But you don’t have to be a birder to experience the same.
Taking the journey to understand and draw these birds is just as exciting.
Therefore, in today’s tutorial, we will learn how to draw a realistic warbler using graphite pencils, erasers, and paper (sketchbook). If you’re interested, there’s another tutorial on using colored pencils.
Step-by-Step Process for Drawing a Realistic Bird
General sketch
While this step is the easiest, it’s undoubtedly the most critical, so try to be as careful as possible. Besides, always sketch lightly using pencils that range from 4H to HB.
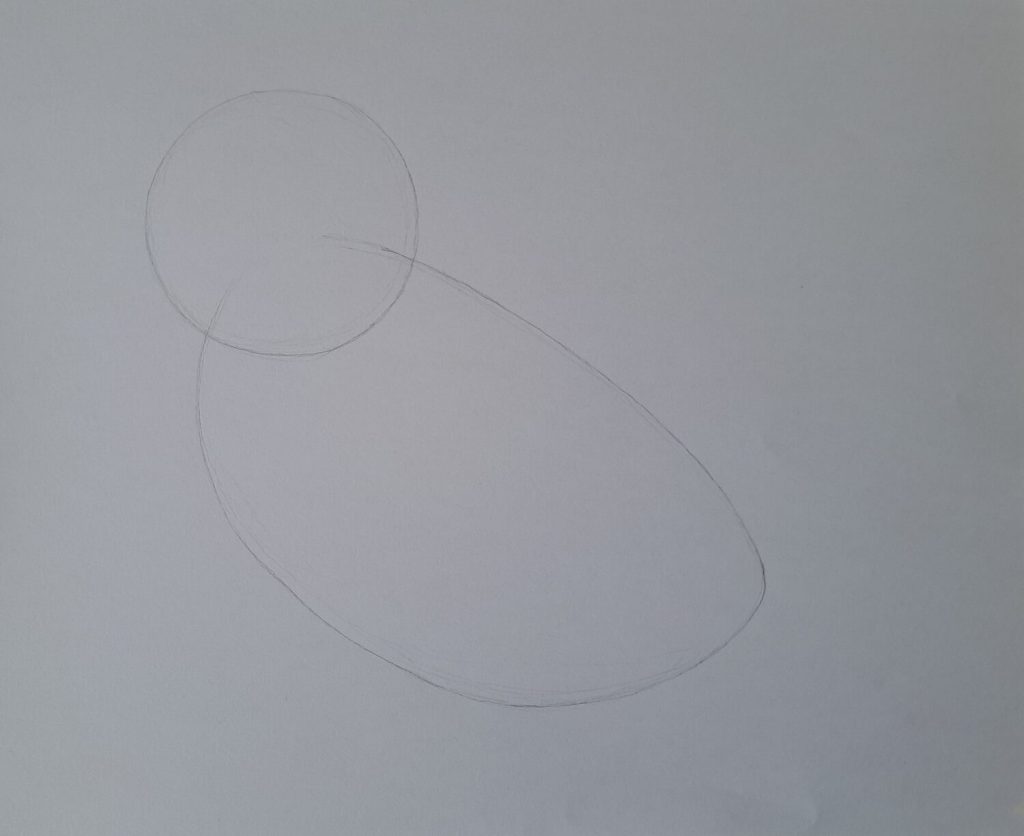
Start by drawing a circle representing the bird’s head, followed by a ¾ oval, as illustrated below. The oval represents the body.
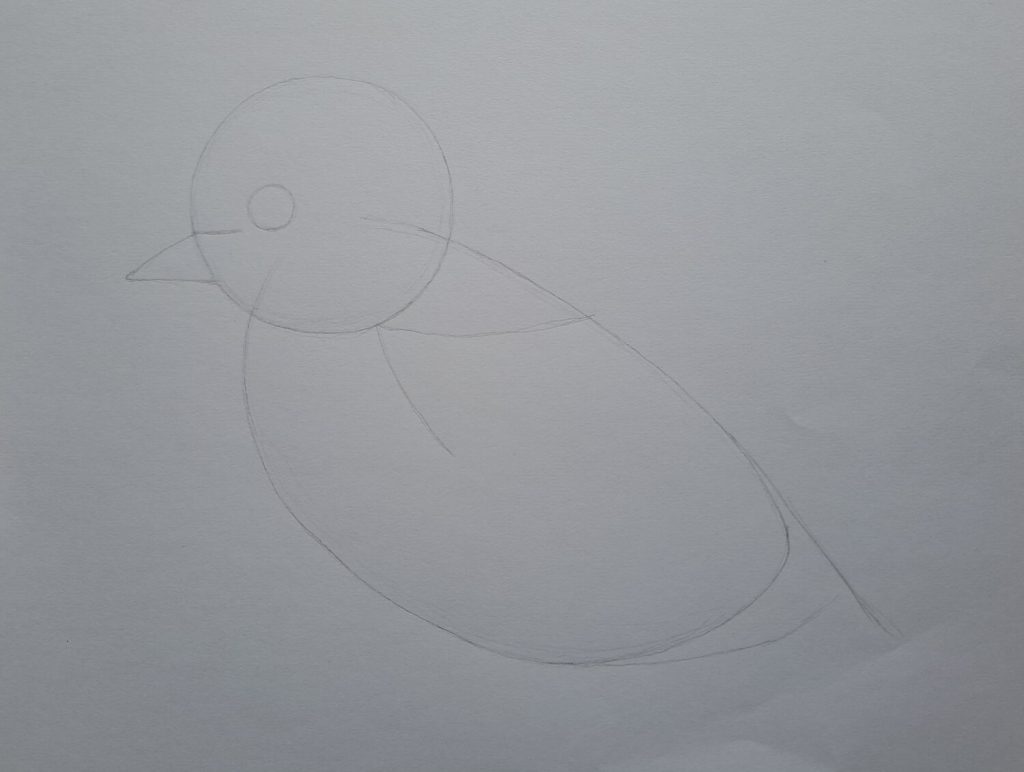
Draw another small circle inside the first to represent the eye. Then, sketch a pointy triangle attached to the circle representing the head. Make two marks in the oval as shown below:
Connect the bird’s neck (nape) by joining the oval and the circle at the top. You can also detail the bird’s wing and tail at this point.
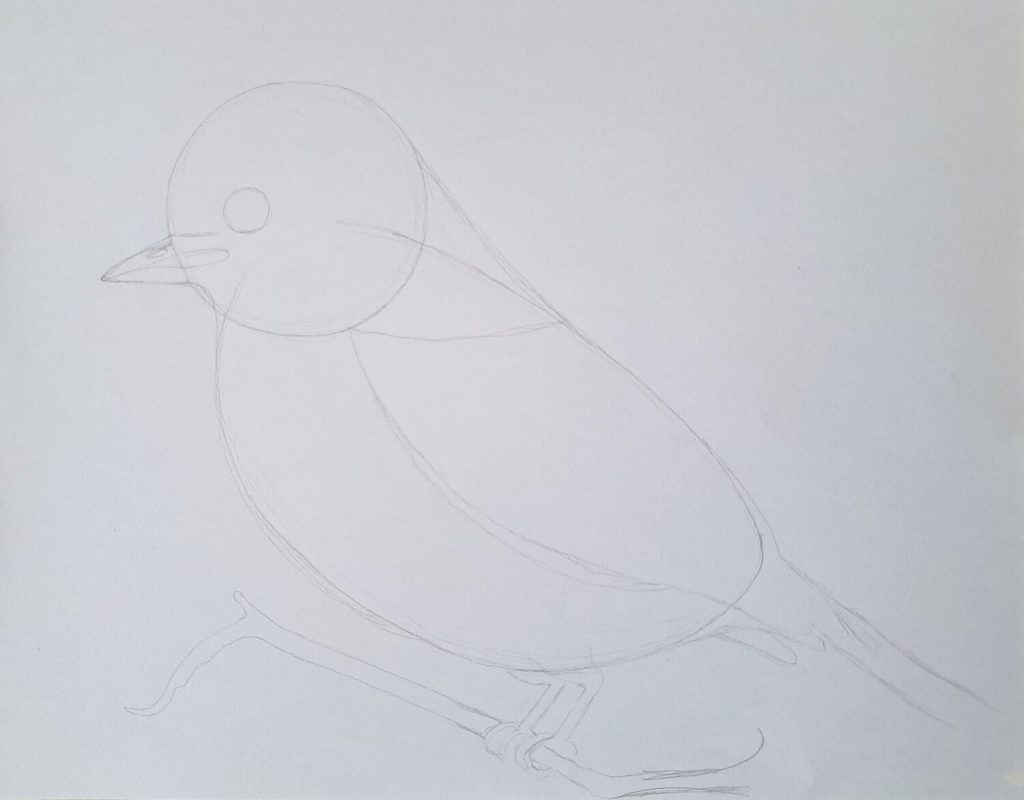
Final Sketch with Details
Begin by outlining the shape of the bird by connecting all the components. You can also draw the legs clamping onto a piece of a branch.
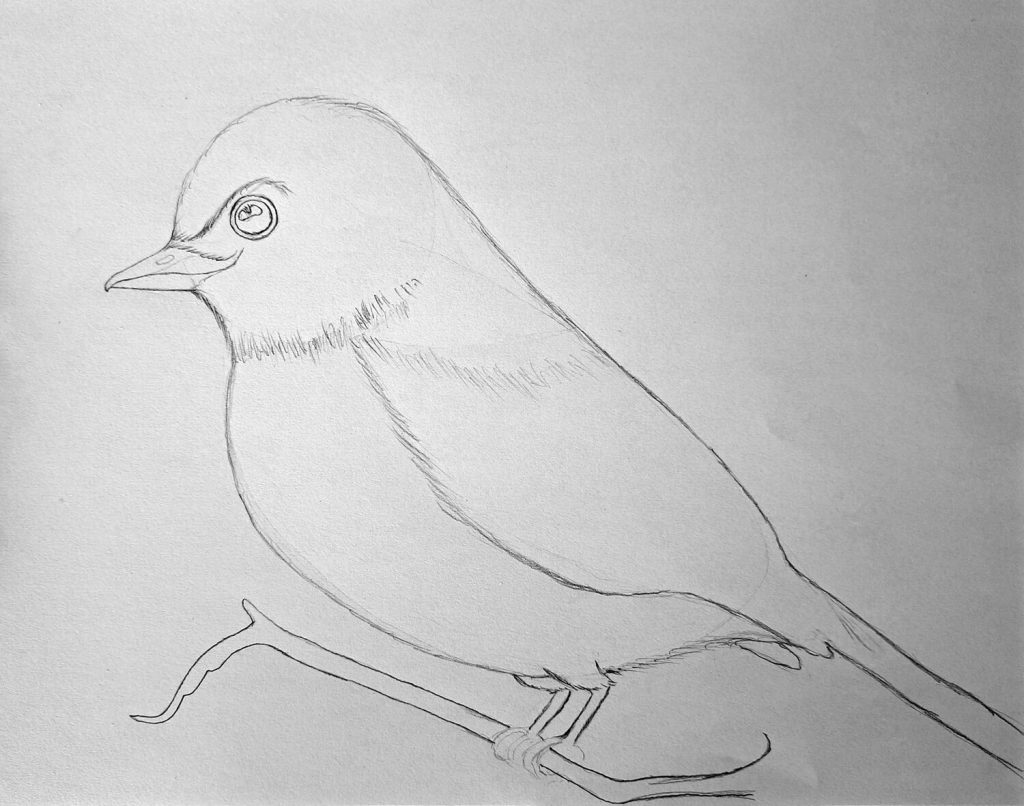
Sketch more details on the beak, including the nostril. Then, add another circle inside the one representing the eye. Once done, sketch the highlight, which we shall leave unshaded to indicate the light’s reflection.
Lastly, using light strokes, define the boundaries between the bird’s throat, breast, belly, and wings.
Basic shading
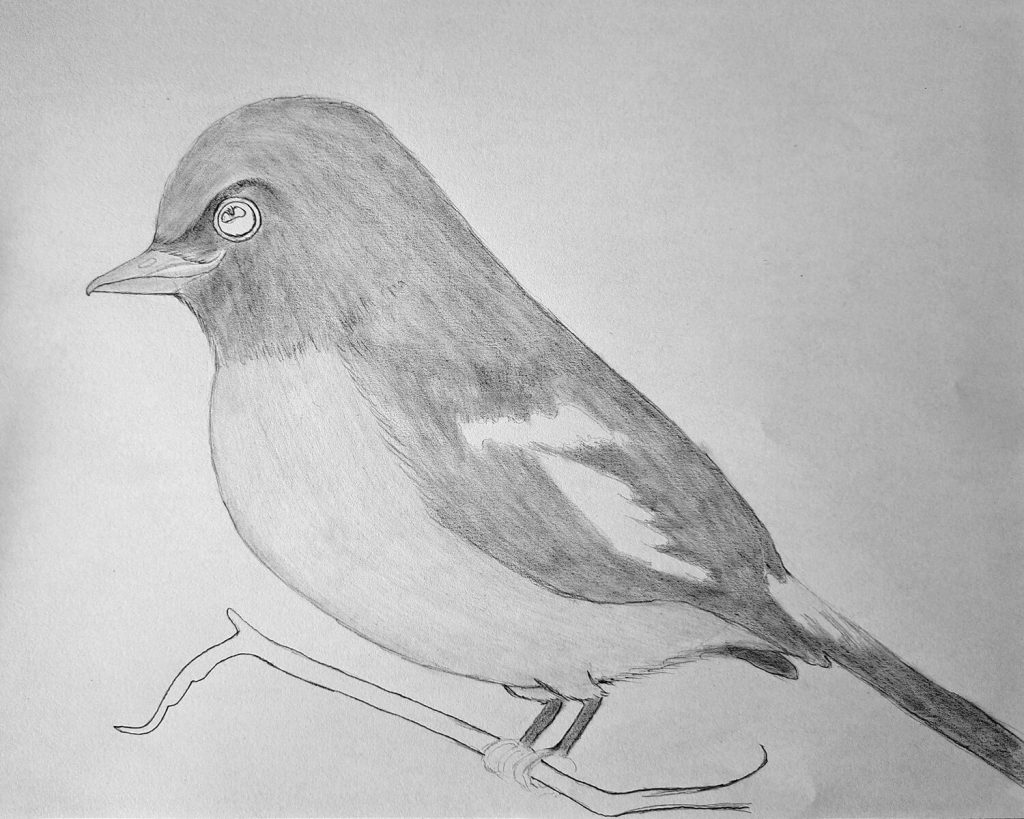
Shade the whole body using an HB or B graphite pencil except for the eyes, breast, belly, and other light-colored areas. Also, shade the tail.
Once finished, get a Q-tip and smoothly smudge the graphite blending to ensure a fine finish.
Shading the Eyes and the Beak
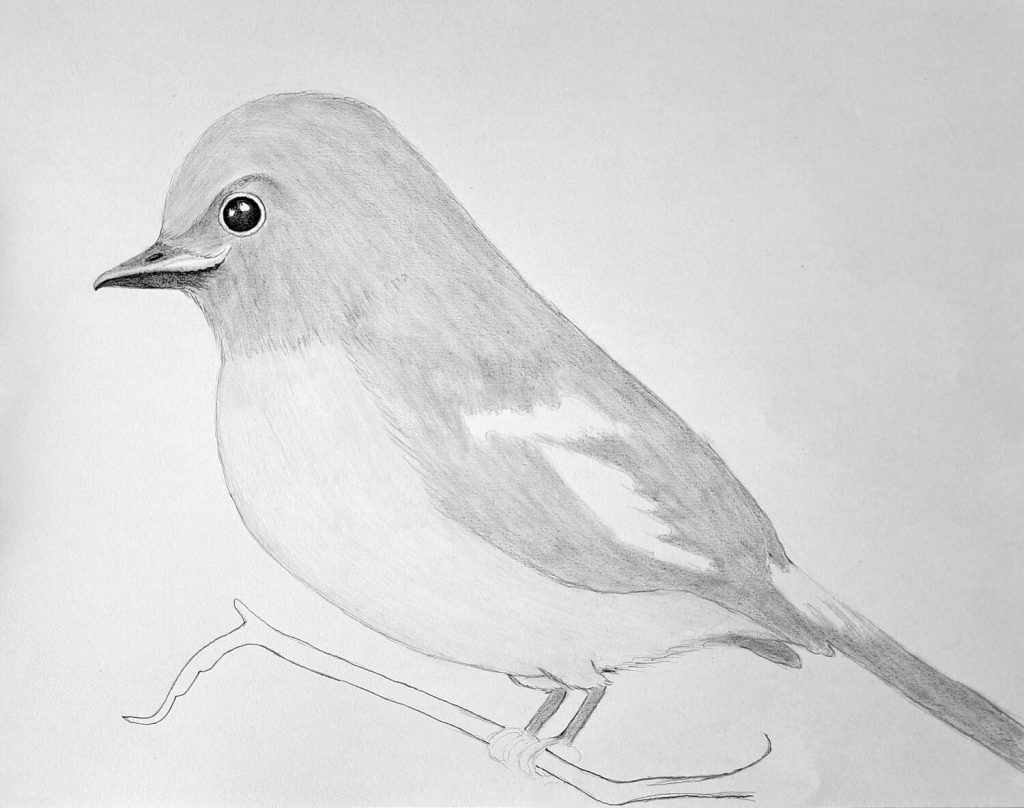
Use a dark pencil, preferably 8B, but you’re also free to use 6B to shade the inner circle, ensuring it’s darker towards the ends and lighter towards the center of the circle.
Remember not to shade the highlights.
Continue to shade the beak, ensuring the nostrils appear darker and the lower part of the beak (those areas receive the least light).
Shading the Bird’s Feather
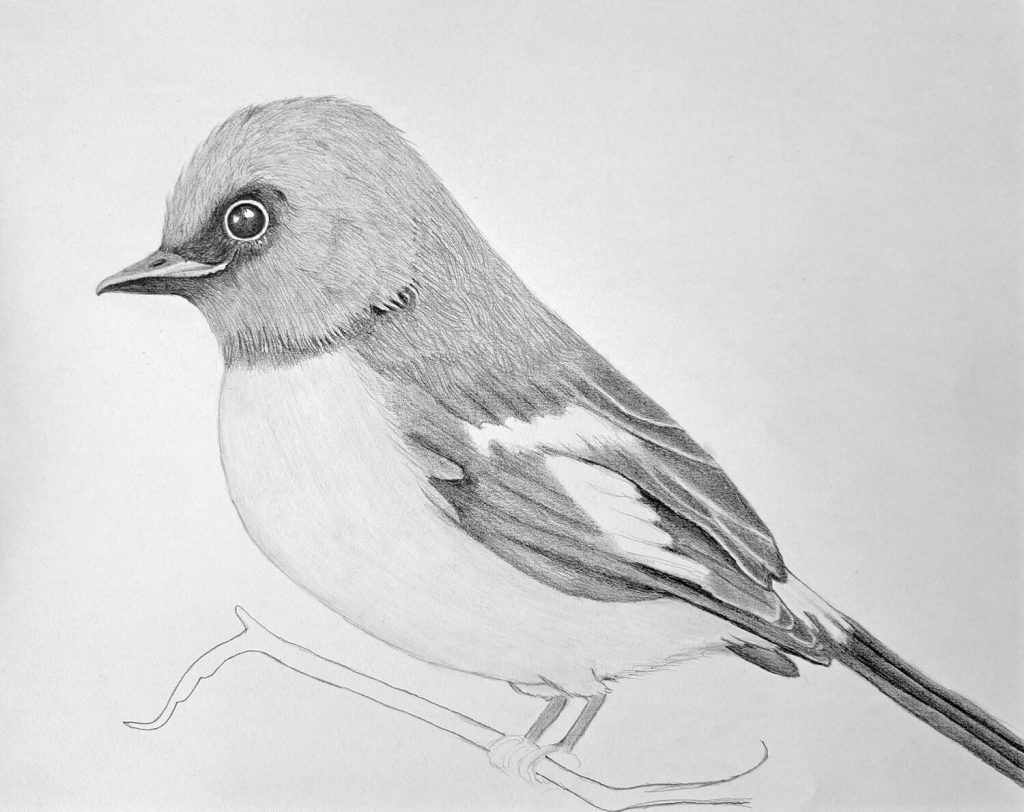
There are different types of feathers – all serving different functions. While that’s not our topic, it’s essential to understand each so that we can draw and shade them as representatively as possible.
Otherwise, we may end up drawing fur instead of feathers – something very common with most beginners.
These feathers are:
- Flight feathers – strong and stiff (found on the wings)
- Tail feathers – Long used for guiding the flight
- Down feathers – keep the bird warm since they’re fluffy – found on the downside of the bird
- Contour feathers – on the whole body
- Filoplume and bristle (Below the beak and around the eye)
Now that we have a simple understanding, we can proceed with the shading. B
Using a mechanical pencil, begin shading around the eyes and below the beak with narrow strokes. Next, shade the bird’s crown (top of the head) and back of the neck with a mixture of contour feathers mixed with filoplume.
In most cases, the contours aren’t as visible as filoplume, which looks like crisscrossing strokes.
Shade the flight and tail feathers with a dark HB pencil. These are well-defined and easily noticeable.
Final Shading and Increasing the Contrast
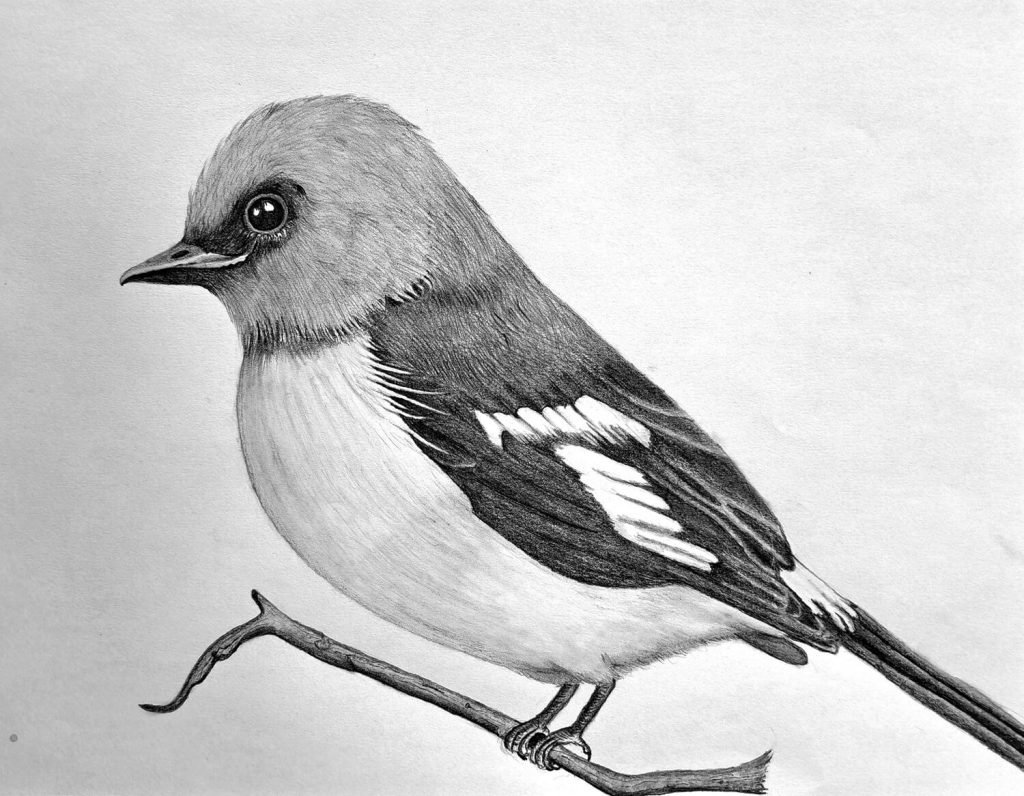
Get an HB pencil and shade the ring around the eye. Continue shading the legs and the tree branch.
Lastly, keep darkening the wings while adding some flairs of down feathers. Using a few strokes to add volume to the down feathers will also have a dramatic effect.
If you need more practice for creating feathers, here are other tutorials:
Conclusion
As always, don’t forget to keep blending and shading to add volume to the feathers.
If you follow these simple steps, you’ll be able to create great masterpieces. Of course, with practice. I hope you’ve found this tutorial helpful.
Keep practicing, and don’t forget to share your work with the world!

