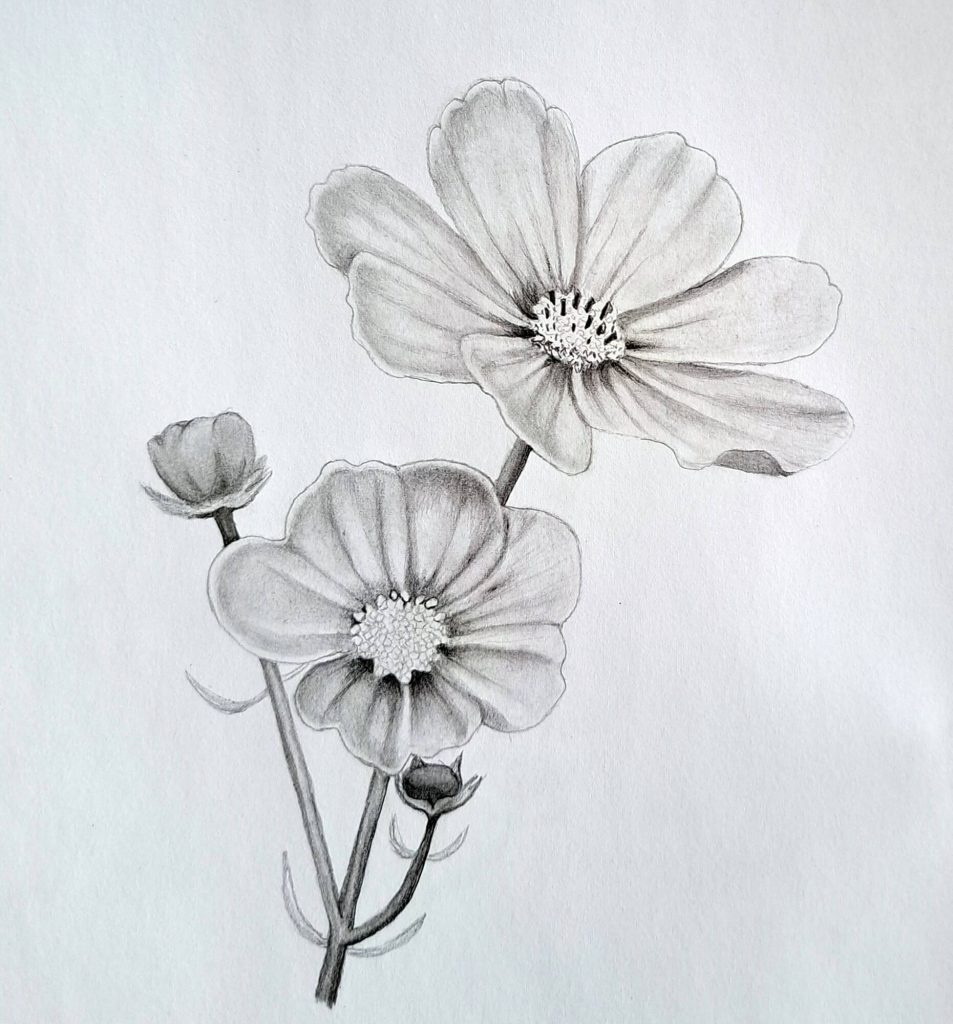
Whenever I have an artist’s block and am unable to find any drawing inspiration or ideas, I always turn to drawing flowers. There are countless numbers of them existing in nature, and as such, you’re likely to find one that gets you in the mood.
Today, I just happened to be in the same situation, and cosmos flowers came to my mind. This flower is one of my all-time favorites, bursting with colors that range from pink, orange, red, and yellow.
However, in today’s tutorial, we’ll draw cosmos flowers in black and white using graphite pencils. The reference image is a pink cosmos flower.
Easy step-by-step tutorial on drawing realistic cosmos flowers
Basic sketch
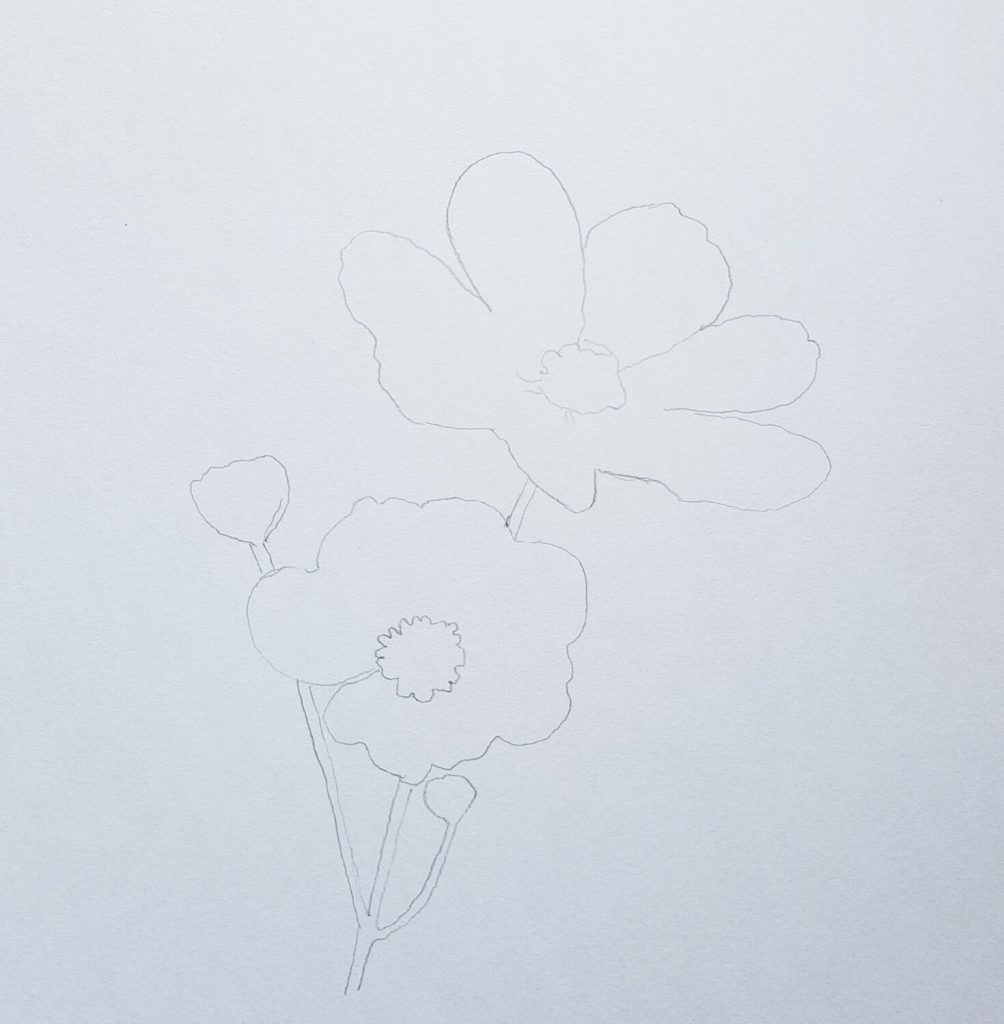
Cosmos flowers are not complicated. The saucer-like flowers have petals that fuse to form an open cup. Therefore, when sketching the basic shape ensure that you pay attention to the edges of the petals rather than the details in the middle.
When sketching, use minimum pressure on the pencil and preferably use a pencil in the range of 4H to H. It becomes easy to erase without making a mess. Also, the petals are tender, and distinct bold lines will look unrealistic.
I sketched mine with an HB pencil so that it’s visible on the screen. Otherwise, I’d drawn much lighter. I’ll have to erase some of it later on.
So, go ahead and draw the basic sketch, preferably several flowers and flower buds like I’ve done. It’s not necessary to draw distinct lines to separate the petals. That way, everything will look more realistic when we shade.
Basic shading
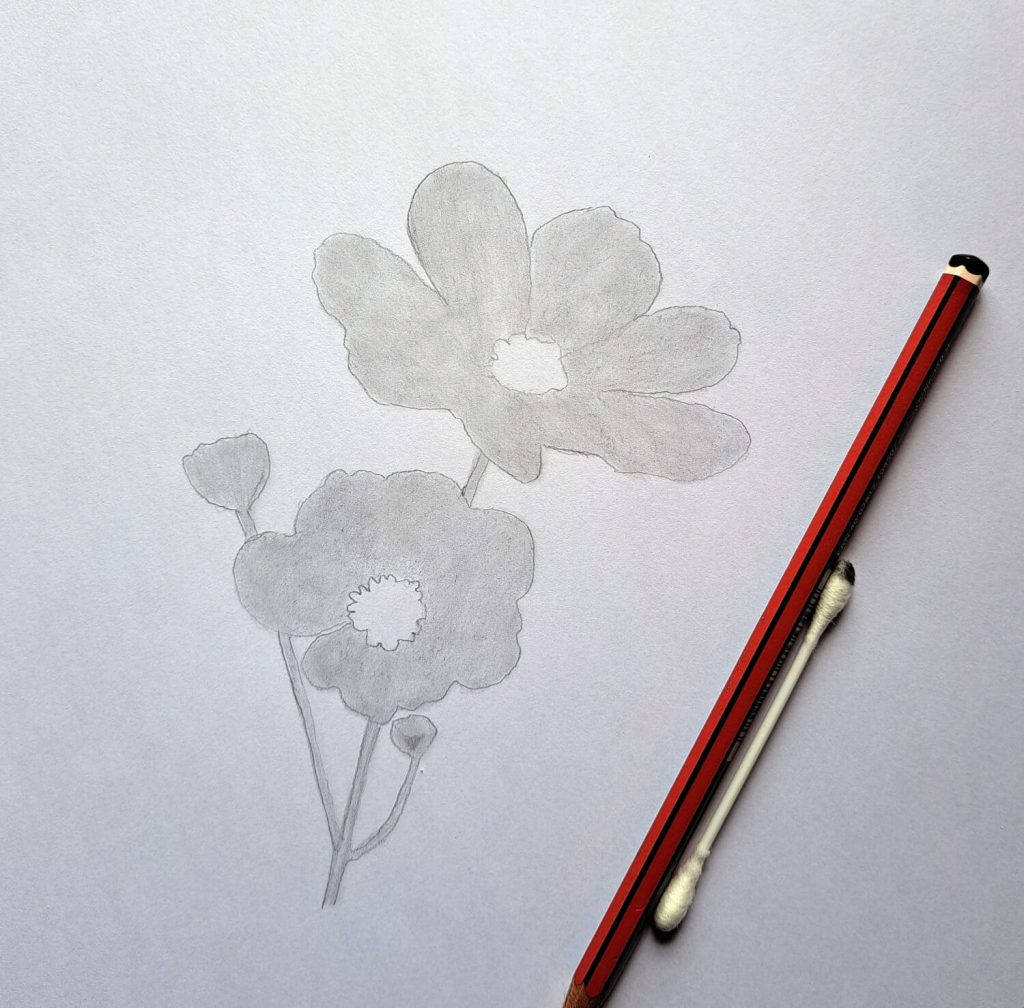
The next step involves giving the sketch form and volume. To achieve this, shade uniformly in a circular manner. Use the same pencil you’ve used to sketch.
Notice that I try to have a stable hand for consistency in shading.
Leave out the center until later. For now, concentrate on shading the petals and partly the stem. Once satisfied, get a Q-tip (my all-time go-to tool for blending large areas of graphite) and smudge the graphite for a smooth finish.
Initial detailed shading
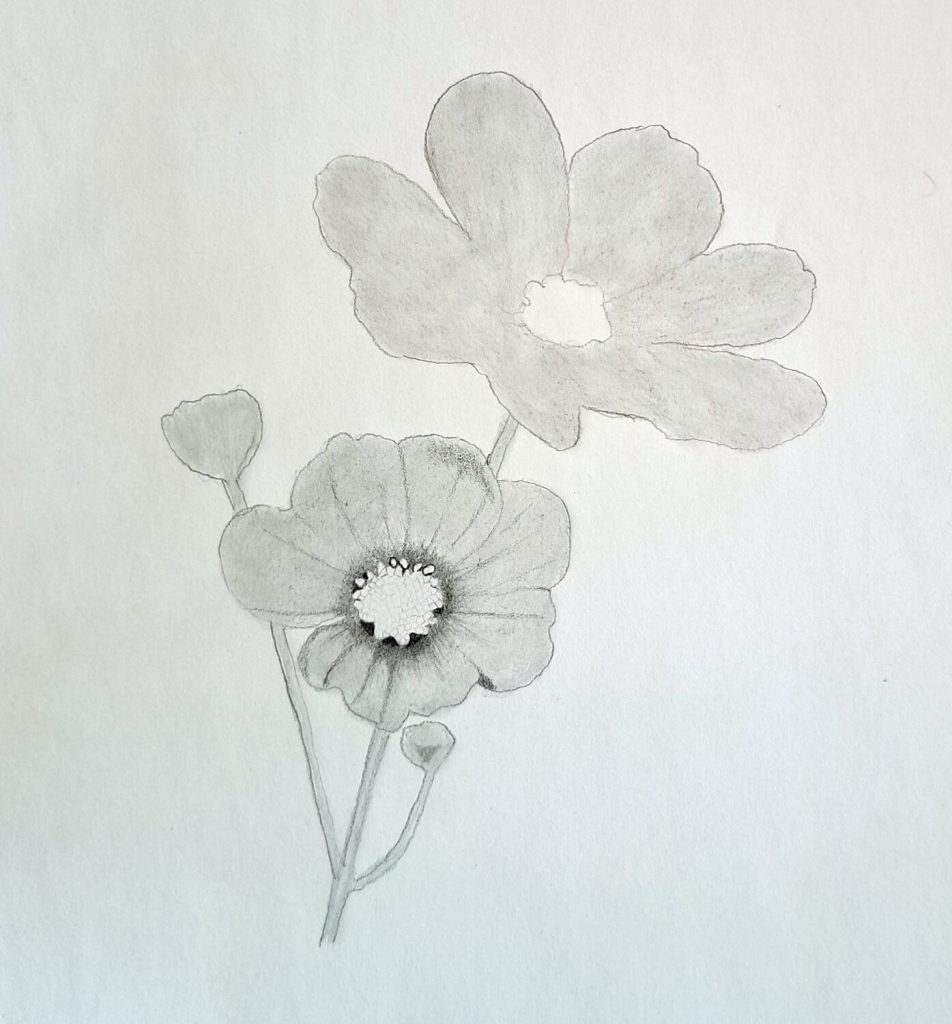
This step involves defining and rendering a few more details about the cosmos flower including the reproductive part (pollen, anthers, and or any seeds) at the center.
We also need to map out where petals have creases and bumps. Try to shade to define those areas rather than drawing distinct harsh lines. Doing so will make the drawing look unrealistic.
Shadows and highlights
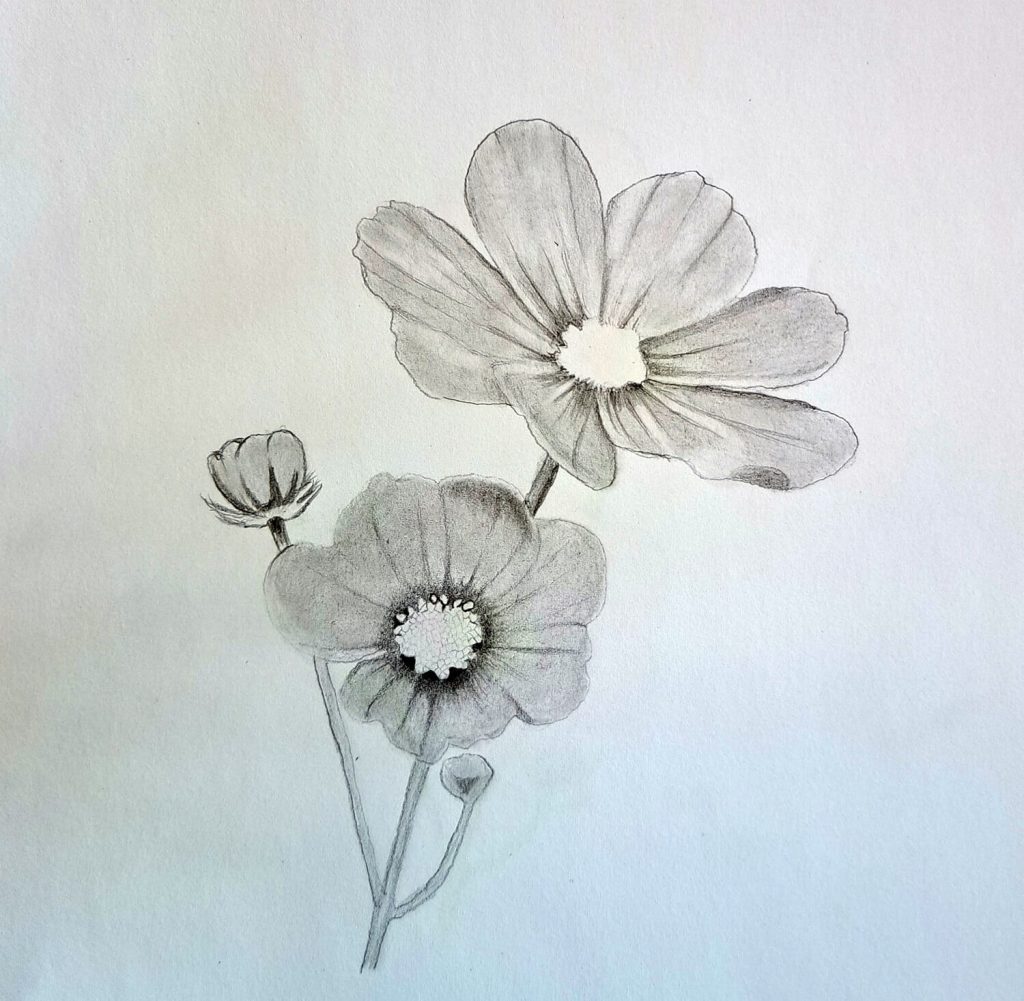
To bring everything together and in continuation with the previous step, an understanding of shadows and highlights will be very vital to correctly render this step.
Start by observing your reference to identify how light interacts with different parts of the flower.
For instance, between the petals and the center, there’s an area far away from your eyes and therefore doesn’t receive sufficient light. Therefore, that area is likely to be shadowy than the petals.
Similarly, there are areas on the petals that bulge towards our eyes and therefore they reflect more light forming highlights.
Once you understand and grasp this concept, you can begin shading those shadows and highlights.
Final shading including shading the cosmos’ stem
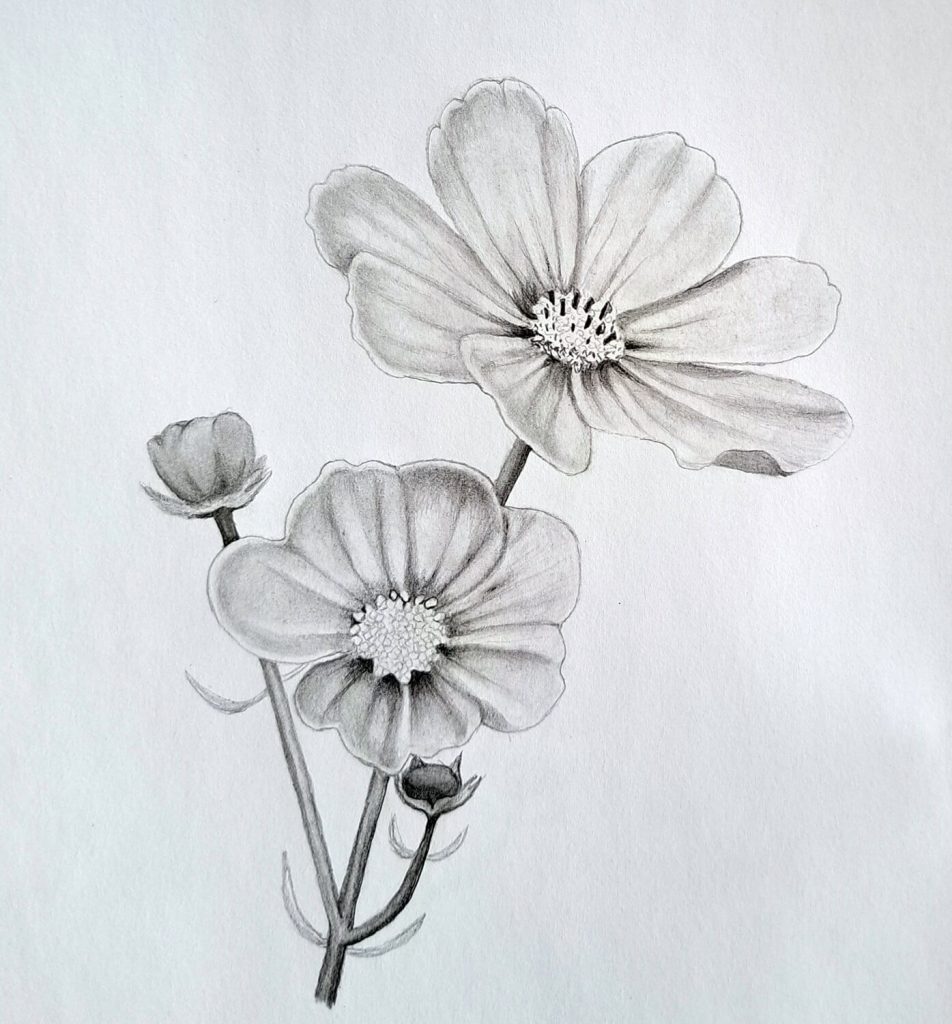
This final step involves shading the finer details. First, I started erasing the petal lines using a kneadable eraser by pressing and picking up the excess graphite. Remember I had drawn these too boldly.
Next, I molded the eraser to a point and erased within the highlights for extra realism. I then used a 3B pencil and shaded the dark areas a little bit more. I also used the same pencil to sketch the forming seeds on the top flower; that’s a bit mature.
To finalize, I shaded the stem ensuring that the side facing down was darker than the top part.
Check out how to draw a dandelion – easy doodle edition.
Conclusion
And just like that, I was able to get back into the drawing mood.
My process has always been simple, when working on complex pieces, you may get overwhelmed and lose the motivation to keep going. However, getting something else that is easy to draw will always give you the energy to keep going.
Drawing not only cosmos flowers is one of the ways to keep practicing and keep your creative juices flowing.

