
Owls have long captivated human imagination with their mysterious nocturnal nature, keen eyesight, and silent flight. These enigmatic birds symbolize wisdom, mystery, and even the supernatural in various cultures around the world.
Their ability to navigate the darkness with precision makes them powerful symbols of intuition and insight, which has drawn artists, writers, and creators to depict them in countless ways.
From ancient cave paintings to modern digital illustrations, owls appear in folklore, mythology, and literature, often representing knowledge, secrecy, or a connection to the unknown.
Artists find inspiration in the owl’s striking features—their large, expressive eyes, intricate feather patterns, and graceful yet ghostly movements.
Here’s a great tutorial on how to draw an owl.
7 Steps on How to Draw an Owl with Realism
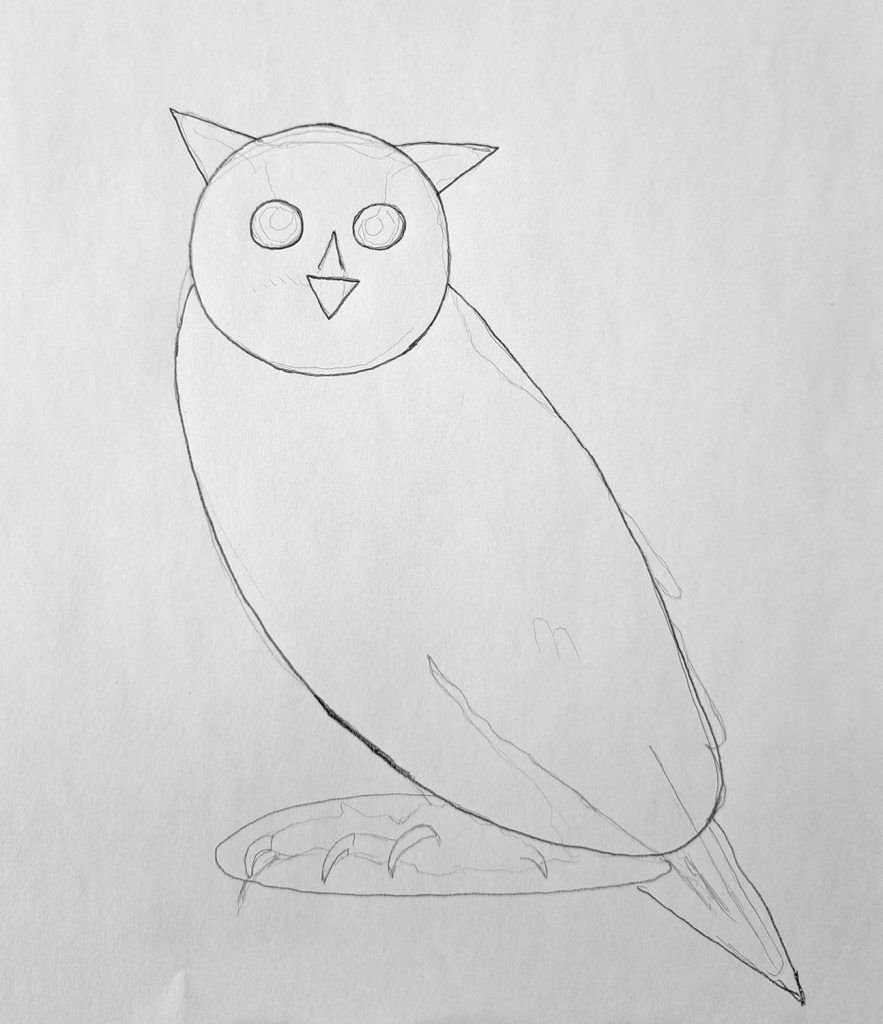
Break the reference into recognizable shapes.
If you read my bio on this site, you’ll realize I’m nowhere near being a great artist. I don’t have any formal training whatsoever. Therefore, most of my drawings are from reference photos instead of memory.
I find that in my head, I know what an owl looks like, but when I attempt to draw it, it looks rather awkward.
I know I’m not alone.
That’s why I recommend finding a reference photo that you can copy (be mindful of copyright infringement). It helps to study your subject carefully before you begin drawing. If it helps, try breaking it into recognizable shapes.
For example, from my illustration, you can see one big circle and two small ones (the head and the eyes) and three triangles for the owl’s ears and nose. I’ve also added an inverted V around the nose.
The owl’s body is oval, with one last triangle for the tail.
Once you complete this step, draw a rough sketch in those shapes.
Erase the shapes and sketch the owl’s outline.
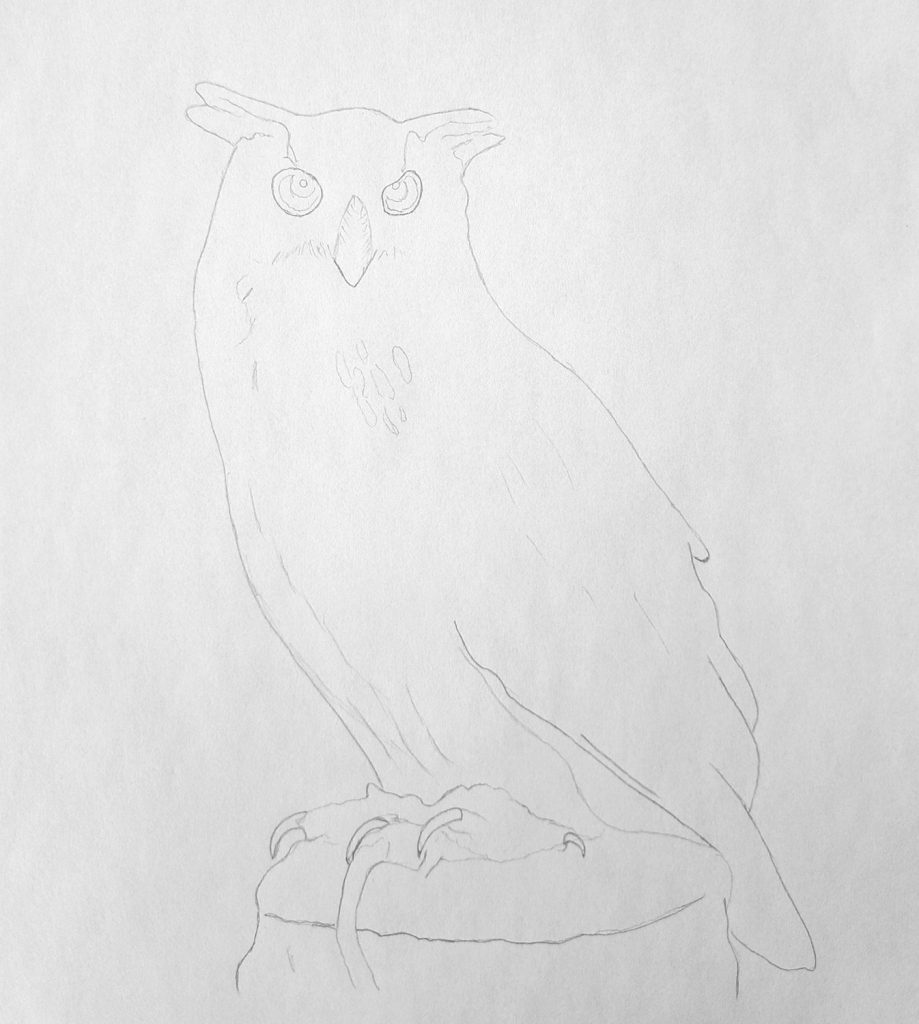
Step two involves erasing all the guiding shapes. At this point, there’s a lot of erasing and re-sketching. Don’t be afraid of making mistakes, and erase as much as you need to.
As a reminder, if you get this wrong, it’ll be very difficult to make the required corrections later on.
Try to make your outline as light as possible using any pencils in the range of 4H-H. You can also sketch out any noticeable details in the eyes.
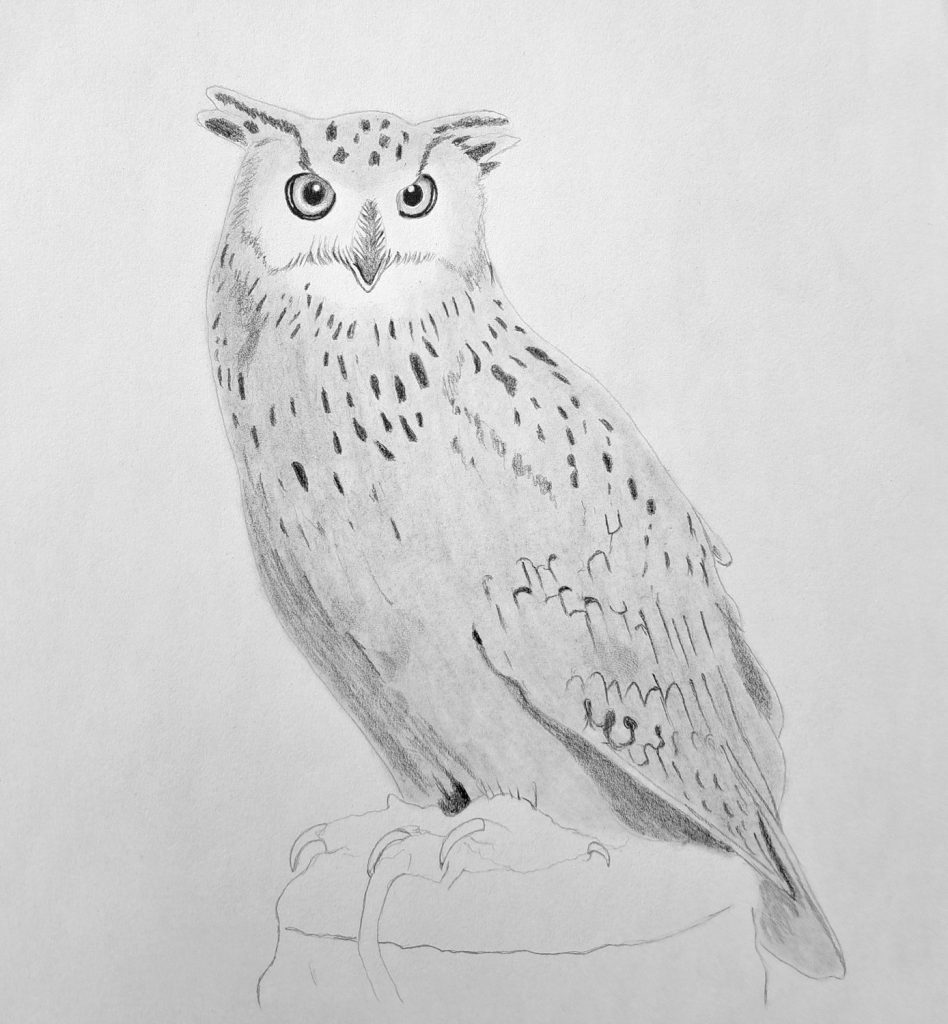
Sketch out the minor details.
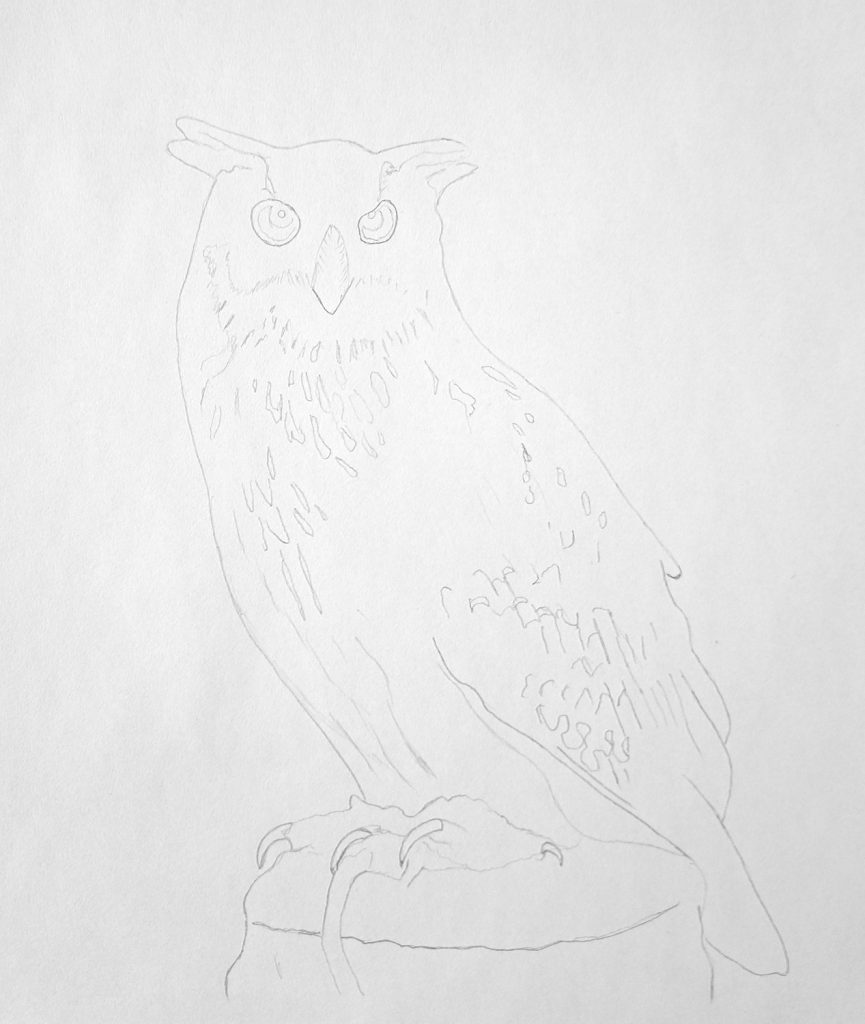
Begin sketching the details, including any strong shadows on the feathers. Start from the head and slowly progress to the rest of the body, ensuring that you don’t miss any significant detail.
You can make those details a little bolder so that you don’t lose them during shading.
Initial shading and blending
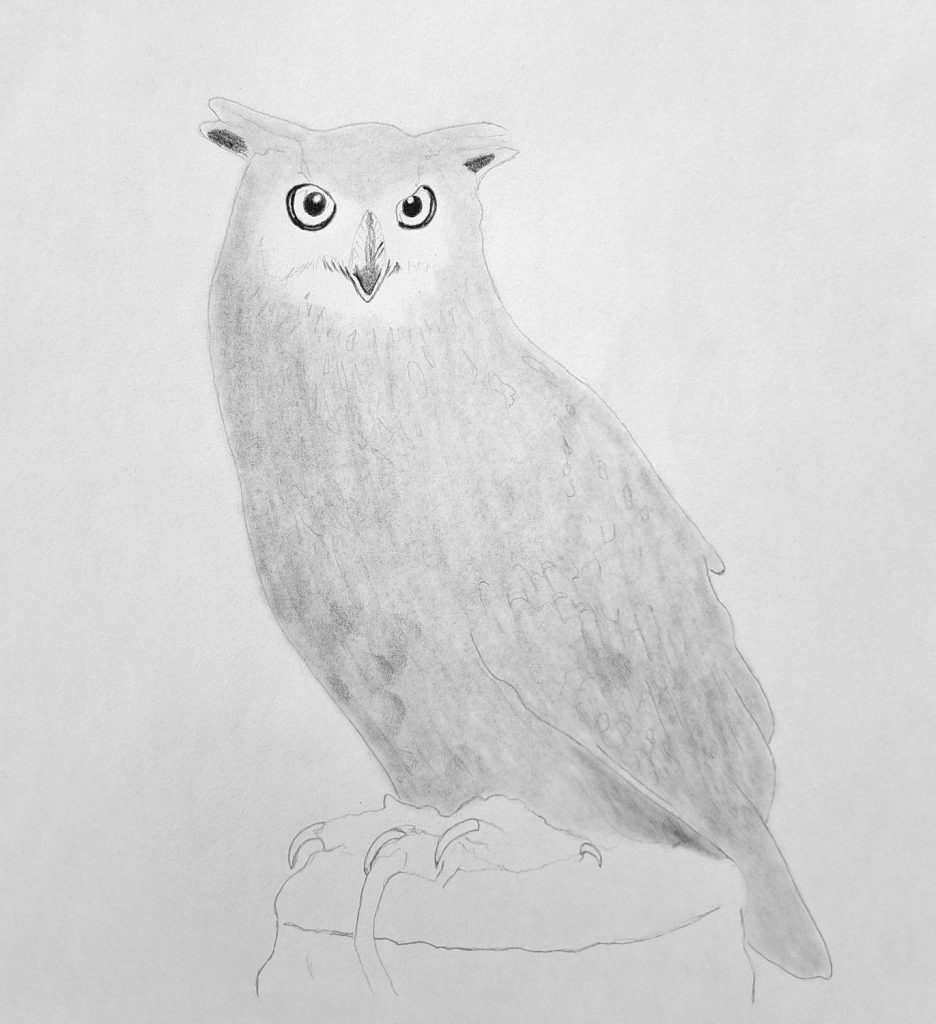
My favorite method to shade the first layer is by using graphite powder and a Q-tip. If you’ve read some of my other tutorials, you already know that.
If you don’t have graphite powder, you can scrap off your HB pencil using an artist’s knife, place the powder on a piece of paper, and proceed to shade. Once you’re done with shading, keep blending with the same Q-tip until the graphite is distributed evenly.
Keep in mind that if you didn’t make your details bolder in the previous step, some of them will be lost. Therefore, you need to be mindful when shading.
Continue shading the main shadows in the owl’s eyes, ears, and nose.
Marking out the shadows
Remember those shadow details you sketched out?
It’s time to shade those with a dark pencil, preferably a 6B pencil. You’ll not render all of them, but at least cover the main ones.
Shading the owl’s feathers
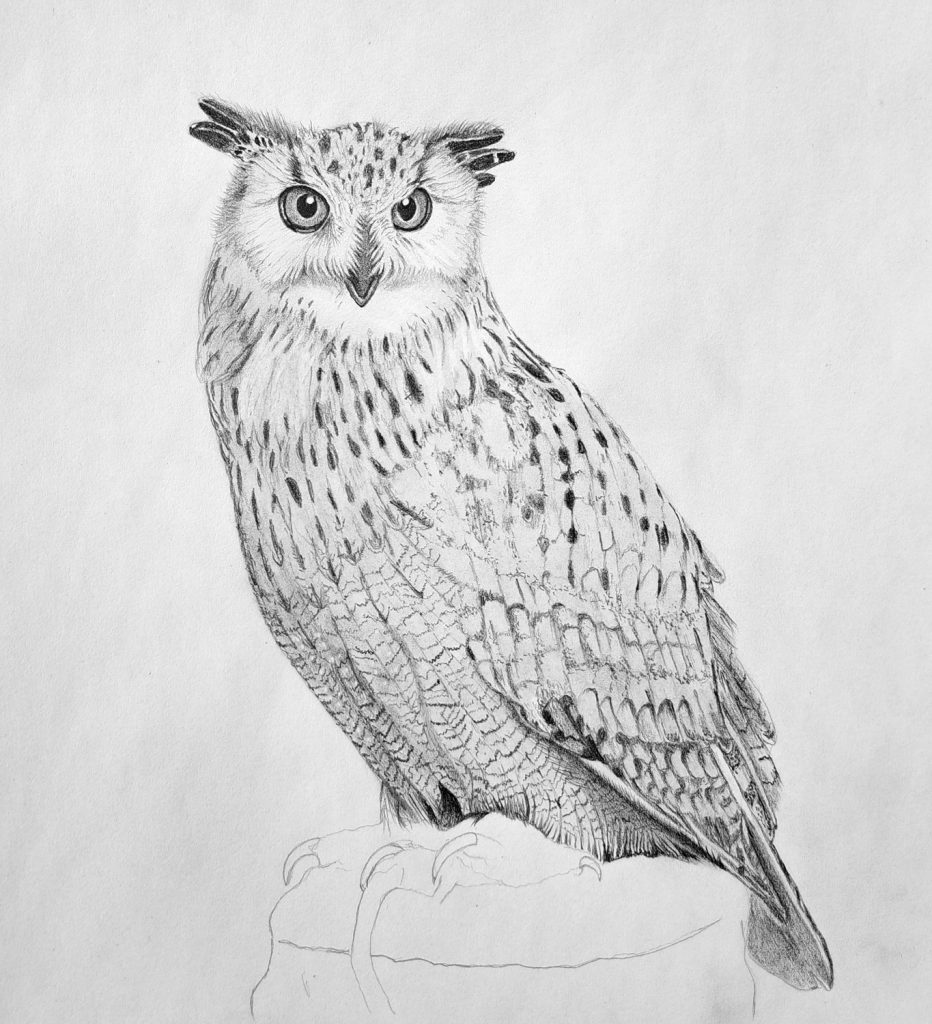
The owl’s feathers are soft and highly patterned. This presents an interesting challenge when shading and rendering the feathers realistically. However, you don’t have to copy the reference photo like a copy machine.
Instead, try to study the pattern and run with it. For instance, you’ll notice that the wing feathers appear strong while around the head and breast look softer.
In essence, it’s less of shading the feather but rather drawing out the pattern. Accept the challenge and keep going. One thing I learned about this step is that patience is key.
Shading the feet and finalizing the details
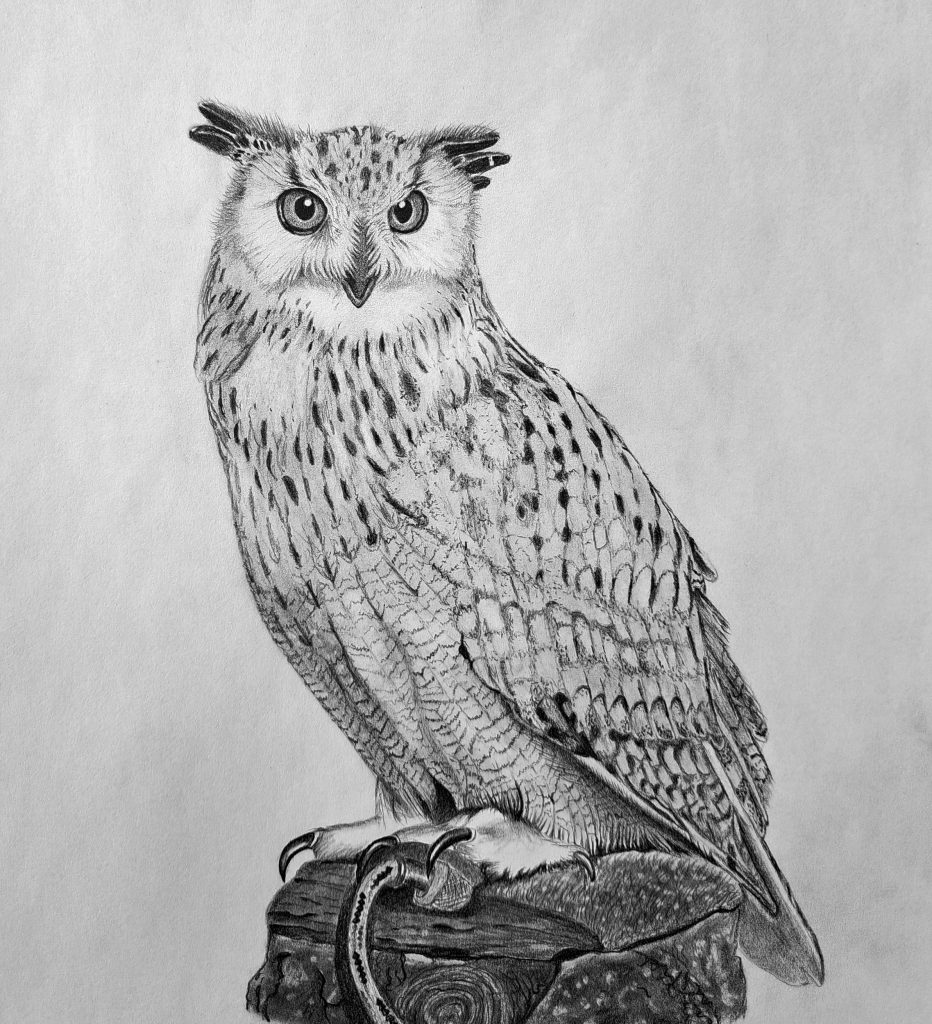
Finish the drawing by shading the claws, darkening the shadows, and the tree stump. Drawing the tree stump is optional for this tutorial, but I hope to cover in detail how I drew it in days to come.
Use an 8B pencil to shade those dark areas where light doesn’t reach. The same pencil can be used to shade the claws and the tree stump.
Lastly, get your kneadable eraser and erase bright areas to increase the intensity of the highlights!
Conclusion
There you have it. Those are the seven steps to follow in drawing a realistic owl. What majestic birds? Some people find them scary, while others find them cute.
The contrast between their soft, quiet demeanor and their predatory prowess adds depth to their symbolism.
Painters use their haunting silhouettes against moonlit backdrops to evoke a sense of mystery, while sculptors and illustrators emphasize their wise and watchful gaze.
Even in popular culture, owls frequently appear in fantasy settings, representing guardianship and ancient wisdom, as seen in books like Harry Potter or Studio Ghibli films. The owl’s presence in art continues to evolve, adapting to new artistic styles while maintaining its timeless allure.
I hope you’ve enjoyed this tutorial as much as I enjoyed creating it.