
When you sit down to draw an elephant, you’re not just sketching another animal.
You’re capturing one of the most remarkable beings on Earth.
Did you know elephants can recognize themselves in a mirror, mourn their dead, and even use tools?
Studies have shown they’re among the most intelligent species on the planet, with memory so sharp it puts us to shame (my own emphasis).
Sadly, despite their size and strength, elephants are vulnerable. Populations have dropped dramatically in the past century due to poaching and habitat loss. Conservation groups worldwide are fighting to protect them, from anti-poaching patrols in Kenya to wildlife corridors in India.
Drawing them, in a way, is another act of appreciation.
It forces you to slow down, to notice every fold of skin and curve of the tusk, and to see them as more than just symbols of “wild Africa” or “majestic Asia.” They’re living, breathing creatures whose survival depends on our attention.
And your drawing is one small way of giving that attention. So, grab your pencils and sketchbook, and let’s begin.
How to Draw a Realistic Elephant in 6 Easy Steps
Step 1: Sketch the outline of the main elephant features
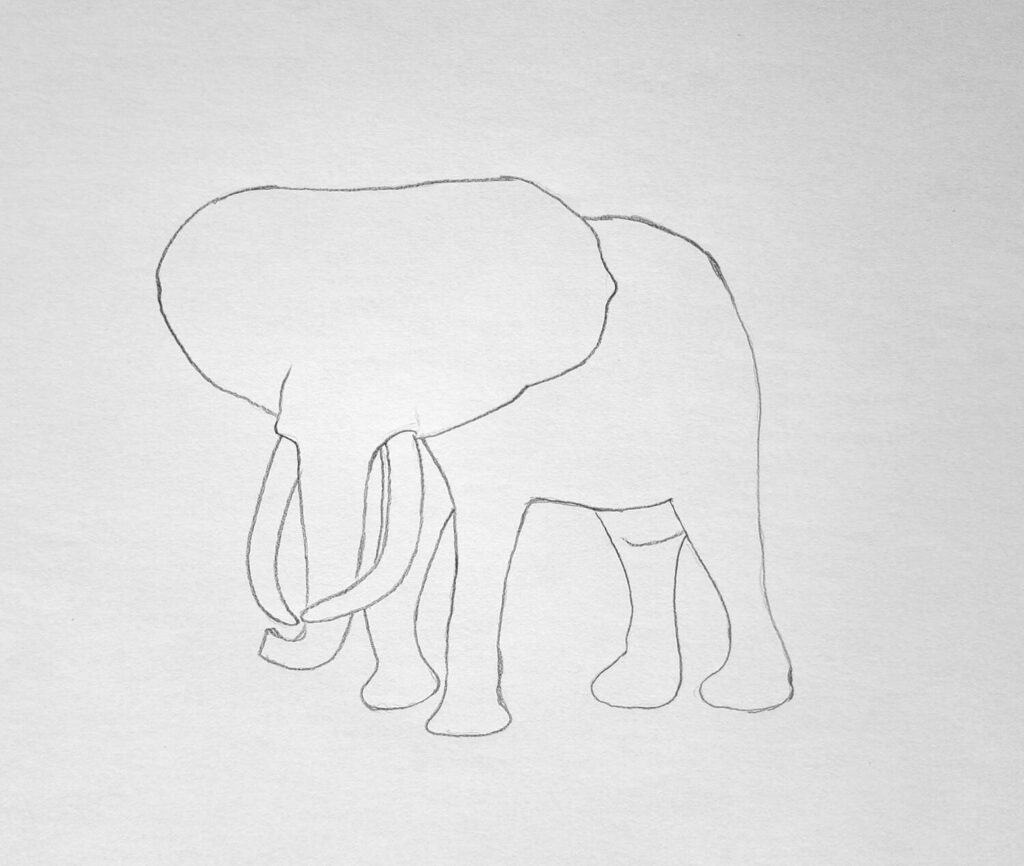
Start by lightly sketching the outer shapes. Forget about wrinkles, textures, or tiny details for now. Just look at the big features that make an elephant recognizable.
Draw the shape of those giant ears, the long trunk with tusks curving out, and the bulky body with thick legs.
Unlike the popular wisdom of sketching the recognizable geometric shapes (I’ve advocated for it in other animal tutorials), just sketch what you actually see if you’re looking at a reference photo.
Step 2: Complete the elephant sketch
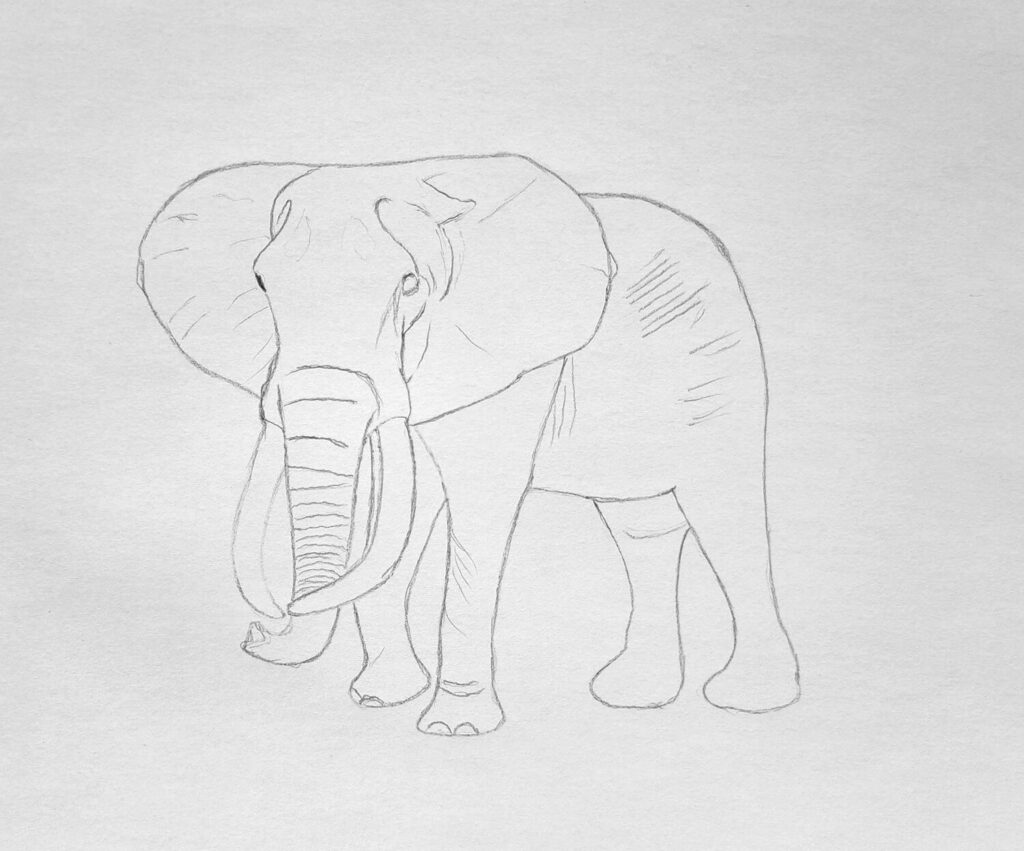
Once the basic outline is in place, it’s time to refine it. Define the head a little more by sketching the skull shape and lightly placing the eyes. Suggest the wrinkles on the trunk and the folds on the ears.
Use an H pencil here so your lines stay light and easy to adjust.
If you want to be extra precise, try the grid method. It’s a simple way to keep proportions accurate, especially when dealing with large animals like elephants. By the end of this step, you’ll have a clear but light drawing.
Nothing too dark yet, because you’ll need room for shading later.
Step 3: Basic shading using an HB pencil
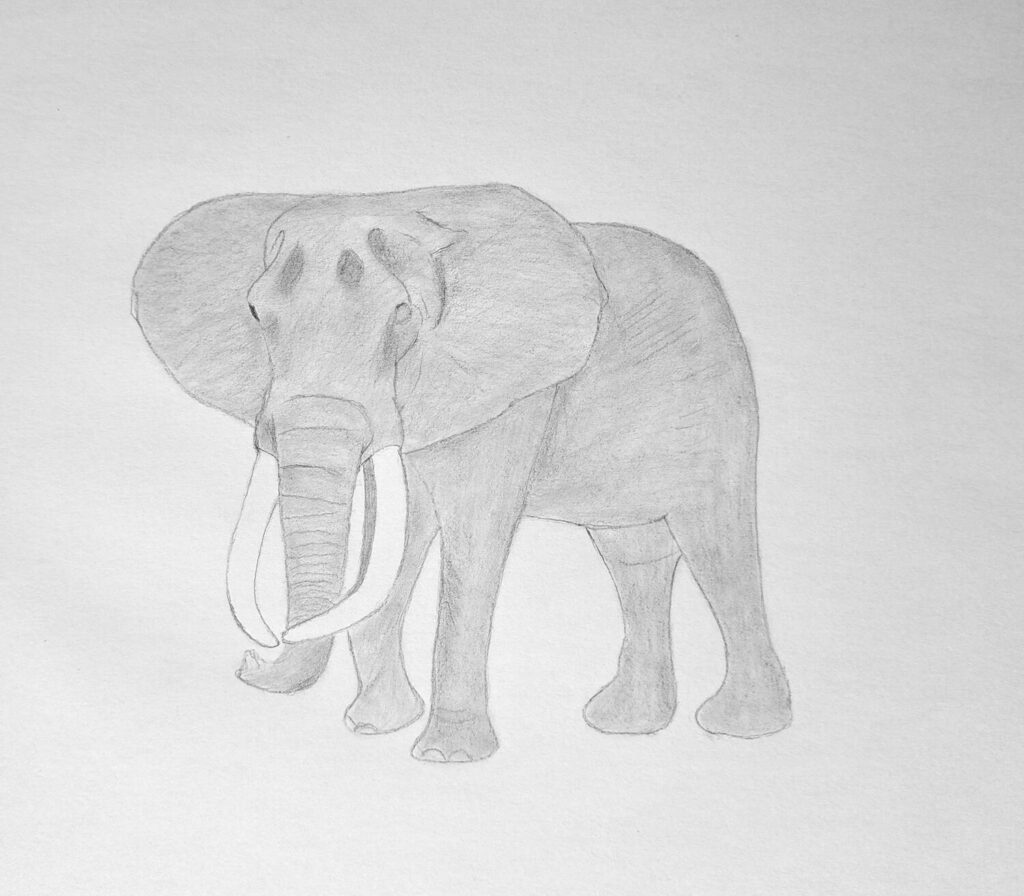
Here’s where the drawing starts to come alive.
Take an HB pencil and begin shading the whole elephant, but skip the tusks for now. Apply the shading uniformly so the drawing has a base tone to work from. Don’t press too hard; you want the outlines and details to remain visible.
Once the entire figure has a soft gray tone, blend it. This smooths out the pencil marks and evens the texture. A Q-tip works best for large areas, but even a piece of tissue or cotton swab can do the job.
Step 4: Shading the shadows
Now let’s add depth.
Switch to a softer pencil, anywhere from 4B to 8B, depending on how dark you want your values. Look closely at your reference photo to see where the shadows fall.
Common shadow areas include between the head and the ears, the creases of the trunk, beneath those giant ears, under the belly, and in the folds of the legs.
Shade these areas carefully, building up the darkness gradually. For wide areas, blend with a tissue wrapped on your finger. For precise shadows, use something smaller, like a blending stump or even a sharpened cotton swab.
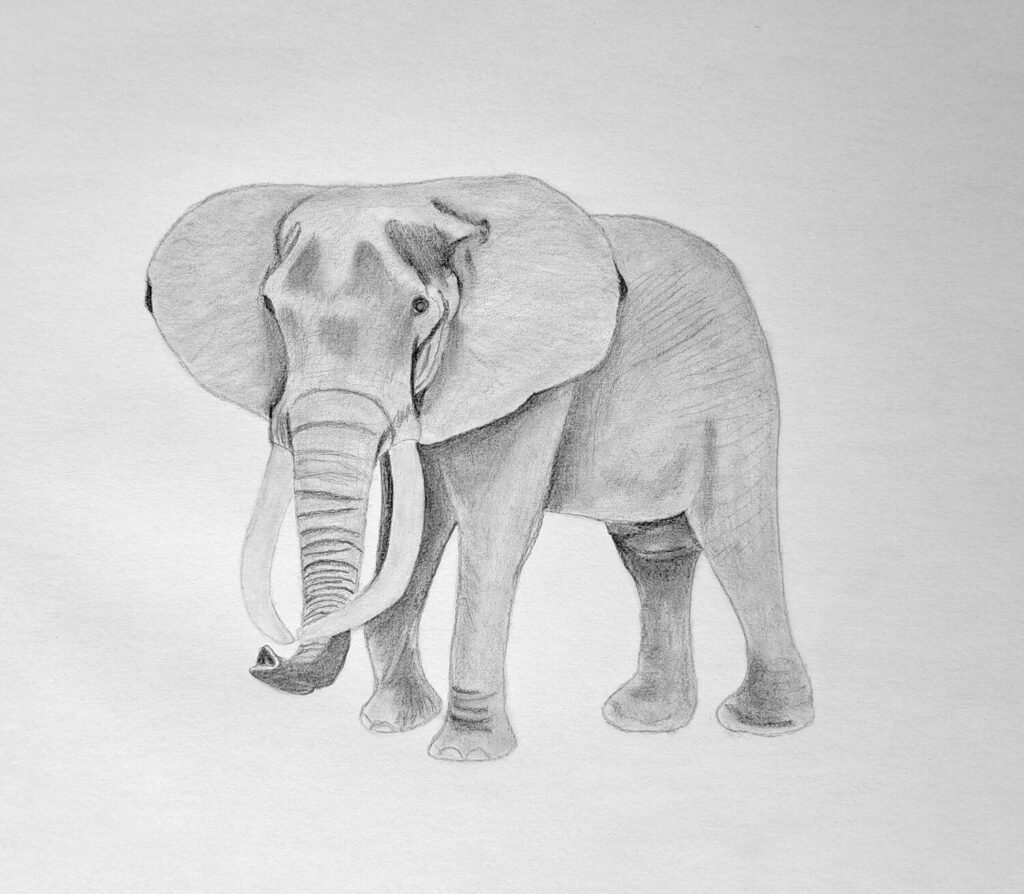
Step 5: Shading the midtones
Next, soften the transition between the darkest shadows and the lighter areas of the body.
Use B or 2B pencils for this. The trick is to avoid harsh lines or abrupt tone values. Blend the midtones smoothly so the elephant looks rounded and three-dimensional rather than flat.
Everything should flow fluidly from shadows, midtones, light values, and lastly, highlights.
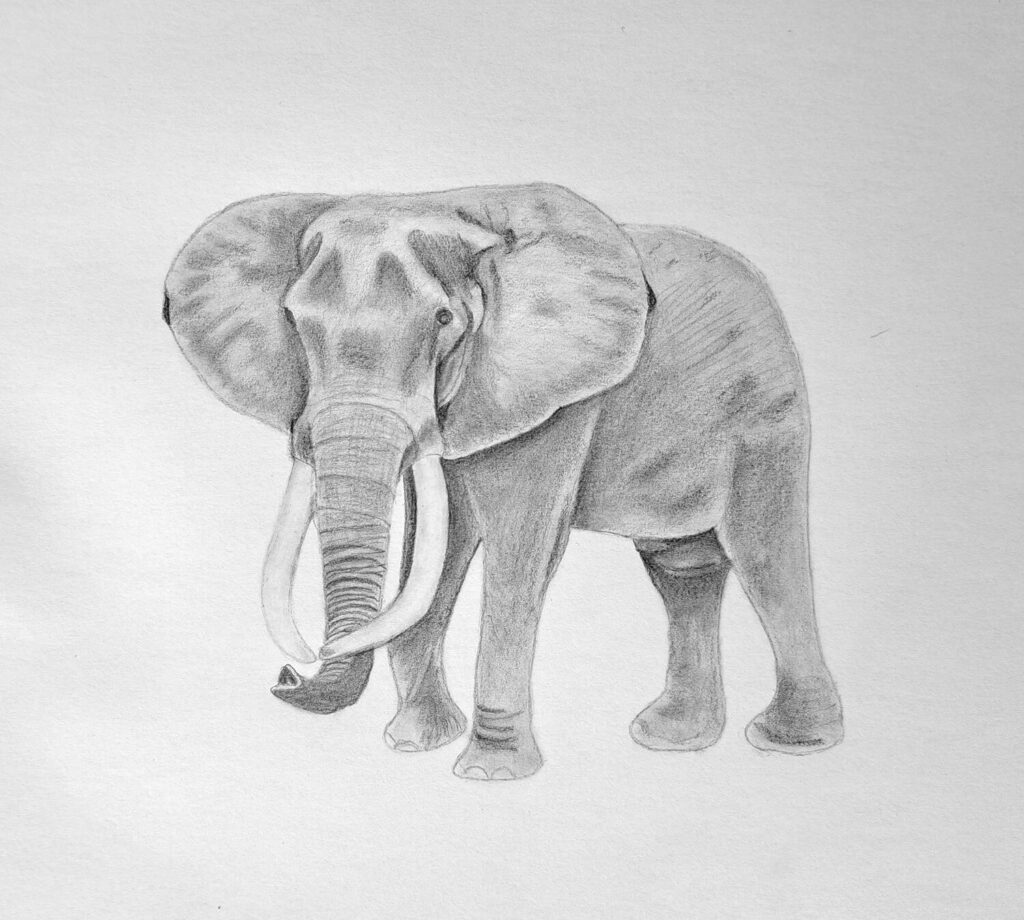
Step 6: Detailed and final shading of the elephant
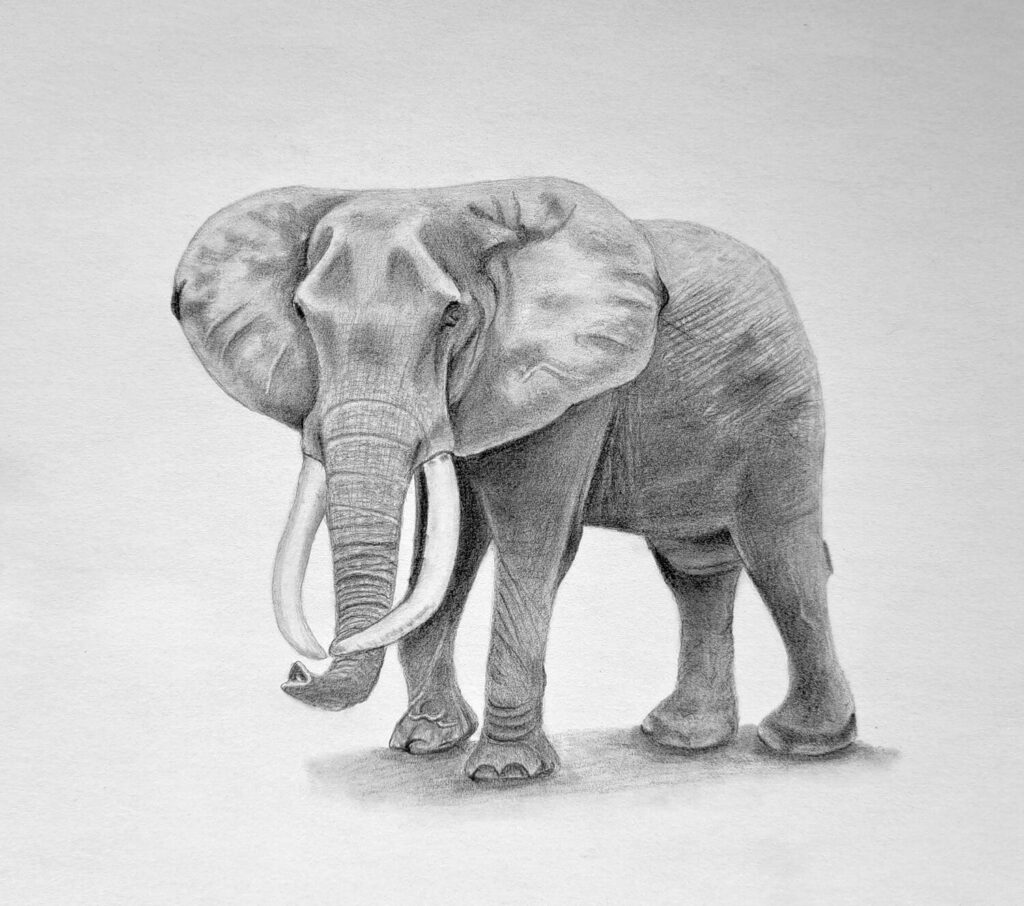
This is what I consider to be the fun part: creating personality and realism.
Deepen the darkest shadows where necessary and dab out highlights using a kneaded eraser. Remember, up until now, we had not done anything with the tusks?
It’s time to work on them. Use a harder pencil, like H, to shade the tusks, as you would a cylinder, so they appear curved and dimensional.
Then add wrinkles and veins on the legs where they naturally occur. Finally, sketch in the cast shadow beneath the legs so your elephant feels grounded instead of floating on the page.
This is also the step where you can spend as much time as you like perfecting details. Some artists love to add every wrinkle, while others prefer a simpler look. Both approaches work. After all, it’s your elephant masterpiece!
Conclusion
Congratulations!
You have more than just a sketch of an elephant. You have spent real time observing an animal that can weigh as much as a car, yet still move silently through the forest.
You have studied the ears that act like built-in air conditioners, and the trunk that can uproot trees or pick up a single blade of grass. Every wrinkle and shadow you’ve drawn connects you a little closer to the reality of what elephants are: extraordinary survivors in a world that hasn’t always been kind to them.
And maybe that’s the bigger lesson here.
Drawing isn’t just about technique. It’s about empathy. Just like any subject, when you draw an elephant, you practice seeing deeply, really seeing an animal worth protecting. And in that sense, your sketch becomes more than a piece of art.
It becomes a quiet statement of respect for one of the planet’s most incredible species.
Please feel free to share your artwork with me. I’d be honored.