Halloween isn’t complete without the Pumpkin King gracing every home’s decoration. While carving pumpkins is part of the tradition, painting is also becoming mainstream. You just need to do a bit of browsing to find countless pumpkin painting ideas.
That’s why in today’s post, I’ll be focusing on only one – sketching and painting your pumpkin with Jack Skellington’s head.
Let’s begin:
What You’ll Need
You really don’t need a lot for this project. In fact, I’ve only used a white Sakura Gelly Roll 10 to paint on my pumpkin. But if you want to take your game to the next level, you need at least the following:
- At least one smooth pumpkin (You can always do more) – let the whole family participate.
- White and black paint
- Glow-in-the-dark decoration paint (optional).
- Paintbrushes
Painting Guidelines
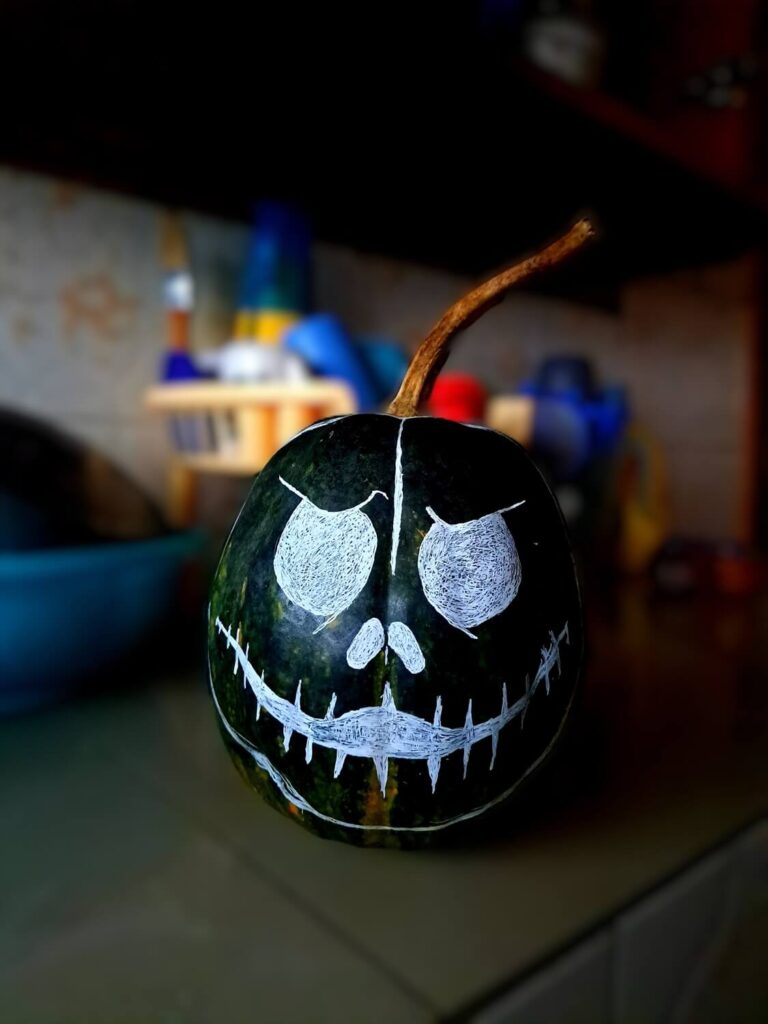
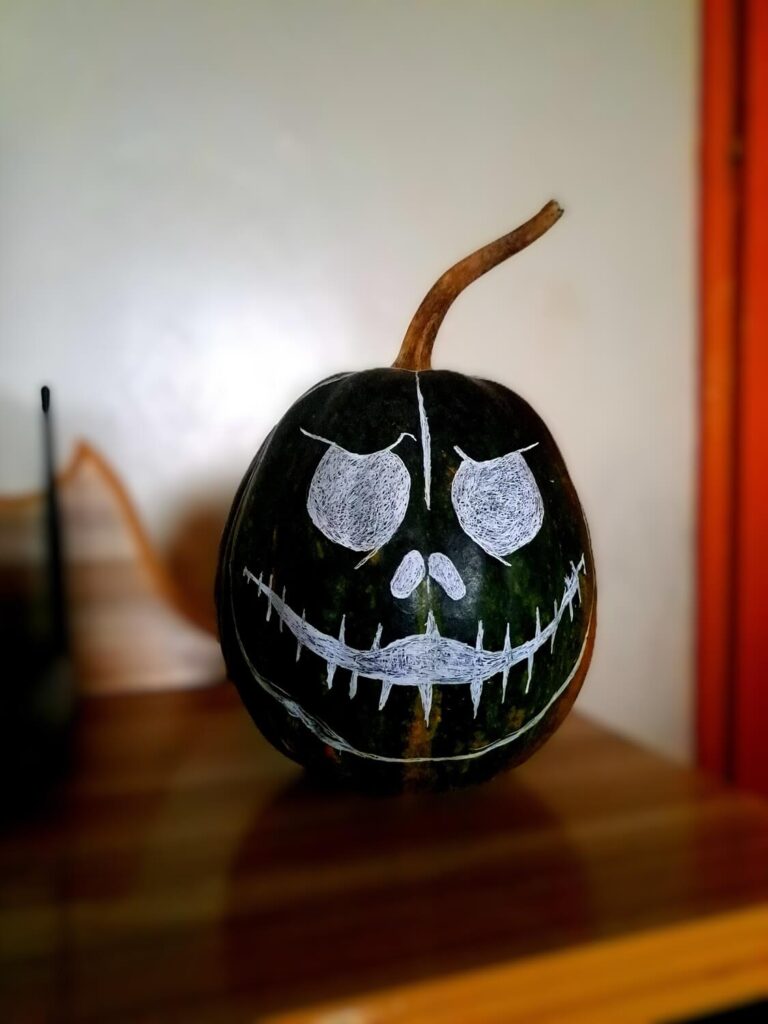
Paint the pumpkin with a complete white undercoat.
Use the black paint to create the pumpkin king’s classic eyes, nostrils, and a stitched smile. For an extra glow-in-the-dark effect, you can use the glow paint to create those features.
This is particularly exciting at night when the Skellington’s facial features come to life.
Pro Tip: Use a marker pen to sketch before beginning painting.
You can repeat on as many pumpkins as you’d like. Besides, you aren’t chasing perfection and can involve other members of your family to paint. In case drawing or sketching is a problem, I’ll discuss how to do that next.
How to Draw Jack Skellington’s Head
Outlining the Head
Sketch a circle to represent the head. It should not be perfect by any means.
In fact, it should gravitate towards an oval. Depending on how realistic you want it to be, the base should be slightly wider than the top (creates an egg-like head).
Sketching the facial features

Begin by sketching the angry eyes, which look like some inverted commas. Don’t forget the slim eyebrows that touch slightly to the eyes.
Then sketch the two nostrils facing sideways at their bottom, and finish with a stitched sinister smile.
Shading /Painting
Use a dark pencil (6B) or black paint to cover the eyes, nostrils, and stitched mouth. Make sure to blend in case you’re using the pencils.
Remember that this is only one version of Jack Skellington. If you’re interested, you can follow the same process to paint the fiery orange version with a sharp, jagged mouth.
You may also be interested to learn how to draw a realistic pumpkin.
Conclusion
There you have it!
Take a break from pumpkin carving and instead use paint to decorate your pumpkins to achieve the same effect.
If you’re up to it, you can still do both. I hope you like this simple yet effective idea to bring your Halloween decorations to life.