
Learn how to draw a simple illusion that’ll make people do a double-take.
Have you ever seen a pencil drawing of a hole that looks so real, you almost try to avoid stepping on it? That’s the magic of anamorphic drawing, a technique that tricks the eye into seeing something 3D on a flat surface.
Sounds complicated, but the truth is, it’s easier than it looks.
In this guide, I’ll show you how to draw a simple 3D hole using graphite pencils. We’ll start with a round hole illusion, then move on to a cracked ground version.
I’m not a master realist or someone who went to art school. I just love the thrill of making something flat look like it’s about to swallow you whole. So, if I can do this, you absolutely can too.
Let’s get started.
How to Draw a 3D Hole Step by Step
Simple Round Hole Drawing
This is the classic “Is that a hole in the paper?” illusion. All you need are your basic drawing tools and a little shading practice.
1. Sketch the Oval and the Center of the Hole
Start by lightly drawing an oval in the middle of your page. This will be the opening of the hole.
Then, sketch a teardrop or cone-like shape underneath the oval to mark the depth. The bottom tip of the shape should be centered right beneath the oval; it helps create that sense of depth we’re going for.
A compass or a circular object (like a cup rim) helps if you struggle with even ovals. I’ve done plenty of lopsided ones myself.
2. Shade the Center with the Darkest Value
This is where the illusion starts coming to life. Take your softest pencil (a 6B or 8B works great) and shade the very tip of that teardrop shape until it’s almost pitch black.
The trick is making it look like the darkest part of the hole is swallowing light. Press gently at first, then build up the layers gradually.
Rushing here can make the graphite look patchy.
3. Shade Other Values (Midtones and Light Areas)
Now, fade out the darkness by layering midtones as you move upward from the tip toward the oval.
Use a 2B or HB pencil for this. Keep your pencil strokes smooth and consistent. If the shading feels too rough, a blending stump or even a bit of tissue can help smooth things out.
Near the edge of the oval, you want your lightest values. This transition from dark to light is what gives the illusion of depth. And remember to shade in the direction that follows the curve of the hole; it really helps reinforce that 3D look.
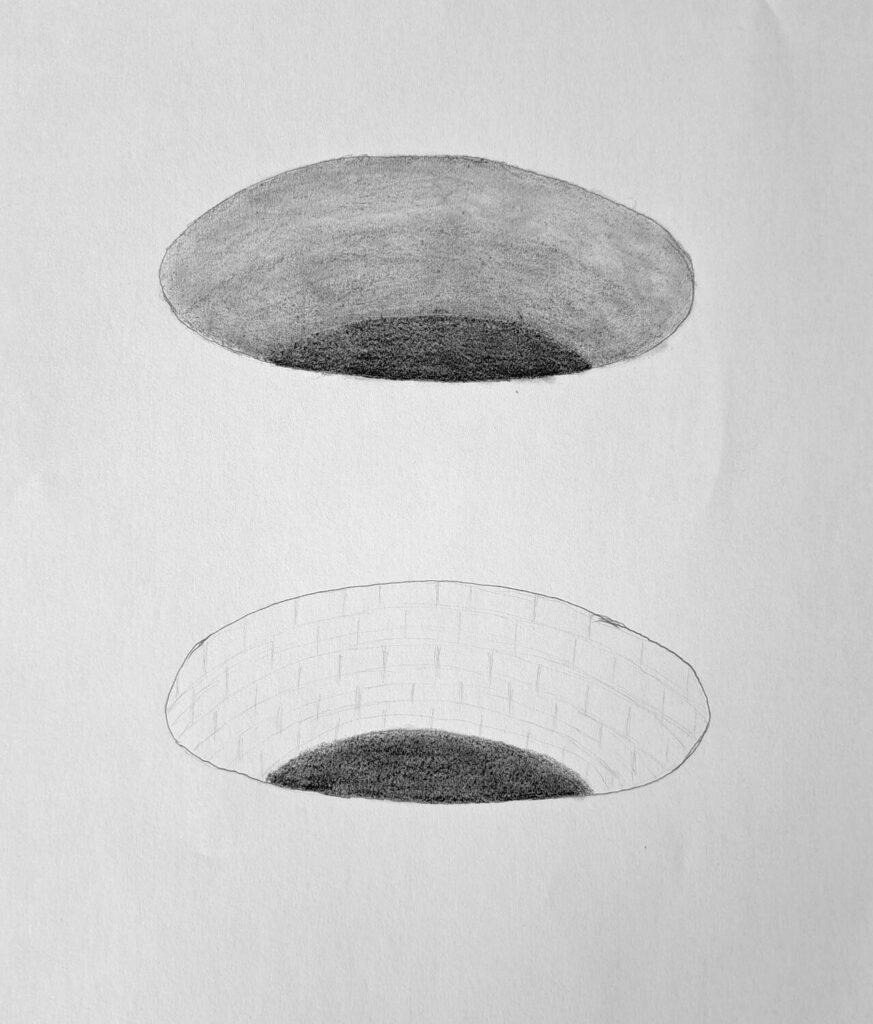
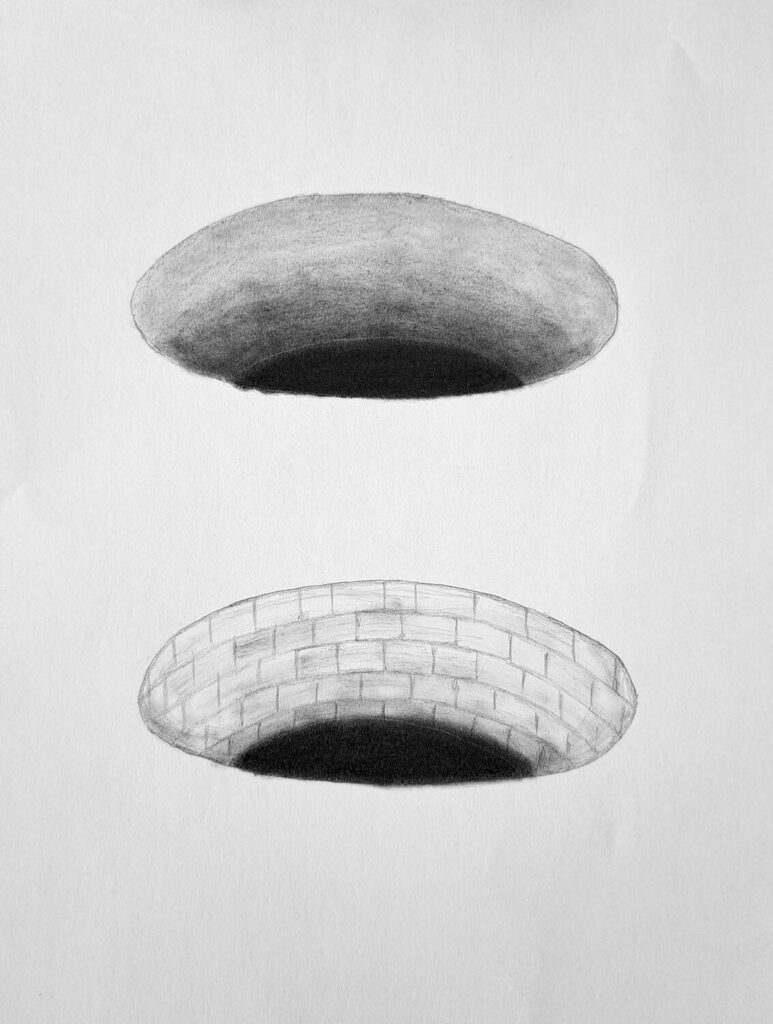
4. Finalize the Drawing
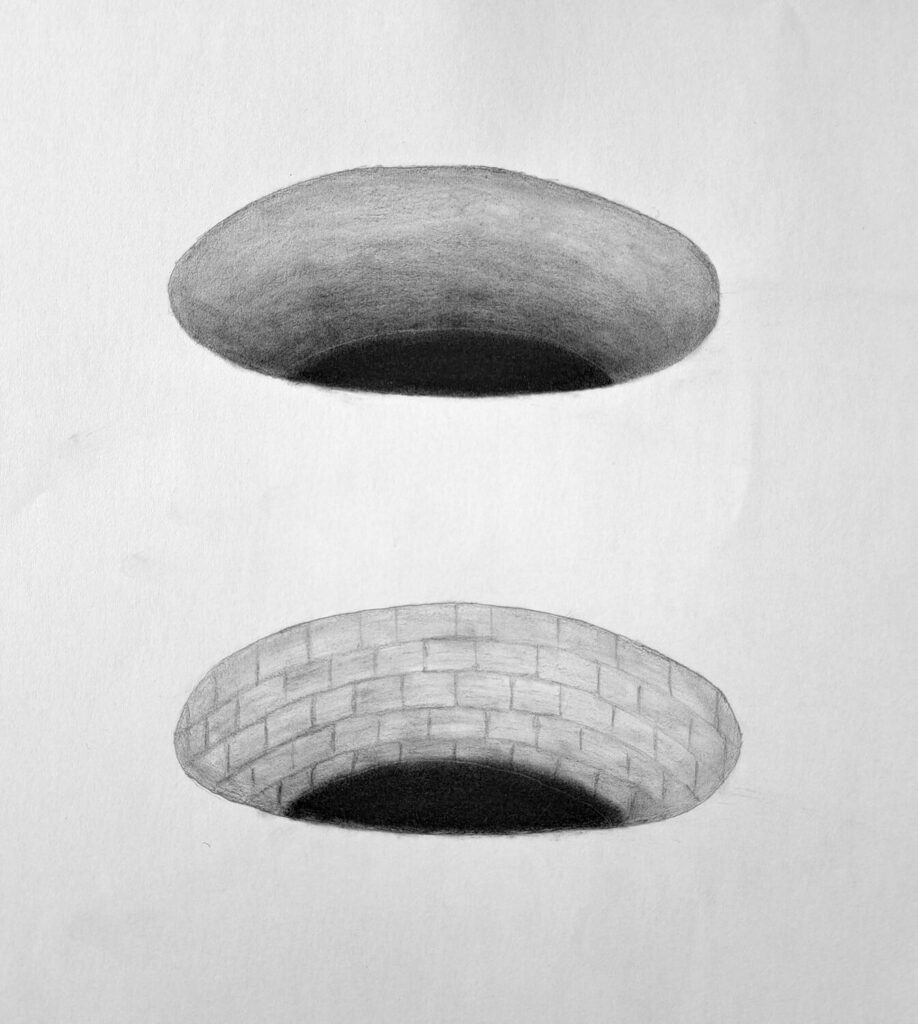
Once you’ve finished shading, clean up the edges of your oval with an eraser. Crisp lines at the top help contrast with the shaded inside, making the illusion pop.
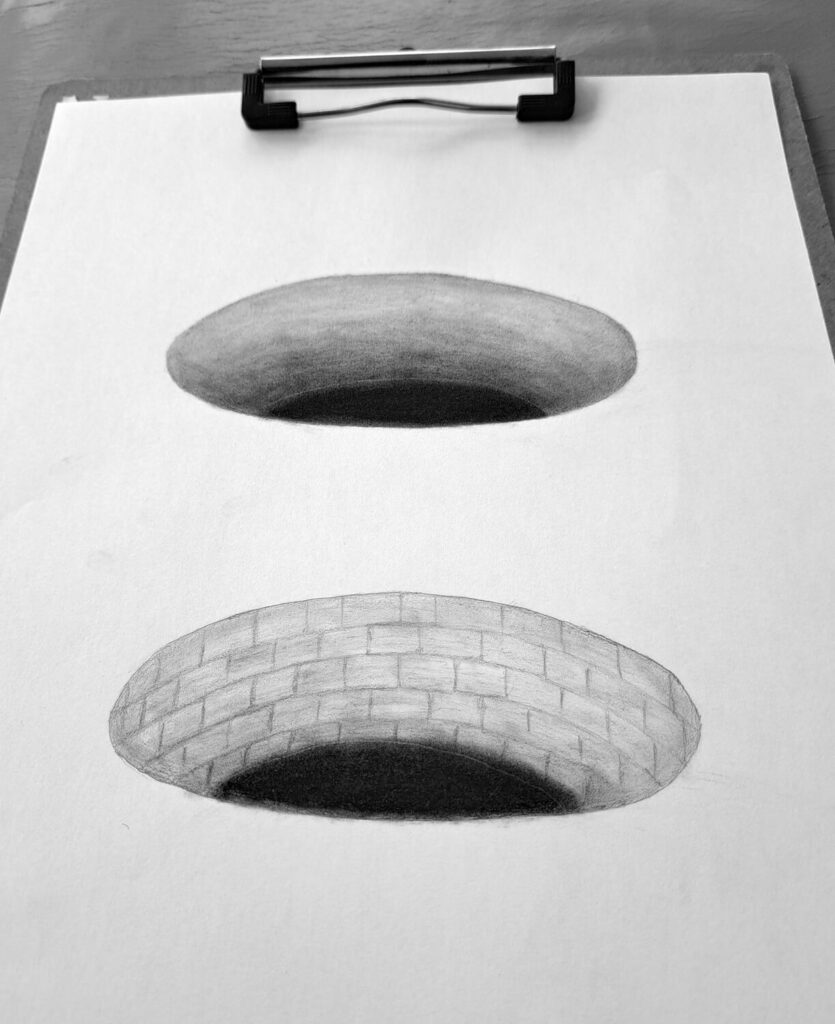
For extra realism, I’ve illustrated a second hole paved with blocks for comparison.
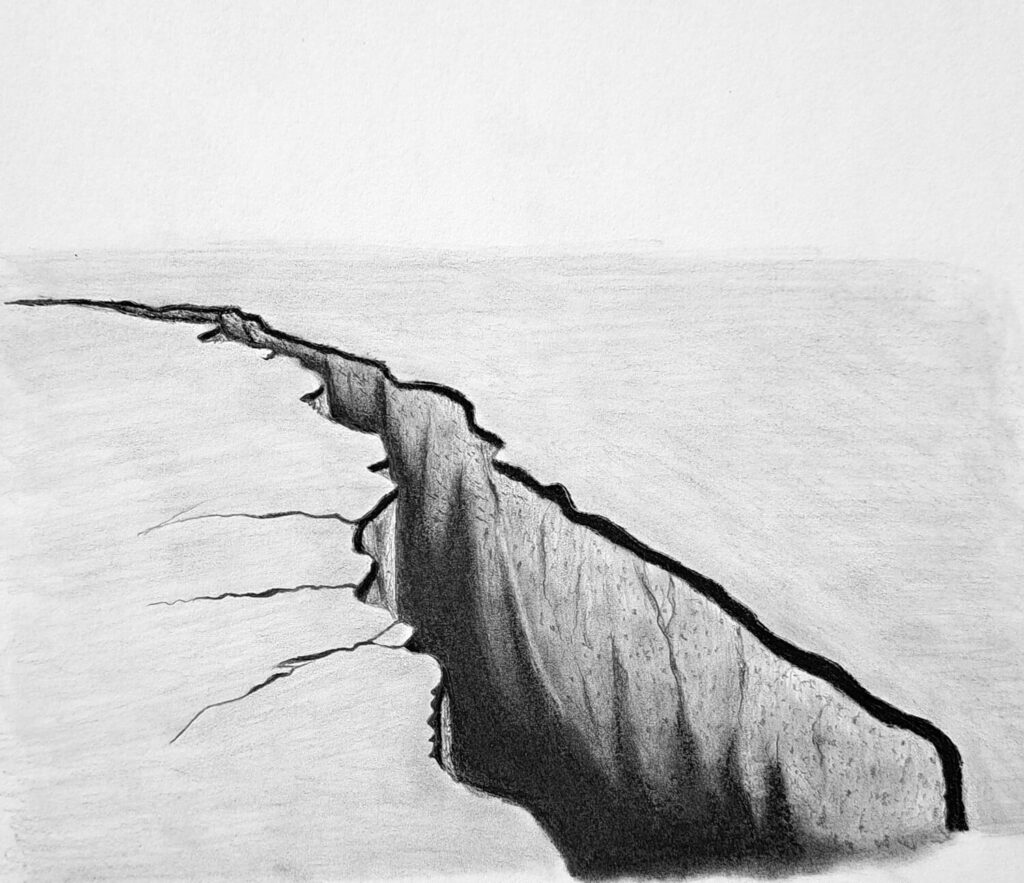
Drawing a Cracked Hole on the Ground
Want to take it up a notch? This cracked-ground version adds a bit of drama and texture. It looks like the floor’s breaking apart. It’s surprisingly fun to draw, too.
1. Lightly Sketch the Ground Crack Hole
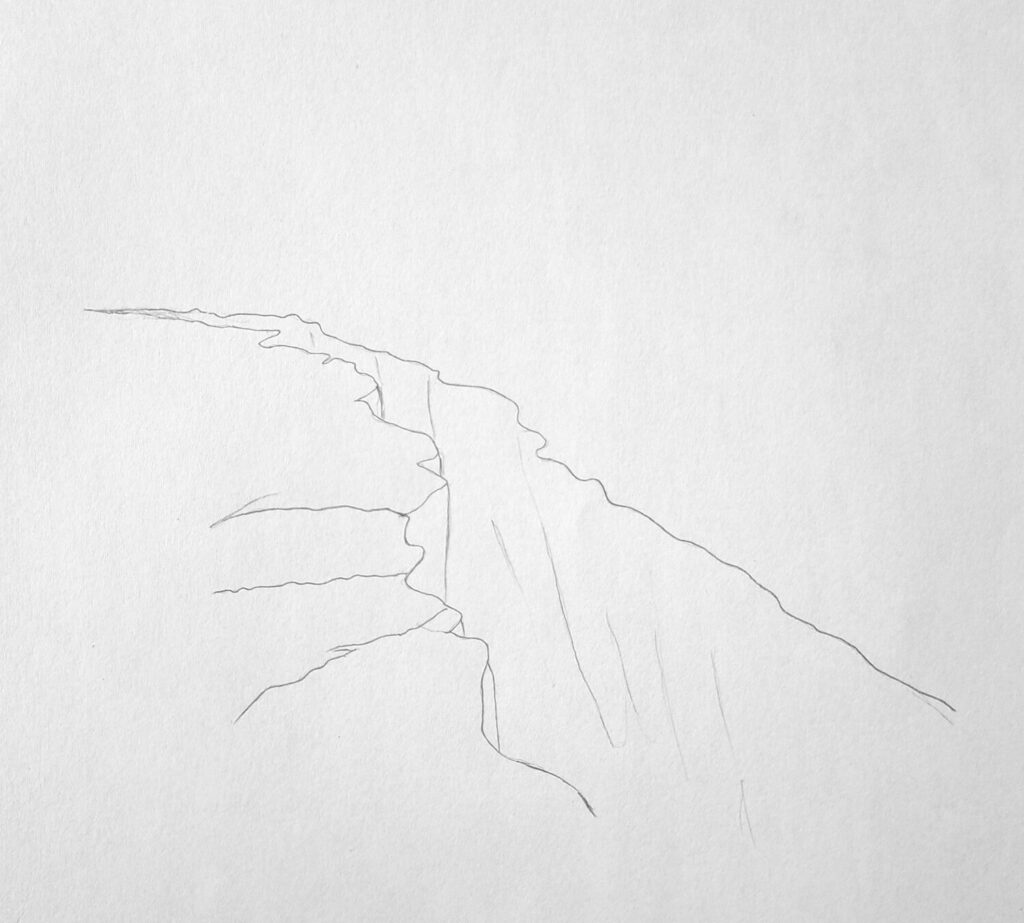
Begin with an irregular crack shape. Think of it like a broken eggshell or shattered glass, jagged, uneven, and spreading outward from a central point.
You don’t need to be precise here. In fact, the more random, the better. I usually freehand it and refine the lines as I go.
2. Uniformly Shade the Ground Level (Use an HB Pencil)
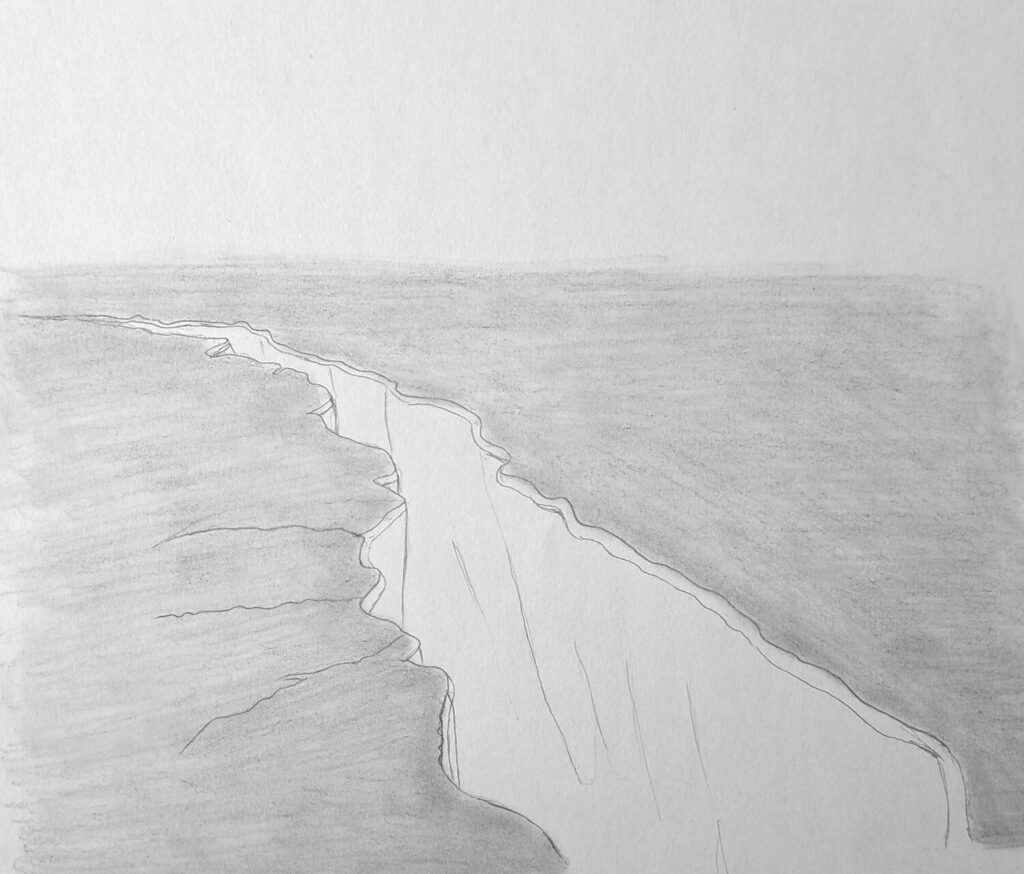
Once your cracks are in place, start shading the area surrounding them with an HB pencil.
Keep the shading light and consistent. This acts as the ground level, and it’s important that the tone stays even so the crack stands out more.
Use circular strokes or a crosshatch technique for texture, but don’t go too dark just yet.
3. Shade the Dark Values
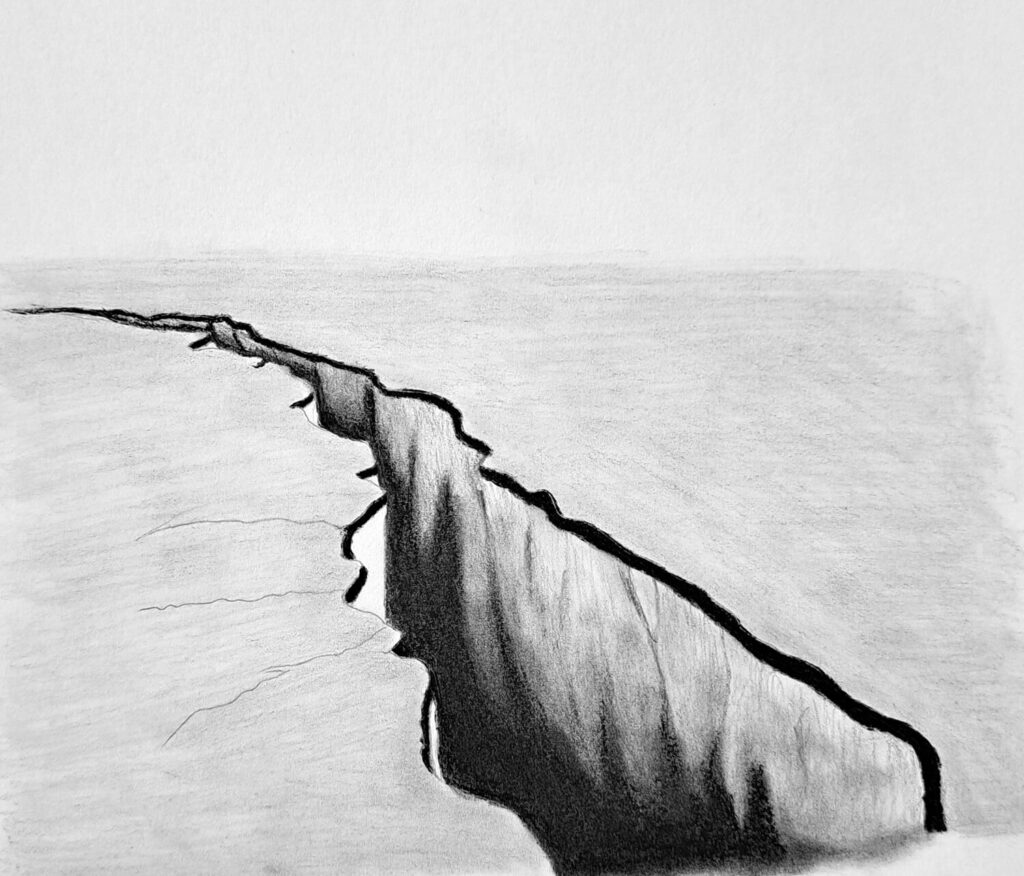
Now, inside the cracked shapes, start shading the darkest areas. These are the parts of the ground that have collapsed inward.
Use a 4B or 6B pencil for this. As before, concentrate the darkest values in the deepest parts of the cracks, and gradually fade toward the edges. You can also shade the edge of the crack a bit darker.
This contrast between the dark cracks and the lighter ground makes it feel like something’s broken or sunken in.
4. Finalize by Shading Midtones and Light Values
Blend midtones upward from the darkest areas. This will make your cracks feel more dimensional.
You can also deepen some of the outer crack lines to give a bit of shadow or shadow cast. If you want to go the extra mile, add tiny debris or jagged rock shapes around the edges. It adds realism and makes it feel like something actually happened.
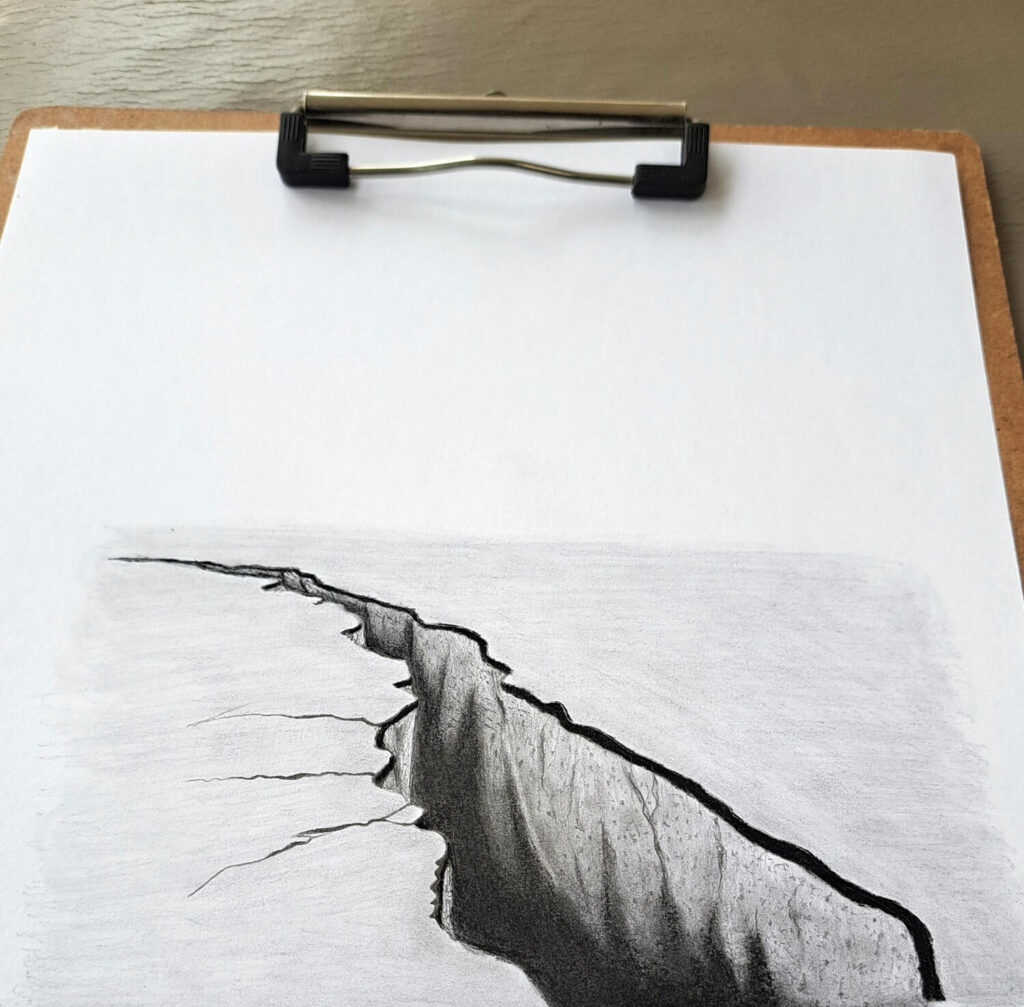
Bonus Tip: Photograph It at an Angle
Anamorphic drawings look their best when viewed from a specific angle. If you’re planning to post your drawing online (and you totally should!), try taking a photo from a low angle, almost parallel to the paper.
That’s when the illusion really fools the eye.
Conclusion
Drawing 3D holes is a blast.
It’s one of those projects that doesn’t take ages to finish, but the impact is huge. Whether you’re sketching during a coffee break or just trying something new for your art portfolio, it’s the kind of trick that’ll keep you inspired.
Don’t stress if your first attempt doesn’t look ultra-realistic. Mine didn’t either. The more you practice shading and playing with contrast, the better your illusions get.
And hey, if you’re looking for ideas on what to draw next, you might love this post I wrote on 52 Drawing Ideas (Draw Every Week for a Year Challenge).
Let me know if you try this. I’d love to see your version!