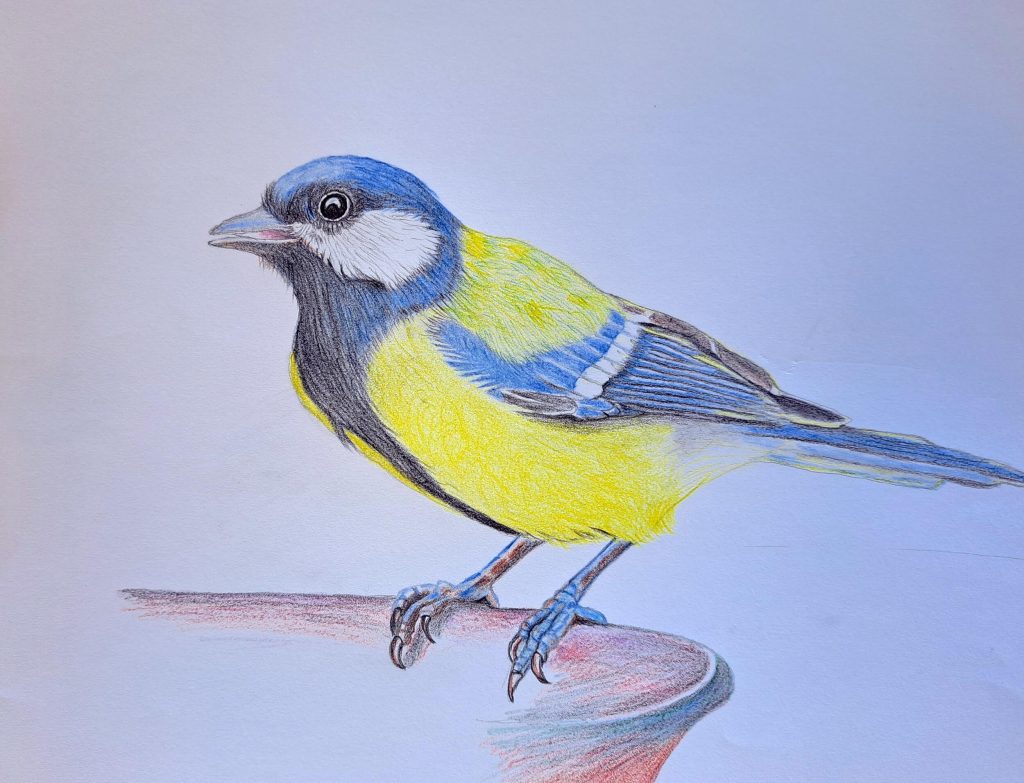
Nature offers endless opportunities if you’re looking for easy drawing ideas to keep your creative juices flowing. You just need to learn to appreciate its vast diversity which couldn’t be complete without birds.
While watching them sing, dance, and flap their wings is therapeutic, drawing and sketching the birds is even more fun. And you don’t have to be a pro artist since they aren’t complicated drawing subjects.
That’s good news for both beginners and intermediate artists like me.
I’ll share my techniques for drawing a realistic bird in today’s tutorial using colored pencils. The guide will be brief and easy.
So, let’s begin:
Easy Step by Step Tutorial for Drawing Realistic Birds with Colored Pencils
Step 1: General Bird Sketch
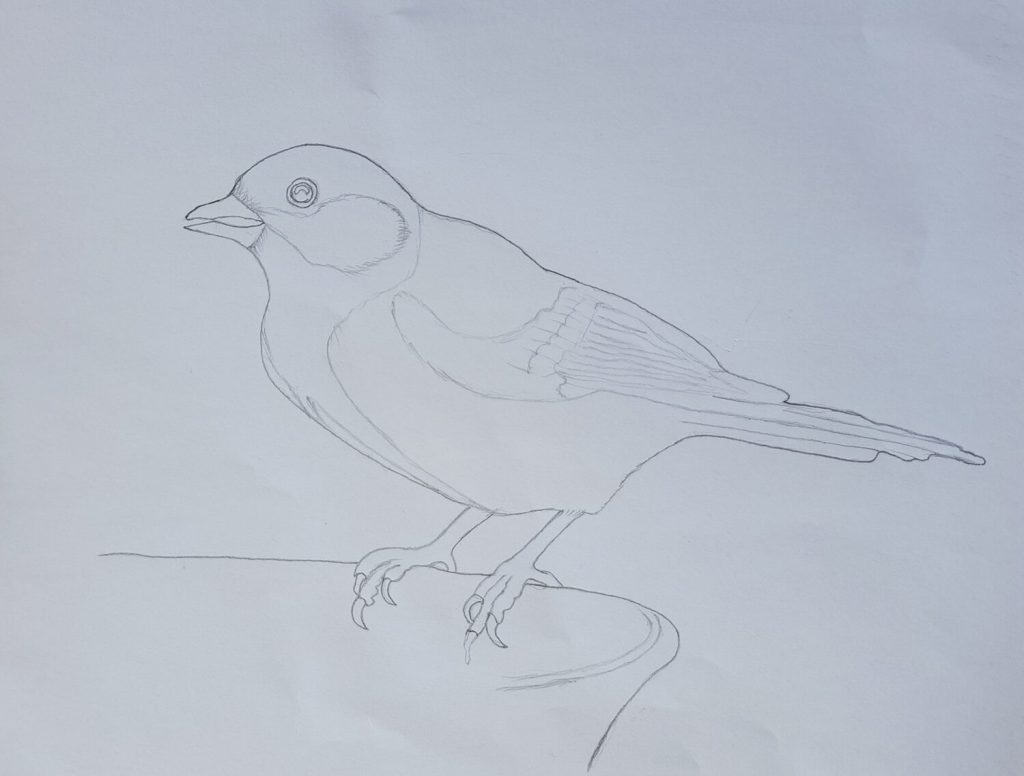
If you’re a beginner, it’s always advisable to use a reference photo to observe while you sketch. Start by sketching the general outline using pencils in the range of 4H to HB.
These will give you a light outline that you can easily erase in case you make a mistake.
Once you’re satisfied with the shape of the bird, start defining the details. In my case, I sketched the bird’s eyes, the boundaries of different types of wings, the legs, and the part of the basin on which the bird is standing.
In my other tutorial on how to draw a bird using graphite pencils, I’ve included more details on the sketching. Therefore, I’d recommend you check it out.
Step 2: Basic Color Shading
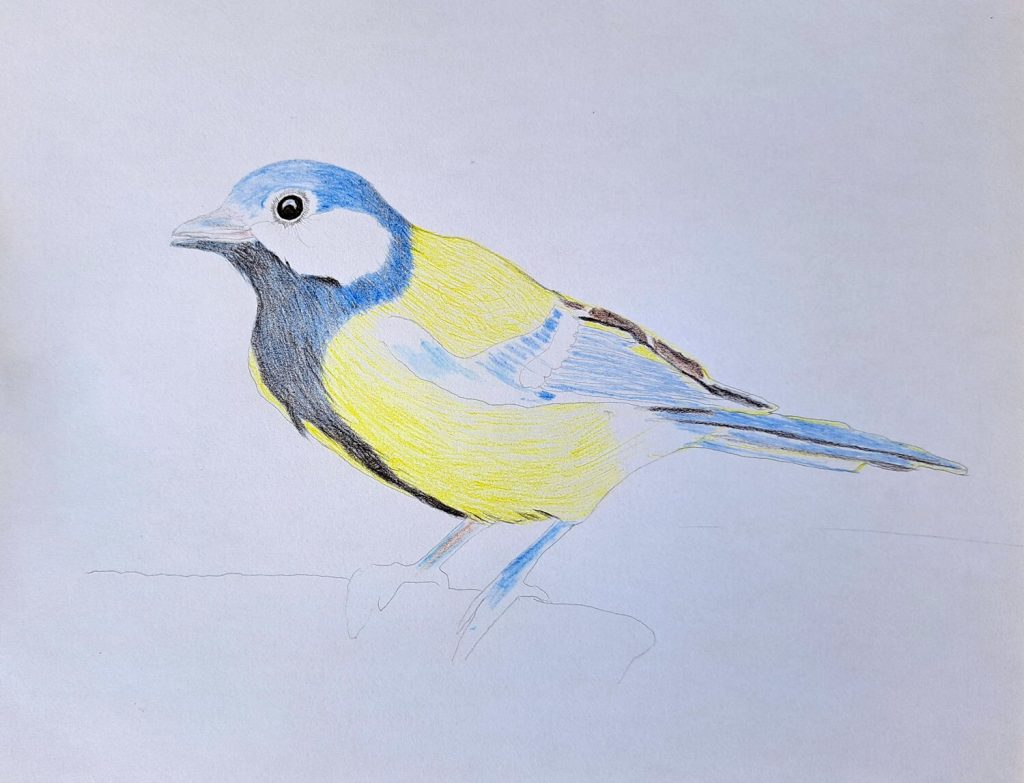
I began by shading the bird’s head using a light blue colored pencil. Progressed down the neck with a dark blue. Below the neck and next to the bird’s breast, I used a mixture of blue and black since that part isn’t getting much light.
Continue across the body using a yellow color alternately with blue. Now, the colors will vary depending on the bird species you’re drawing. It doesn’t have to be exactly like mine.
At this basic shading step, shade uniformly without paying much attention to the details.
Note: I’ve used Superfine 504 Color Pencils on the entire drawing
Step 3: Advanced Coloring
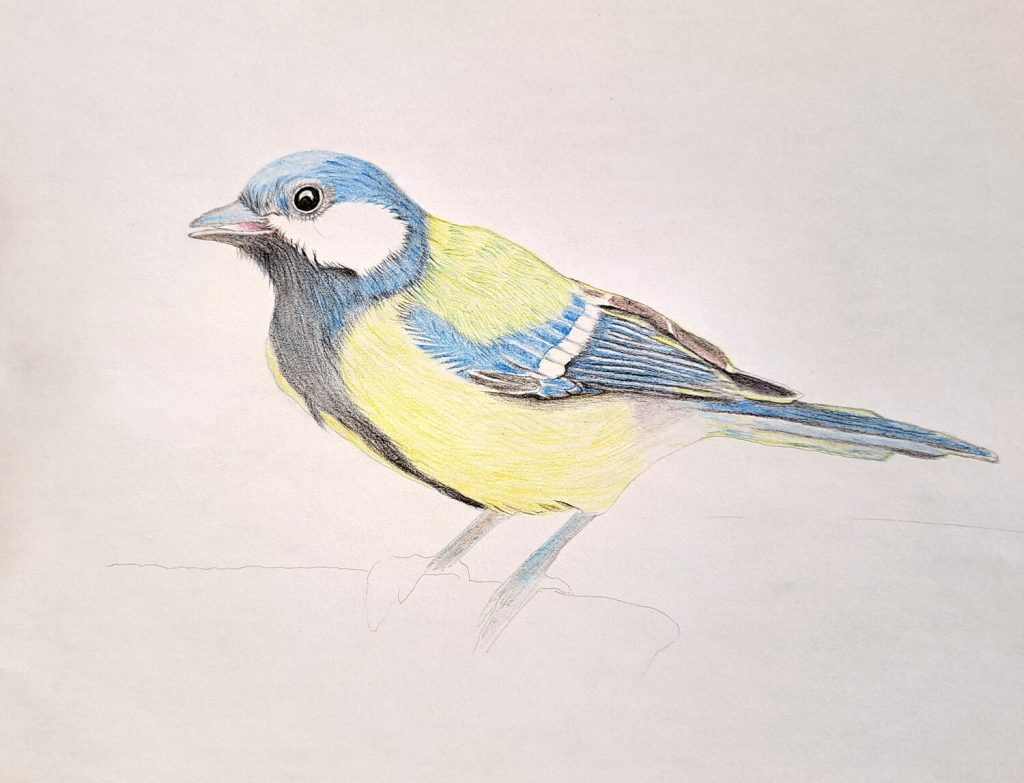
We’re going to add more details to our sketch in this step. To that, ensure you’ve sharpened your pencils well and add finer darker strokes to render the feathers.
Pay close attention to the details on your reference photo and make those subtle strokes close to each other. Keep going until you’ve covered the whole drawing.
Pro Tip: When sketching and rendering the details on a subject, patience is key. Most people rush through the process and wonder why the results are disappointing. I know because I’ve done it so many times. Therefore, take your time.
Step 4: Wrapping it up with more color
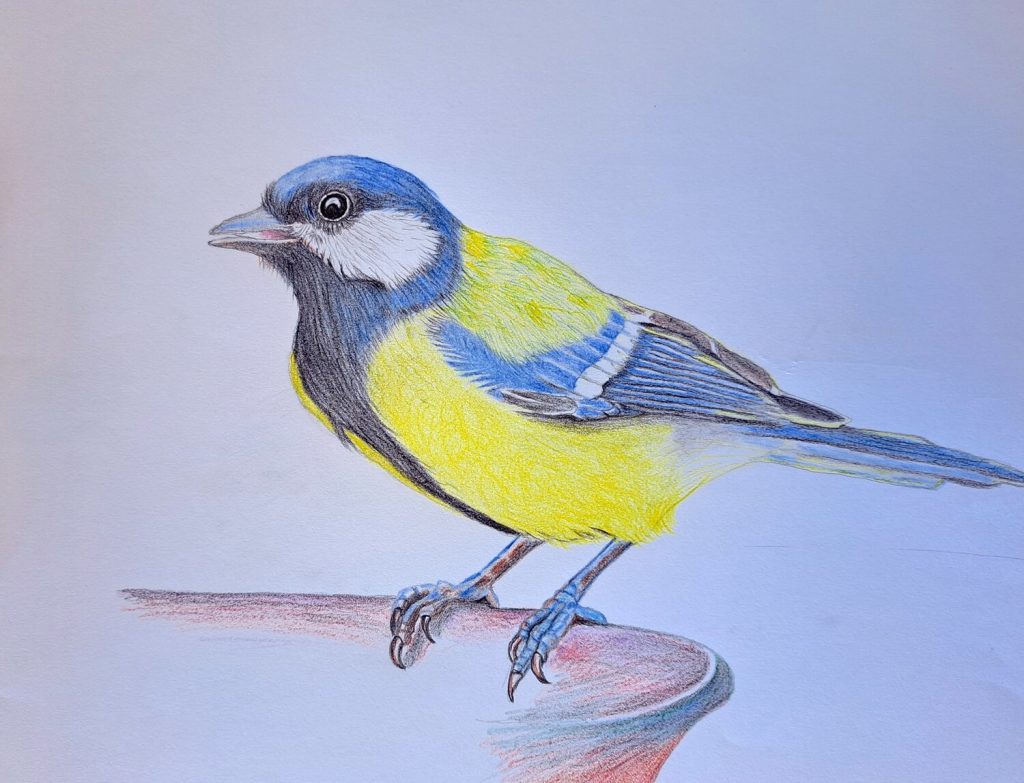
To wrap up everything, shade a little bit darker to increase the contrast of the image. Pay attention to light reflection in the eyes. Also, the pink inside the beak.
Observe the scaly legs, and claws, and shade accordingly. Shade the basin and in general ensure everything blends in seamlessly. Remember some feathers are softer than others like the breast and underbelly of the bird.
Shade those areas with slightly tilted pencils and others like the top with defined strokes to create the impression of texture.
Challenges You’ll Likely Encounter
Working with colored pencils is challenging when it comes to layering and blending. Especially if you’re using low-quality pencils.
I noticed that instead of layering different colors to form an intermediate or secondary color, one will just overpower the other one. I was able to work around this issue by shading the base layer very lightly and pressing hard as I progressed.
Maybe you’ll need to do the same or get better pencils than the ones I worked with.
Whichever way, don’t let the lack of better materials hinder you from expressing yourself through your artwork.
You may be interested to learn how to draw a penguin.
Conclusion
I hope you’ve been able to learn something from this tutorial or inspired to keep drawing and appreciating life for what it is – an adventure to explore.
As always, I’d also love to hear and learn from you. Please consider sharing your work so that we can appreciate it together. Or better still, share this tutorial with your friends.
It would mean the world to me.

