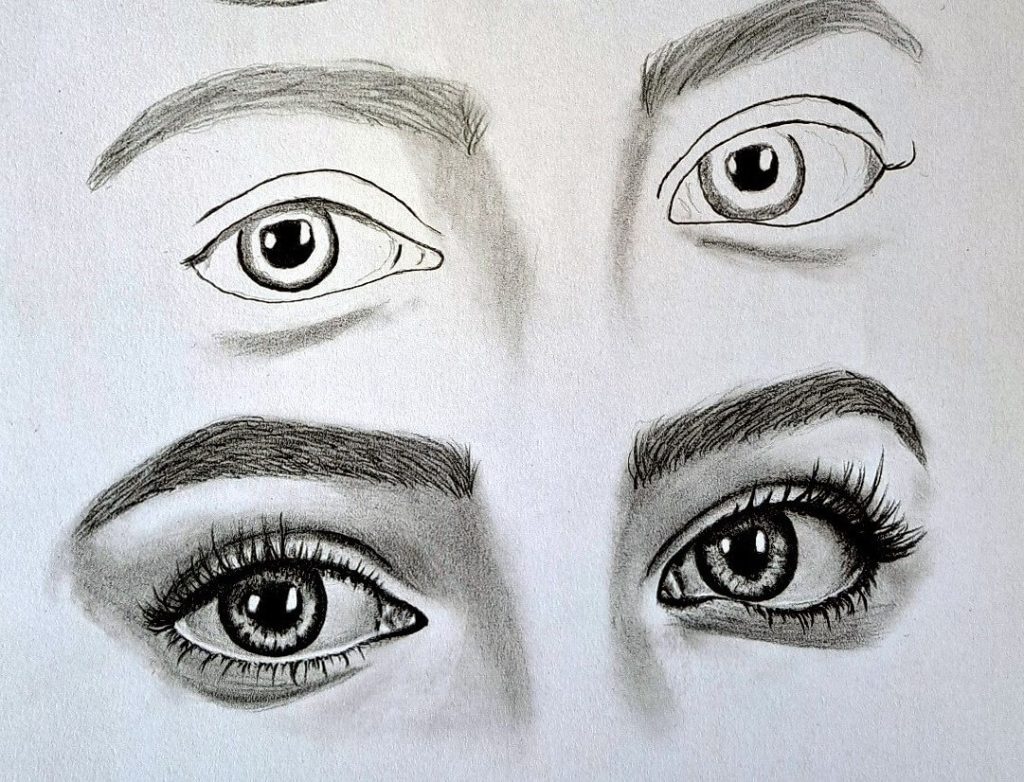
I struggled to draw realistic human portraits for a long time until I realized I wasn’t paying enough attention to one of the most significant facial features, the eyes.
They convey a person’s feelings and personality. Therefore, if you miss even the slightest detail, you won’t achieve a believable representation of that person.
That’s probably the case for so many aspiring artists out there.
That’s why I’m excited to share how to draw realistic female eyes, breaking down the process into easy-to-remember steps.
Realistic Female Eyes Drawing (Front View)
We can draw the eyes from different angles depending on where the subject is facing. For instance, there is a profile view (facing to the side), a three-quarter view (almost facing the front), and a Front View.
In today’s tutorial, we’re focusing on the latter. Hopefully, we’ll cover the other angles in the days to come.
If you prefer to watch instead of reading, the video is embedded below. However, you can scroll further down to continue reading.
Let’s begin.
Sketching the shape of the eye
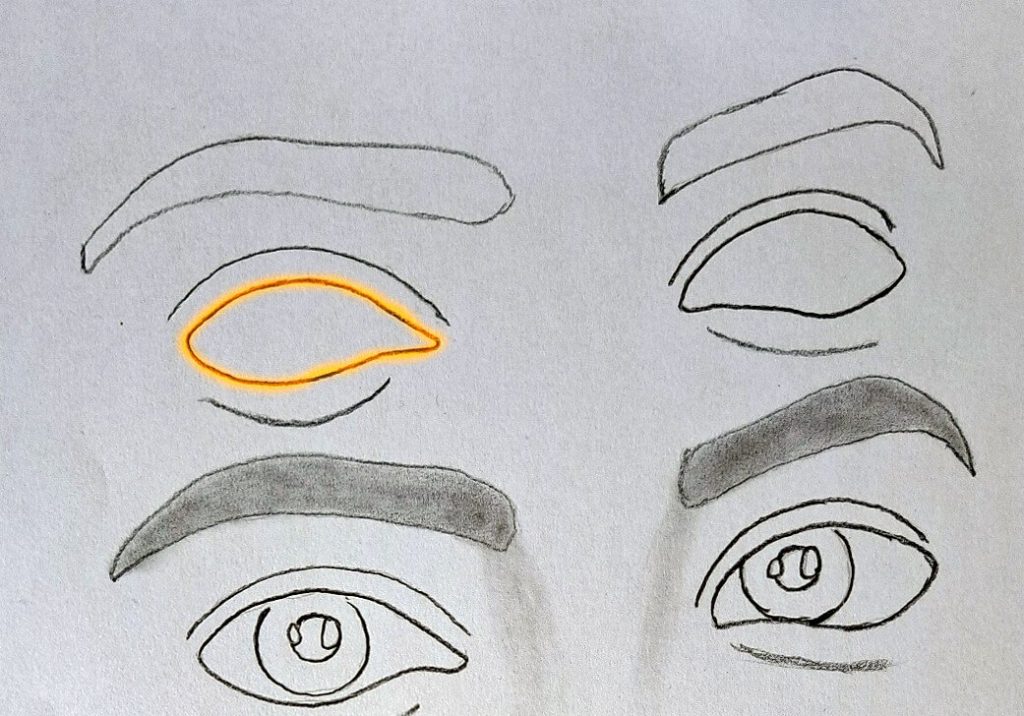
Using a 3H pencil, sketch an oval that tapers on one side (towards the bridge of the nose). Next, draw a curved line above and another small one below. These lines have to be as faint as possible in case you need to erase anything later.
The line above represents the eyelid.
If your subject faces straight in front, the other eye will mirror the first. On the other hand, if there’s a slight head tilt (like in my illustration), there will be a subtle difference.
Sketching the eyebrows
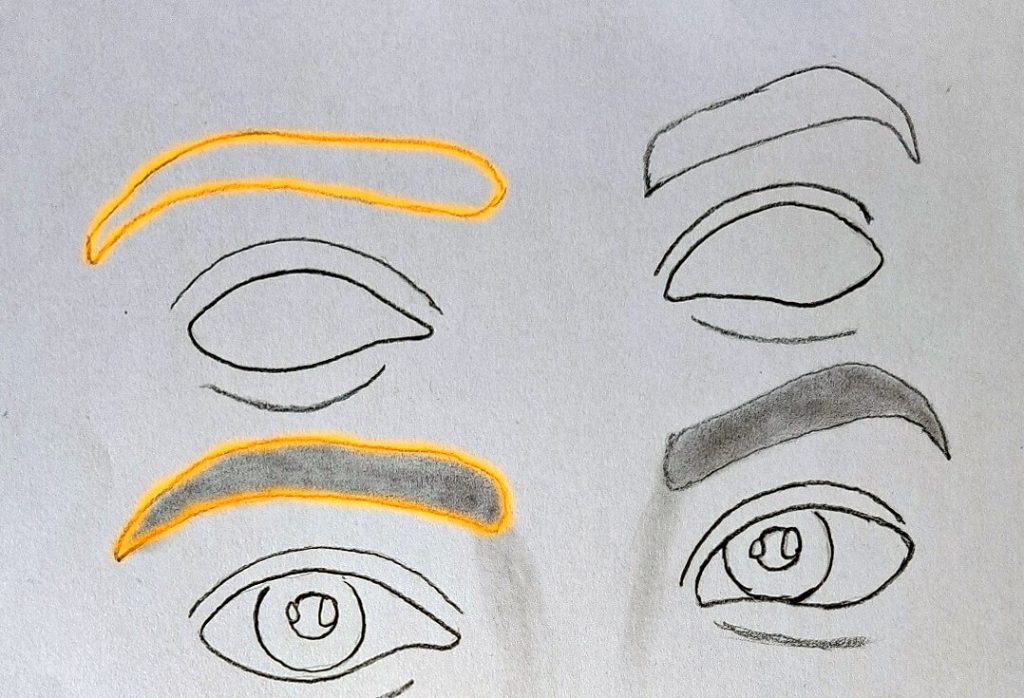
When it comes to drawing the eyebrows and the eyes, most experienced artists use tone rather than lines to render their shapes. However, using the pencil strokes is way easier for most beginners.
Again, use a light pencil to sketch the shape of the eyebrows. Take note of the distance between the eyelid and the brow, the length and thickness, depending on the head tilt.
Once done, uniformly shade the eyebrows and blend.
If you’re unsure, always use a reference photo to observe.
Sketch the eye details
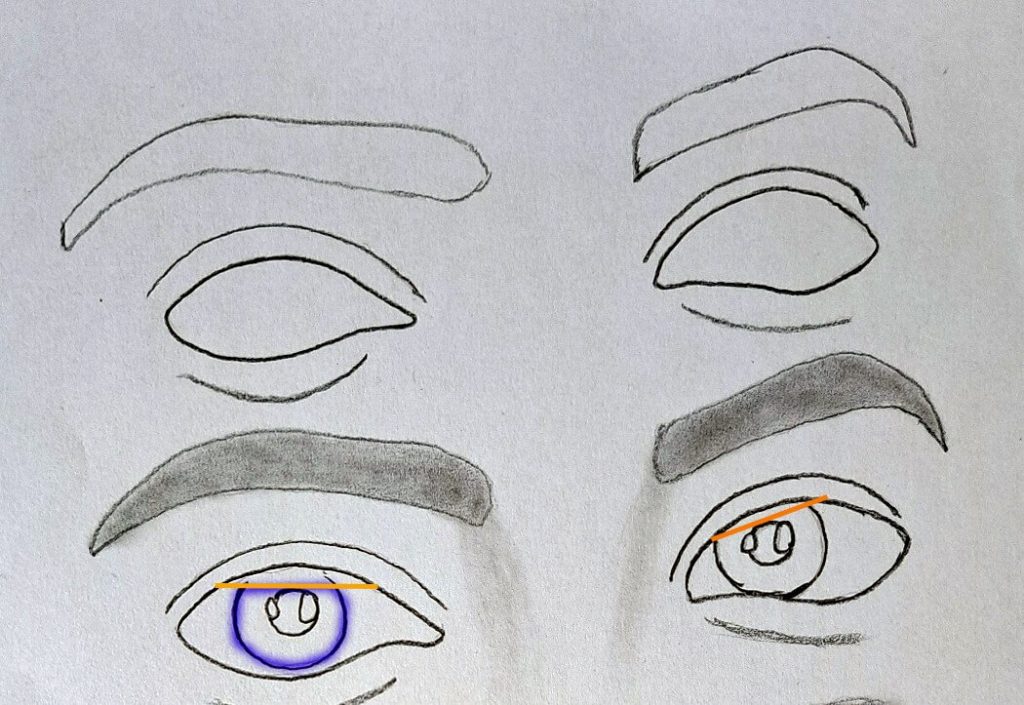
In this step, we’ll draw the iris, pupil, and light reflection. Sketch a circle to represent the iris and another small one to represent the pupil.
Besides, draw small light reflections as illustrated in the image above.
Notice how the pupil is 100% visible around the lower eyelid and partially hidden by the top eyelid.
Shading the Iris and the Pupil
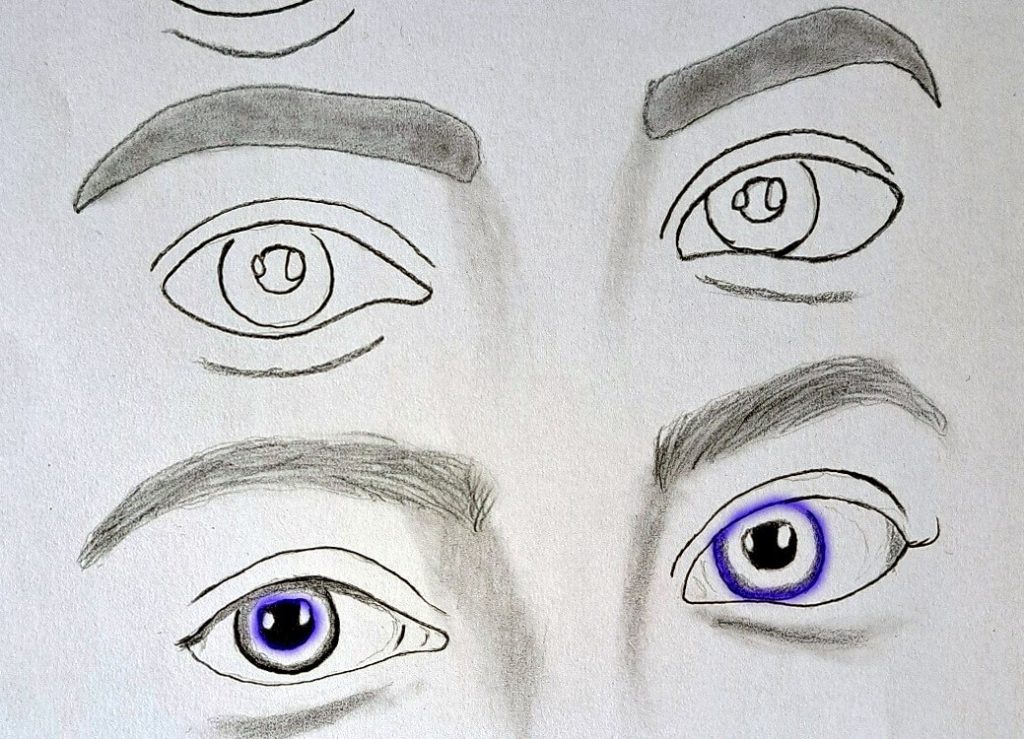
Establishing the tonal spectrum between the cornea’s whiteness and the pupil’s blackness is crucial. Therefore, use an 8B soft graphite pencil to shade the pupil. Leave out the highlight sketch to represent light reflection.
Besides, use the same pencil to shade the edges of the iris, leaving out the middle, as illustrated above. At this point
You can take this opportunity to build up the eyebrows with a few more pencil strokes.
Final Shading: Iris, Cornea, Eyebrows, Eyelashes, and around the Eye
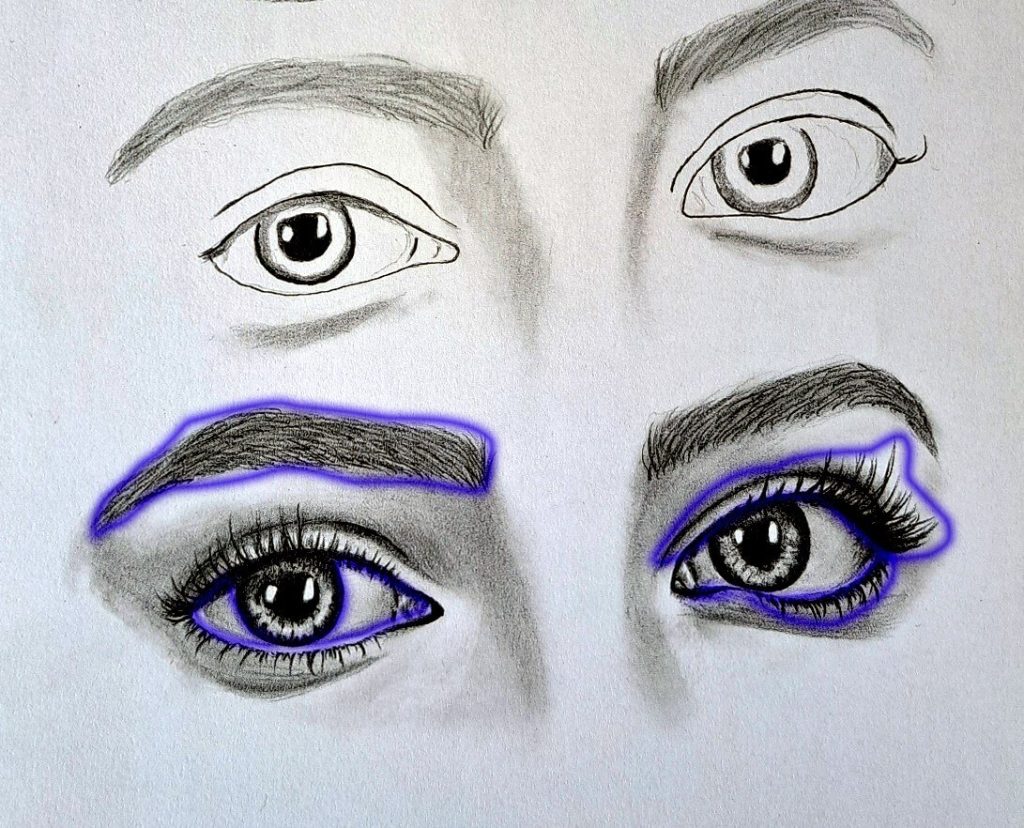
Use a 6B pencil to smudge the darkest areas inside the eye to indicate the upper eyelid covering the cornea. Remember not to shade the edge of the lower lid to indicate the tears. Since the cornea isn’t entirely white, use an H pencil to shade it and blend for a smoother texture.
Next, use long, outward-sweeping pencil strokes for the upper lashes and short dashes for the lower ones. Notice that the lashes are so dense that they cast a shadow beneath them.
To build volume, finish by shading the eyebrows with a well-sharpened 6 or 8B pencil. Lastly, use an HB pencil to shade around the eye and blend with a Q-tip.
You may also be interested in learning how to draw a realistic ear.
Conclusion
If you can analyze and accurately interpret the eyes, you can draw them realistically in three dimensions. But the best part is that it becomes easy to develop any portrait.
Keep practicing with different eye types until the confidence kicks in.
I hope you’ve enjoyed this tutorial. In case you prefer to watch a video instead, here it is – https://www.youtube.com/watch?v=k-JpKhM5naE

