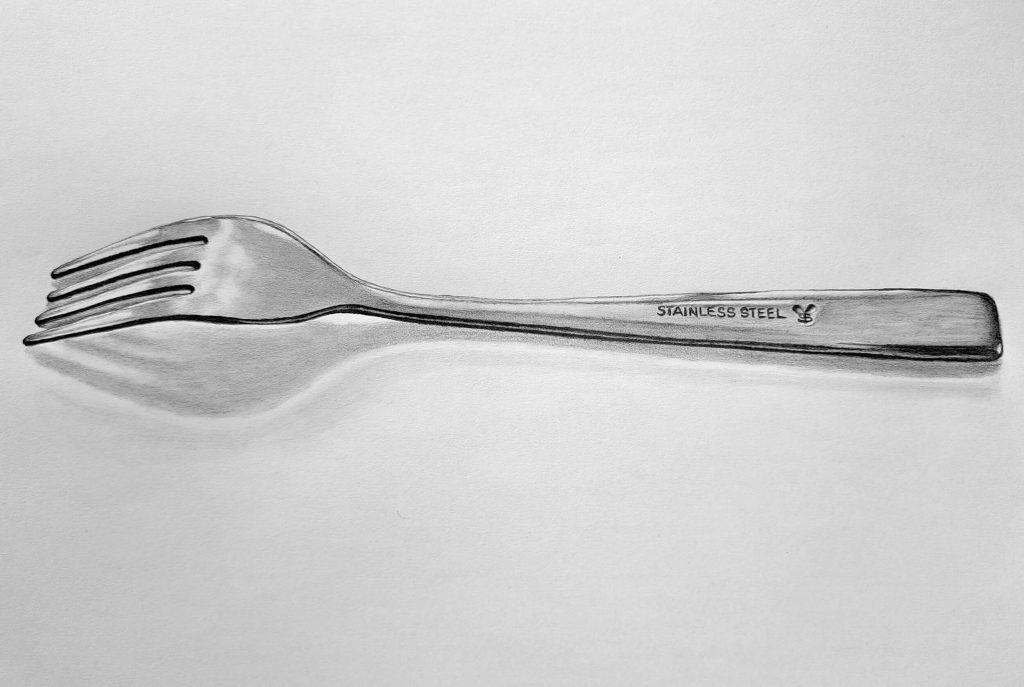
Drawing a fork sounds easy, right?
I mean, it’s just a basic kitchen utensil with a handle and some prongs. But if you’ve ever sat down to actually sketch one, you’ve probably realized it’s sneakier than it looks.
The reflections! The symmetry! Those annoying little shadows between the tines!
Trust me, I’ve been there. Staring at a fork like it personally wronged me. But once I broke it down into simple steps, it got a whole lot less frustrating.
So, if you’re ready to turn a tricky utensil into a drawing you’re proud of, I’ve got you. Let’s dive in.
What You’ll Need
Not much! Here’s the bare minimum:
- A pencil (H to 4B is fine)
- Eraser (because mistakes will happen)
- Sketchbook or drawing paper
- A real fork (yep, grab one from your kitchen)
If you’ve got a blending stump or even a Q-tip for shading, that’s a bonus, but not required.
How to Draw a Realistic Fork Step by Step
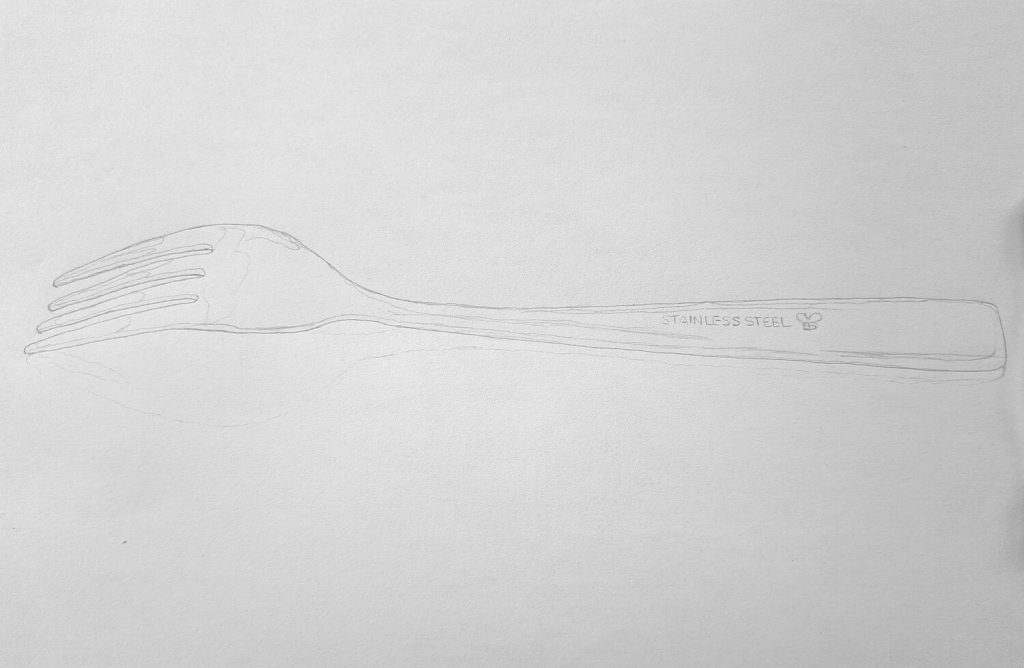
Step 1: Start with a Freehand Light Sketch

Okay, no rulers or grids here.
Don’t break it into shapes. Just squint at your fork and sketch it lightly and loosely. I know, it’s tempting to go full geometry mode, but this is about training your eye and getting comfortable with the general shape.
Try to capture the flow of the handle and the curve of the tines. Don’t stress about making it perfect.
Step 2: Refine the Sketch and Add Details
Now that you’ve got the basic outline, start tightening it up. Make the lines cleaner, straighten the handle if it’s gone wobbly, and define the tines more clearly.
Pay attention to how they’re spaced and the way they curve slightly toward the tip. A lot of forks have subtle quirks, maybe a slight taper or a thicker middle tine. So, take your time observing.
You’re basically making your drawing less “spork” and more “fork.”
Step 3: Define the Midtones and Shade
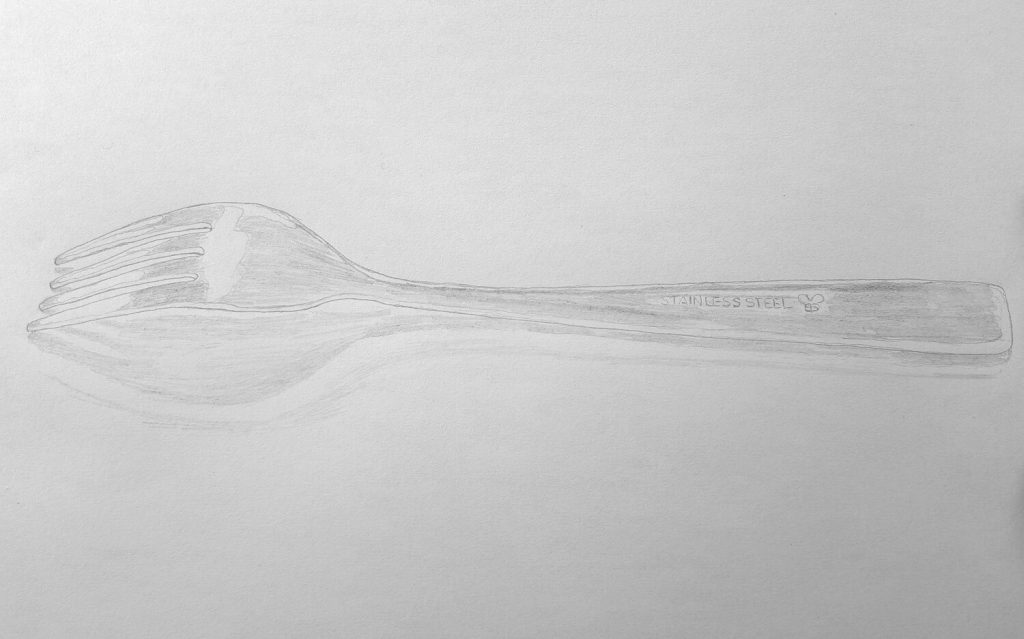
This is where your fork starts looking less like a cartoon and more like an actual object. Look closely at your fork and squint. Do you see those soft gray areas?
That’s what we’re calling midtones.
Use the side of your pencil to lightly shade those parts. Don’t go too dark yet. This step is all about building a foundation and getting the form to pop off the page.
Step 4: Add the Dark Values and Shade
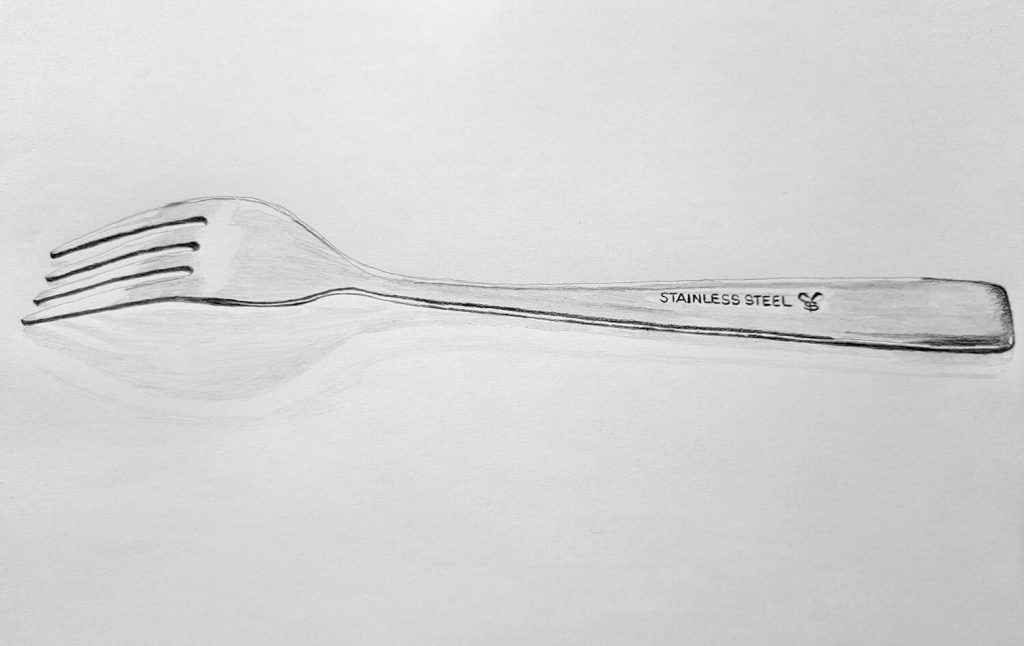
Now let’s punch things up a bit. The darkest areas on a fork are usually between the tines, around the base where the handle meets the head, and anywhere there’s a strong shadow or reflection.
Use a softer pencil if you have one (like a 4B or 6B), or just press a little harder. Layer in those darker tones but keep it controlled. You’re building depth, not scribbling.
Step 5: Shade the Transition and Add the Cast Shadow
This part makes a huge difference. Smooth transitions between your midtones and dark areas will give the fork that sleek, metallic look.
Use a blending tool, your finger (make sure it’s not oily), or even a tissue to soften the edges.
Now add a cast shadow.
This is the shadow the fork throws onto the surface it’s lying on. It helps ground the drawing so it doesn’t look like it’s floating in space. Keep it soft and pay attention to the direction of your light source.
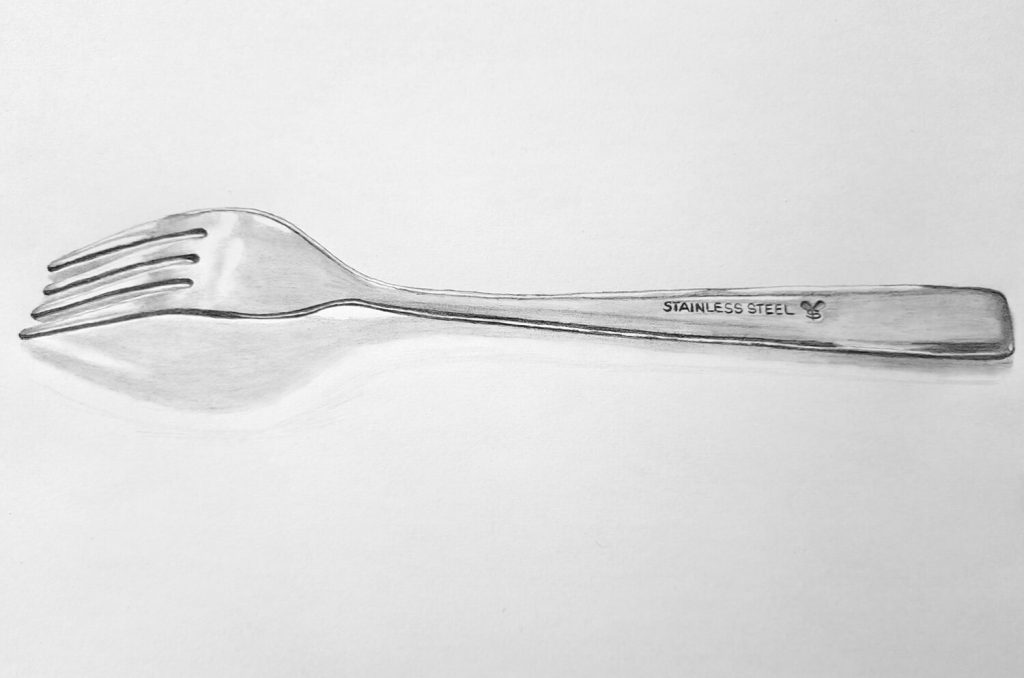
Step 6: Finalize with Contrast—Darken and Highlight
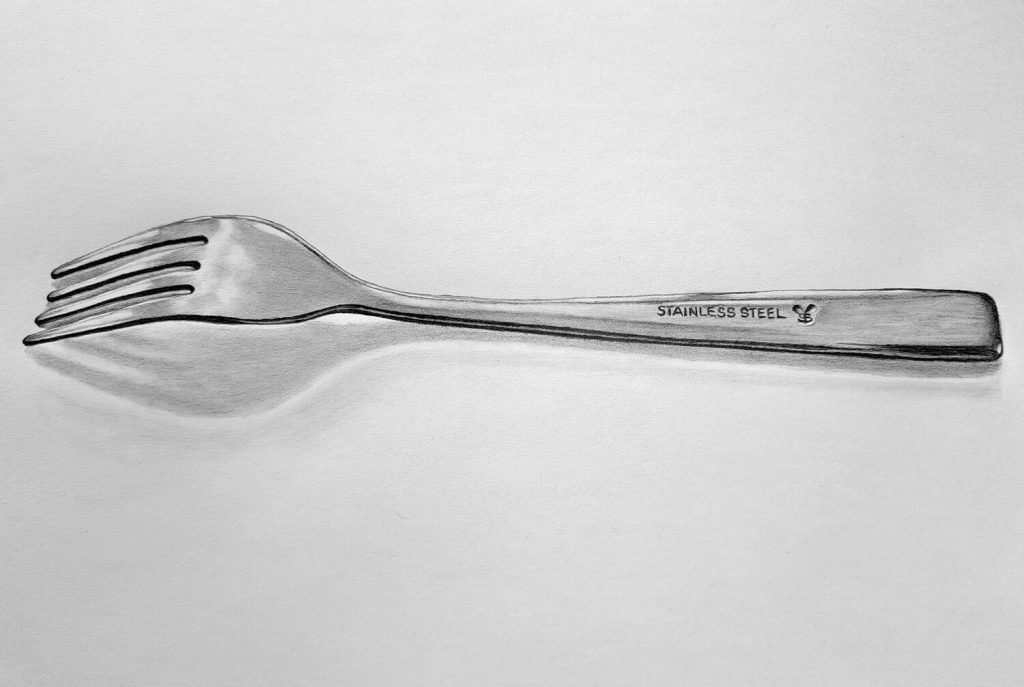
Time for the finishing touches!
Deepen your darkest areas to create more contrast. Then go in with an eraser to pull out some highlights along the edge of the tines, the handle, or wherever light is bouncing off the metal.
This contrast between light and dark is what gives your fork that polished, shiny look. Think of it as adding a little drama to an otherwise quiet utensil.
Helpful Tips
- Use a real fork. Reference is everything. Even if your drawing looks different from mine, drawing your fork helps you learn observation.
- Keep your hand loose. A death grip on the pencil will result in stiff lines.
- Work from general to specific. Don’t obsess over tiny details at the start.
- Practice reflections. Shiny objects are all about light and dark contrast.
- Be patient. The first fork might look like a weird gardening tool. That’s okay.
Conclusion
Drawing a fork isn’t about technical perfection. It’s about seeing an everyday object in a whole new way. It’s a chance to slow down, pay attention to the little things, and improve your observational skills.
Plus, once you’ve nailed a fork, you’ll feel way more confident tackling other reflective or symmetrical objects (I see you, spoons, wine glass, and scissors). So don’t stress it. Just sketch, shade, smudge, and enjoy the process.
Now go grab that fork and give it a new life on paper!