In the late 1800s, when Thomas Edison and his team were working on the first practical light bulb, they tested thousands of materials for the filament. Bamboo, cotton thread, even bits of cardboard.
Nothing seemed to last long enough. It took years of trial and error before they found something that could glow steadily without burning out too quickly.
What’s more fascinating is how delicate that balance is.
A light bulb works because everything inside it is just right: the shape of the glass, the thinness of the filament, and the absence of air. One small change, and the whole thing fails. It’s a simple object on the outside, but inside, it’s a careful piece of design.
That subtle complexity is part of what makes it so interesting to draw a light bulb.
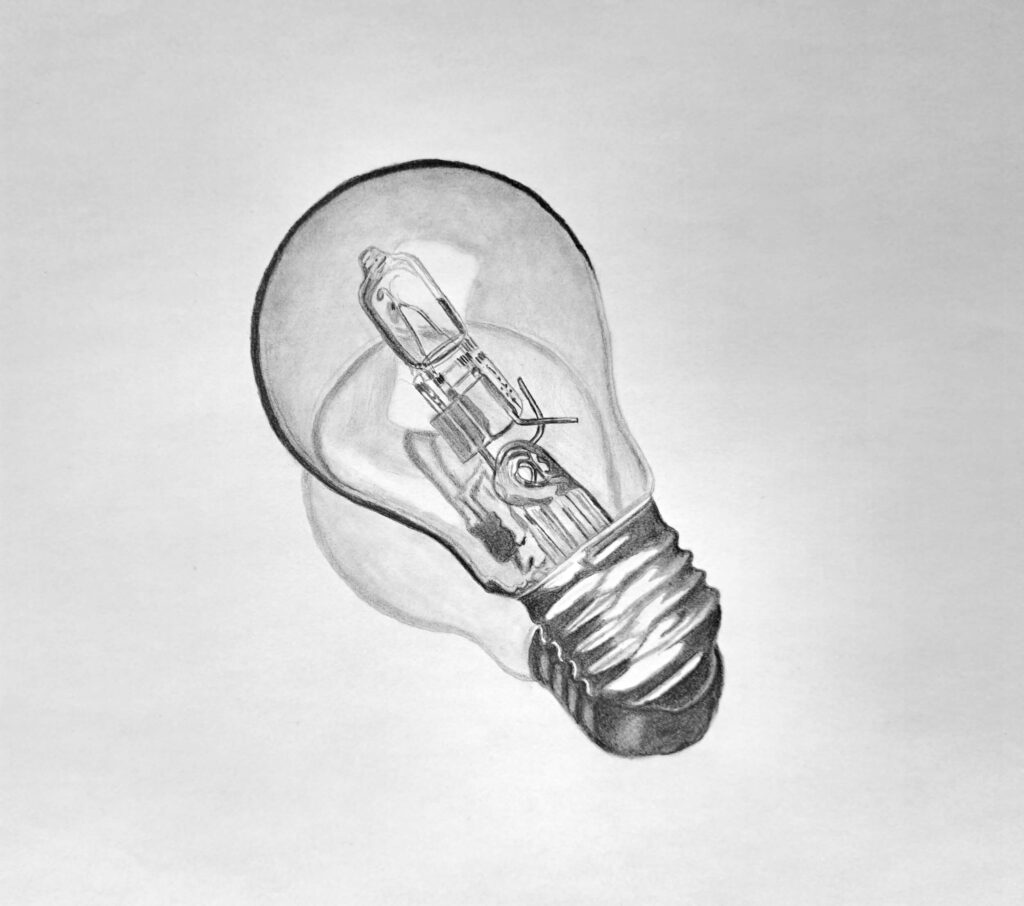
When you carefully observe the light bulb, you start to notice details most people miss: the subtle curves, the way light wraps around the glass, the tiny structures hidden inside.
In today’s tutorial, we’ll discuss how to draw a light bulb even if you’re a beginner. Let’s get to it:
How to Draw a Light Bulb Step by Step
Sketch the guiding shapes (Circle, Rectangle & Triangle)
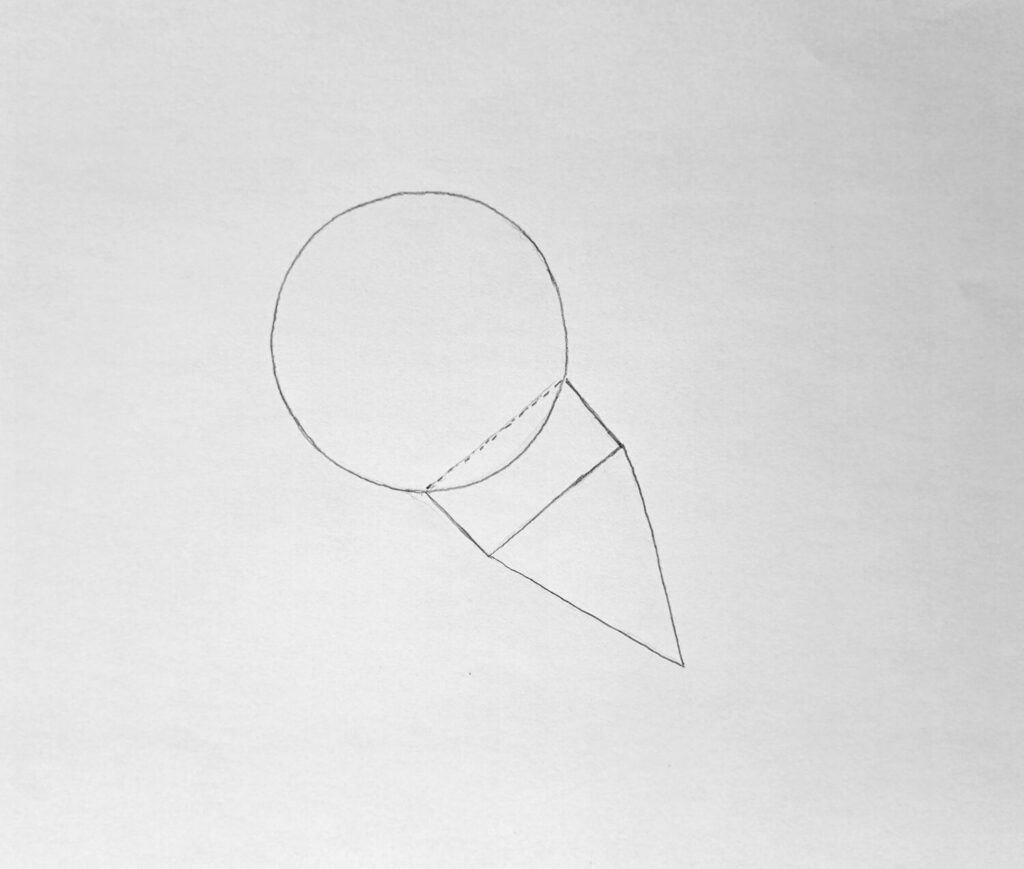
To sketch the bulb, observe for any identifiable shapes, then draw them instead of sketching the bulb right away. This is possible with a reference.
Begin by drawing a light circle (make it as perfect as you can). This will guide in drawing the glass body. Then, right below the circle (slightly overlapping), draw a rectangle to represent the tapering of the bulb glass.
Lastly, connect a tapering triangle to indicate where the cap will go, as shown in my illustrative drawing. Alternatively, you can just draw a short cylinder that narrows at the bottom.
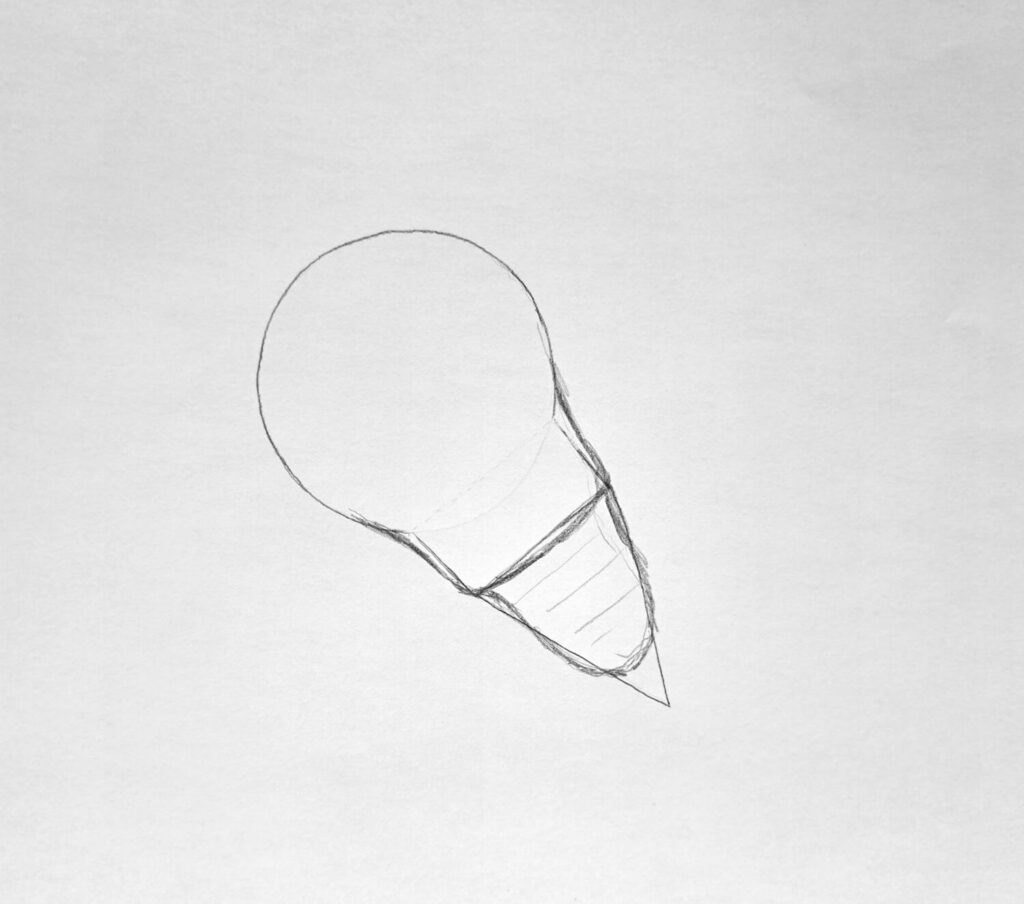
Sketch the shape of the bulb
Most artists agree that the most difficult part is studying the subject before you begin to draw. You’ve already done that in the previous step.
Now, without being confined by the shapes, sketch the shape of the bulb as one unit. Let the top feel round and full, then gently narrow it as it approaches the neck. Add a slight curve at the bottom for a more realistic screw base.
Complete the light bulb sketch
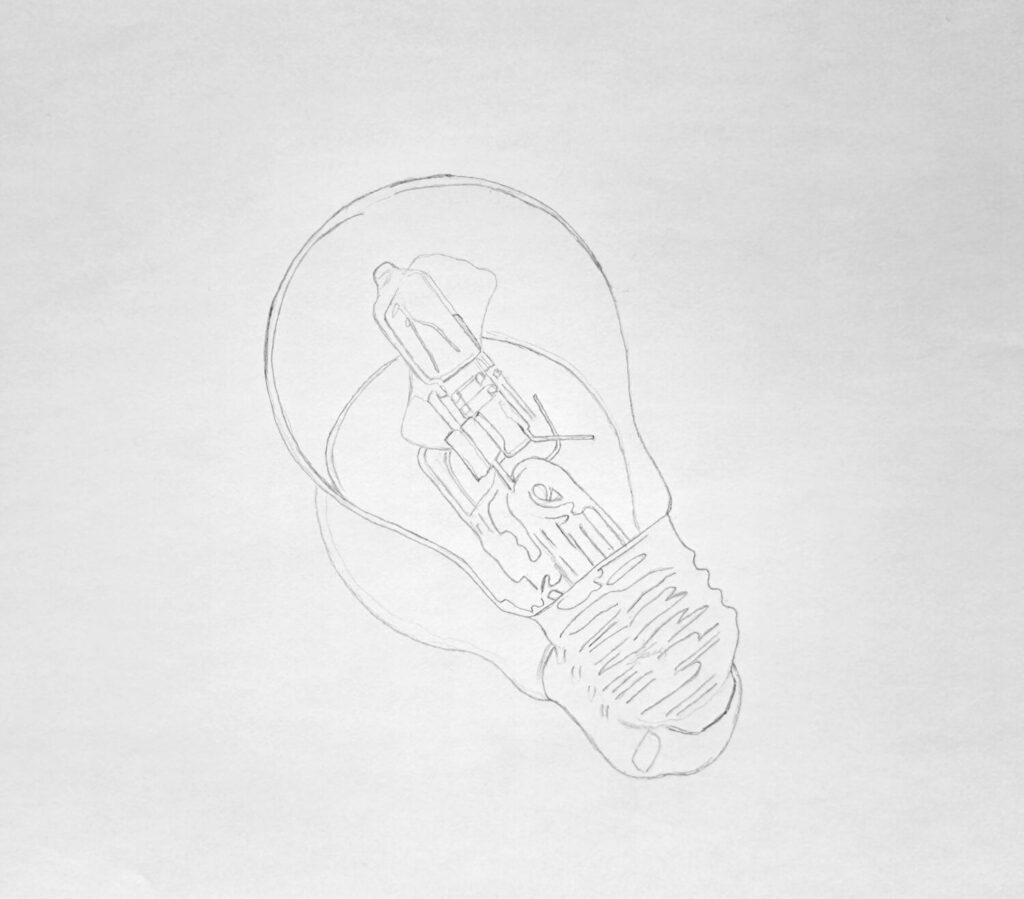
At this point, the guidelines have served their purpose. Therefore, gently erase the circle, rectangle, and triangle lines that are no longer needed. What remains should be a clean outline of your bulb.
Then, inside the glass, draw the filament. It’s best to observe a real light bulb or reference image instead of cooking up your own details.
Add the internal support wires that connect the filament to the base. For the best results, complete this step with light lines, preferably with a 3H pencil, while trying to be as precise as possible. Overlapping lines may skew the illusion of smoothness.
You can also sketch the shape of the shadow beneath. Position it slightly offset if your light source is coming from one side. That small shift makes your drawing feel more realistic.
And just like that, you’ve finished your bulb sketch.
Basic shading of the dark values
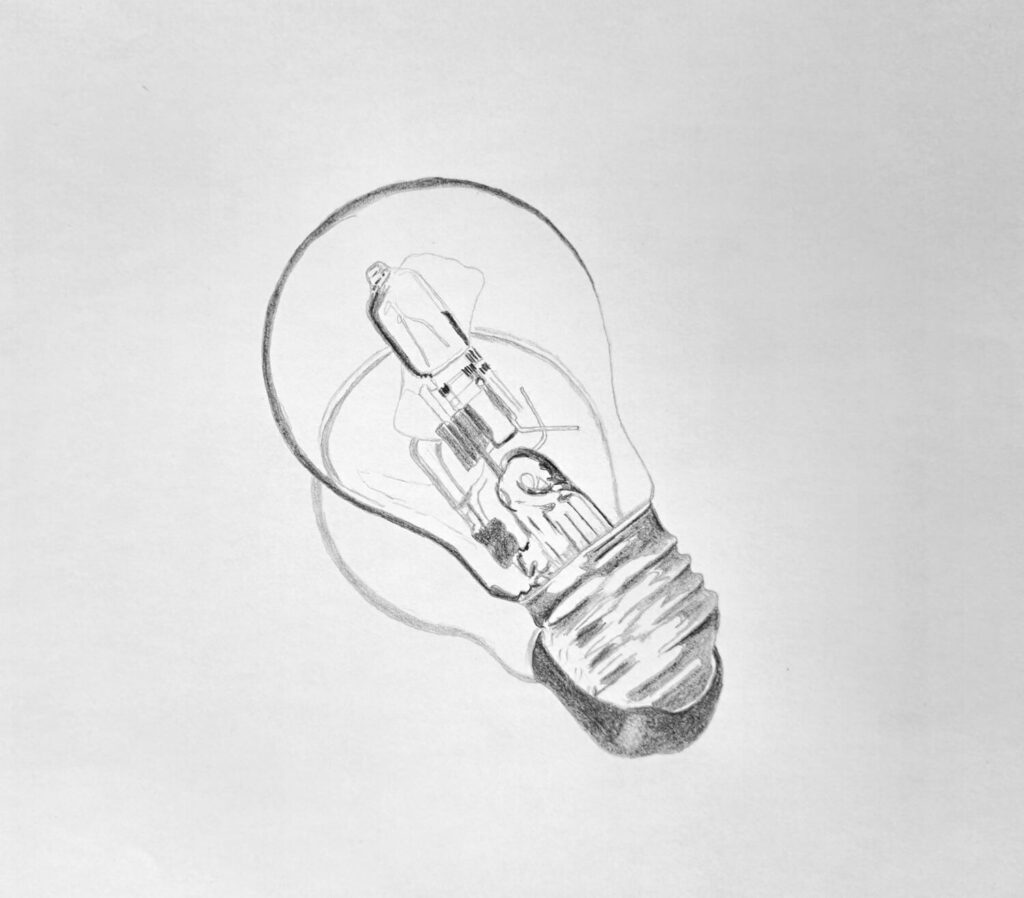
For most drawings, I always begin by shading the midtones to create form and volume. However, when shading and rendering glass texture, I find it convenient to block the dark values first.
Therefore, get a 2B pencil and begin shading the edges of the glass, parts of the filament, and the cap as shown in the progress shot above.
You can touch up on the shadow. Remember, we’ll still shade these areas, but the idea is to block all the dark values.
Shading the bulb head (Midtones)
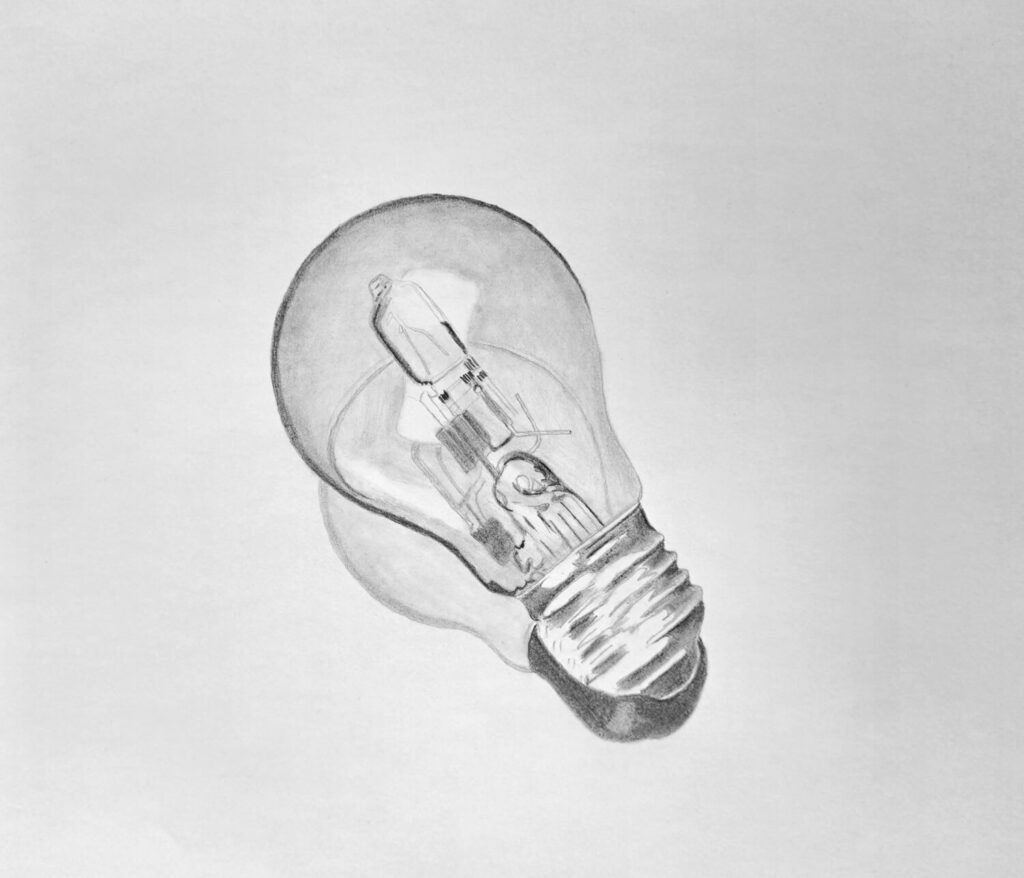
Using an HB pencil, lightly shade across the bulb, but leave a clean highlight area untouched. The highlight is what tells the viewer this is shiny glass. Ensure to shade as uniformly with a steady hand as you can.
Continue by blending your shading gently, either with a blending stump, Q-tip, or a tissue wrapped around your finger.
Now, I understand this action will present a few challenges for us. First, the drawing will look smudged and blurry, and secondly, the details won’t be as clear, but that’s alright for now.
We’ll fix those two problems next.
Refine and shade the bulb head details
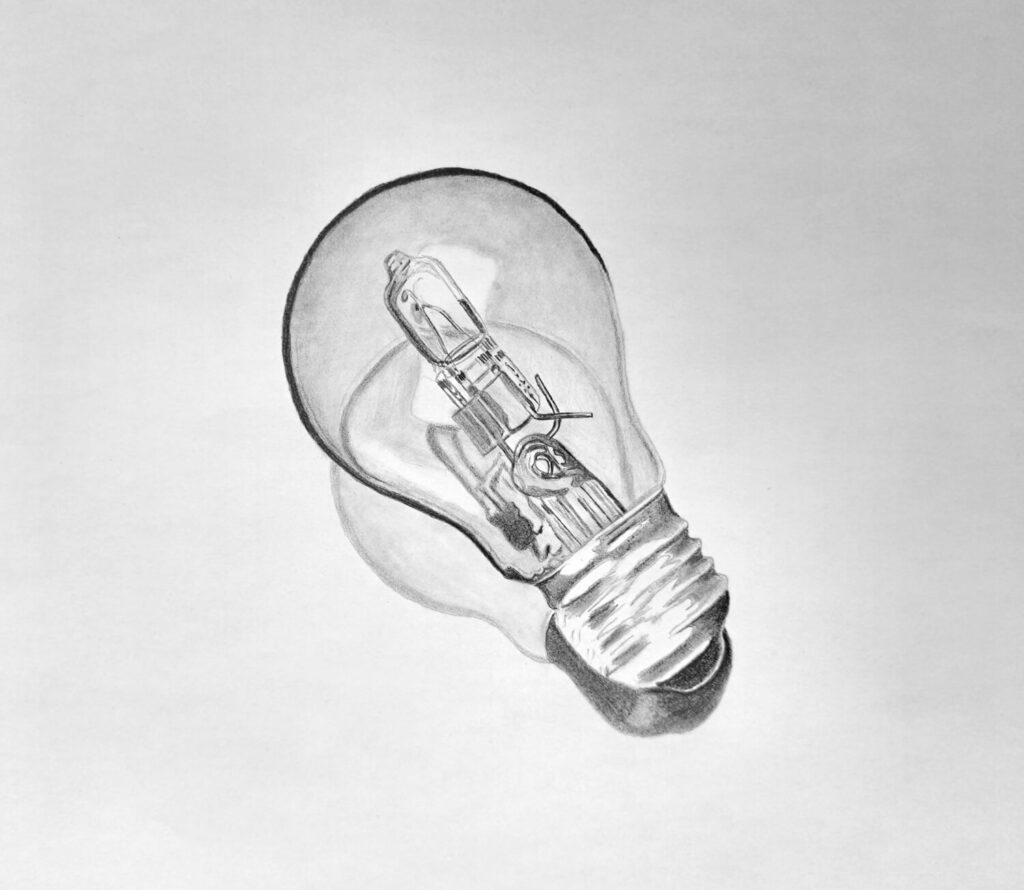
Remember that for a glass to appear as “glass,” it needs enough contrast. You achieve this by keeping your highlights bright and your edges and details slightly darker.
Therefore, go back to the filament and inner structures. With a sharpened 2B pencil, darken them slightly and make the lines cleaner. These details should stand out against the softer glass shading.
If you have a thin lead mechanical pencil, I’d recommend using it for the filaments and internal structures that require precision.
Complete shading of the bulb cap and shadow beneath

To complete the drawing, we need to refine the appearance of the bottom cap. Deepen the darkest parts of the cap. Add subtle highlights by leaving thin, lighter lines where light hits the ridges.
Metal reflects light differently from glass, so it needs stronger value changes. Compare this tutorial about drawing a fork vs this one about drawing a wine glass. Do you notice the difference?
Great!
Once satisfied with your light bulb, focus on the transition between the metal cap and the shadow. Ensure there’s a slight reflection to create that boundary.
Then soften the shadow’s edges slightly. Real shadows rarely have hard outlines, especially under soft lighting.
You can even add faint reflected light within the shadow area. It won’t be obvious, but it makes the drawing feel grounded and believable.
Here are my other top recommended tutorials for you to check out:
Conclusion
Drawing a light bulb teaches you something bigger than just drawing a light bulb. It trains your eye to see subtle shifts, the quiet transitions between light and shadow that most people overlook.
After finishing this exercise, try to use the concepts discussed to draw other textures and objects because the principles are always the same.
I hope you’ve been inspired today. If so, consider sharing this post.