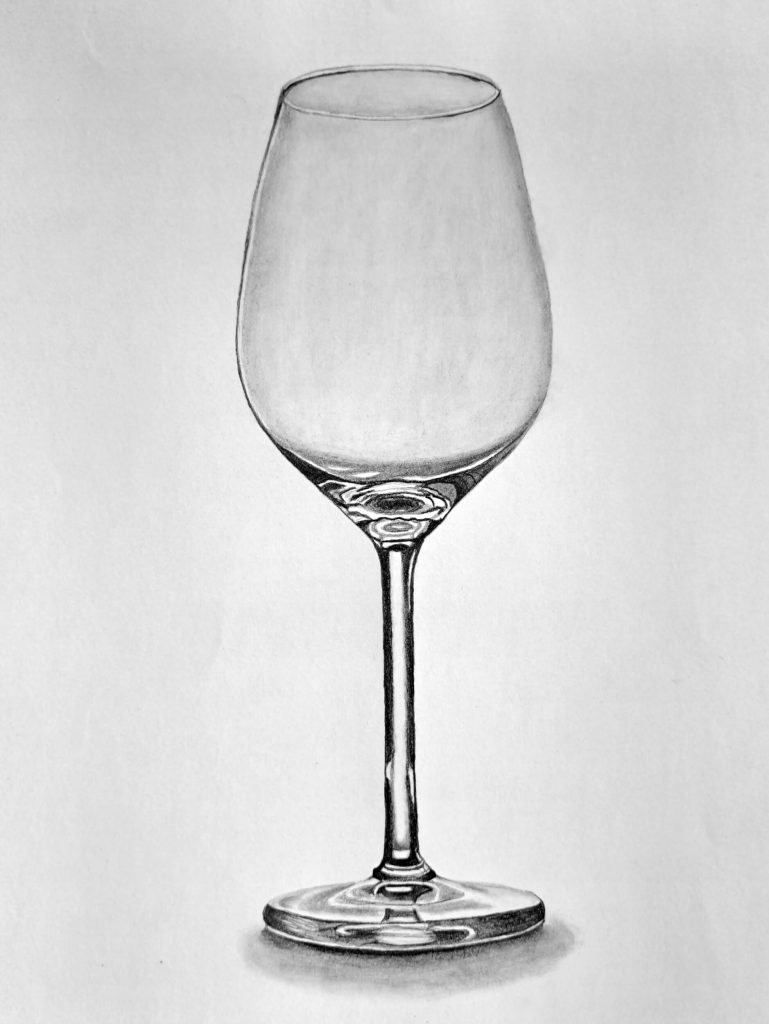
Wine glasses come in different styles, shapes, and sizes. However, the most conventional ones are referred to as stemware or goblets. This means they have three distinct parts: the bowl (top), the stem (middle), and the foot or base.
We won’t discuss why that’s the case today. All that matters is that almost every homestead has one, and we’ll learn how to draw it.
While it’s relatively easy to draw a wine glass with colored pencils, drawing in black and white is somewhat challenging but still doable with the correct approach.
4 Easy Steps to Drawing a Realistic Wine Glass Using Graphite Pencils
Sketch the wine glass outline
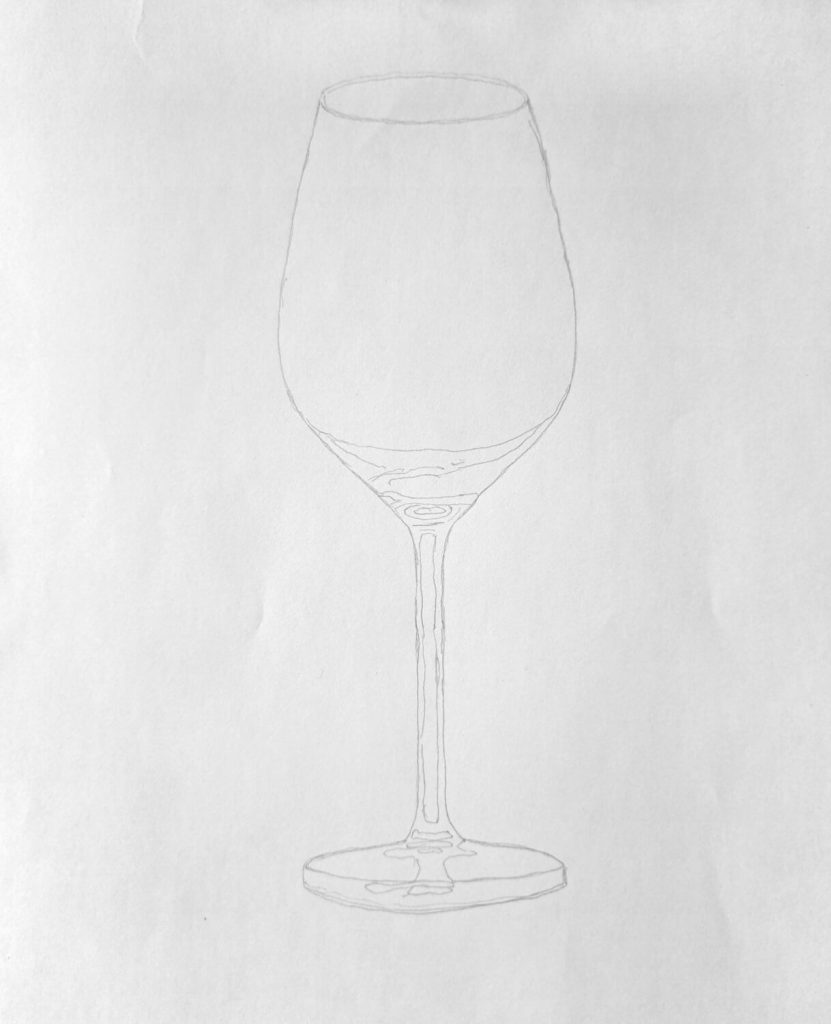
Drawing from memory is the ideal practice for experienced artists. However, for the rest of us, having a glass on the table and drawing by observation is the surest way to guarantee excellent results. Alternatively, you can get a reference image and copy it.
So, let’s begin:
First and foremost, draw the top oval representing the glass opening. Make sure that the edges of the oval are smoother and not pointy.
Next, draw the first curved line on the left before drawing the right one, which mirrors the first. Draw the stem of the glass where the two lines meet at the base of the bowl.
To do that, draw two straight lines. Observe how thick and long your glass stem is when doing this.
Lastly, draw the support base to finalize your glass outline.
However, before you move to the next step, lightly sketch any reflections (highlights) you can observe. You don’t have to be perfect – but try your best.
Pro Tip: I’ve used a 3H pencil to sketch my glass outline. Besides, I’ve tried to have a steady hand so the glass doesn’t appear wavy. You should try to do the same thing.
Shading and blending the glass bowl
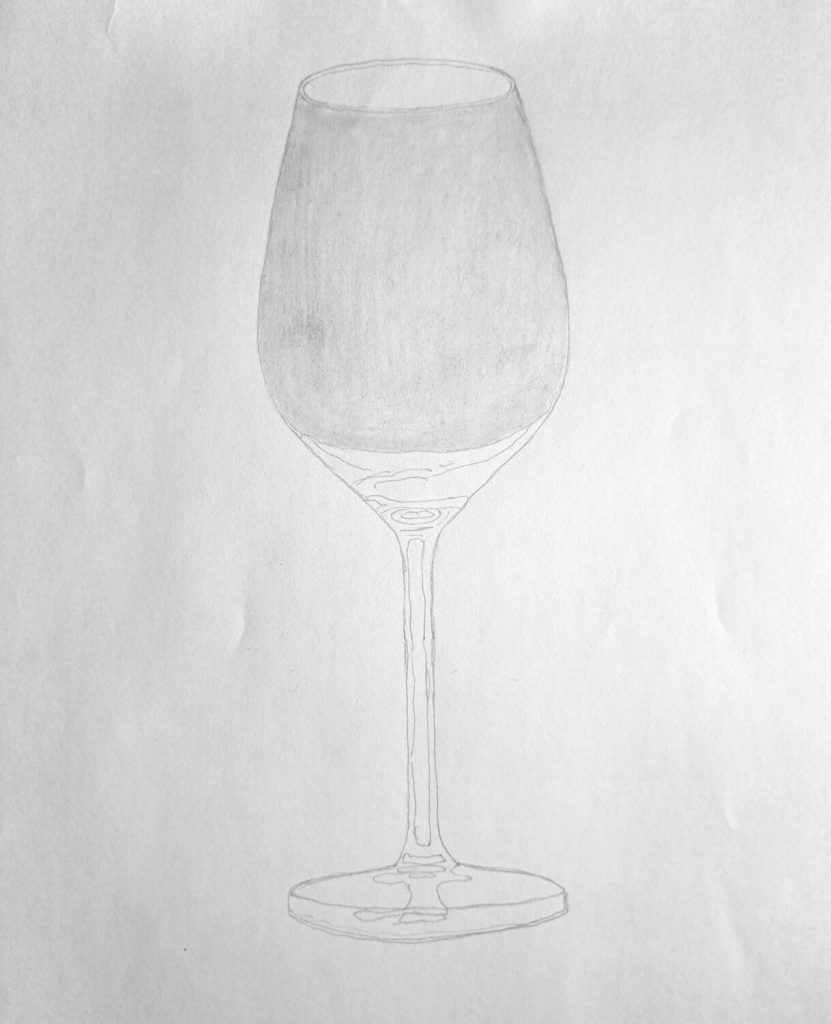
You’ve already done the hard part.
But all we have is a 2-dimension image of a wine glass. Therefore, we need to create volume by shading. Using the same pencil you used to sketch, shade the entire bowl and blend to spread the graphite evenly.
You can also shade the top oval, but I will leave mine unshaded, for now.
Shading the stem and base
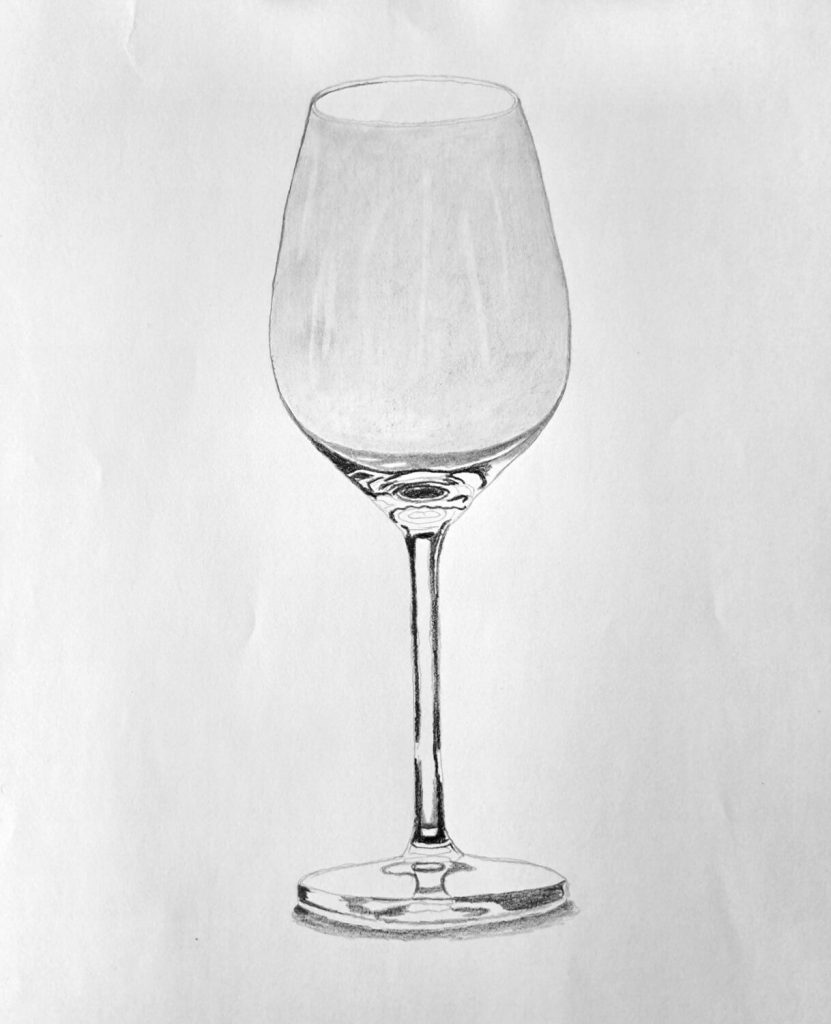
If we get this step right, we’ll have a shiny-looking stem and base. The trick is to create a high contrast between the shadows and highlights.
Get a soft graphite pencil 6B or 8B and shade the sides of the stem. Leave out any highlights, including the main one at the center.
You can also leave out the edges because soft pencils have broad graphite, which might not shade the edges as accurately as we would want.
Do the same around the bottom of the bowl and the support base.
Increasing the contrast for a realistic glass-like appearance
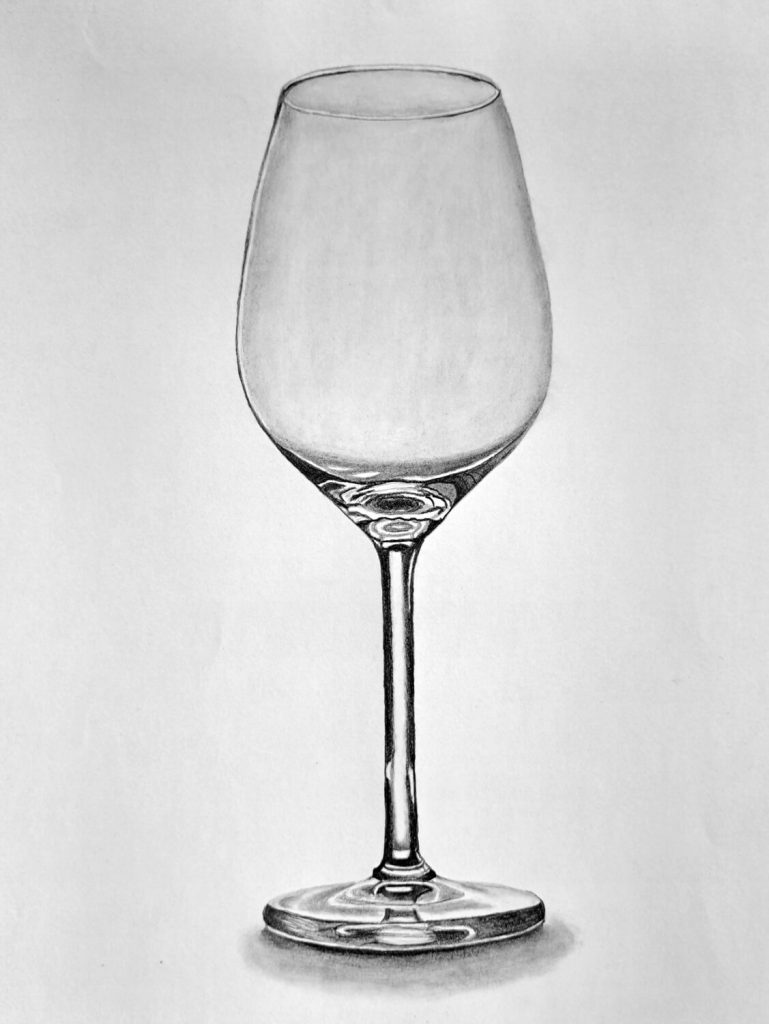
At this point, we already have a 3-dimensional wine glass. But we need a few more final touches to wrap up.
Take an HB pencil and darken the edges around the glass bowl, including the oval part. You can optionally create more reflections on the top part of the glass by using a kneadable eraser to make the marks.
Besides, remember that the edges of the glass stem aren’t as crispy. Sharpen a 6B pencil and shade along the edges. Do the same around the base of the bowl, allowing the highlights to pop.
Here’s another related tutorial on drawing a photorealistic glass of water. It will help you with more practice.
Conclusion
I’m always looking for exciting things to draw in my day-to-day activities. I’ve realized that this is the only way to never run out of drawing ideas.
No matter how mundane something is, you can always draw it.
I sure enjoyed drawing and creating this tutorial. I hope you find it insightful!

