I received an email from one of my readers recently asking whether I could break down the basics for a one point perspective drawing. That’s why I’ve taken a break from my usual drawings to explore this important concept for rendering environments, backgrounds, and scenes.
Essentially, a one-point perspective is a drawing technique used to create the illusion of depth and space on a two-dimensional surface.
It is based on the principle that parallel lines appear to converge at a single point in the distance, known as the vanishing point.
The key elements of the one-point perspective include a horizon line, a vanishing point, and orthogonal lines that recede toward the vanishing point.
Objects that face the viewer directly retain their true shape, while those extending into the distance shrink proportionally as they approach the vanishing point.
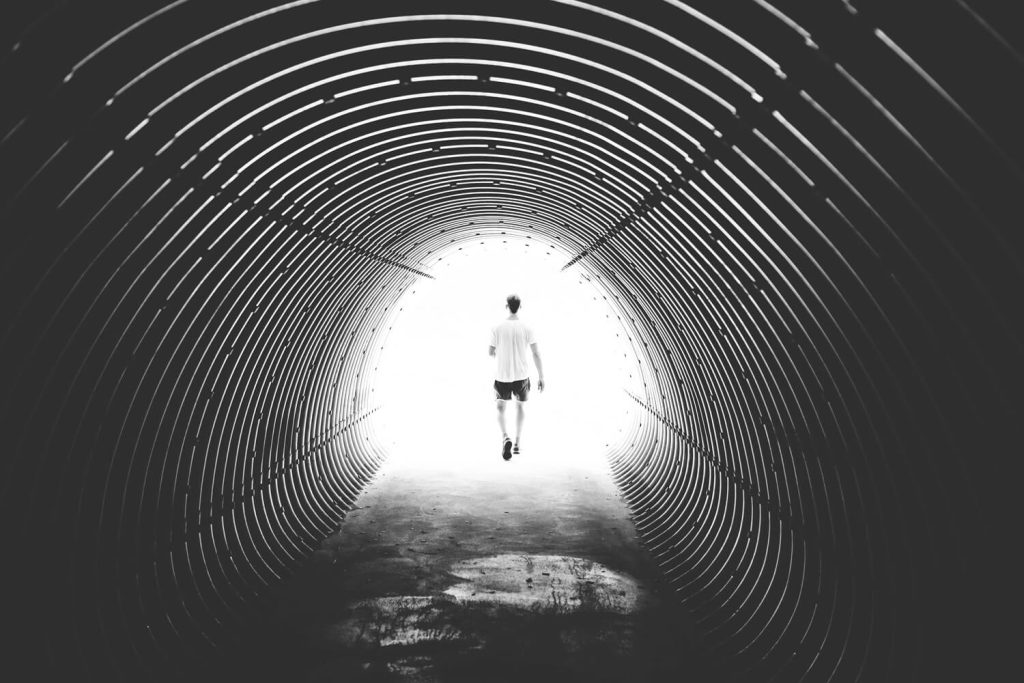
This method is particularly useful for drawing scenes such as hallways, tunnels, streets, or rooms, where objects are aligned along straight paths. Below is a great example of such a scene.

Steps for Drawing a One Point Perspective
Step 1: Define the Picture Plane
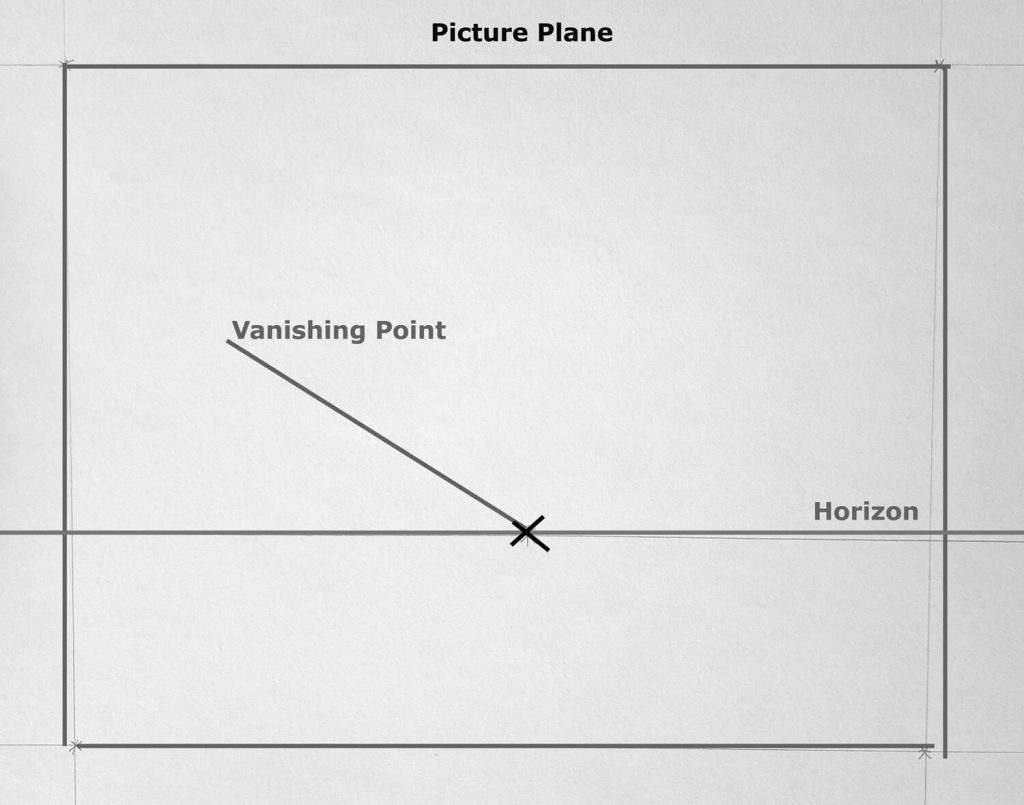
Begin by defining your picture plane.
In practice, the picture plane is the same as the actual physical surface of the painting. It can also be a piece of paper you’re planning to draw on or you draw a rectangle or square to define the picture plane like I’ve done in the illustration above.
Next, draw a straight horizontal line across the picture plane. The horizontal line represents the horizon and can exist anywhere on the picture plane. In my case, the horizon is located at the lower end of the picture plane.
It’s also important to note that the horizon line can exist in or outside the picture plane.
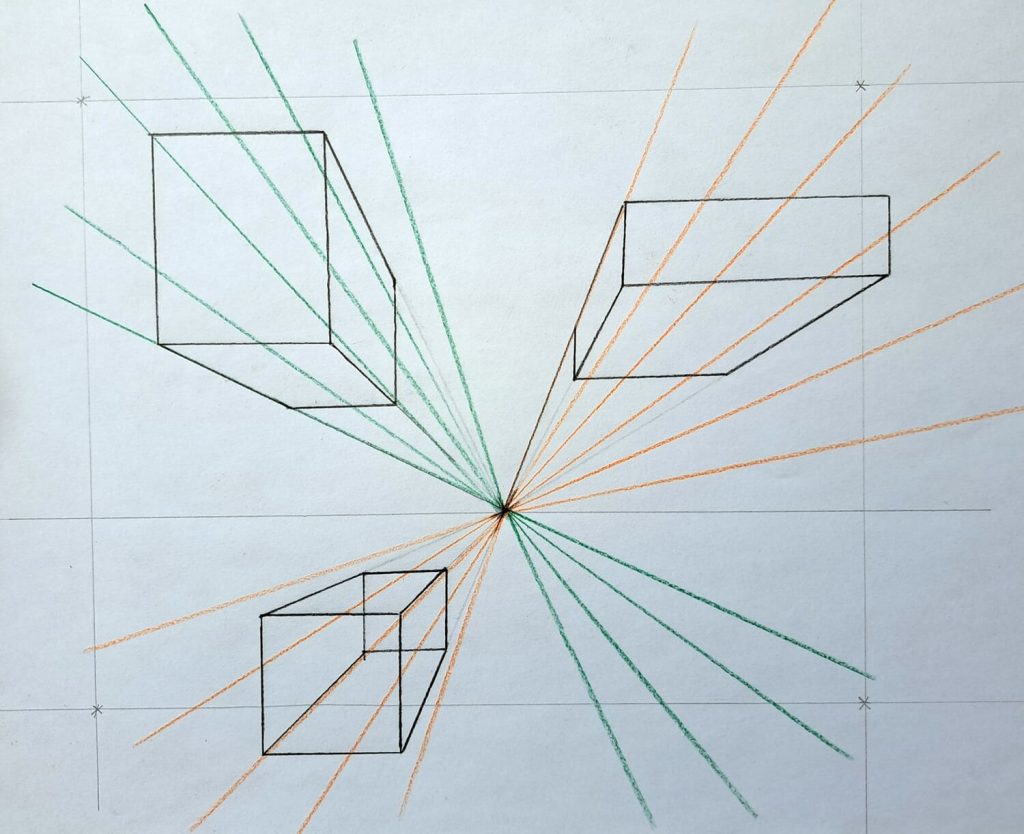
Step 2: Pick a Vanishing Point and Draw Orthogonal Lines
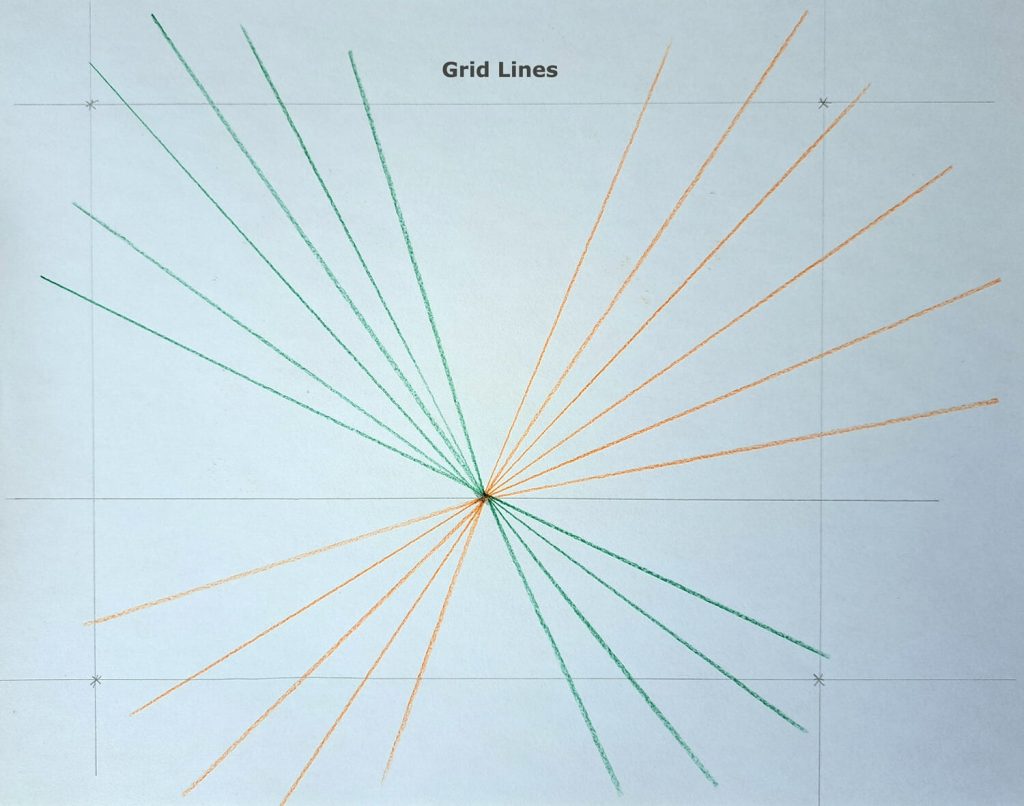
Now, think of two parallel lines receding in front of you. These lines appear as if they do meet at the furthest end. That point which they seem to meet is the vanishing point.
Decide where your vanishing point is located on the horizon line and mark that spot (in our illustration, it’s at the center of the horizon).
Then use colored pencils to draw radiating lines from the vanishing point. These radiating lines are known as orthogonal lines or simply put, grid lines.
Step 3: Draw Objects in the Scene (3-D Boxes or Wireframes)
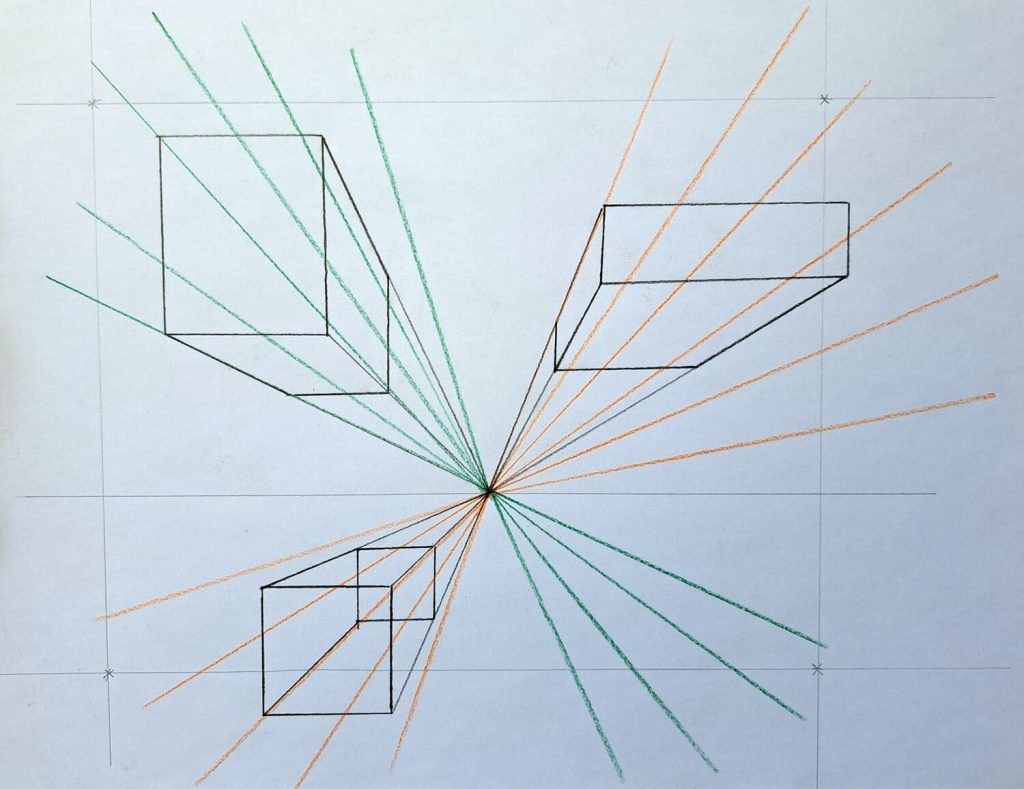
You can think of the first two steps as setting up the scene. This step, however, is where the magic begins to happen by sketching the real objects in perspective. Always sketch lightly since you’ll need to erase a lot.
If it’s your first time sketching in perspective, I always recommend beginning with the basic shapes such as boxes, cubes, etc.
Once you’ve fully grasped the concept you can attempt rendering complex scenes such as a road vanishing at a distance, a room with furniture, an urban street, or a dark tunnel.
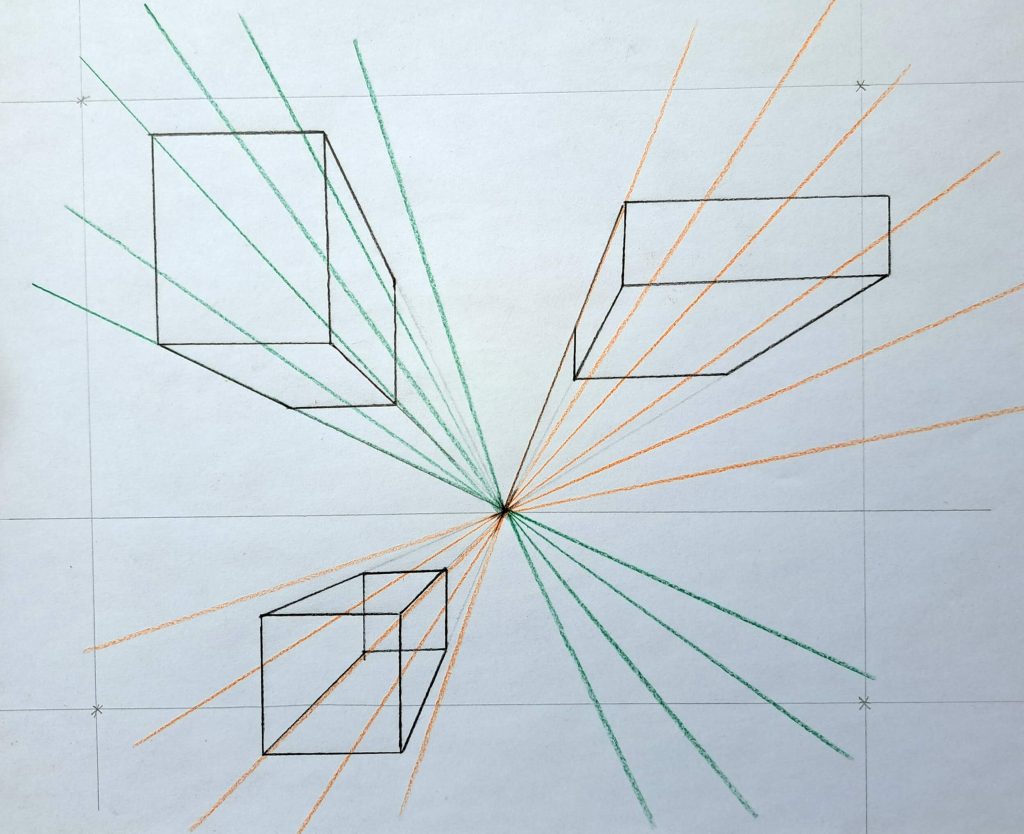
Step 4: Cleaning Up the Scene (Erasing Unnecessary Lines)
The last step involves, cleaning up the scene by erasing any unnecessary lines receding from the vanishing point.
Besides, you can get a soft dark pencil and draw the objects in the scene bolder than the first sketch. At this point, you’ll also need to be a bit more precise.
Application of One Point Perspective Drawing
I’ve included more pictures depicting one-point perspective scenes to show you what’s possible. Of one point perspective alone is quite limiting.
Therefore, to draw complex scenes and environments, you need to understand two and three-point perspective as well.
A straight tarmacked road into a forest
An urban one-point perspective street

One-point perspective tunnel
In the days to come, I’ll share a complete tutorial demo on drawing one of these complex scenes in perspective. Make sure to join my mailing list, so that you won’t miss it.
Conclusion
Artists and designers use one-point perspective to guide the viewer’s eye toward a focal point, enhancing the sense of realism and immersion in a composition.
By understanding and applying this technique, creators can effectively represent spatial relationships, making their artwork or designs appear more convincing and visually appealing.
Whether in traditional drawings or digital art, mastering one-point perspective is a fundamental skill for anyone interested in realistic representation.