Drawing the human ears accurately might not seem like something you need to learn and master.
After all, most portraits feature front-facing poses with ears that extend slightly or, in some cases, are completely covered with hair.
It makes sense.
In fact, I have several tutorials about portrait drawings that barely discuss how to draw the ears. For instance, if you check out my tutorial on how to draw a realistic female face, you’ll realize that only the earlobes are visible.
However, the challenge arises if your subject is facing sideways. That’s why it’s important to know how to sketch and shade ears from the sides.
If this sounds like something you’d want to try, follow these four easy steps to drawing a realistic ear.
Basic anatomy of the external ear

Before we start drawing, it helps to understand what we’re looking at. As a newbie, I always thought that the ears were just big question marks with some random shapes at the center.
But then I learned one important aspect that applies to everything we create as artists – the devil is in the details.
Therefore, it’s crucial to understand our subject in detail before attempting to render it on paper. That’s where a basic understanding of the ear anatomy comes in.
While it’s not the scope of this tutorial to go into details, we need to understand the main parts of the ear as follows:
- Helix – The outer rim that wraps around the whole ear.
- Antihelix – Just inside the helix and splits into two small branches near the top
- Superior and Inferior Crus – The two small branches near the top.
- Trigus and Antitrigus – Two small shapes framing the ear opening
- Concha – A bowl-shaped area that feels like a soft cave leading toward the ear canal
- Earlobe or Lobule – The fatty tip at the bottom of the ear.
Take some time to observe my drawing with the illustrations above. If you’re inspired to learn more about the nitty-gritty, here’s the definitive anatomy of the external ear.
If you prefer to watch instead of reading, the video is embedded below. However, you can scroll further down to continue reading.
How to Draw a Realistic Ear from the Side
1. Sketching the ear with all the parts

Using an HB or H pencil, lightly draw the helix. It usually starts at the top, curves down, and tucks into the lobe. Next, add the antihelix. It sits inside like a smaller arc that splits near the top.
Draw in the concha near the center-right or left of the ear, depending on where your character is facing. Add the tragus and antitragus as small, bent shapes hugging the ear canal.
Your goal is to place the parts, not perfect them. I’ve found that most artists make the same mistake at this stage: they draw the ear too stiffly. Try to keep your lines loose and sketchy. The ear is all soft cartilage, so sharp angles feel out of place.
Once all the pieces are in the right spot, refine the sketch.
Before you proceed to the next step, don’t be afraid to erase until everything looks right. You won’t have any other chance to make corrections.
2. Basic shading of the first layer
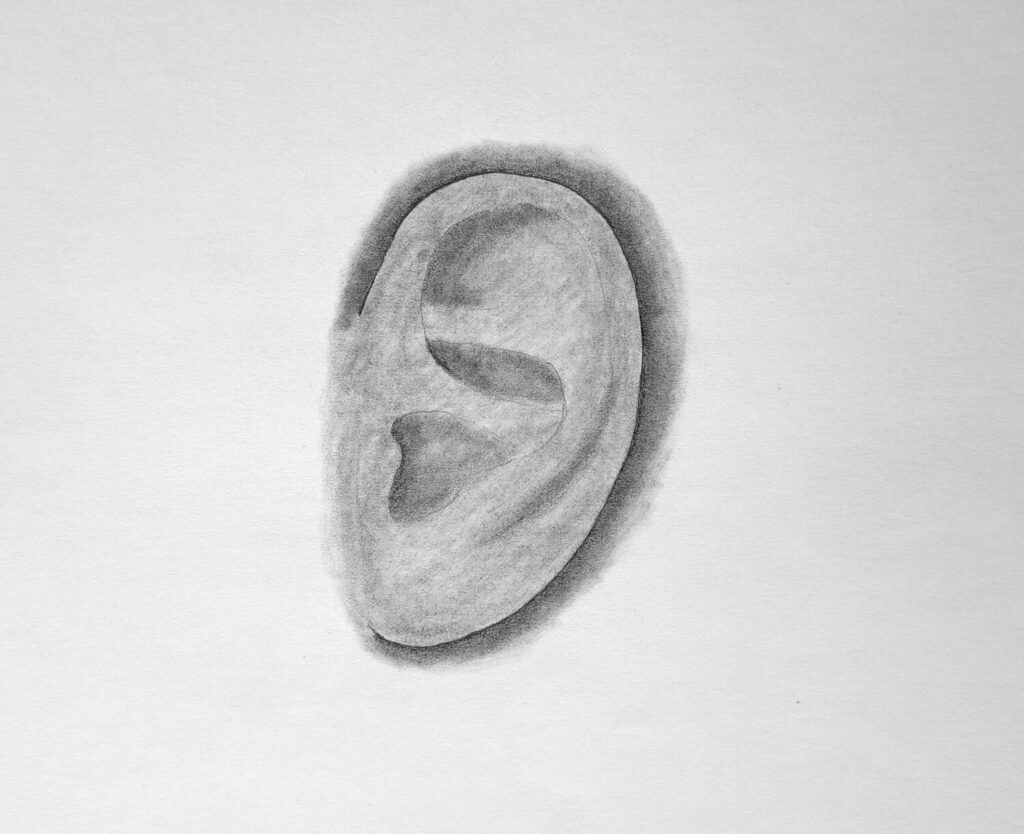
There are two approaches that I rely on. The first (happens to be my favorite) is using graphite powder and a Q-tip. Then dip the tip in the powder and shade lightly and uniformly over the entire sketch.
I find that this approach is much faster and gives a smoother consistency.
If you don’t have the powder, you can scrape it off from your HB pencil using a razor blade or artist’s knife.
Alternatively, use the side of your pencil and sweep a light tone across the entire ear. Keep the pressure low. This helps unify the drawing and gives you a base tone to build on.
Smooth out the tone with a blending stump or a soft tissue if you like. This first pass is all about removing the stark white areas so your shadows later feel more natural.
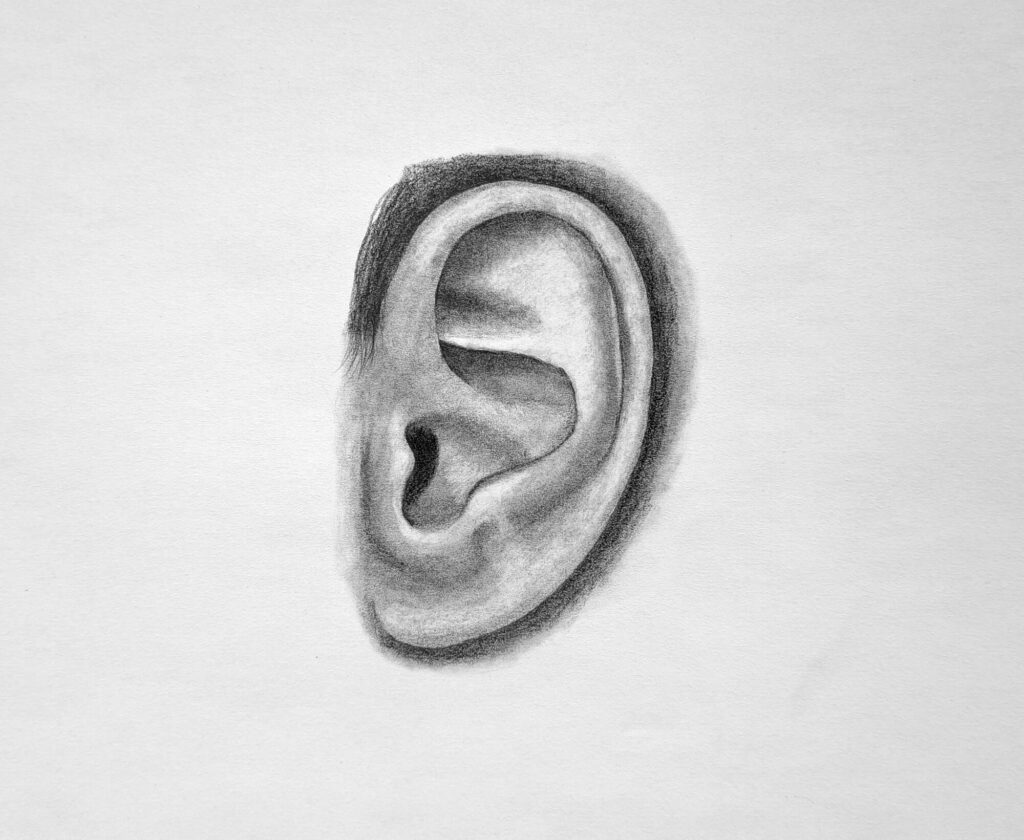
3. Shading the shadows near the concha and crus
The deepest shadows are almost always in the same places: the ear opening near the concha, under the antihelix, and just beneath the helix rim. These areas dip inward, so they catch less light.
Start by darkening the ear opening using a 4B pencil. This part of the ear creates your main contrast, and contrast is what makes the form pop.
Add darker shading right under the helix, too, since it casts a soft shadow on the shapes beneath it. Then move to the two branches of the antihelix. The lower branch usually fades into shadow as it approaches the concha, so give it a smooth gradient.
Besides, most shadows inside the ear have soft edges because cartilage doesn’t create hard breaks. If any edge feels too sharp, soften it with small circular strokes.
Keep stepping back to check your values. If the shadows look too dark too soon, you can soften them or blend them into the base tone.
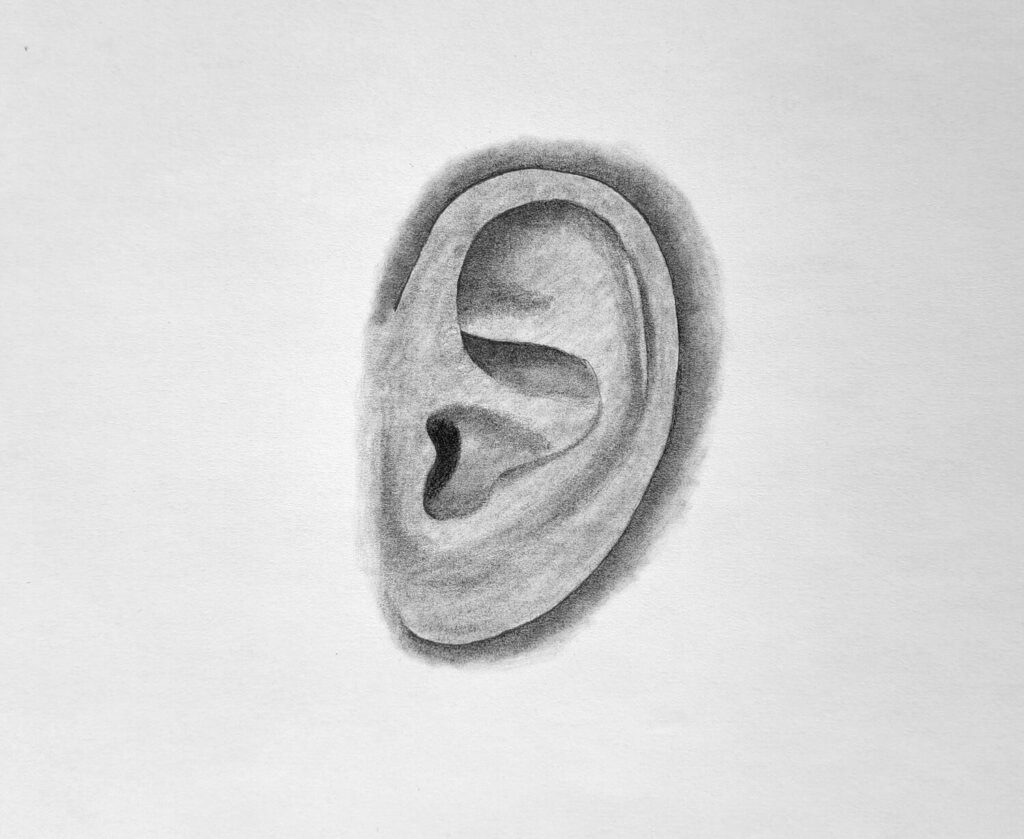
4. Final shading of the ear’s highlights

Once your shadows feel solid, the last step is bringing the ear to life with highlights. This is one of my favorite parts.
Even small highlights can make the ear look three-dimensional, like light is truly hitting the surface.
Use a kneadable eraser to lift tiny highlights along the helix where the light catches the rim. Add a softer highlight on the upper part of the antihelix. You can also pull a faint highlight on the tragus, antitragus, and the outer curve of the lobe.
Highlights should never look like stickers.
If something feels too bright, blend over it with the unused part of the stump or tissue. The skin of the ear has a subtle shine, not a glossy shine. If you want a more realistic finish, compare your drawing to a side reference photo.
Once you’re happy with the balance between light and shadow, sharpen the key edges. I usually crisp up the outer part and the border of the helix.
That tiny bit of definition at the end creates a clean finish.
Be sure to check out some of my tutorials on:
Conclusion
There you have it – a 4-step process on how to draw a realistic ear from the side.
As a recap, always start lightly, possibly with a reference photo, shade your first layer, define and shade the dark values, and finish with highlights for an amazing contrast effect.
I hope you’ve enjoyed today’s tutorial as much as I enjoyed creating it for you. Don’t forget to share it a share to spread the word.
It would definitely mean the world to me!