Ever wanted to learn how to draw a perfect smile?
Drawing a smile will give you enough practice to become a better portrait artist, regardless of age or skill level.
With the proper techniques and materials, you can create realistic smiles with just a few simple steps.
In this guide, I’ll show you how to draw a realistic smile from start to finish – including drawing the lips, teeth, tongue, and even shading around the mouth for added realism.
So grab your pencils and paper and let’s get started!
Step-by-Step Guide on How to Draw a Smile
Smiley Lips
Drawing smiley lips is an important part of creating a happy expression. Start by drawing two curved lines to form the top and bottom lip.
These should be slightly wavy since lips are rarely symmetrical. Add two small lines on either side towards the middle of the mouth, simulating bumps in the lips.
Besides, you should leave a significant space between the lips blank. This is where we’re going to draw the teeth, gum, and tongue.
Drawing the Teeth

One of the biggest mistakes when it comes to drawing teeth is sketching individual teeth with bold lines. This will ultimately create fake-looking teeth.
Instead, try to sketch the teeth with a light pencil preferably a 4H, and do it as lightly as possible. As a beginner, it will help to have a reference photo to give you a rough idea of how they line up inside the mouth.
It’s also important to remember that when someone is smiling, the upper teeth are exposed fully (for most people) while the lower teeth are often covered by the lower lip.
When drawing the teeth, leave a space between the upper and lower jaw – where we’ll draw the tongue.
Then, you can add shadows and highlights around each tooth for a more realistic look. Make sure to pay attention to the light source and how it’s affecting the shadows and light around the teeth.
Pro Tip: Always remember that very few people if any have perfect teeth. Hence the teeth should also show some signs of wear, such as chipped edges, discoloration, or irregularities.
Drawing the Tongue
This is where it gets interesting. Most noobs will shade the tongue area completely black as if nothing exists there.
I can understand why that’s so. For one, tongues are rarely protruding when smiling. Instead, they’re tucked inside the mouth in a way that light is blocked from bouncing off of them.
And this creates an impression that it’s all dark.
But if you’re keen enough, you’ll realize that a bit of light is reflected on the tongue. Therefore, when drawing the tongue, add some details like bumps and ridges to make it look more realistic.
Then, you can use shadows and highlights to give it a three-dimensional effect. To achieve this, use a soft pencil like 8B to shade around the tips of the teeth and go lighter as you progress toward the middle of the mouth.
Shading Around the Mouth
By now, we’ve mastered how to draw a smile but we can make it better.
The last step is to add some shading around the mouth. Start by using a darker tone to add shades around the lips, gum, and teeth.
For my drawing, I’ve used a combination of hard pencils (4H and H), HB, and softer ones (2B and 8B). I’ve used 4H to shade the teeth since they’re not entirely white.
For the lips, gum, and tongue I’ve used a combination depending on how dark or light I want to create a more realistic look. You can also add some highlights on the tongue to make it stand out even more.
If you want to add highlights to the lips, teeth, and gum use a kneadable eraser to pick out some graphite for that shiny look.
Bonus: Draw the Nose and Curvy Cheeks
As a bonus, you can draw the nose and curvy cheeks to enhance the smile. Even though this is optional and entirely up to you, it has a significant difference in the overall result.
So, try it and see how that smile pops up.
Should you need more drawing practice, check out these other guides:
- Learn how to draw a cat in minutes
- How to draw a realistic dog head
- How to draw a mug
- How to draw an Ear
- How to draw realistic female eyes
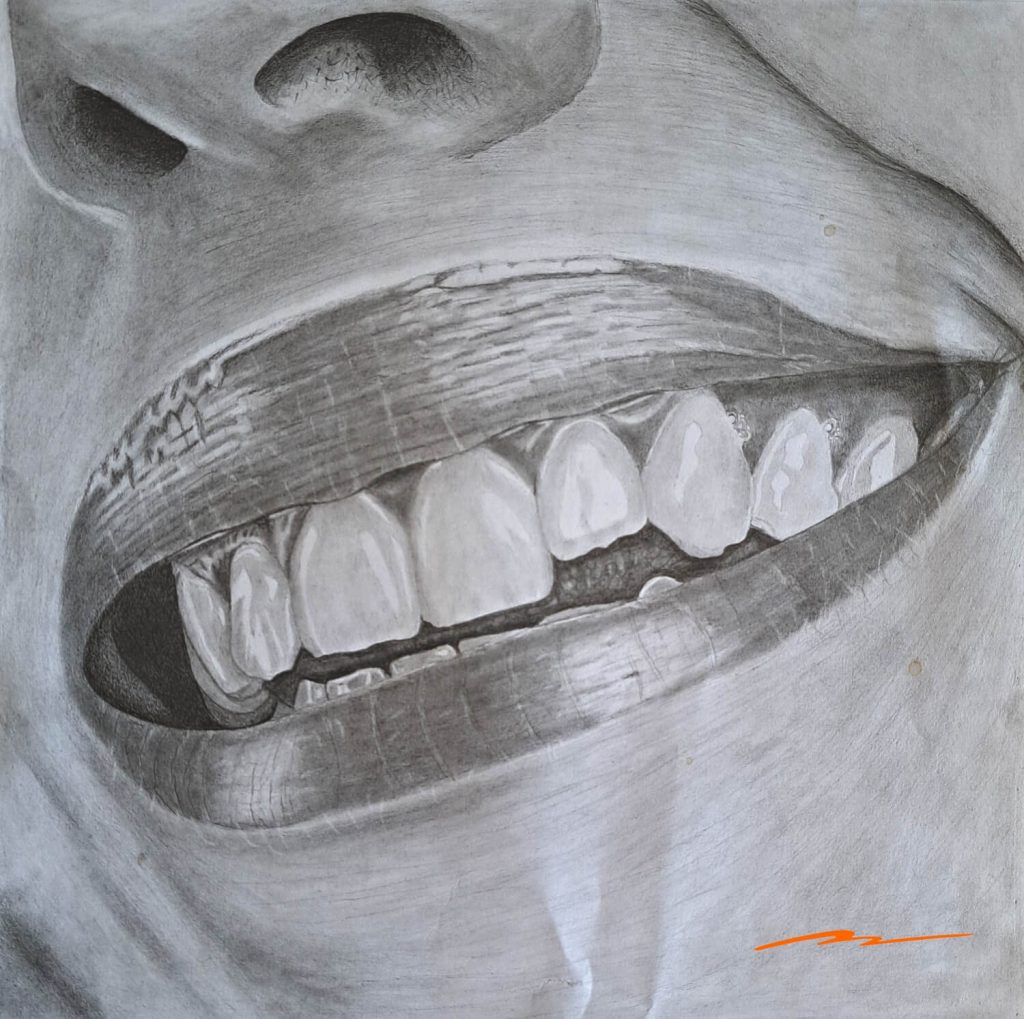
Here’s the final piece of drawing:
Conclusion
Now that you’ve learned how to draw a smile from start to finish, you can create realistic expressions with ease. But most importantly, you’re well on your way to becoming a master portrait artist!
And, in case you’re wondering feel free to use my drawing as a reference and try to replicate it. When you do, I’d love to see your work. You can post it on your favorite social media platform and tag it as #muusartsmile.
Good luck and have fun drawing!