
Is there anything more adorable than a kitten? They’re soft, fluffy, and have big eyes that seem to glimmer with curiosity. In this blog post, I’m going to show you some tips for drawing a cat’s head in minutes.
So whether you’re a beginner or an experienced artist, this tutorial is for you!
Let’s get started:
Preparations for Drawing a Cat’s Head as Realistic as Possible
- Gather your graphite pencils – In this tutorial, we’re going to use the following graphite pencils 4H, 3H, H, HB, 4B, 8B, and a Mechanical Pencil 0.5mm where possible.
- Piece of drawing pepper or your sketchbook – I’m going to use normal printing paper (210 x 297 mm) and 80gsm. Alternatively, use premium drawing papers 68lb/100gsm.
- If you’re going to use a piece of paper instead of a sketchbook like I’m doing, you’ll also need a clipboard.
- A blending stump – I’m not going to complicate anything here. Instead, I’m going to use the good old earbuds readily available in most homes.
A Step-by-Step Guide to Drawing a Cat’s Head Plus More
Step 1: Get a well-lit reference photo
A good reference photo will help you to draw as realistically as possible. Try getting royalty-free photographs to avoid getting yourself into trouble with copyright issues.
Alternatively, you can use other artists’ drawings but make sure you properly credit them when sharing your work. In today’s exercise, just download my reference photo and follow along.
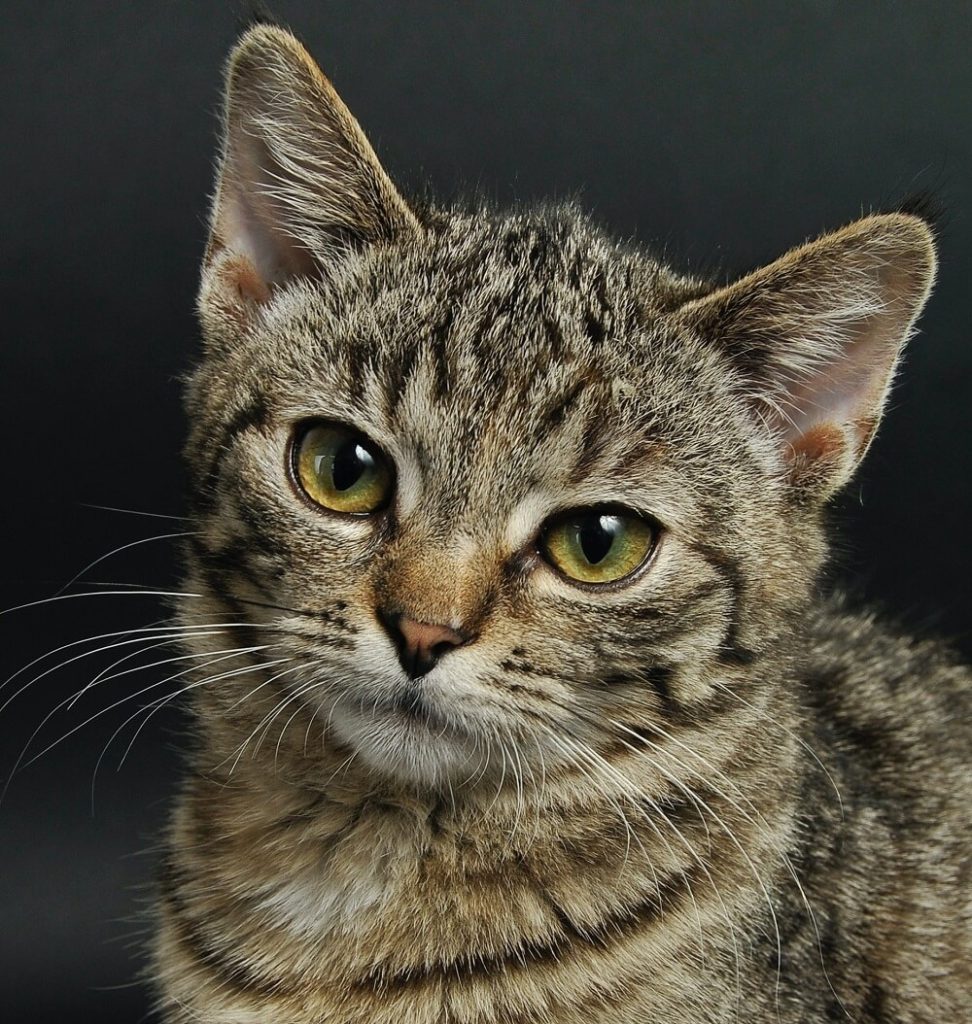
Here’s the link to the photo: https://bit.ly/3WGVWX5
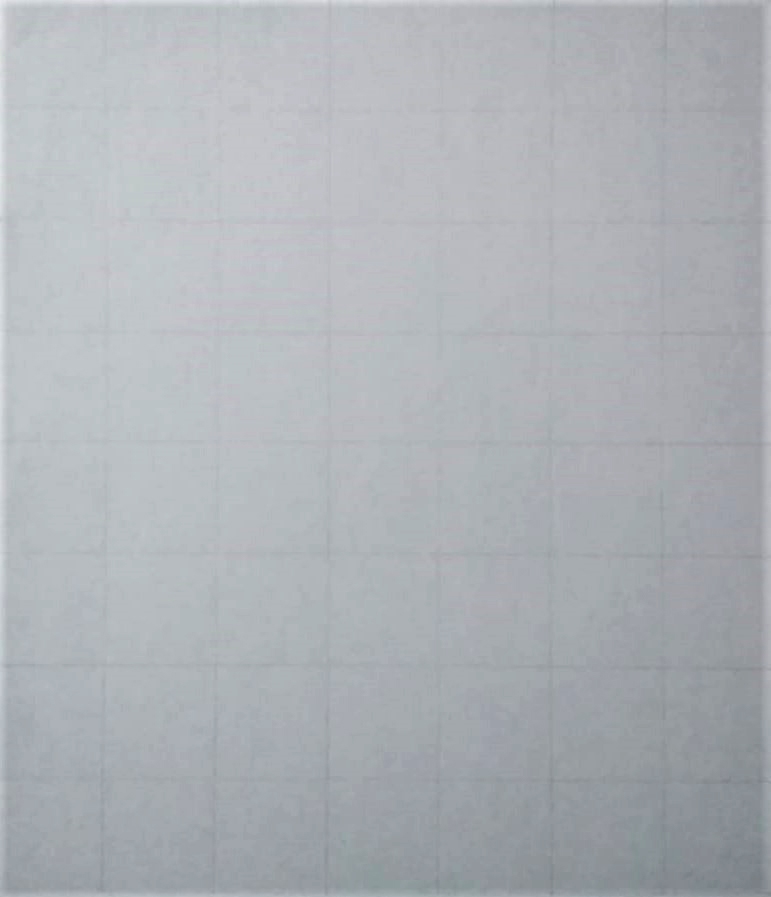
Step 2: Use the grid method to draw to scale
The secret to drawing realistic objects is to sketch the reference photo as accurately as possible. My favorite way to do this is to use the grid method.
The method involves, printing your reference photo and drawing equal gridlines on top of the image. Once done, count how many boxes you have horizontally and vertically.
On your drawing paper, draw similar grids with an equal amount of boxes respectively as shown below:
Step 3: Begin the sketching process
By focusing on just one grid at a time, you’ll be able to sketch all the details that would have gone unnoticed. Sketch lightly using a 4H pencil.
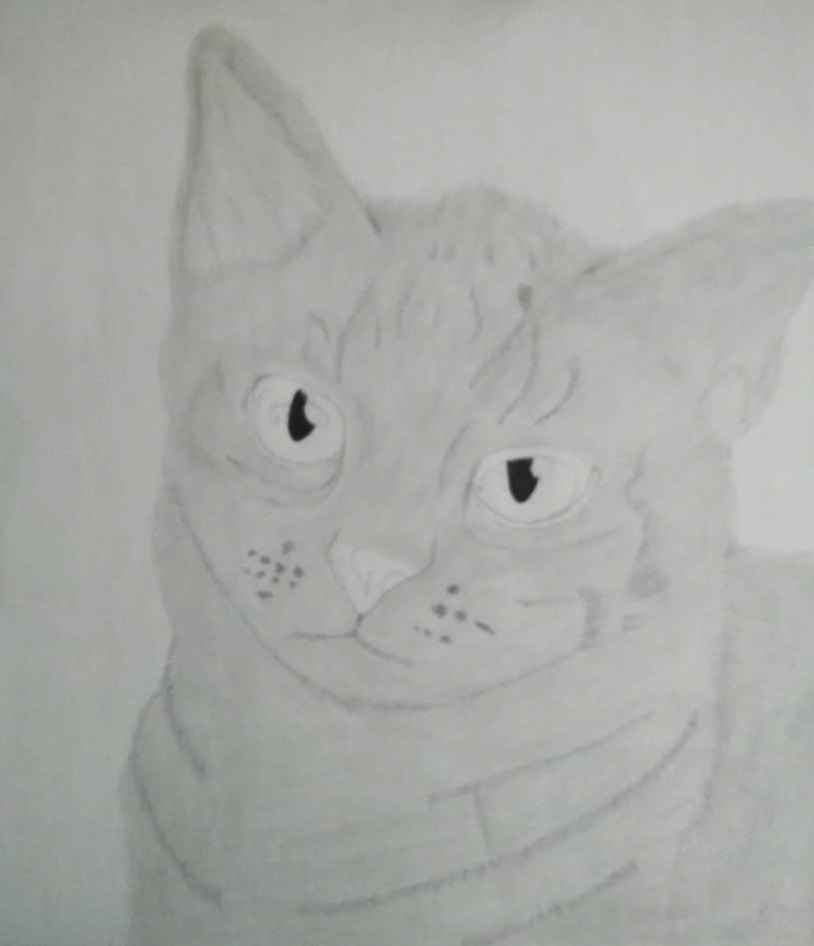
Start with the eyes which give your drawing the character and emotions of the cat. Draw as many details as possible. Next sketch the cat’s nose and mouth area.
Draw the shape of the ears making sure you capture all the details and their angles. You also need to identify specific areas where you’ll have the whiskers. Identify areas with dark and light values and indicate them on your sketch.
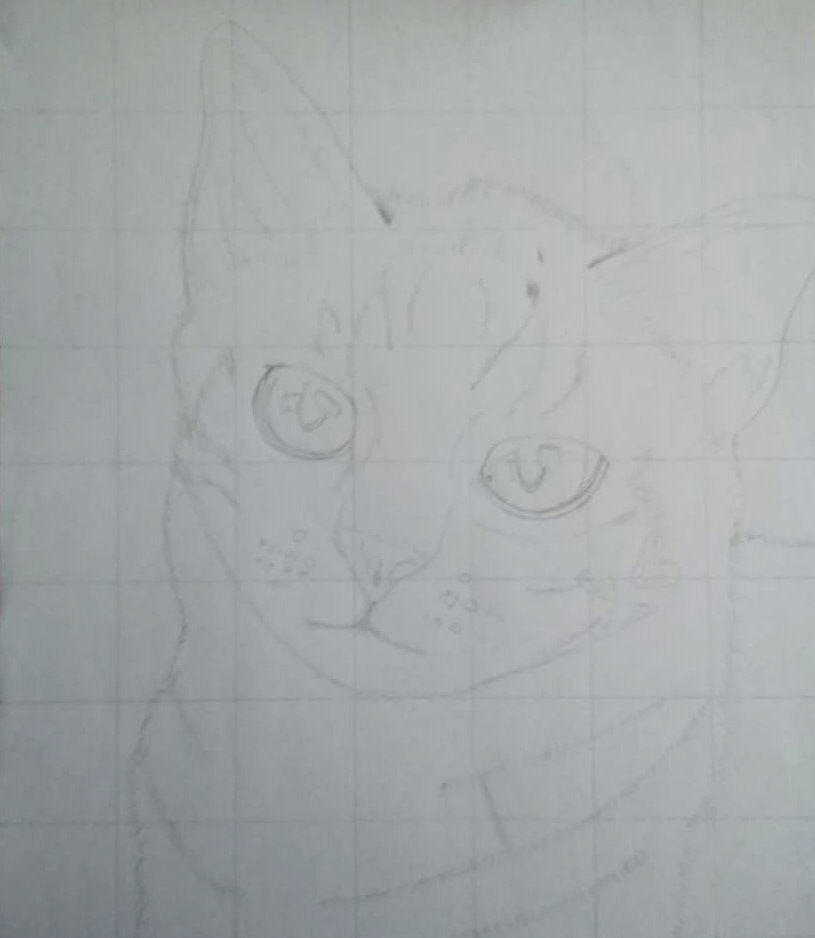
Pro Tip: Avoid outlining with a straight line instead have them wavy or multiple strokes close together to create the outline. This will create an impression of the fur. Doing this will also help to remember the direction of the fur when we begin to add more details to the drawing.
Check out how to easily draw a realistic wolf
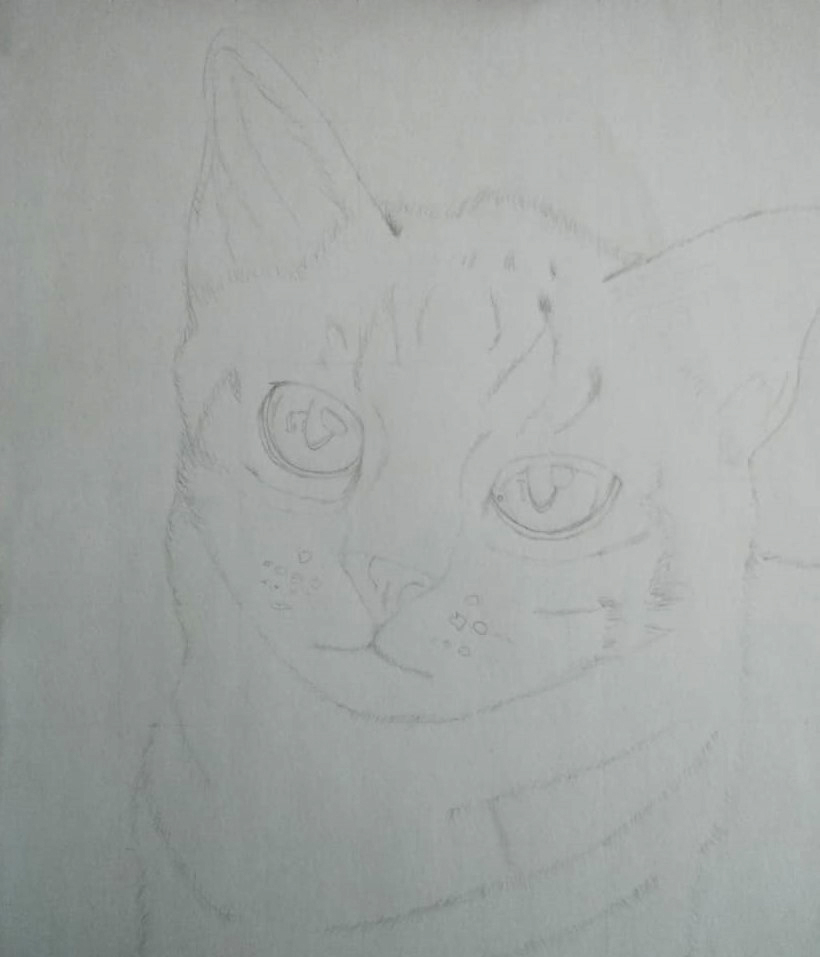
Step 4: Erase the grid lines
Now that we have the main outline of our subject plus all the major details included, it’s time to do some cleaning up. Erase all the gridlines while leaving out the sketch.
Don’t worry if some lines are still visible – once we start shading and adding details, they’ll disappear.
After this stage, you should be able to have the subject representative of your reference photo as much as possible.
Step 5: Shading
Phase 1 – Initial shading and Blending
I always like to start the initial shading with a light 3H pencil. I do this as uniformly as possible while re-emphasizing any conspicuous details – so that I don’t lose them while blending.
Next, blend the entire drawing except for the cat’s eyes and nose. We’ll work on these separately. While there is a variety of blending stumps out there to choose from, I’ve come to appreciate using ear buds to blend – it gives a very smooth shade.
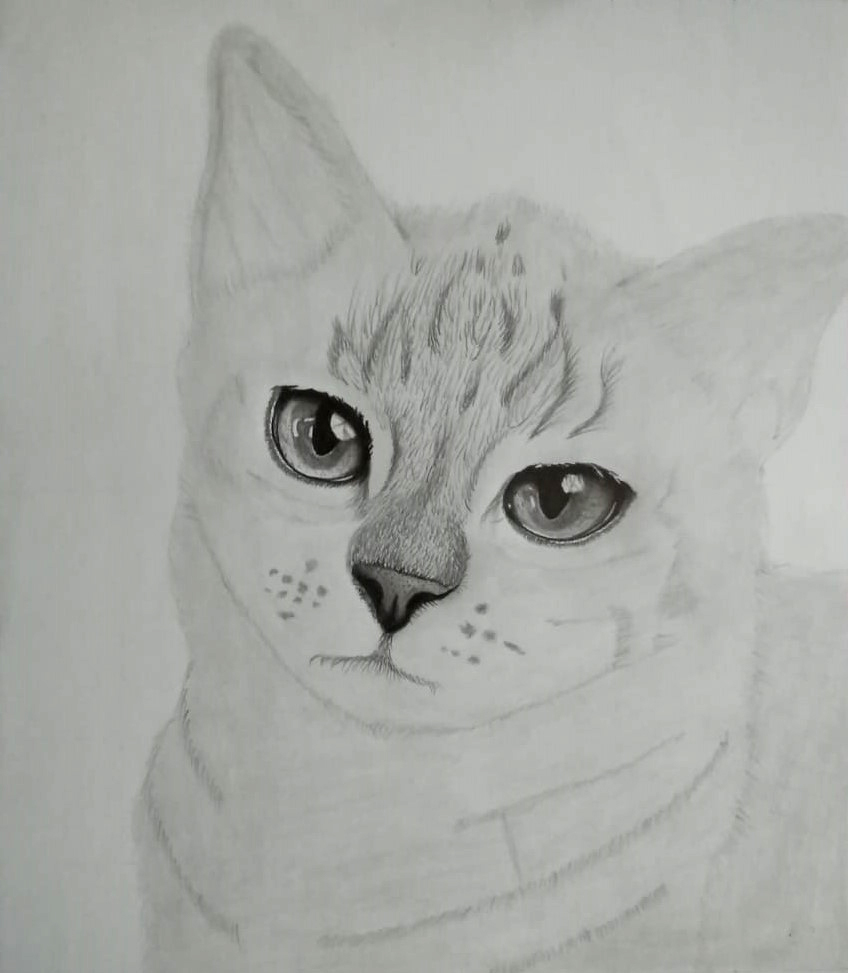
Phase 2 – Drawing the cat’s eyes, nose, and mouth
In this phase, we’re going to focus on shading to give the cat’s eyes, nose, and mouth a realistic look. This is going to be relatively easy because we already have an outline of the main features including light areas and darker areas – refer to step 3 on sketching.
For the dark areas of the eyes such as the pupil, outline, and shadows – I’ve used an 8B pencil. I’ve done the same for the cat’s nose.
Next to the pupil and for the smooth transition of values, I’ve used a 4B pencil shading as light as possible. If you want to go lighter use an HB pencil and H.
For the fur around the nose, I’ve used a mechanical pencil 0.5mm. Make very short strokes to indicate the short fur around the nose. Using the same pencil, make several strokes from the bridge of the nose towards the mouth so that the whole mouth area is covered with fur.
If you’ve followed along, you should have the drawing of a cat’s head below:
Phase 3 – How to shade a cat’s face and the fur around the body
I used the mechanical pencil to add numerous strokes around the cat’s face and part of the body. For darker areas, I’ve used a soft pencil (4B) to create an impression of stripes visible in the reference photo.
Pro Tip: Make sure to study your reference photo and take note of the direction of the fur around the face, neck, and body. Similarly, take note of the shadows, stripes, and light areas. Then, using the hatching shading technique, draw similar strokes.
If you’re new to shading techniques, here’s a great guide on pencil shading techniques.
Step 6: Final Blending
You need to have dense-looking fur. To achieve this, a second and final blending is required. Just make sure to blend along the direction of the hatchings. Here’s a video of how to do just and the outcome.
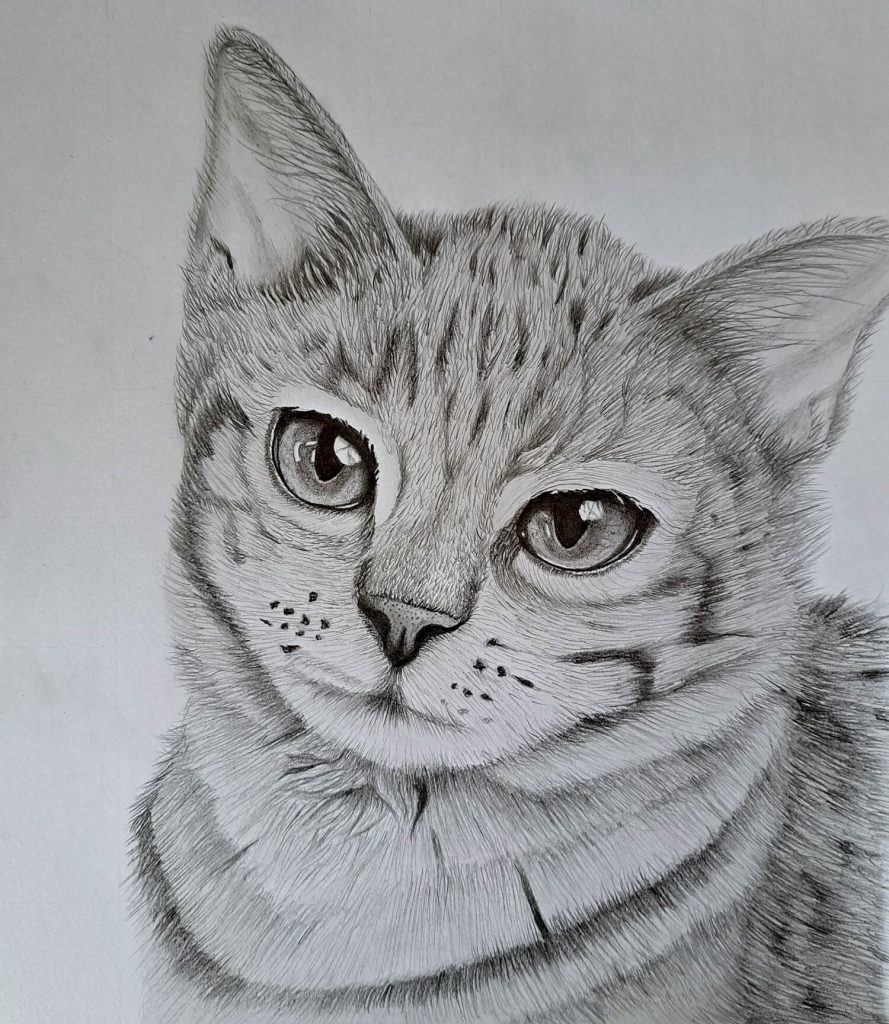
Step 7: Final touches
Repeat step 6 until you’re happy with your final drawing. For the cat’s whiskers you can use a white Caran d’Ache Pablo pencil to draw them – just make sure the pencil is pointy enough. In this case, I’m keeping things simple.
Therefore, I’ll draw black whiskers using the mechanical pencil – we want to be done in minutes, remember?
If you’ve followed along, you should have a drawing similar to mine below.

Don’t worry if yours look a little different – with enough practice, you’ll be able to produce realistic pieces of art. On the other hand, yours might be better than mine. In this case, I congratulate you and request that you share it on IG and tag it #muusartcat so that I can admire your creation!
Check out our blog for more tutorials and inspiration or learn how to draw one of the big cats – the lion.
- How to draw a realistic tiger
- How to draw a Weimaraner dog
- How to draw a koala
- How to draw a wolf
- Drawing a realistic deer
Conclusion
Cats are one of the most popular animals to draw, and for good reason—they’re absolutely adorable!
If you want to learn how to draw a realistic cat in minutes, all you need is a graphite pencil, some paper, and a good tutorial like the one you’ve just read.
Start by sketching out the basic shape of the head, then add details like whiskers and shading to bring your kitty to life. With a little practice, anyone can learn how to draw an incredibly cute cat.
So what are you waiting for? Pick up a pencil and get started!