A volumetric sphere is nothing more like a 3-dimensional circle. It is so simple yet so complex to an untrained eye. Besides, this is one of the most essential forms to familiarize yourself with as an artist.
In today’s tutorial, we will discuss a few strategies you can use to draw believable spheres, including the shading process for extra realism.
Let’s begin:
Part 1: Drawing the circle
The first step to drawing a realistic 3-dimensional volumetric sphere is sketching an accurate circle. If you get it wrong, no amount of shading will help.
There are three methods that you can use depending on your level as an artist as follows;
- Using a geometrical divider (for beginners)
- Perpendicular vertical and horizontal axis lines (intermediate)
- Free form (Advanced)
Let’s briefly discuss each one of them.
Using a geometrical pair of compass
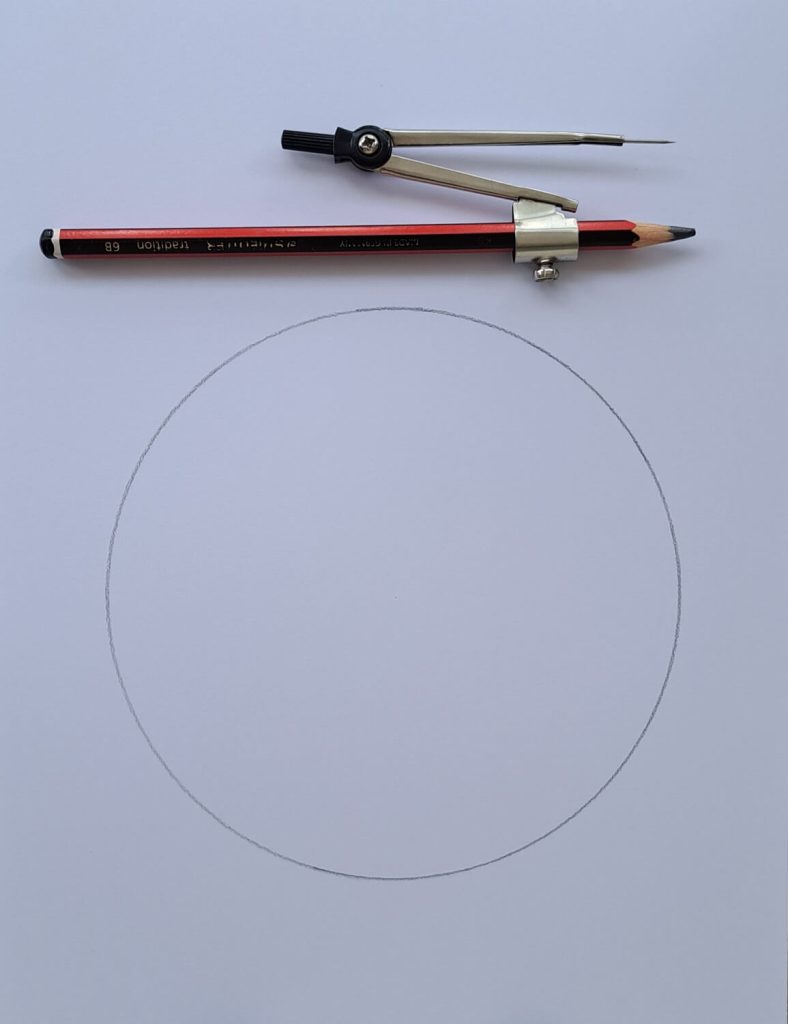
This is probably the easiest and most accurate way to draw a circle. It’s an excellent place to start, but it introduces something that kills creativity—perfection!
While it’s a good starting point, you should explore other methods that don’t require mathematical precision.
Free-hand circle drawing
Art is all about constructing a believable illusion without trying to chase perfection. This is where freehand drawing becomes fun.
All you need to do is grab your pencil, preferably 4H to H, which are hard and light. The key is to draw the circle as round as you can. Make circular light markings that overlap and continue perfecting until you’re satisfied with your circle.
Only then should you make the circle bolder with a softer pencil like an HB. Lastly, clean around with an eraser for any unwanted lines.

Pro Tip: Don’t expect to draw perfect circles just yet. Especially if you’re an aspiring artist. To improve, draw over fifty circles on paper using this method until you get a hang of it.
Vertical and Horizontal axis lines
Start by drawing vertical and horizontal lines that intersect perpendicularly. You don’t have to use a ruler, but it doesn’t hurt if you do.
The point of intersection represents the center of the circle. Once you have done this, draw the circle, ensuring the four radiuses are equal.
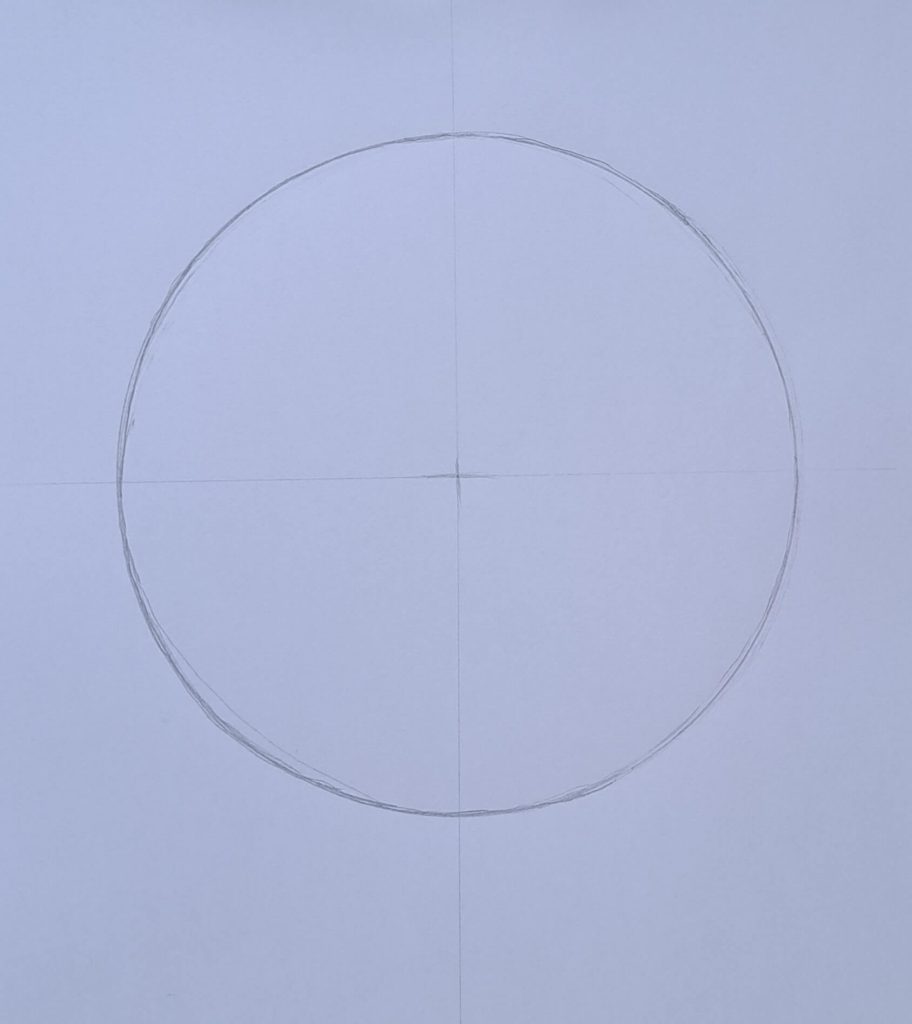
Pro Tip: Practice drawing as many circles as possible until you become confident.
Other tutorials related to drawing a sphere:
Part 2: Transparent Volumetric Sphere Drawing
Now, let me introduce a strategy I learned from Brent Eviston. He calls it the line, the oval, and the circle. This strategy helps us to draw a volumetric transparent sphere that looks three-dimensional without having to shade.
To execute it, you need to add two vertical and horizontal ovals, with one side of each oval favored over the other while the axis acts as lines of symmetry as shown below:
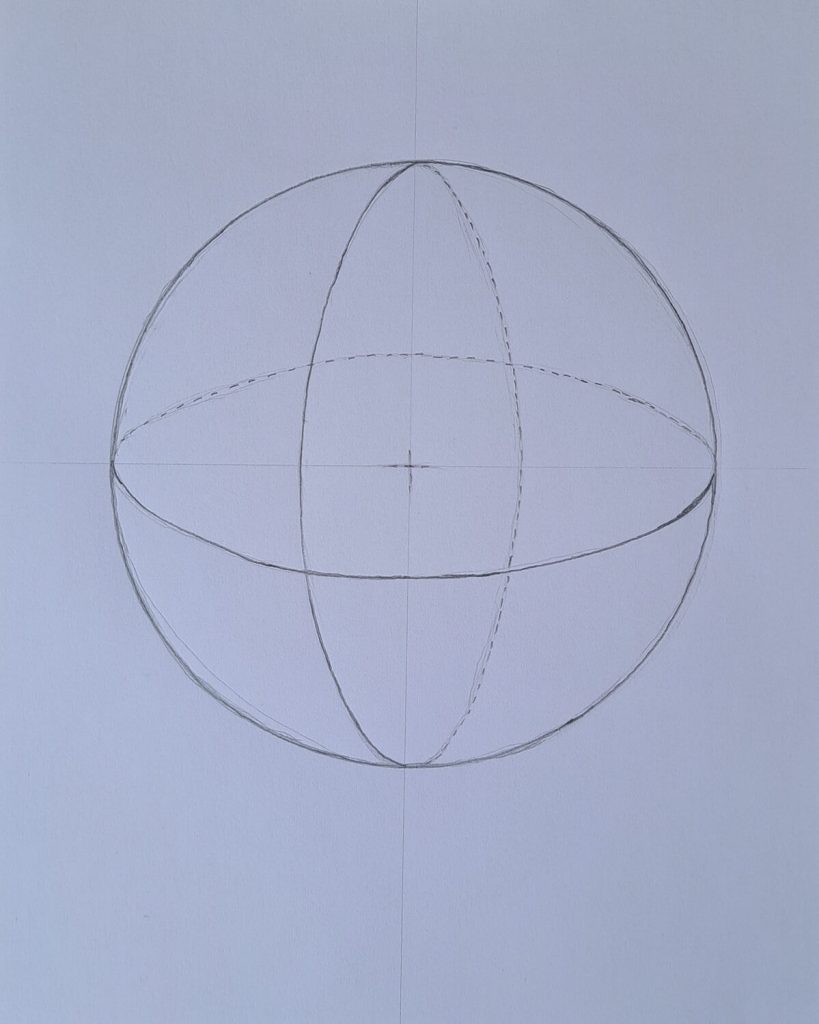
As you can see, this is no longer just a circle but a volumetric sphere.
Pro Tip: Draw at least 100 volumetric spheres using Brent’s method to keep improving.
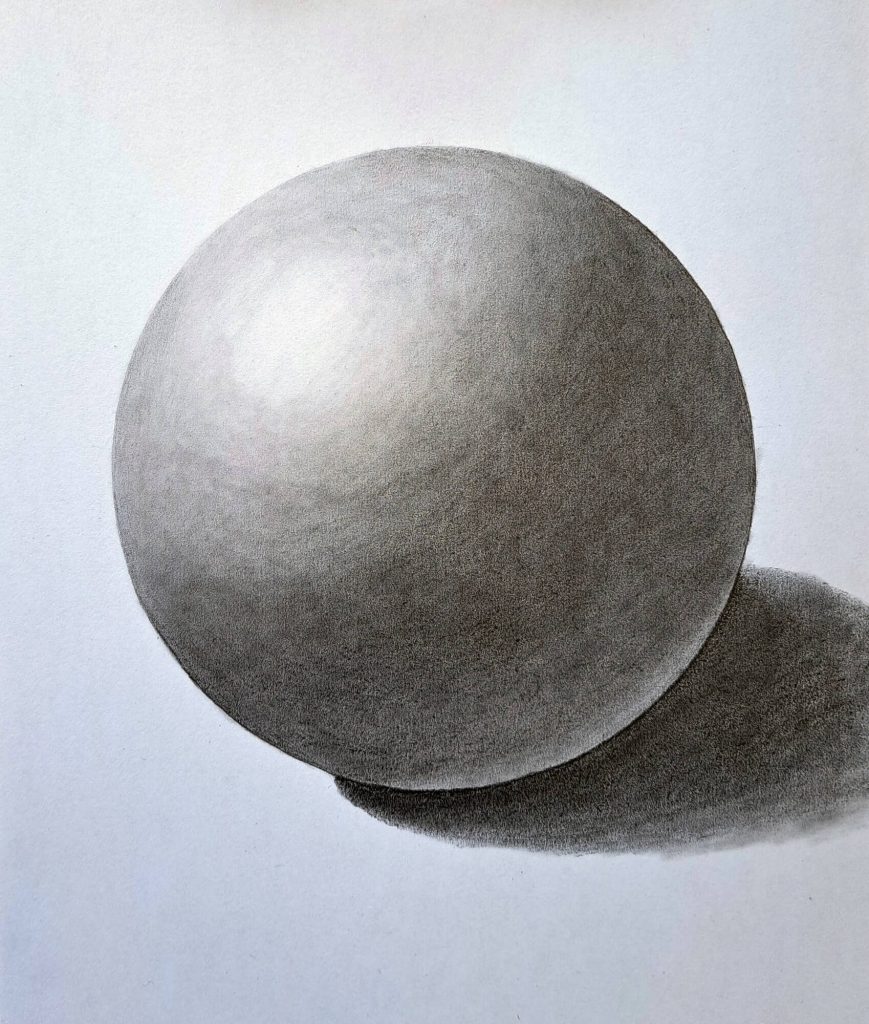
Part 3: Shading the Sphere
This is the fun part, in my opinion. While the previous step helped us create an illusion of volume in a sphere, shading takes it further by adding depth, texture, and realism.
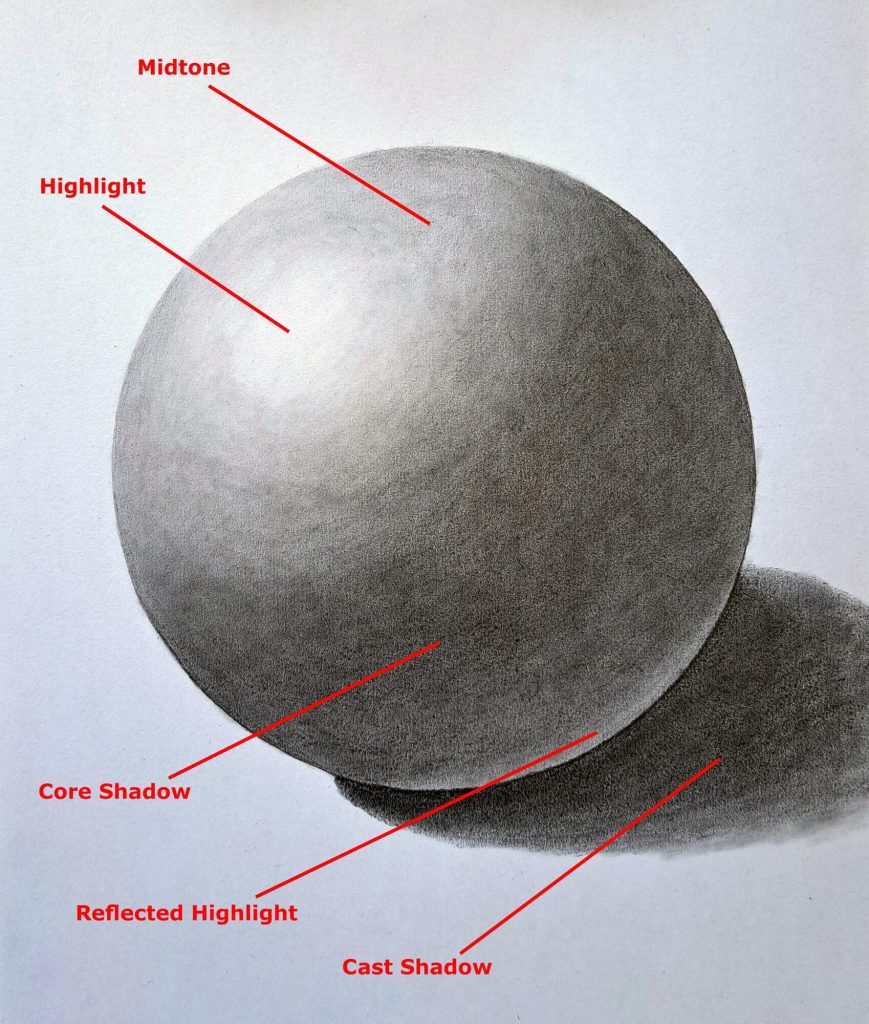
By creating a variation in value scales, we can draw a realistic volumetric sphere. It all boils down to understanding how light and shadows interact on the sphere’s surface. In any setup, we’ll have the following attributes:
Highlights—Establish the source and direction of light bouncing on the sphere’s surface. This will determine the brightest spot on the sphere (almost no shading is required in this area).
Midtones – This is the area between the highlights and core shadow (medium value scales)
Core Shadow – This is the darkest part of the sphere, which is blocked from the main light source.
Reflected Highlights – If the sphere is placed on a surface, light usually reflects on that surface and bounces back to the sphere.
Cast Shadows – This is a shadow cast on the surface by the sphere. Note that it’s darker just below the sphere and brightens towards the edges of the shadow.
How to shade the sphere
While there’s no right or wrong way to shading, some strategies work better than others. For instance, you need to have a range of pencils depending on how darker you want your core and cast shadows.
Alternatively, graphite powder may come in handy.
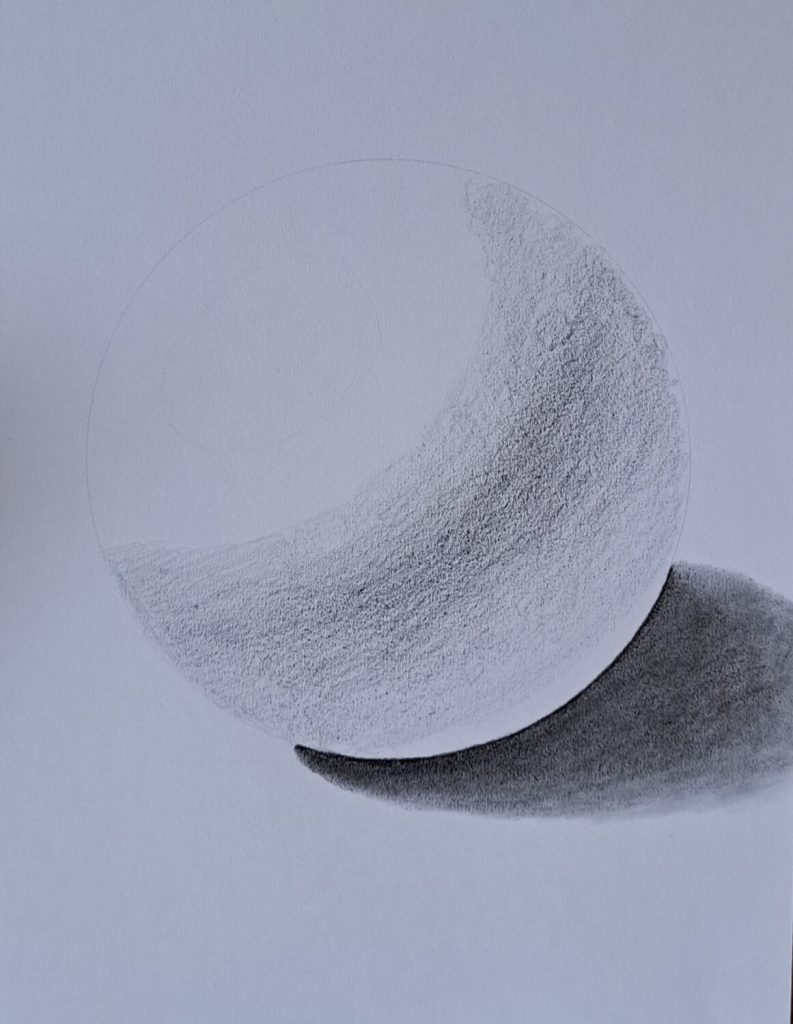
The first thing I always do is to lightly (barely visible) segment your circle, as already discussed, based on your light source.
The next step is to shade from dark to light, starting with the core shadow and proceeding to mid-tones before drawing the cast shadow. Depending on how dark your core shadow is, get a very light pencil and work through the reflected highlight area.
Sidenote: You can use all these principles to draw and shade a cylinder.
Do the same for the highlight, but as you move in, shade even more lightly. At the end of it all, your sphere should look as follows: