
If you want to become a better pencil artist, you need to practice drawing different stuff all the time. From animals to portraits, still objects to nature, and so on. In today’s post, you’re going to learn how to draw a mug like a pro.
And to make it even more realistic as always, you’re going to learn how to shade with an understanding of light and shadows.
The different areas of light to dark and in between are what we refer to as value scales. You can manipulate the value scales of your drawing to make it appear 3-dimensional as opposed to a 2-D appearance.
If this sounds like something you want to read about then let’s begin.
Objects are Made Up of Shapes
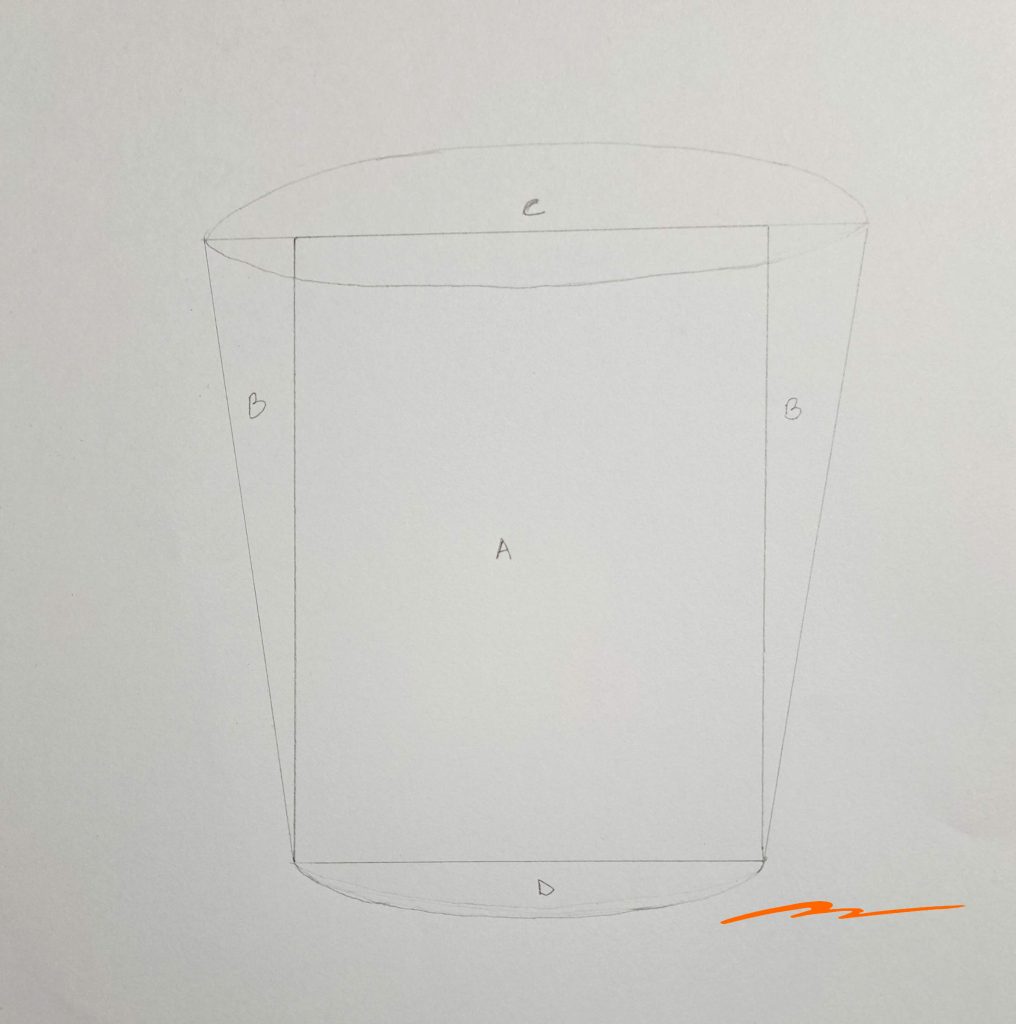
Most objects including a mug are made up of various shapes which we use as a recipe for drawing. Whenever you look at an object on paper, electronically, or in real life, try to pay attention to details and see if you can spot any basic shapes such as triangles, rectangles, squares, or circles.
If you look at my drawing of the mug, we can break it into four distinct shapes.
First, we need to draw a rectangle (A) with widths at the top and bottom. Next, add two equal triangles (B) with bases at the top of the mug.
Lastly, draw an oval (C) on top of the mug with the top base of the rectangle intersecting the oval right in the middle. To finalize the general shape of the mug, draw a semi-oval at the base.
At this point, we should have a basic shape of the mug without the handle.
Drawing the Mug Handle
Drawing the handle is pretty easy. Think of it as half of the love symbol. Draw them as double lines parallel to each other seamlessly connecting them to the mug.
Remember, we’re drawing a mug and not shapes. Therefore, this is the time to erase all the straight lines inside the mug except the outer outline.
And just like that, we have a 2-dimensional drawing of the mug. Although not a realistic representation of the image, it looks quite good. While some people would want to stop at this point, we can take the whole craft further by shading.
Shading the Mug Drawing
Before we begin shading to get that 3-D look, we need to identify the direction of the source of light and the angle with which it hits the mug. After that, identify the shadow of the mug and other dark areas where light is relatively blocked.
Once you’ve done that, start shading from the darkest areas and moving to lighter ones. In my case, I used a 6B to shade dark and 2H to shade light. For the mid-range value scales, I used 2B and HB pencils. Also, I used the hatching shading technique for the entire drawing.
Don’t forget to use a blending stump to evenly distribute the graphite to achieve a smooth finish or texture.
If you’re new to drawing, use my drawing as a reference and try to replicate it as much as you can.
Having a Background is a Must!
If you want your drawing to pop out, ensure to include a background. Although this is optional, it will help your drawing to stand out. And, it’s even easier than you think. Here’s how:
Draw a straight line around the middle of the mug. Don’t have the line cross through your drawing. Once done, shade the upper part using a soft pencil like 8B to resemble a dark background.
Conclusion
There you have it!
You’ve just learned how to draw a mug by using a few basic shapes, understanding how light strikes objects and shading like a pro to have a realistic piece of art.
I hope you’ve enjoyed the whole process and I would love to see your creation. You can post it on your favorite social media platform with the tag #muusartmug so that I can find it.
All the same, keep drawing.