If you want to become a good artist, one you can be proud of, you have to learn to draw and render different textures.
The reason is that you’re training yourself to draw what can be observed, as well as to show how it feels. Feathers are great subjects to draw since they come in different types and textures. For instance, wing feathers feel different from down feathers that feel fluffy.
But feathers in general are one of nature’s small engineering miracles. They help birds fly, stay warm, attract mates, and sometimes survive brutal weather.
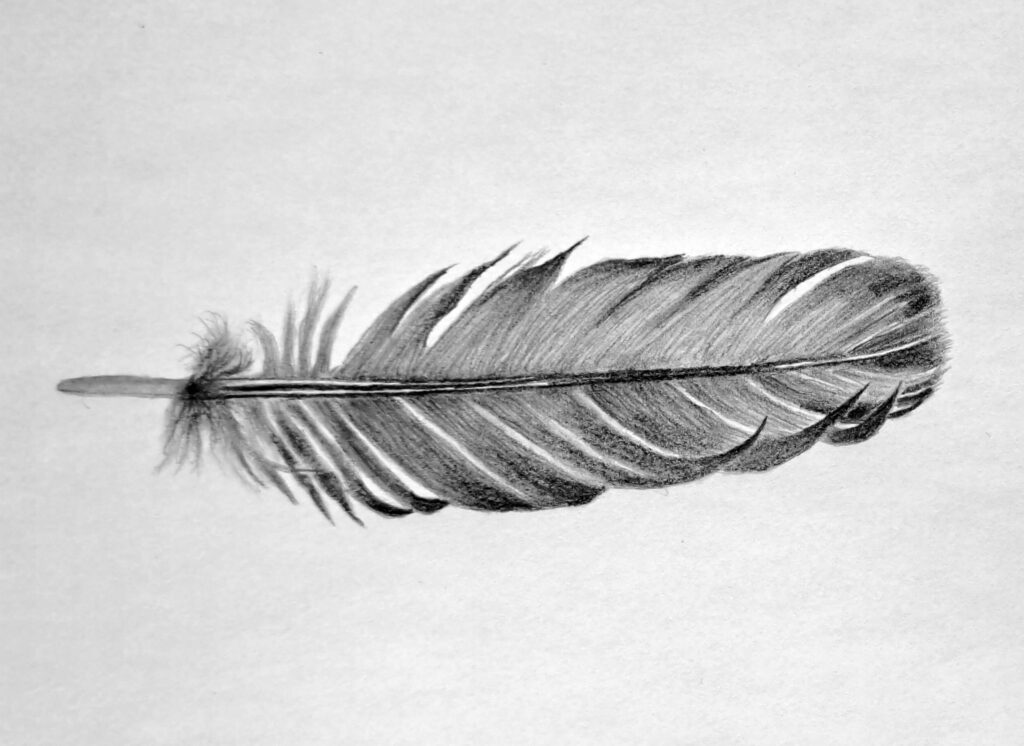
In this tutorial, we’re going to learn how to sketch and shade a single wing feather using graphite pencils, making it look and feel as realistic as possible.
Let’s break it down together.
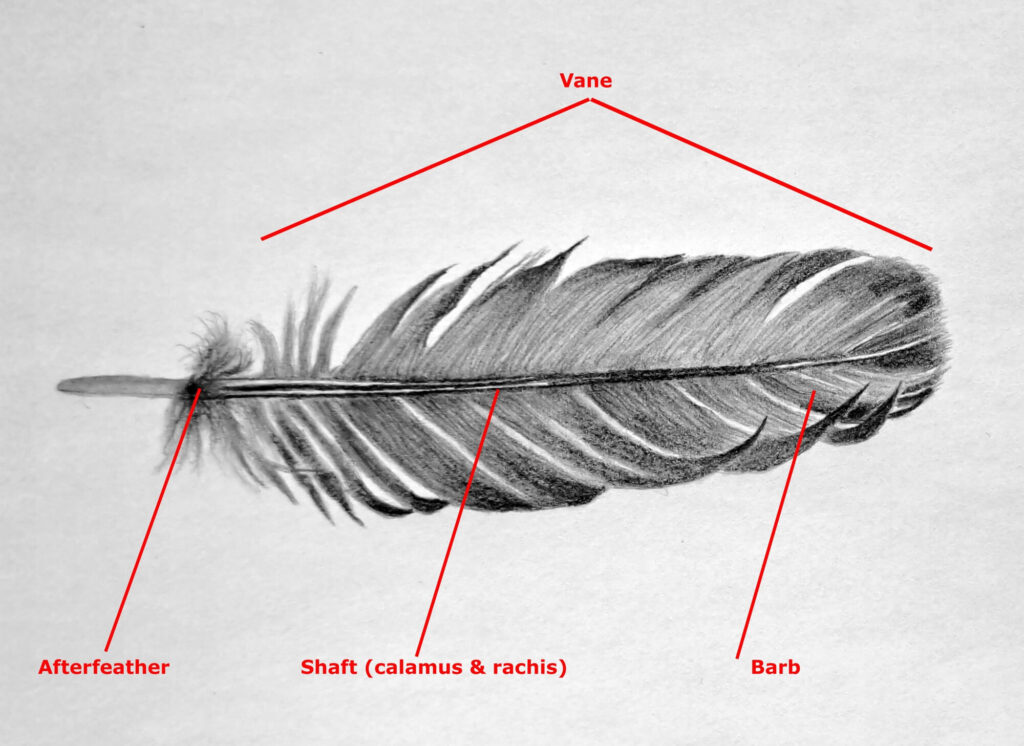
Wing Feather Anatomy (Parts)
Let’s face it, we’re not ornithologists, and therefore, we don’t need to memorize anatomy terms to draw well. But knowing what you’re looking at makes everything easier.
So, let’s go through the main parts so that we know what we’re looking at in detail.
Hollow Shaft (Calamus) and Rachis
The shaft runs down the center of the feather. The hollow base that attaches to the bird’s body is called the calamus, and the solid upper portion is the rachis. Most people, including artists, just call the whole thing the shaft, and that’s fine.
If you pay attention to the shaft, you’ll realize that it isn’t a straight stick. Instead, it tapers, curves, and often casts a soft shadow depending on the light source.
Vane
The vane is the flat, broad surface of the feather that catches air when the bird is in flight. When drawing a feather, this is the shape most people focus on first, sometimes unnecessarily too much.
Each feather usually has two vanes, one on each side of the shaft. They’re often slightly uneven. That asymmetry is important and easy to miss, especially for newbies.
Barbs and Barbules
Barbs are the thin strands that branch out from the central shaft. Barbules are even smaller hooks that connect the barbs, forming a smooth surface. The barbules are almost invisible to the naked eye and therefore impossible to draw individually.
Visually, this means the vane isn’t a solid slab. It’s a layered weave.
Afterfeather
Some feathers have a fuzzy secondary structure near the base called the afterfeather. Not all feathers show it clearly, but when it’s visible, it adds realism fast.
It’s softer, looser, and less structured than the main vane. Their main purpose for a bird is to provide warmth rather than aiding in flight.
Drawing a Single Feather – Steps to Follow
This process works whether you’re using graphite, charcoal, or colored pencil. The principles stay the same.
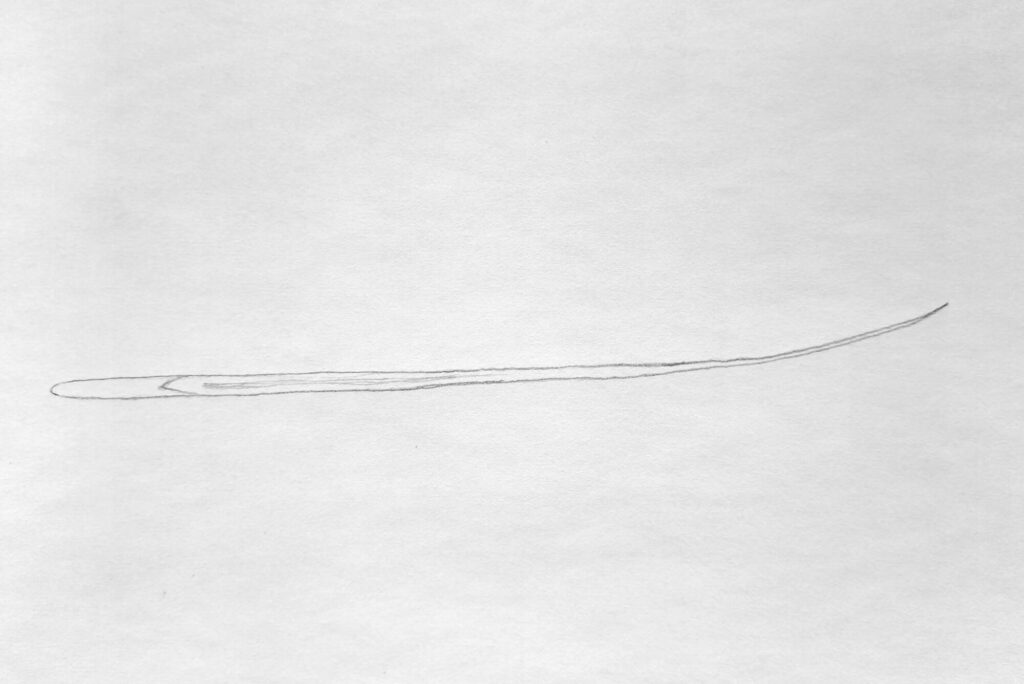
Reference and Sketching the Central Shaft
Aside from types, feathers vary wildly depending on the bird species. Therefore, always start with a reference image.
The Audubon Society has excellent reference photos to study if you need a reliable source. However, you need to be certain that you’re not infringing on copyright. If you’re unsure, use copyright-free sites like Pixabay and Pexels.
Begin by lightly sketching the central shaft with the calamus at the base, and let it taper naturally into the rachis. Keep your pressure light and consistent, letting the shaft curve slightly. Very few feathers are perfectly straight, and that tiny curve gives the drawing realism.
Outline the Overall Feather Shape (Vane)
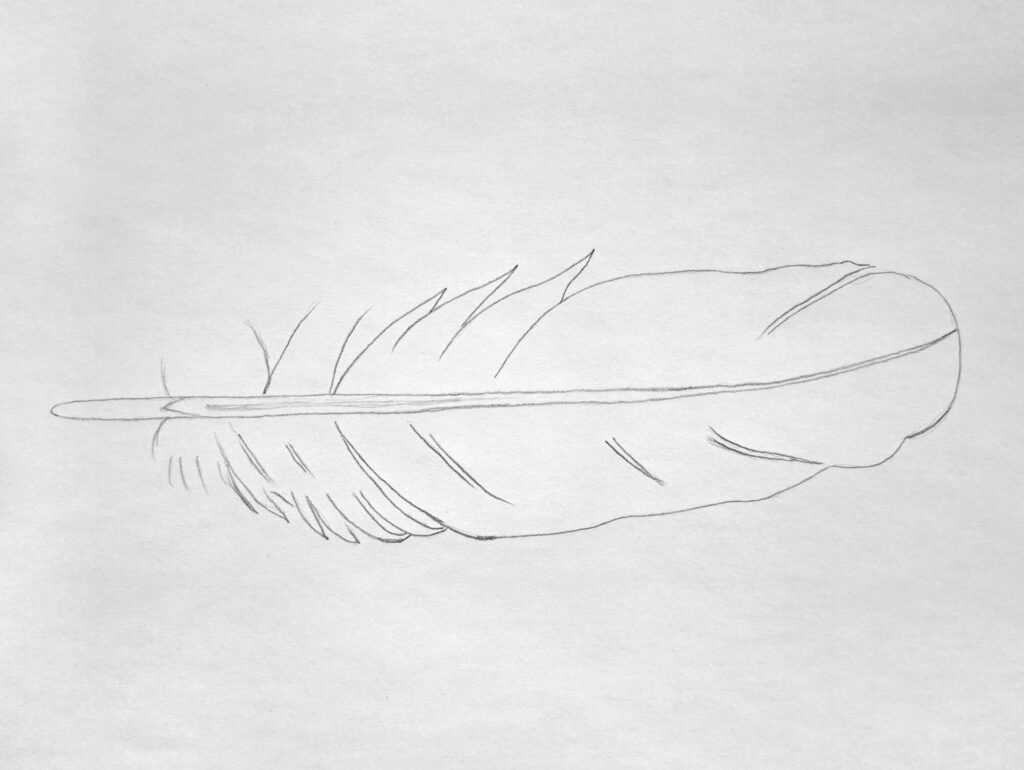
Once the shaft is in place, loosely outline the outer shape of the vane on both sides of the shaft.
Remember to split the vane, instead of appearing as a block, into barbs (smaller chunks). For extra realism, vary the spacing and their length.
At the end of this step, you should have a complete sketch of the feather. Now you can proceed by shading using colored pencils, graphite, or even painting. We’ll proceed with graphite.
Shade the Barbs That Make Up the Vane
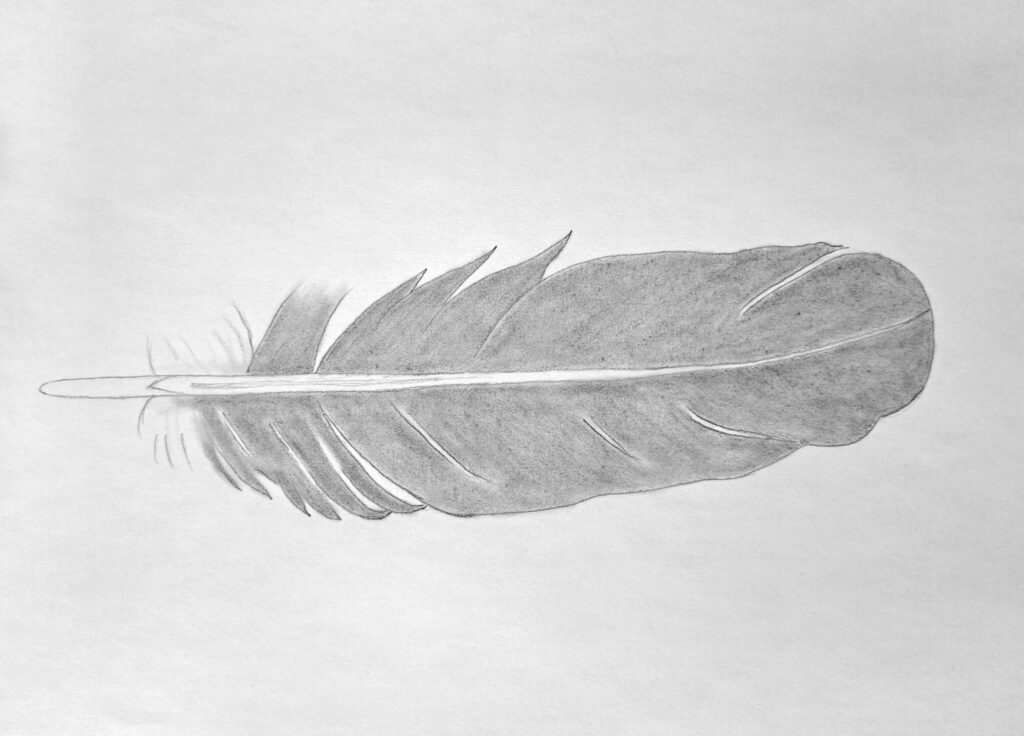
To establish a base tone and build volume, use an HB pencil and uniformly shade both vanes. I prefer to use the hatching method of shading using short, tapered strokes that follow the direction of the barbs.
Always start at the shaft and flick outward, keeping your hand relaxed. Once that’s down, gently blend using a blending stump or a clean brush. A Q-tip does wonders, too.
Don’t worry if all the details get lost since we’re aiming for a smooth tone at this stage.
Shade the Central Shaft and Afterfeather
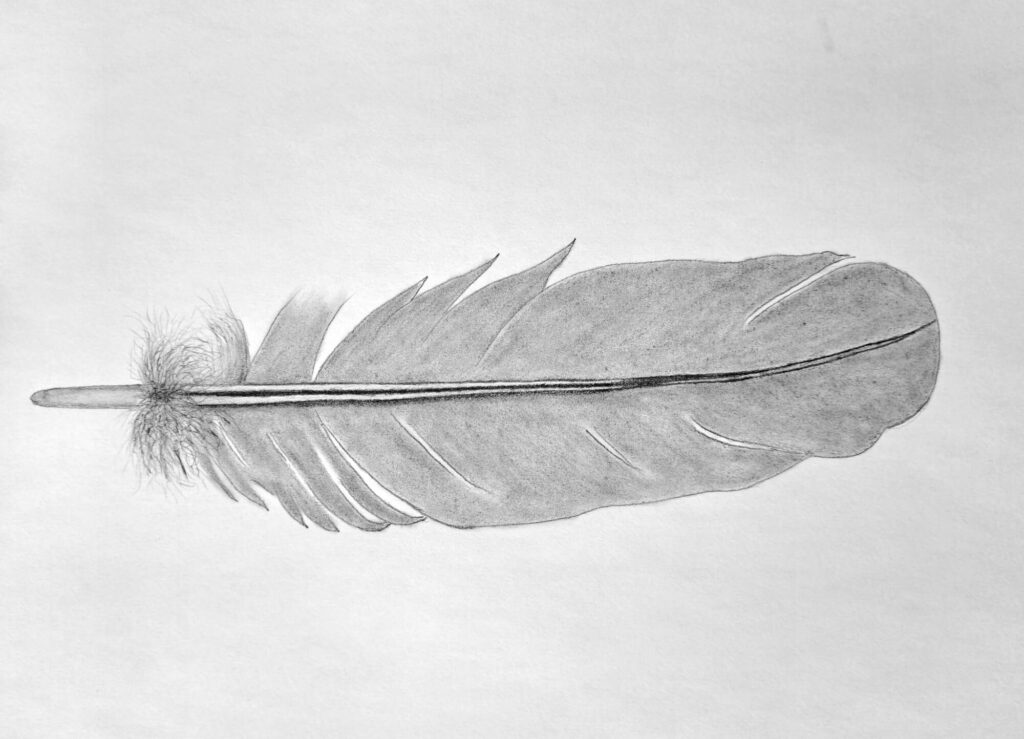
Add subtle shading along the shaft. The calamus is usually lighter, while the rachis has a soft gradient with a hint of shadow where it meets the vane.
You also need to add a dark tone at the center of the rachis, as shown in my illustration drawing.
Lastly, sketch and shade the afterfeather around the calamus with loose, fluffy strokes. This part should look softer, furry, and less controlled.
Deepen the Shadows and Refine Feather Highlights

This is the final step.
As such, we need to introduce details on the feather. To do that, begin to shade the vane with short strokes following the direction of the barbs as you did before.
But this time, ensure you’re using a sharpened and relatively darker pencil, say 2B. Deepen the shadows between barbs near the shaft and around the edges to create an illusion of curviness.
When done to your satisfaction, refine the edges of the feather and along the barbs by lifting graphite with a kneaded eraser. A few bright breaks along the vane can suggest light catching the barbules.
If you can pull this off, you can draw realistic birds. Here are some tutorials to keep you practicing:
Conclusion
Drawing a single bird feather is quite a satisfying exercise. The more you observe real feathers, the more your hand starts to understand their rhythm.
But here’s the key takeaway: don’t get tired of creating highlights by erasing and shading. Meaning don’t expect to get it right the first time. Instead, you create highlights, realize the drawing is too bright, shade a bit, realize it’s too dark, until you strike the balance.
That’s what excites me about these drawing exercises.
Let me know what you think.