
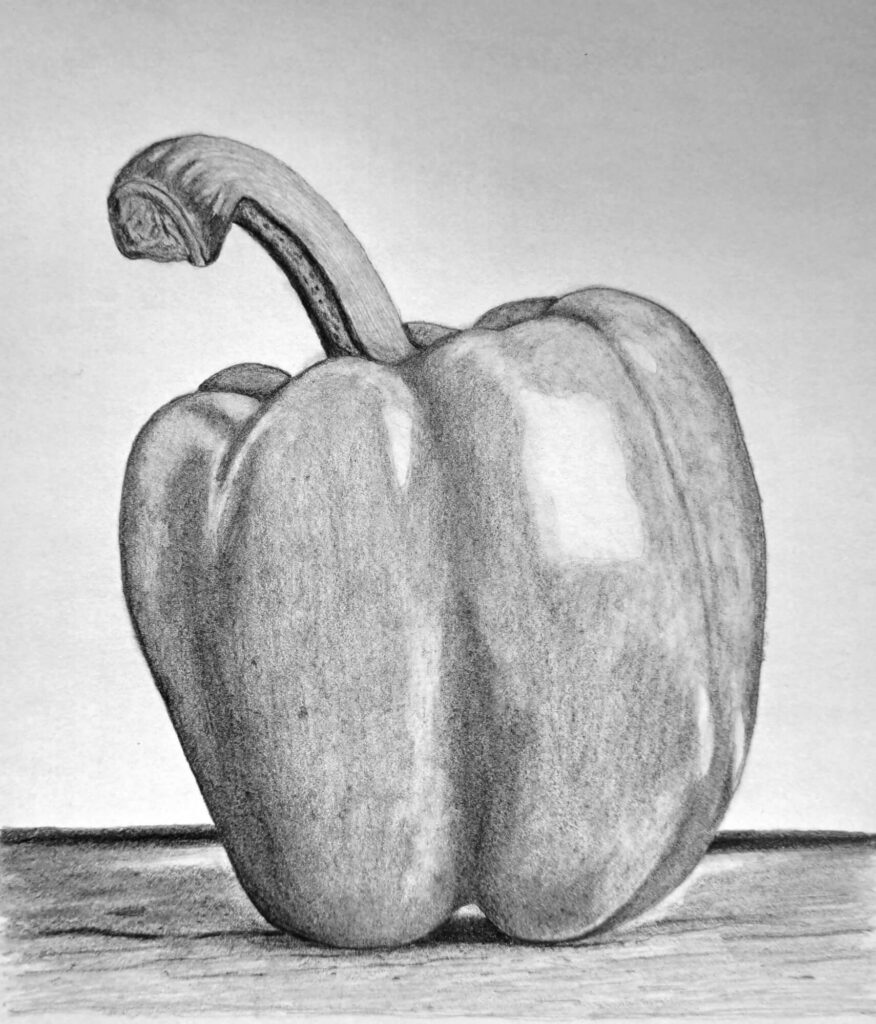
If you’re looking for inspiration for your next drawing project, look no further than everyday household items.
A bell pepper, for example, on the kitchen countertop, can offer great texture lessons.
Bell peppers are usually three- or four-lobed fruits, but the number and shape of those lobes vary with the cultivar and growing conditions. However, one thing is common, and that is their irregular and glossy appearance.
In today’s tutorial, I’m going to show you my step-by-step process for a realistic bell pepper drawing.
What you’ll need
Graphite pencils, paper, and a kneaded eraser
If you have a range of H to 2B pencils, that’s awesome.
However, an HB pencil alone is enough to make the drawing shown above, along with drawing paper and an eraser. A kneaded eraser is ideal for lifting graphite when we get to the highlights, although a clean ordinary eraser will work too.
A reference subject
A real bell pepper as a reference. Look for one with a reasonably clear shape and a stem that’s still attached. Bell peppers are generally blocky, thick-walled fruits with three or four lobes, although individual peppers can vary considerably.
The color isn’t important for the graphite drawing. What matters is the light falling across the surface. A red pepper, green pepper, or yellow pepper can all be translated into grayscale, provided the reference has enough variation between light and dark areas.
6 Steps for Drawing a Bell Pepper for Beginners
Sketching the overall bell pepper shape
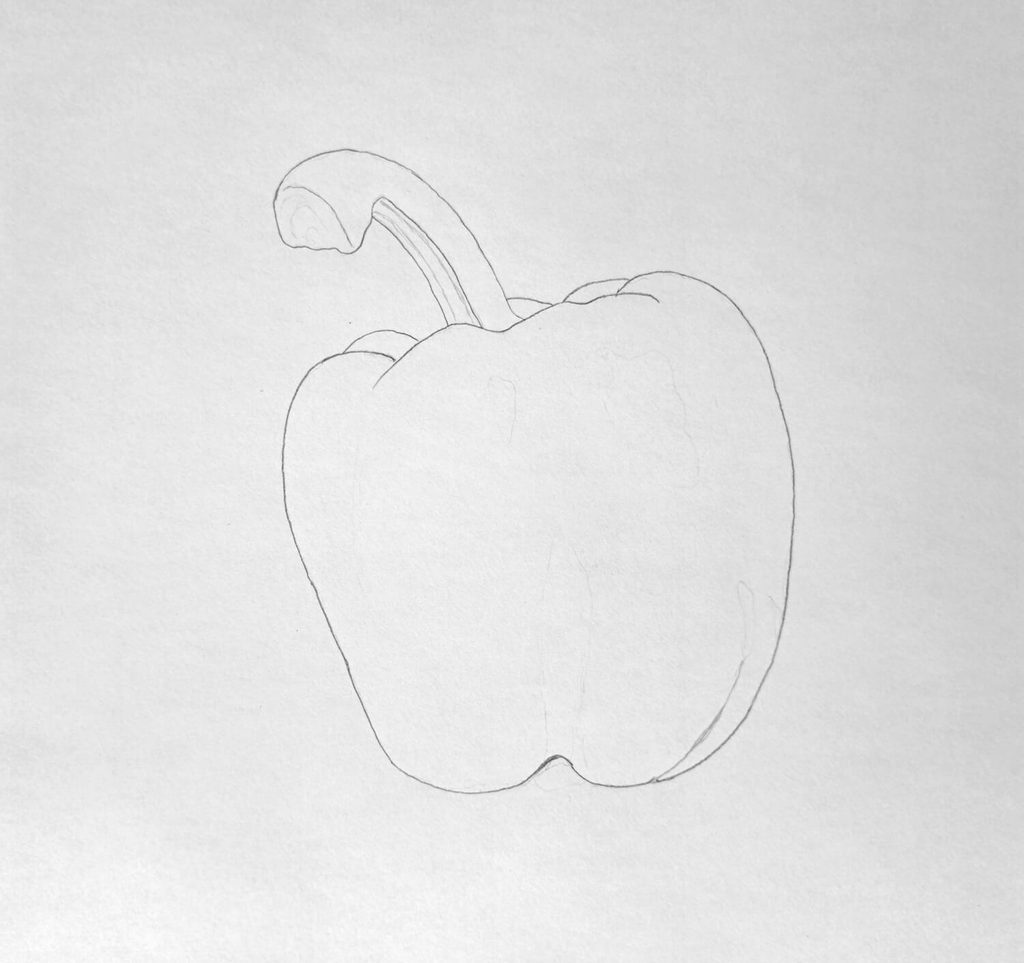
Begin observing and studying your reference. Look at its overall height compared with its width. Is it squat and broad, or slightly taller? Where does the widest part occur? How quickly do the sides move inward toward the bottom?
Once you have a slight understanding, lightly sketch that outer shape, preferably with an H pencil, including the stalk.
While sketching, pay attention to the individual sides. One shoulder might rise higher than the other. One side might bow outward while the opposite side is comparatively straight.
If you look at my sketch above, the left side seems shorter than the right. Lastly, depending on the variety and how the pepper is resting, you may see several rounded sections meeting at the blossom end.
Always let your reference guide you and sketch what you see rather than what you think.
Sketching the details and table surface
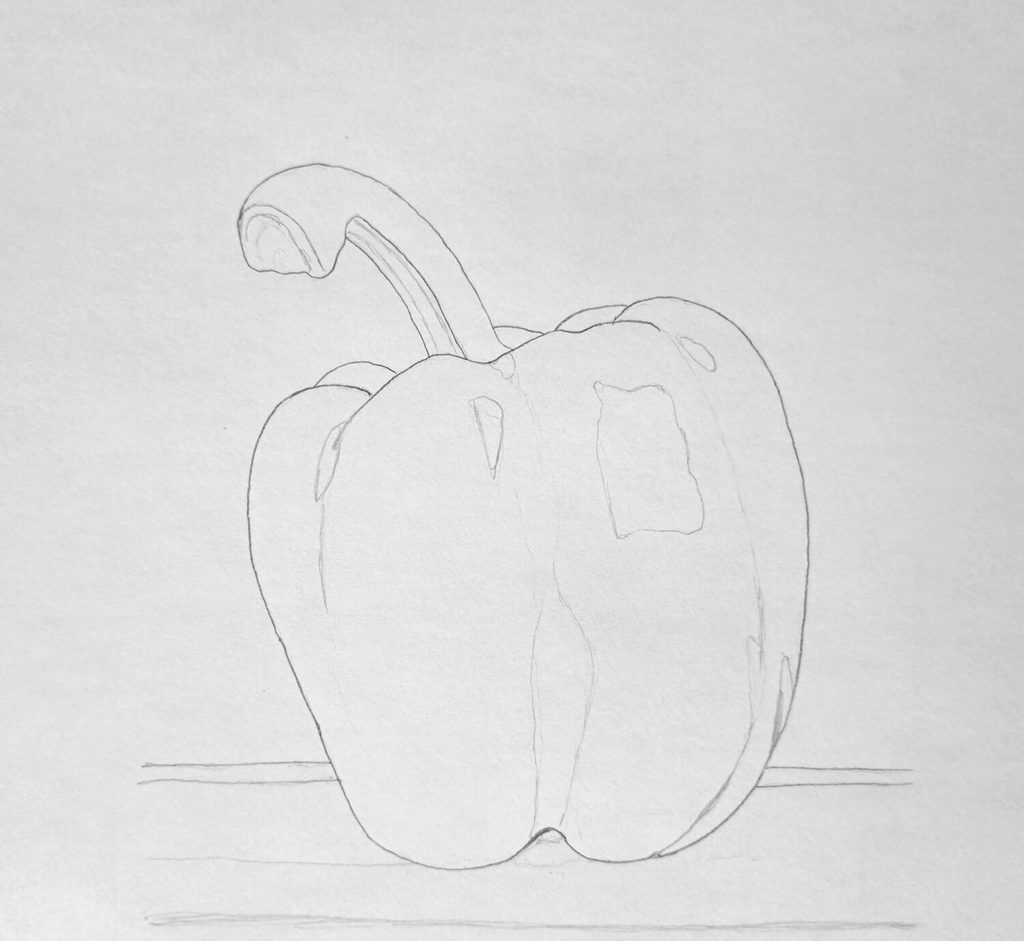
To complete the bell pepper’s sketch, add in some details.
For instance, rather than drawing the stem as a little cylinder stuck onto the pepper, look at the way it disappears into the depression at the top or bends sideways. The surrounding surface rises toward it, then falls away into the lobes.
Next, refine the boundaries between the lobes. Some will be quite visible, while others may almost disappear depending on the direction of the light.
Avoid giving each groove the same line weight. If every division receives an equally dark pencil line, the pepper will start to look segmented rather than rounded.
On my sketch above, notice that I just have marks indicating highlighted areas instead of dividing the pepper with lines. Distinct lines could make it look like a pumpkin drawing.
I also lightly indicate the edge of the wooden table beneath the pepper.
The table establishes the environment and gives the pepper a physical surface to rest on and creates the opportunity for the cast shadow that will become important later.
Basic shading with an HB pencil
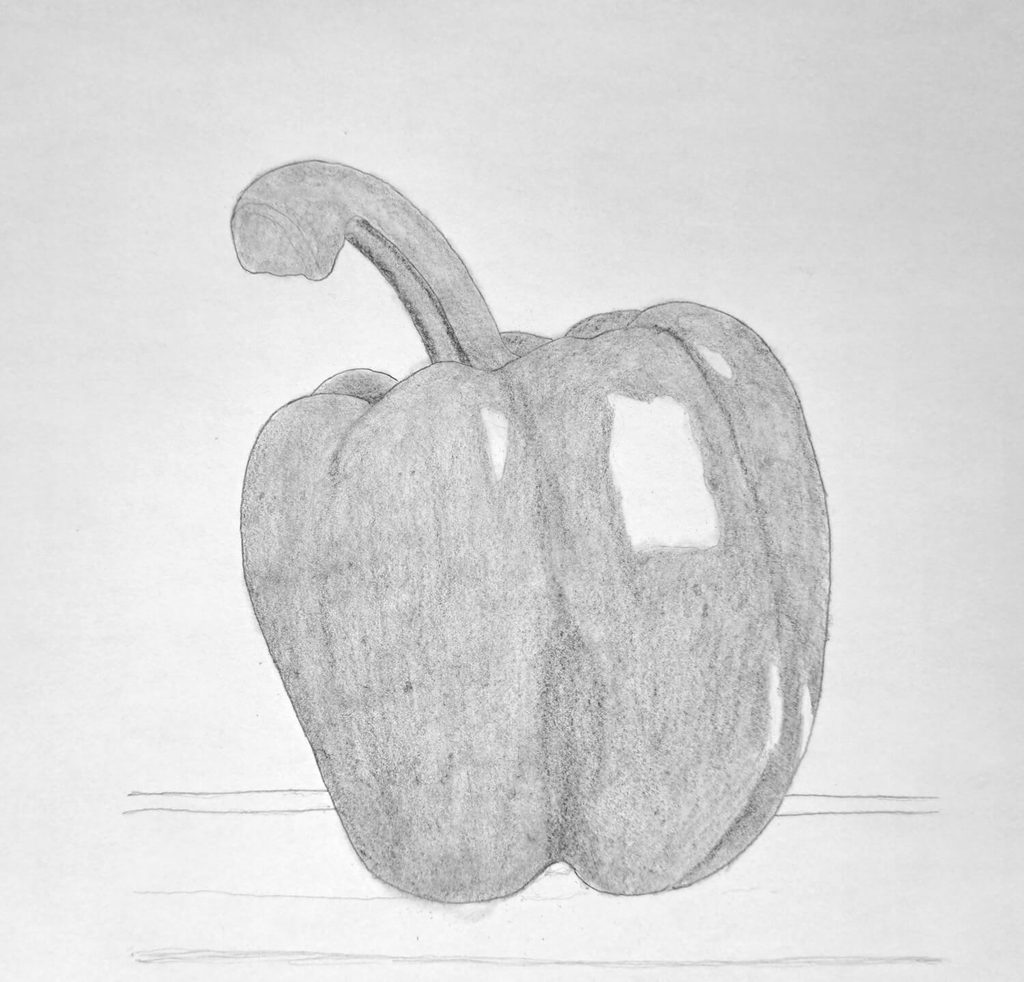
Use the HB pencil lightly and build a first layer of tone across the whole drawing (except highlights). The purpose of this layer is to establish the middle values that everything else will sit on.
With minimal pressure, follow the curvature of the pepper with the pencil strokes where possible. The marks don’t have to trace every contour perfectly, but their direction should support the rounded form.
Check out the guide on shading techniques and pick one that you’re most comfortable with.
While shading, leave the brightest areas largely untouched.
That’s an important habit when working in graphite. White paper is already your lightest value, so there’s no need to cover the whole drawing with graphite and then try to create every highlight afterward.
Shading the shadows
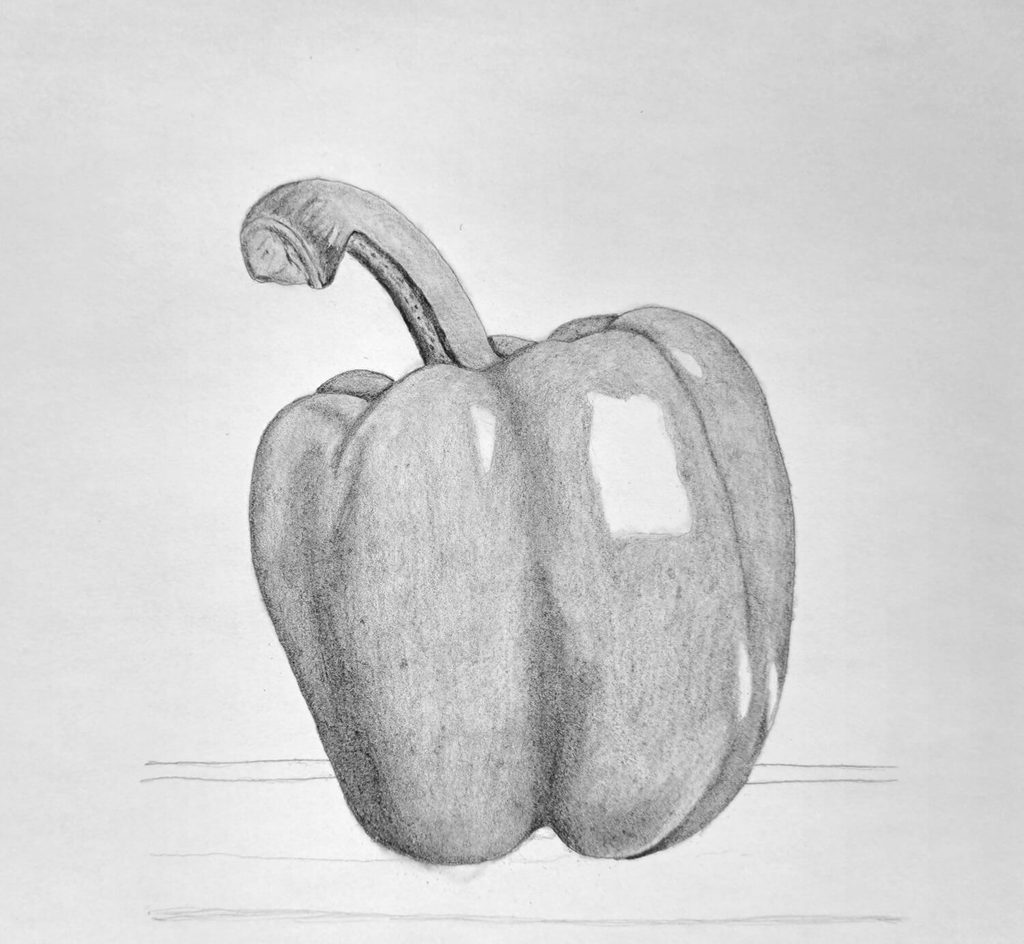
Once the basic tone is established, make the darker areas more deliberate.
The deepest values usually work best where the form turns sharply away from the light; on this pepper, that includes valleys between the lobes, parts beneath the stem, and selected areas along the lower sides.
You have to be subtle with your shading; failure to which you’re likely to make one of the most common mistakes in realistic pencil drawing: coloring every visible groove until it becomes an outline.
Creating the highlights
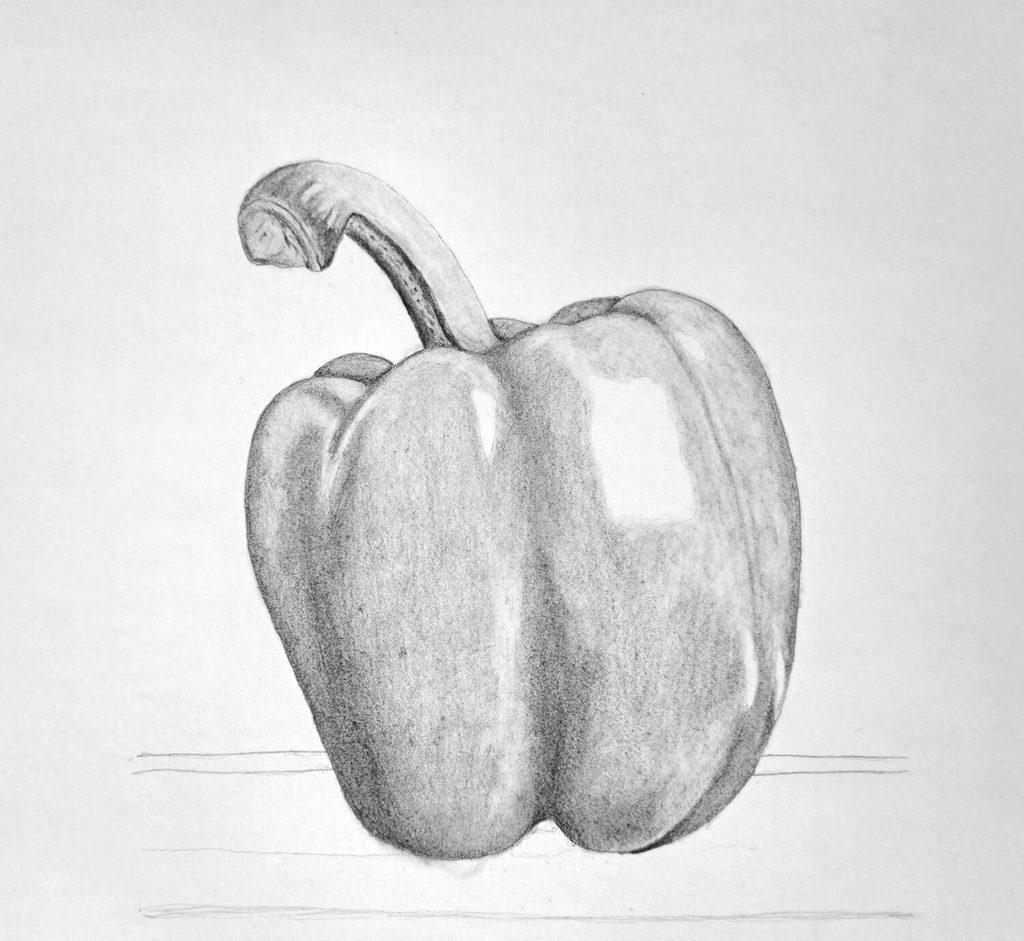
Bell peppers have smooth, reflective skin, so the brightest areas tend to occur where the surface is oriented toward the light. The highlight might be long and soft across one part of a lobe and much sharper somewhere else.
As much as possible, don’t try to draw those highlights with a pencil.
Instead, protect the lightest areas from the earlier shading and use the eraser afterward to clean or strengthen selected areas. A kneaded eraser works particularly well because it can lift small amounts of graphite rather than producing one blunt white patch.
Pro Tip: A highlight needs to make sense in relation to the light source. If one lobe has a bright area on its upper curve, neighboring surfaces should respond to the same light.
Final bell pepper drawing: Shading the wooden table surface
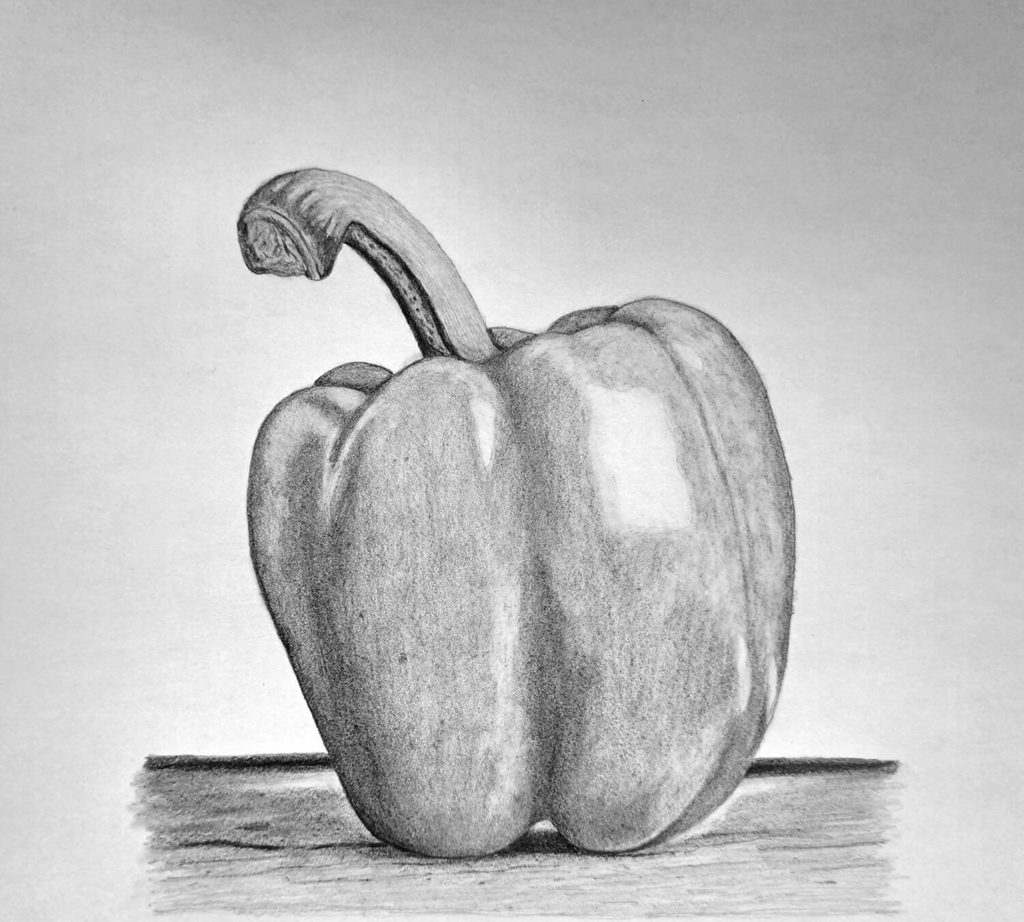
To prevent the subject or artwork from appearing like it’s floating in space, it’s important to shade the resting surface. In this case, it’s a wooden tabletop.
Start with the area around the cast shadow. The darkest part is close to the pepper, particularly around the places where it touches the surface. The shadow should fade slightly as you progress away from the cast shadow.
Next, suggest the subtle wood texture. The wood has plenty of information in it, but drawing every grain would give the background far more attention than it deserves. Instead, use a few directional marks and changes in tone to establish the surface.
Keep the marks consistent with the orientation of the table. If the visible grain runs horizontally in the reference, random vertical scratches will work against the illusion of a flat wooden surface.
Lastly, soften some areas so the table doesn’t become as contrasty as the pepper.
Conclusion
To recap, the most important advice I can give when drawing a household item like the bell pepper is to have a real object in a well-lit environment for reference.
Next, make sure to observe and study the subject before starting to sketch and shade. And lastly, keep trying different items and objects.
Our blog has a treasure trove of tutorials about different things to challenge your drawing skills.
I hope you’ve enjoyed today’s tutorial as much as I’ve enjoyed preparing it for you. Don’t forget to share with your friends, including your artwork, or save it on Pinterest for later. As always, I appreciate your support.