
I remember it was just the other day when I used to avoid drawing transparent things because they felt impossibly complicated.
The reflective glass texture was quite intimidating at the time. And I know it feels that way for most hobby artists like me. However, understanding value scales and enough practice shading different textures from hair, feathers, fur, and other shiny surfaces, I gained confidence.
If you’re ready to take your realism game to the next level, this is the guide for you. I’ll walk you through everything without assuming you’ve been to art school. Just real, practical advice from one artist to another.
Let’s get started.
Requirements and Reference
Before we touch a pencil, let’s get our setup sorted.
Place a Physical Glass on the Table
Honestly, there’s nothing better than drawing from life. It gives you the most accurate view of light, distortion, and reflections. Grab a clear drinking glass, fill it halfway or almost full with water, and set it on a plain white surface.
If you’ve got access to natural light, even better. Move the glass around until you find an angle that looks visually interesting. Pay attention to bold highlights and shadows.
Use a Reference Photo
If setting up a real glass isn’t possible, no worries. Sites like Pexels, Unsplash, or Pixabay have high-quality royalty-free images. Just search for “glass of water on table” and you’ll have plenty to choose from.
Try to pick an image with good contrast so you can really see those light and dark areas.
Gather Your Drawing Materials
Here’s what I use, but feel free to adapt based on what you’ve got:
- Graphite pencils (2H, HB, 2B, 4B, and 6B work well).
- Erasers (a kneaded eraser and a precision eraser if you have one).
- Blending stump, tissue, or good old Q-tip, which happens to be my favorite.
- Smooth drawing paper (Bristol is ideal for photorealism). I’ve used normal printing paper, though.
- Ruler (helpful for symmetry)
- Sharpener (keep those pencils crisp)
All set? Great. Let’s draw.
Drawing a Realistic Glass of Water Step by Step
1. Sketch the Glass and the Saucer, Including Visible Details
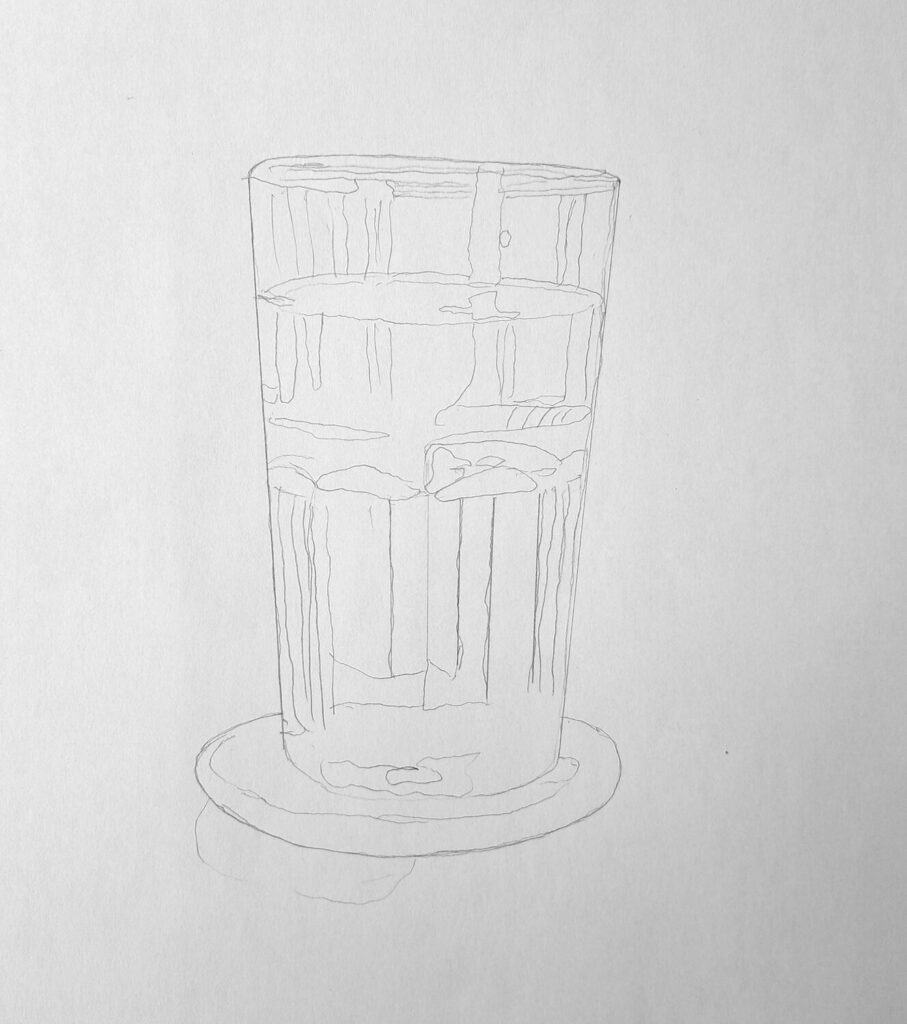
Start light.
I usually go with a 2H pencil for the initial sketch. Focus on symmetry—glasses are usually cylindrical, so getting those curves right makes a huge difference.
Use a ruler if you need to block in vertical guides. Lightly sketch the top ellipse (that’s the mouth of the glass), the vertical sides, and the shadow details. Don’t forget to draw the water line—it’ll curve too, but differently from the top.
If your glass is on a saucer or casting a shadow, lightly indicate those shapes as well. Keep everything faint and adjustable.
2. Shade the Darkest Details with a Soft Pencil
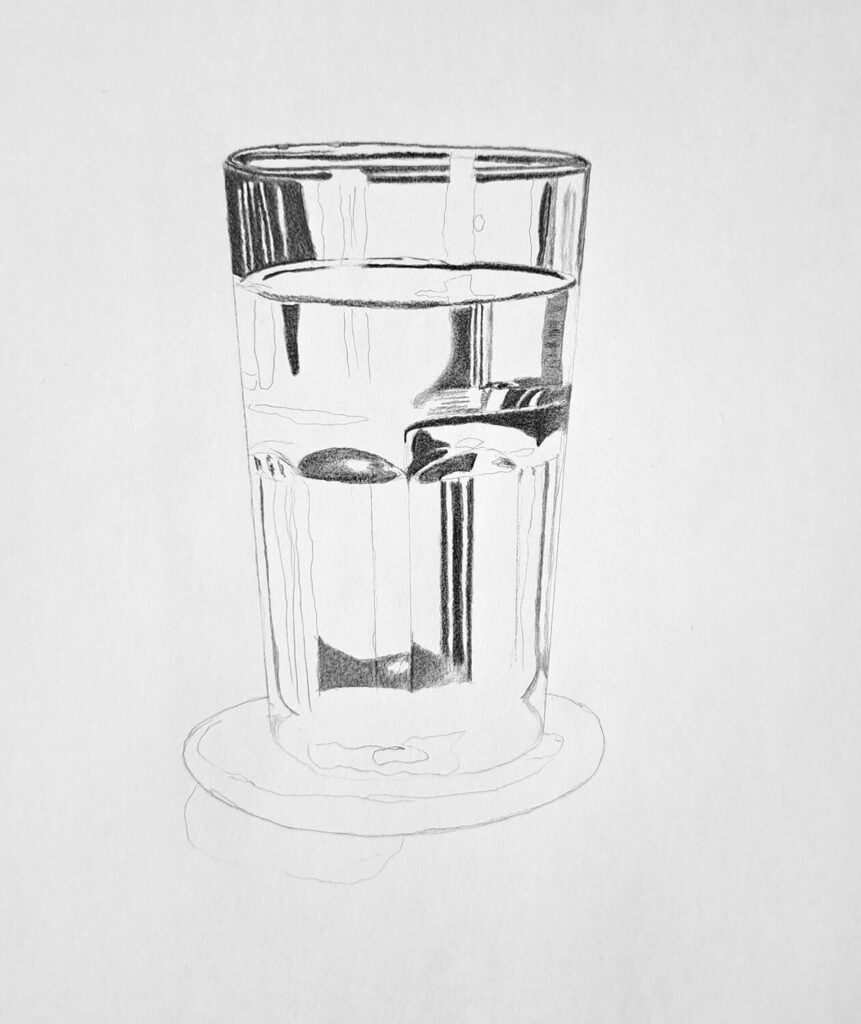
Now, grab your 4B or 6B. Look closely at your reference. Where are the darkest values? Often, you’ll find them along the base of the glass, in the shadowed water areas, and wherever the light hits the rim and creates a stark contrast.
Be bold here.
High contrast is what makes photorealistic drawings pop. Don’t be afraid of deep blacks. Use controlled strokes and avoid overblending at this stage.
3. Shade the Saucer and Dark Values
If there’s a saucer or table detail, shade that next. This gives your glass some grounding. Again, use your softer pencils for the darkest parts and HB or 2B for the more subtle shadows.
Pay attention to how shadows curve around the glass. A round saucer, for instance, won’t have a perfectly straight shadow. And remember, glass affects the shape of the shadows—it bends light and changes how things look behind it.
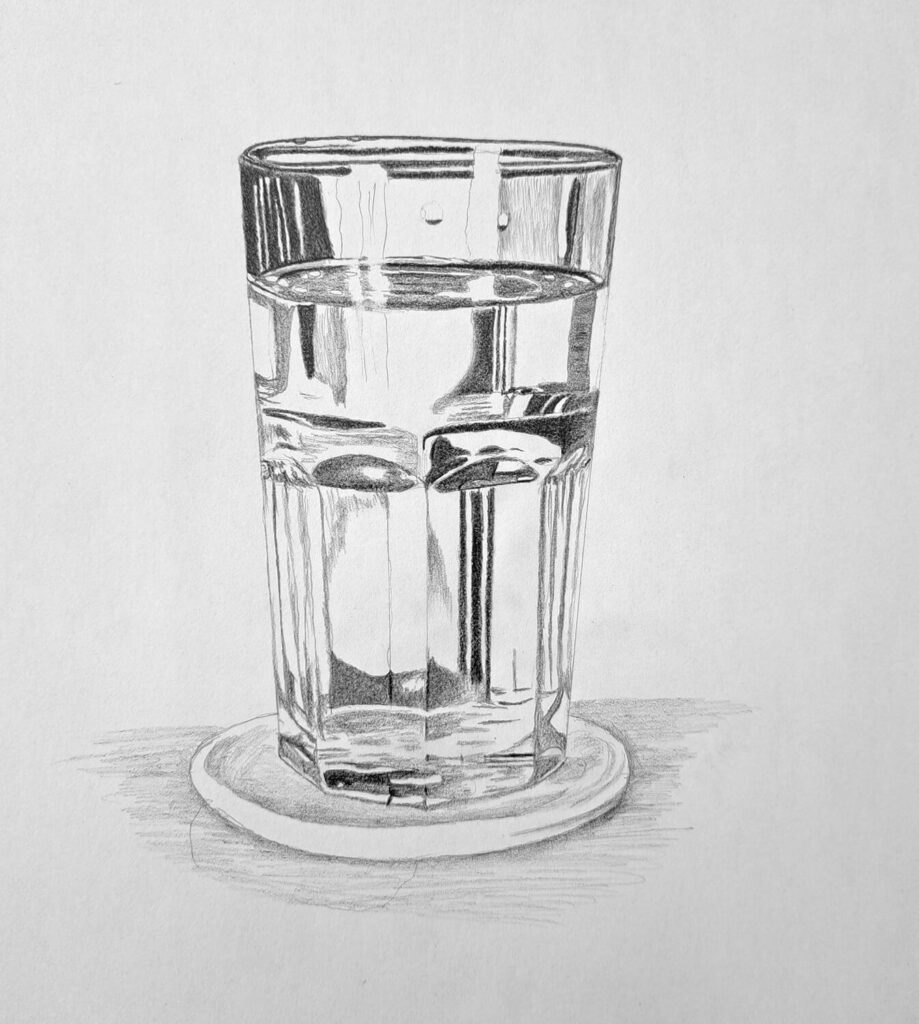
4. Shade the Midtones
Now we’re building volume. Use your HB and 2B pencils to gently layer in the midtones of the glass and water. Look for subtle gradients. This means the way the light fades as it wraps around the surface.
Don’t rush this part.
Use light pressure and circular strokes or soft hatching. Blend gently with a stump or tissue, and don’t be afraid to go back and darken areas once you see how the midtones settle in.
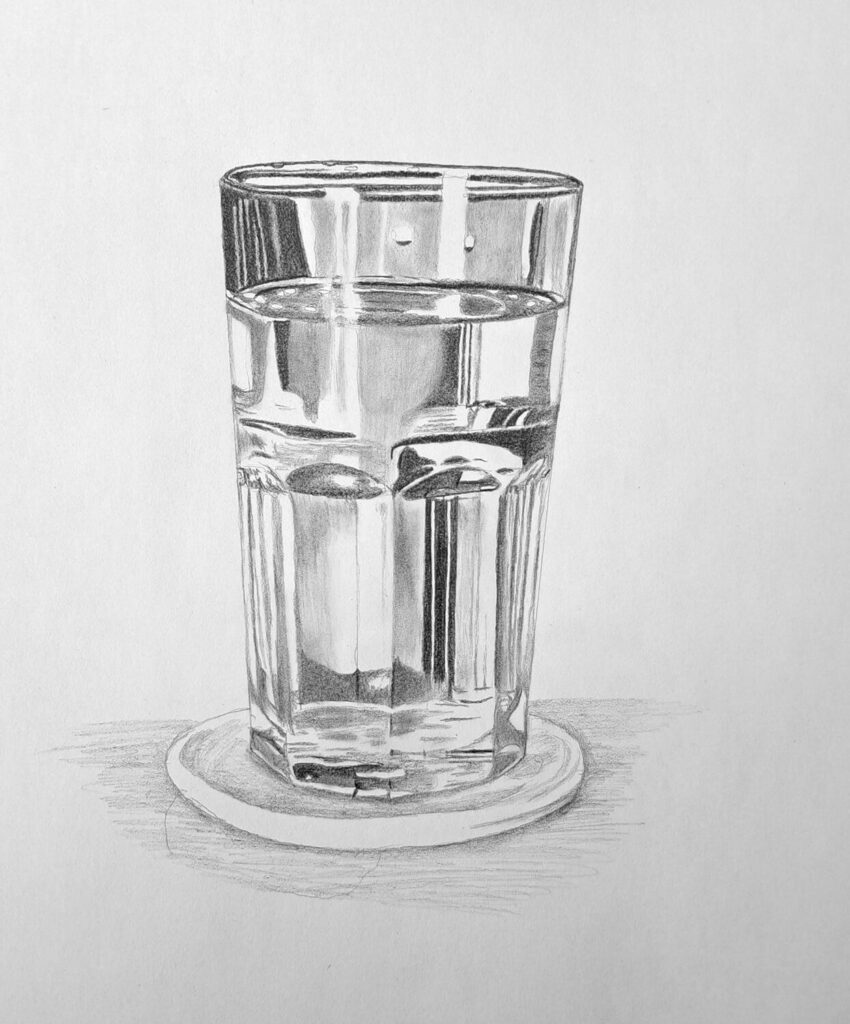
5. Finalize the Drawing with Smooth Transitions, Highlights, and Shading of the Table Surface
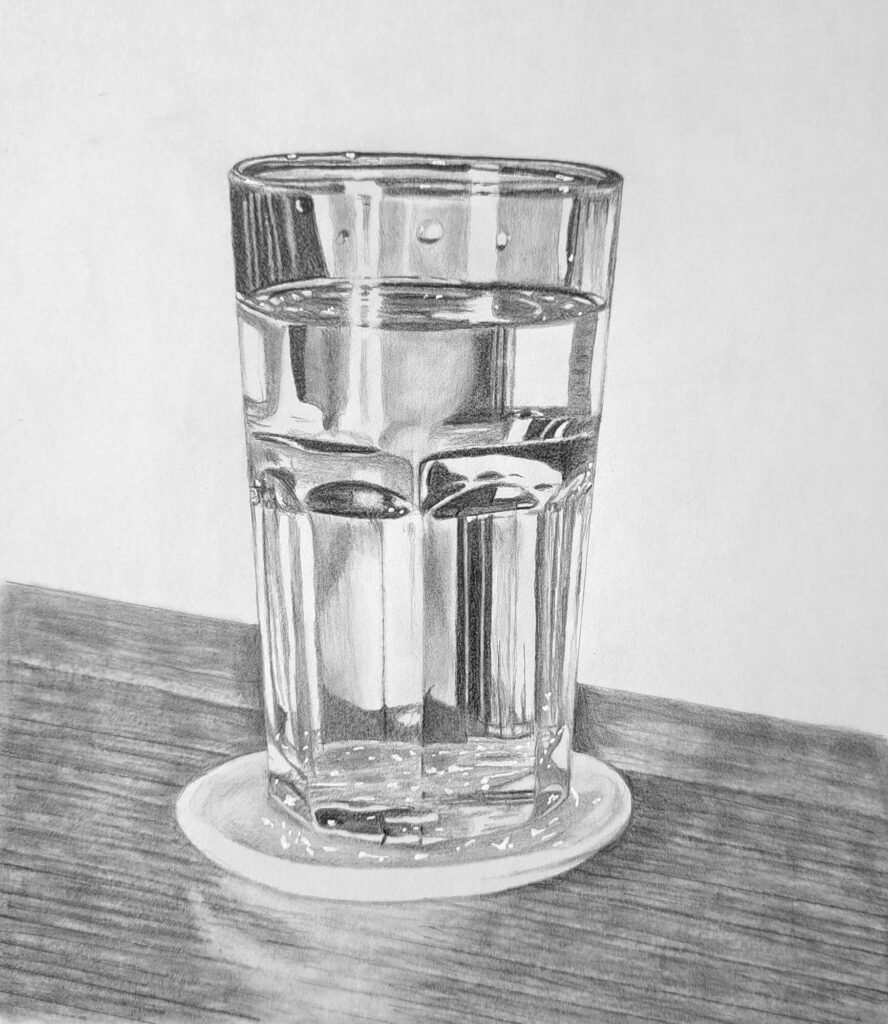
Here’s where the magic happens.
Use your kneaded eraser to lift highlights along the rim, inside the water, and anywhere the light is bouncing off the glass. Be precise. This is what gives the illusion of shine.
For the final polish, blend transitions so the darks and midtones fade smoothly. Shade the table surface, keeping in mind the light source. A soft shadow under the glass makes it look grounded and real.
Lastly, sharpen your highlights. I sometimes use a precision eraser or even a battery-operated eraser to pick out tiny lines of light. A clean white highlight against a rich black area?
Instant realism.
If you want to keep practicing, check out the following similar tutorials:
General Tips and Advice
- Patience is key. This kind of drawing takes time. Don’t expect to finish in one sitting.
- Work from dark to light. You can always erase to bring back highlights, but over-blending early on can make your drawing look muddy.
- Squint at your reference. Seriously, squinting helps simplify the values so you can focus on the big picture instead of getting lost in the details.
- Take breaks. When you stare at something too long, it stops making sense. Come back with fresh eyes.
- Zoom in on your reference. Details like tiny bubbles, light distortions, and surface textures matter more than you think.
Conclusion
Drawing a photorealistic glass of water is one of those challenges that sounds simple but can really push your skills. It’s not just about making something look “real”. It’s about understanding light, texture, and transparency in a way that forces you to observe like never before.
And the best part?
You don’t have to be a master to try it. You just need a pencil, some patience, and a willingness to learn.