
I didn’t expect a baseball bat and ball to be tricky to draw. After all, it’s just a wooden stick and a stitched-up ball, right?
But the first time I tried, my bat looked like a bloated rolling pin, and the ball? More like a squashed potato with weird stitches.
Not great.
That’s the thing about drawing simple objects, because they leave no room to hide. If your proportions, shading, or texture are even slightly off, it shows. But once you do get it right?
It’s super satisfying.
The clean curves, soft shadows, and textured wood grain make the whole sketch feel polished and realistic.
In this guide, I’ll walk you through the exact steps I use to draw a baseball bat and ball with just graphite pencils. Whether you’re drawing for fun, practicing realism, or creating a sports-themed piece, these tips will help you avoid the usual pitfalls and add real depth and form to your drawing.
Let’s dive in:
Easy Steps to Drawing a Baseball Bat and Ball Using Graphite Pencils
We’ll begin with the baseball since it’s spherical and a great way to warm up your shading and observation skills. Then, we’ll tackle the bat, where texture and grain play a bigger role.
Drawing the Ball
1. Basic Sketching of the Ball and Bat
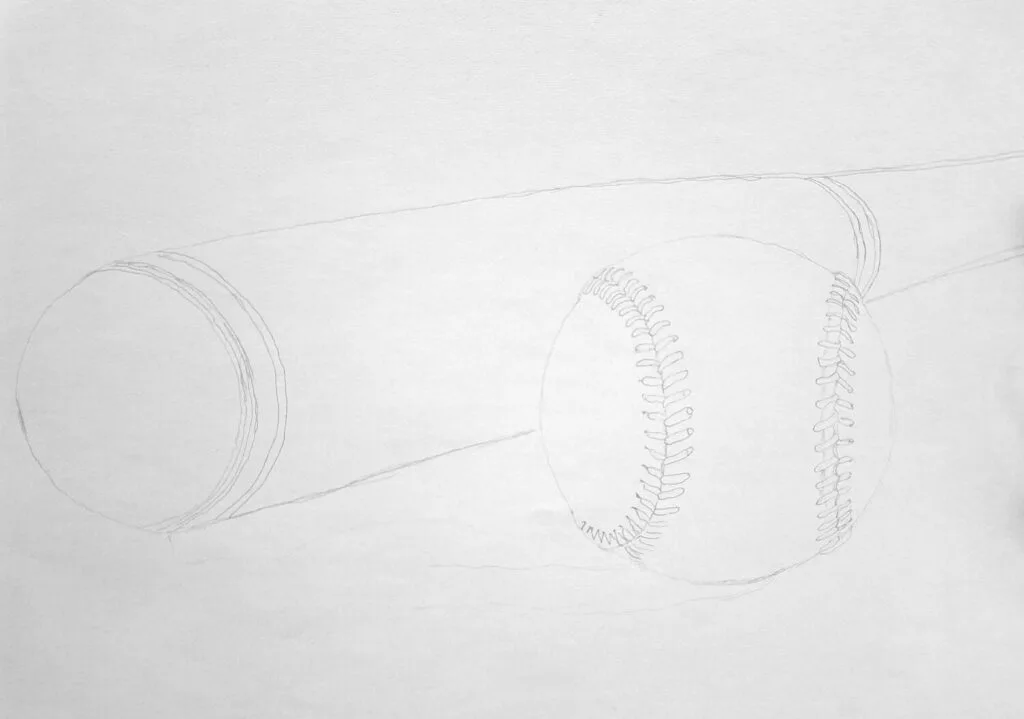
Start light. I always use an H or 2H pencil here. Draw a perfect circle for the ball or as close as you can get. A circle template or lightly tracing around a circular object (like a tape roll) helps if you’re struggling.
For the bat, sketch a long cylinder that tapers off at one end. Make sure the handle is thinner and the barrel has a slight bulge, then curves in at the end.
A gentle arc across the bat’s length can add perspective if you want a slight 3D tilt. Place the ball near the bat, either resting against it or beside it, depending on your composition.
I also prefer to sketch the stitches at this point so that I don’t miss anything later on.
2. Shading the Ball for Form and Volume
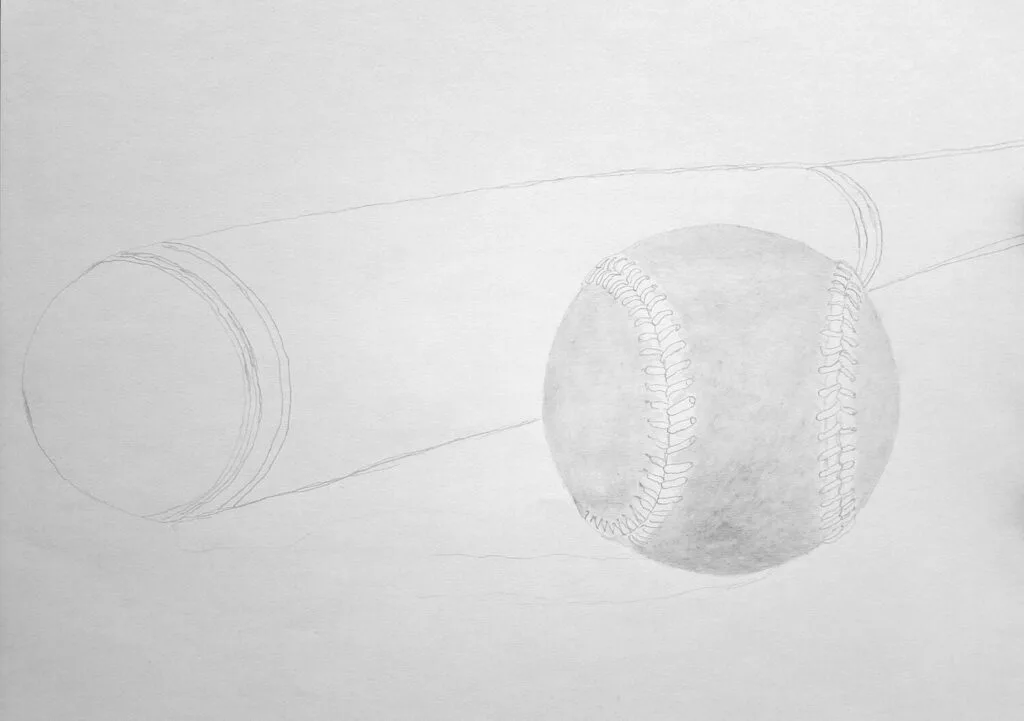
Here’s where your drawing starts to look real. Think of the baseball as a simple sphere. Light usually hits from one direction, so decide where yours is coming from.
There are two ways to approach this. Either shade the whole ball uniformly using an HB pencil, leaving out the stitches like I’ve done, or get your gradient earlier on.
To that, start by shading the darker side with an HB pencil, then gradually blend into lighter tones toward the highlight. Don’t press too hard. Use small circular strokes and build up layers. I like to use a tissue or blending stump to smooth things out, then go back and darken the shadows.
The key is a smooth gradient from light to dark that wraps around the form.
3. Shading the Rolled Ball Stitches
Baseball stitches curve in a double arc. They aren’t straight lines; they wrap around the ball like seams on a globe. Lightly sketch them with a sharp HB pencil, keeping the spacing consistent.
Then use a darker pencil (2B or 4B) to add contrast and shadow under the stitches, especially on the side away from your light source. This helps them pop and feel raised.
Stitches are like little “V” shapes, usually angled and slightly offset. Look at reference photos to get them right.
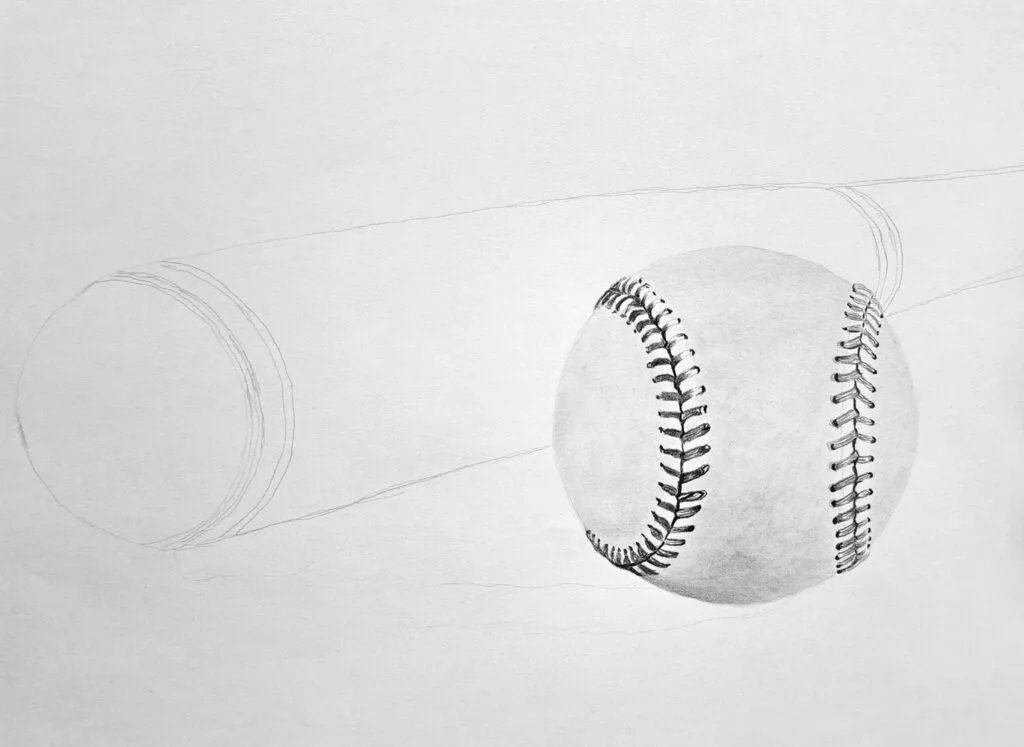
4. Rendering Details to Finalize the Ball Drawing
To give the leather that authentic look, add subtle texture. It’s not smooth; baseballs have a faint grain. Use a kneaded eraser to lift tiny dots of graphite from the shaded areas, creating that speckled look.
You can also add shading by stippling. I also like to use a mechanical pencil to strike through the stitches to give them a thread-like appearance.
Then, sharpen your darkest pencil (a 6B works well) and go over the deepest shadows between stitches and under the ball where it touches the ground. That soft cast shadow helps anchor it.
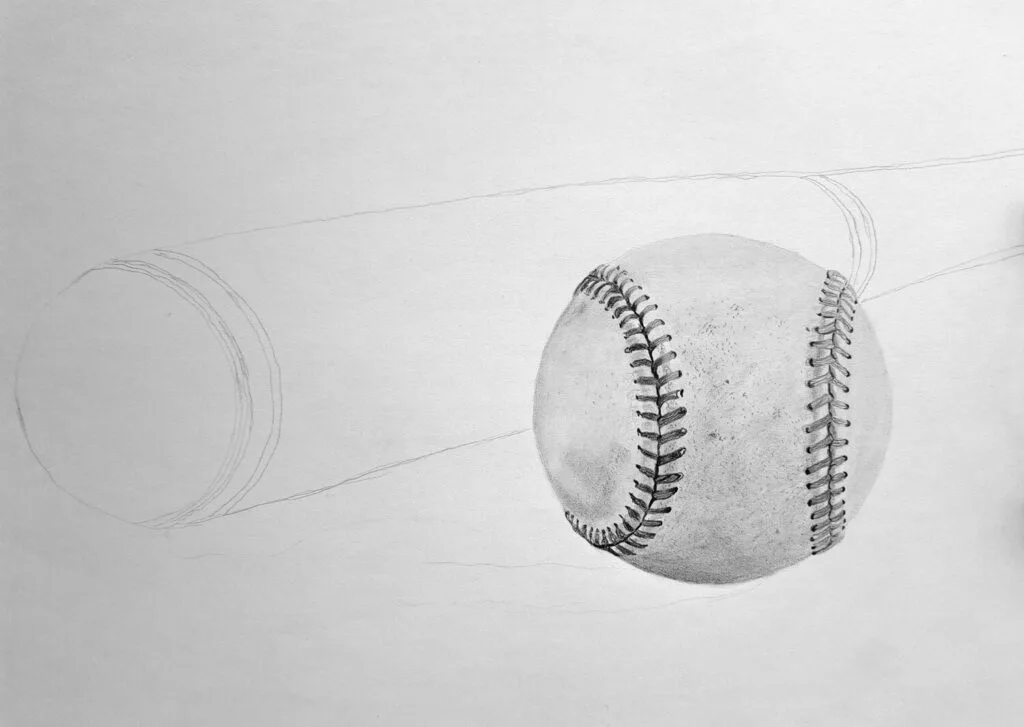
Now step back. It should look round, weighted, and textured, not flat or floating. In my illustration, notice that I haven’t added the shadow yet. I’ll do that later on after I’ve drawn the bat.
Drawing a Wooden Baseball Bat
1. Basic Shading with HB Pencil
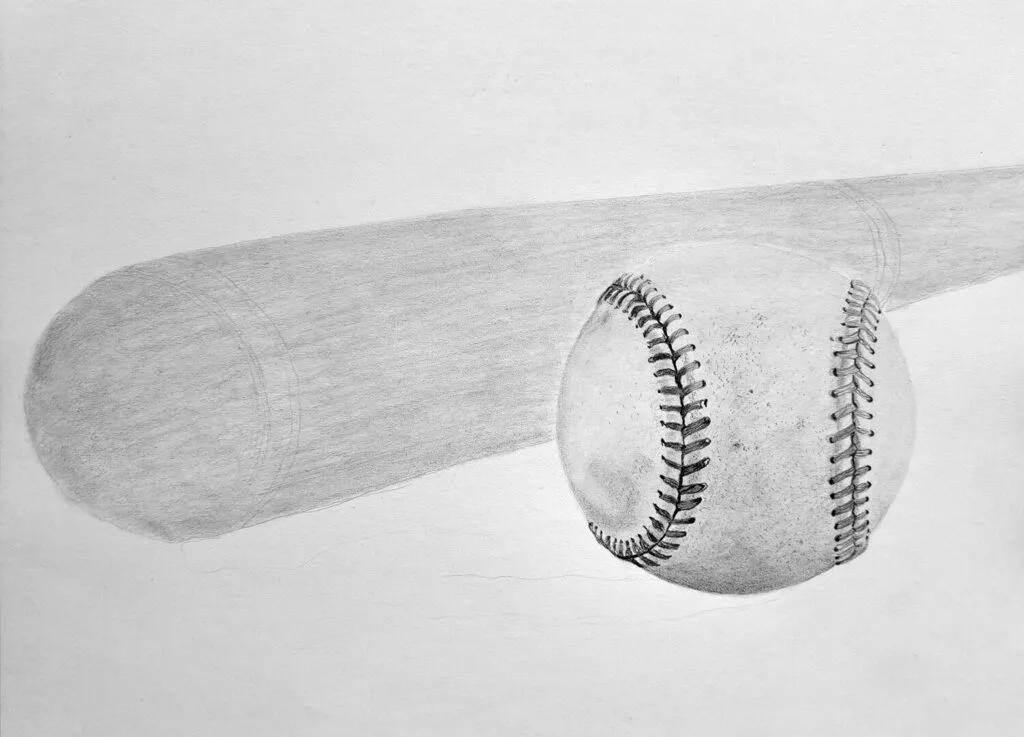
With your sketch in place, use your HB pencil to begin laying in even, light shading along the length of the bat. Since it’s cylindrical, imagine it as a stretched-out version of the ball’s shading.
Start from one side and build toward the center, leaving a lighter band where the highlight would hit. Be mindful of where the bat curves, especially near the knob and the barrel. These areas catch light differently.
2. Rendering the Details to Achieve a Wooden-Like Appearance
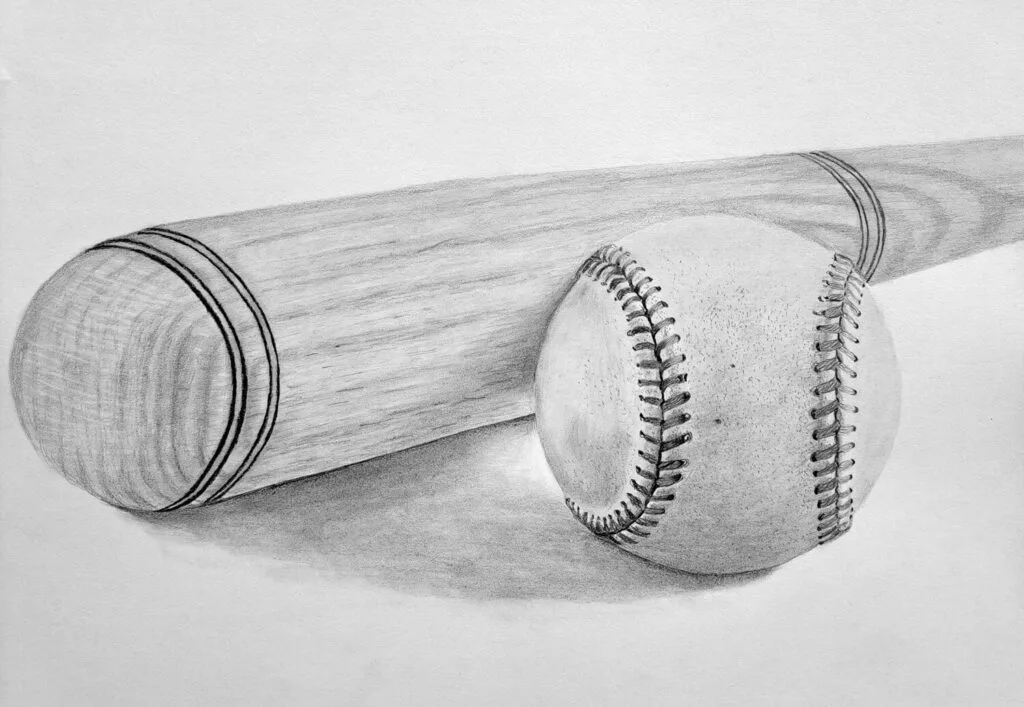
Now comes the fun part – wood texture. If you’ve ever looked closely at a wooden bat, you’ll notice subtle grain lines. They’re not perfectly straight or evenly spaced. Use an H or HB pencil to draw faint, slightly wavy lines running the length of the bat.
Some can curve slightly or break up.
Then, with a softer pencil (2B or 4B), add more contrast in the deeper grain and shadows. A few quick vertical strokes and cross-hatching help create natural wood inconsistencies.
If the bat has any logos, lines, or text, sketch those lightly, then shade around them to make them look printed or engraved.
For realism, blend your shading in the smooth areas, but leave a little texture in the grainy spots. It’s that contrast that sells the look.
Don’t forget to draw the cast shadow of the ball and the bat so that they don’t appear to be floating.
Additional Tips to Remember
Pay Attention to the Light Source
Honestly, everything hinges on this. A consistent light source makes your whole drawing feel real. Decide early where it’s coming from, then shade accordingly. Highlights, shadows, and even stitch depth depend on it.
Shadows and Highlights
Cast shadows are your best friend. A softly blended shadow under the ball or bat instantly grounds it. Highlights aren’t just white spots; they often blend into mid-tones. Use your kneaded eraser to lift graphite slowly and shape those reflective areas.
Practice Shading a Sphere
Before drawing the ball, try shading a plain sphere. It’s one of the best ways to train your eye to see value transitions and curvature. Once you master that, applying the same logic to a baseball becomes way easier.
Here’s a great tutorial on how to draw and shade a sphere.
Reference Is Everything
Don’t wing it.
Use real images of baseballs and bats. I’ve learned more from 15 minutes of studying a reference photo than an hour of guesswork. Look at how light interacts with the surface, where the darkest shadows fall, and how subtle the textures are.
Conclusion
Drawing a baseball bat and ball isn’t just about copying shapes. It’s about noticing the little things, the way the bat catches light along its curve, how the ball’s stitches wrap around the surface, and how a simple cast shadow can make everything feel grounded.
If your first attempt doesn’t look perfect, don’t sweat it. These objects are great practice for mastering form, texture, and value – skills that apply to almost everything you’ll draw.
Each time you go over your shading or redraw a stitch, you’re training your eye and your hand to work together better.
So, keep your pencils sharp, your expectations realistic, and your eraser close. And if all else fails, laugh at the weird shapes and try again.