If there’s one thing that used to intimidate me every time I sat down to draw, it was hair. It’s wild, unpredictable, and somehow always looks either too flat or too stringy if you’re not careful.
But over time, and after a lot of practice, frustration, and smudged paper, I figured out a process that works for me.
And today, I’m sharing it with you.
Whether you’re working in graphite or colored pencil, drawing realistic hair doesn’t require magic. It just takes patience, layering, and a good eye for values (yep, those lights, darks, and midtones matter).
I’ll walk you through my five go-to steps for both graphite and colored pencils. Let’s tackle this hairy situation together.
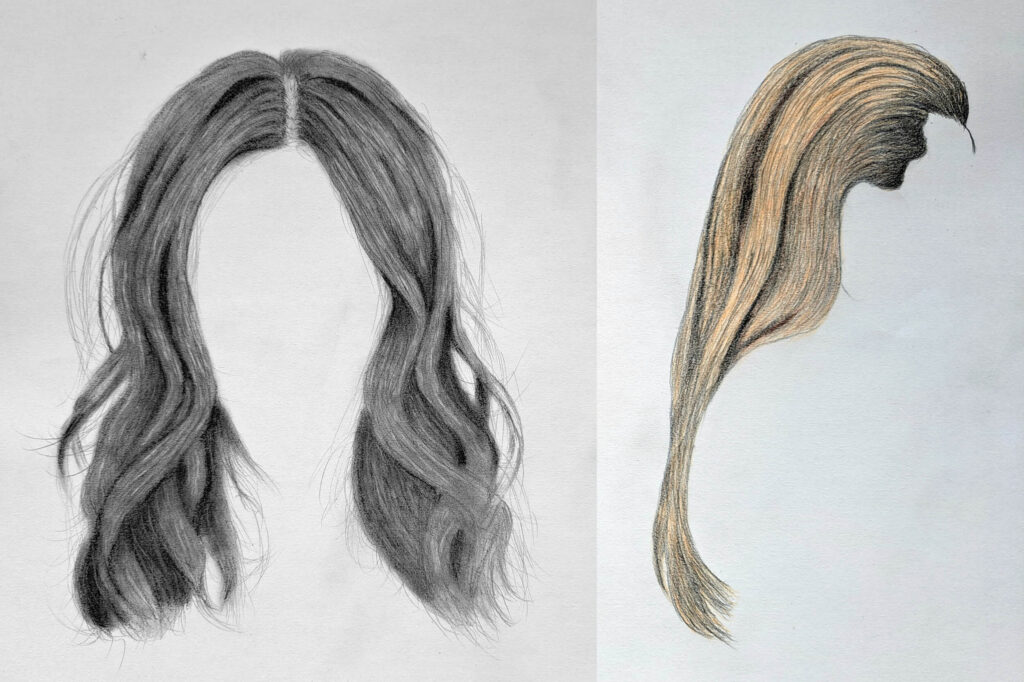
Drawing Realistic Hair with Graphite
Graphite is super forgiving, which is why it’s great for practicing hair texture and value. Plus, you don’t have to worry about color mixing; just focus on light and shadow.
1. Start with a Light Sketch
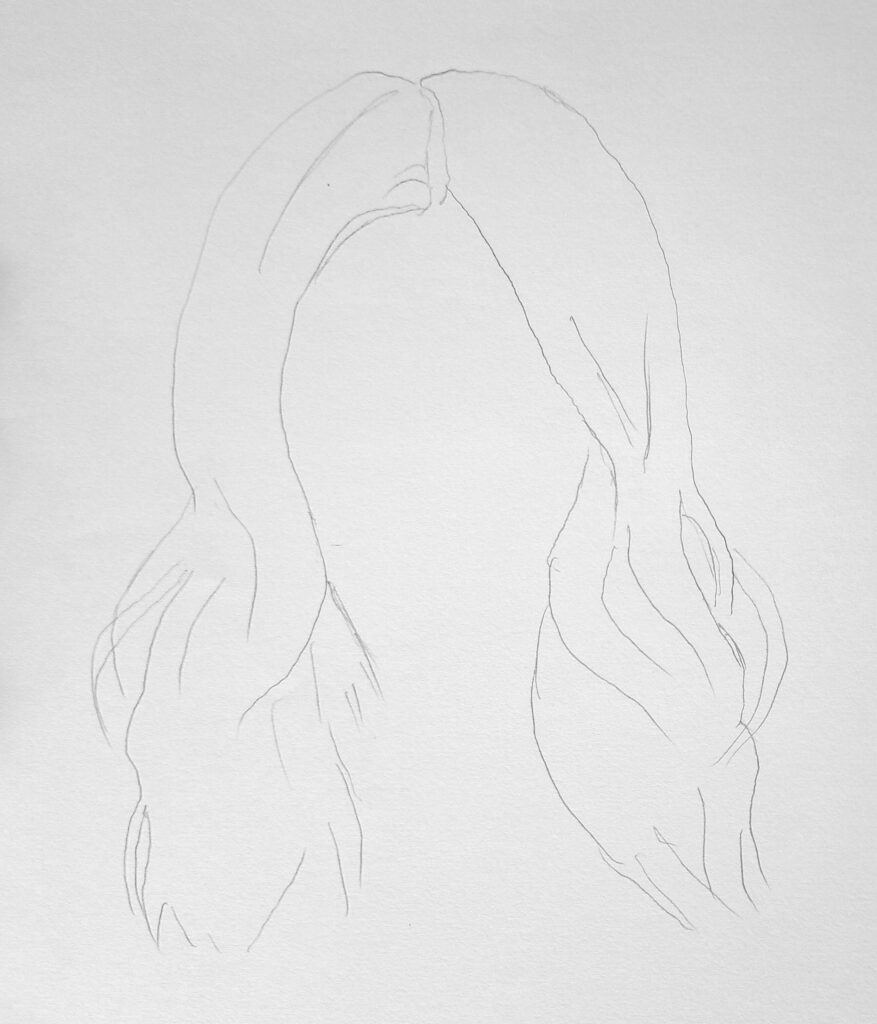
Begin with a super light outline of the hair’s flow and shape.
Don’t try to draw every strand; just map out the general direction. Think of it like plotting a roadmap for where the hair’s going to go.
I usually squint at my reference photo during this stage so I can focus on the big shapes, not the details. A soft 2H or HB pencil works great here; something that won’t leave harsh lines.
2. Build Basic Shading
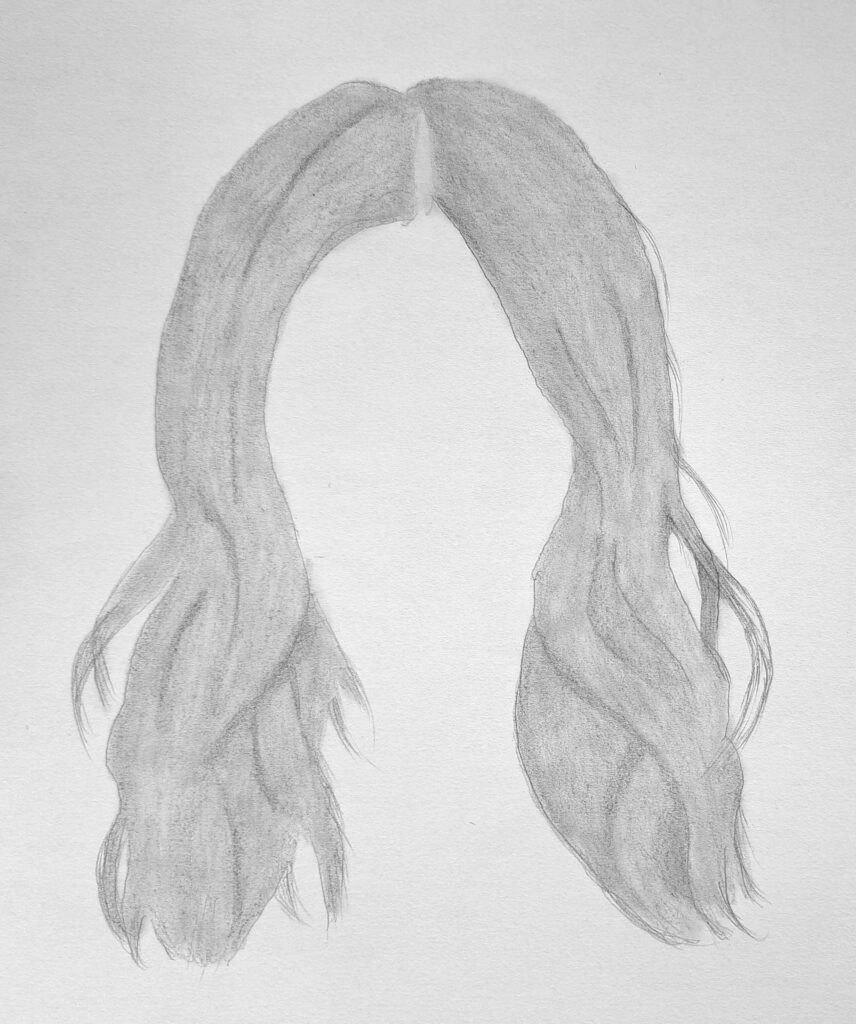
Once the sketch is down, start blocking in the darkest areas lightly. Look for where the hair clumps together or where shadows fall (behind the ears, under layers, at the roots).
Use small, controlled pencil strokes that follow the direction of the hair flow. And don’t press too hard; you’ll go darker later, but you can’t easily lift off graphite if it’s pressed into the paper.
The goal is to shade uniformly to give your drawing volume, and then blend with a Q-tip to smooth.
3. Deepen the Dark Values
Here’s where things start to pop. Switch to a softer pencil, like a 4B or 6B, and deepen those shadow areas.
The trick? Don’t just scribble. Instead, layer your strokes gradually and stay consistent with your pressure.
I like to use a blending stump (or even a cotton swab) to soften these dark sections slightly. It creates that silky look without making everything blurry.
Try to keep the darkest values right next to your lightest highlights for contrast; that’s what creates that realistic depth.
4. Add Midtones and Texture
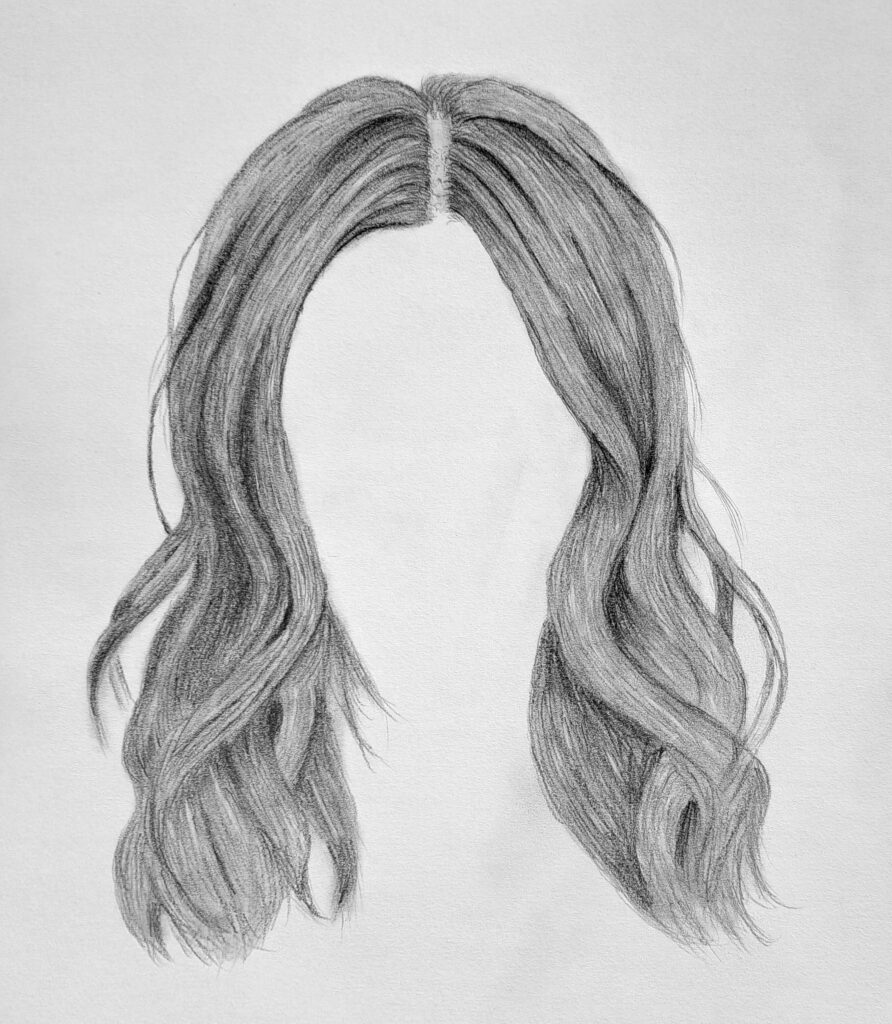
Midtones are the bridge between your shadows and highlights. I usually go back to an HB or 2B pencil and layer over the entire section of hair, being careful not to cover my highlights.
However, if you do cover the highlights, don’t freak. You can erase those later on with a kneadable eraser.
This is also when I start adding in texture: tiny flyaways, subtle changes in direction, a few wispy strands. Don’t overdo it, though.
Less is more when it comes to fine details.
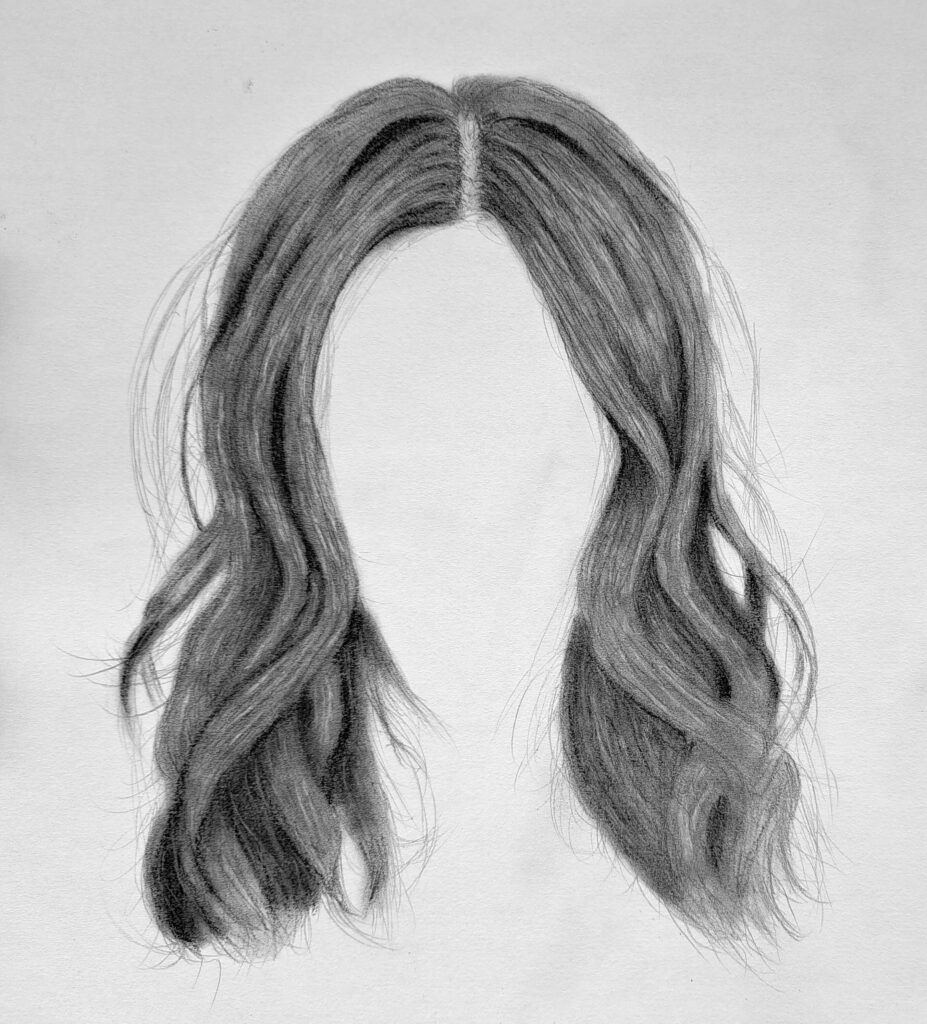
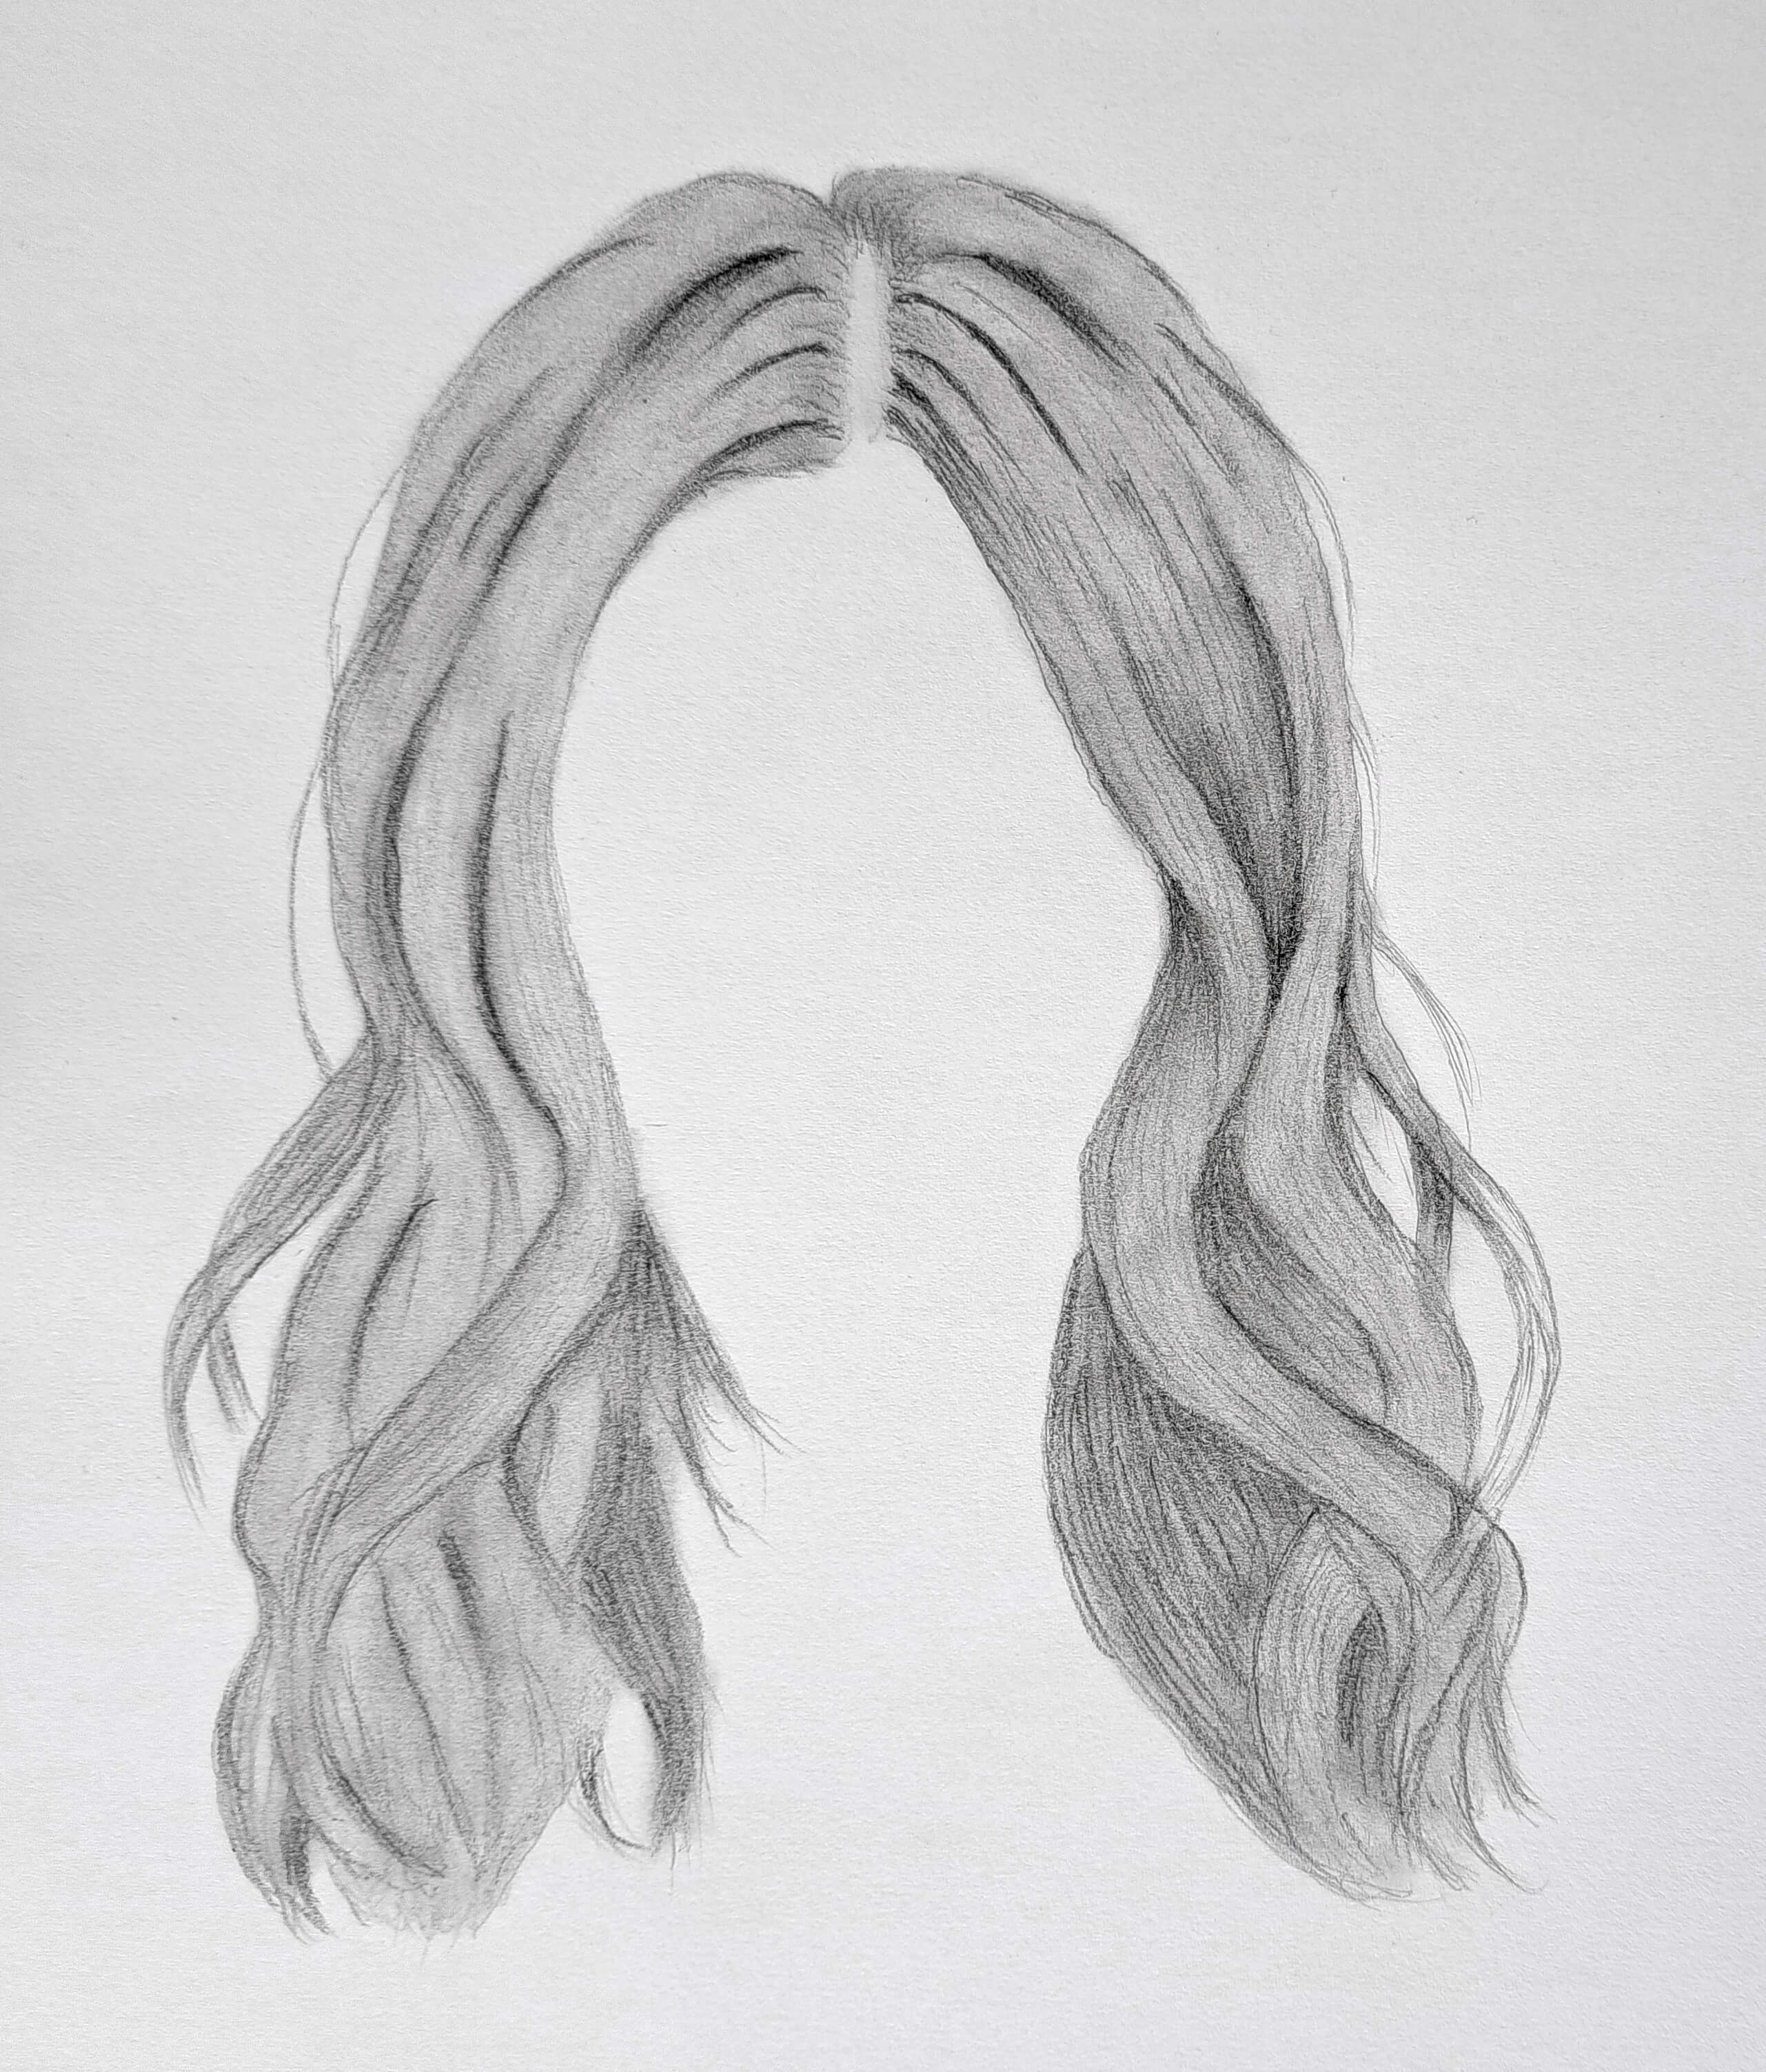
5. Refine and Highlight

For finishing touches, I use a kneaded eraser to lift out highlights. I press and twist it into tiny points to get those clean strands of light, especially where the hair curves or reflects the most.
Sometimes I even go back in with a mechanical pencil for crisp strands over dark areas. That contrast gives the hair movement and realism.
Pro Tip: Real hair isn’t perfect. Add slight irregularities, vary the width of strands, and resist the urge to make everything symmetrical. That messy bit? That’s probably the part that’ll make it feel the most real.
Drawing Realistic Hair with Colored Pencils

Colored pencils add a whole new layer of complexity (literally). But they also let you create beautiful, rich hair that feels alive. You’ll need a bit more patience here, but the payoff is worth it.
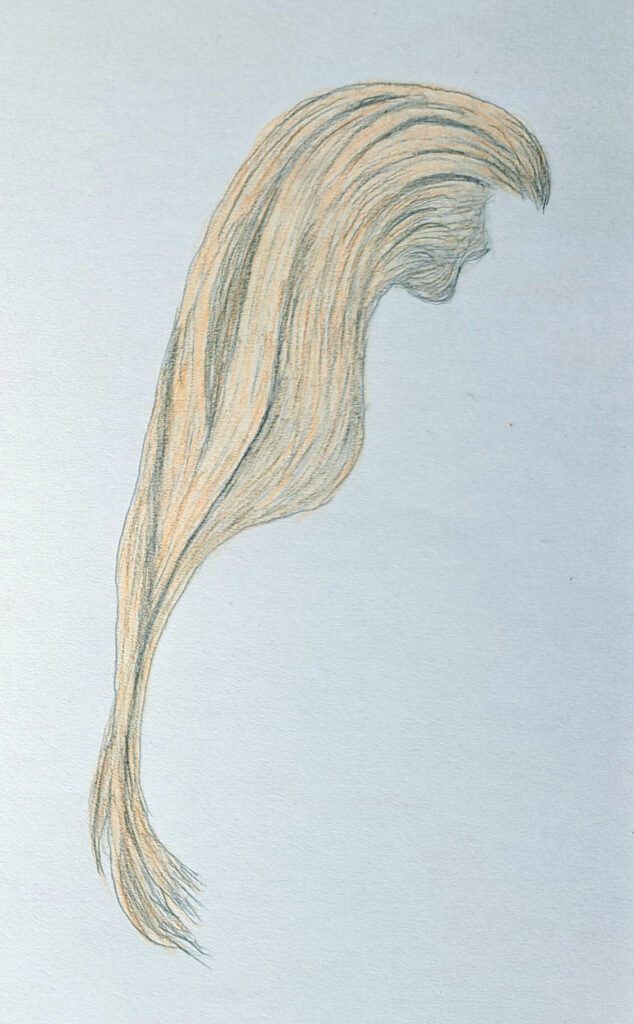
1. Sketch the Hair Flow
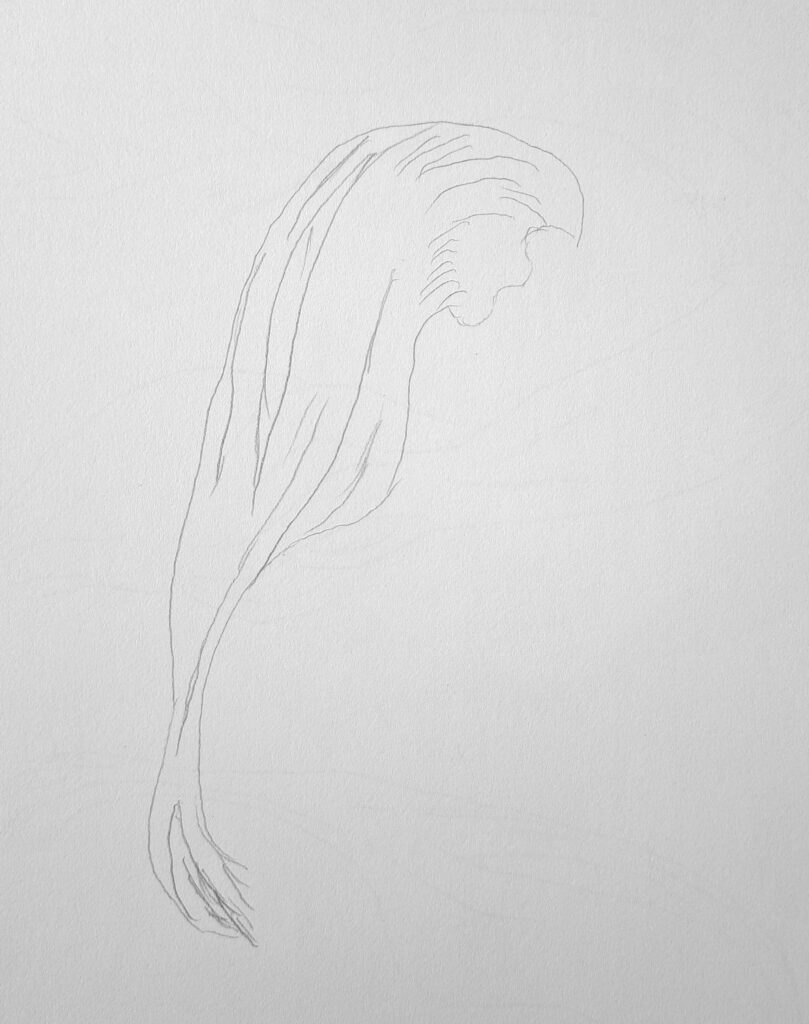
Just like with graphite, start with a light sketch of the hair’s shape and direction. Use a hard colored pencil like a light grey or peach (depending on hair color) to avoid harsh outlines that are hard to blend later.
Get the movement right early, and you’ll thank yourself later.
2. Lay down the Base Color(s)
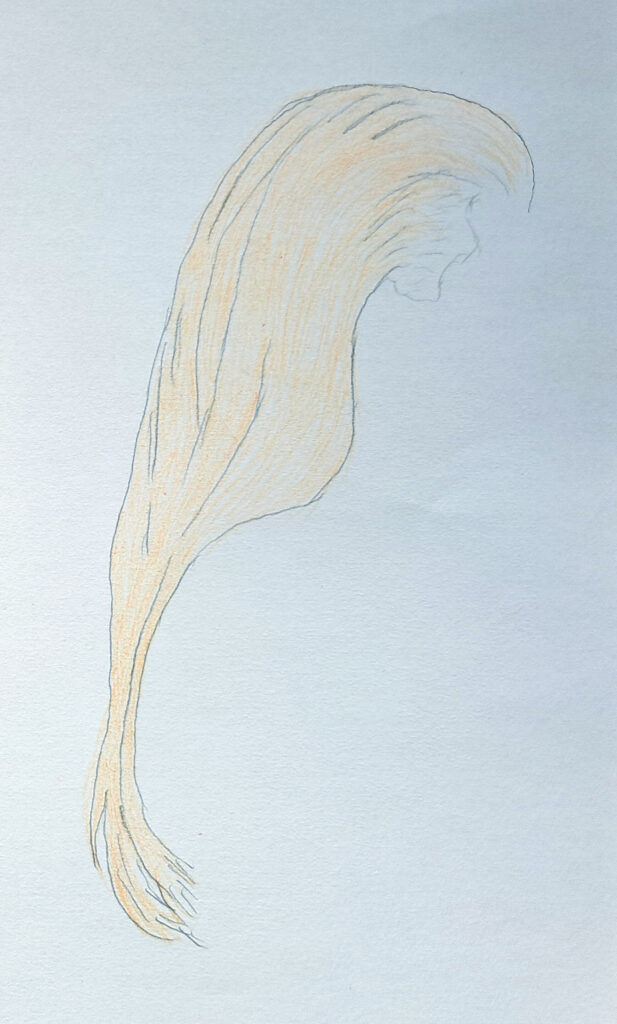
Pick 2–3 shades that match the hair’s undertones. For blonde hair, it might be cream, ochre, and light brown. For black hair, start with dark blue, grey, and black. Always work from light to dark.
Use light pressure and small strokes that follow the hair’s direction. I call this the “underpainting” stage; it sets the stage for everything to come.
Note: In this tutorial, I was limited to only 12 colored pencils, with one or two usable. Hence, my illustration may look a little different.
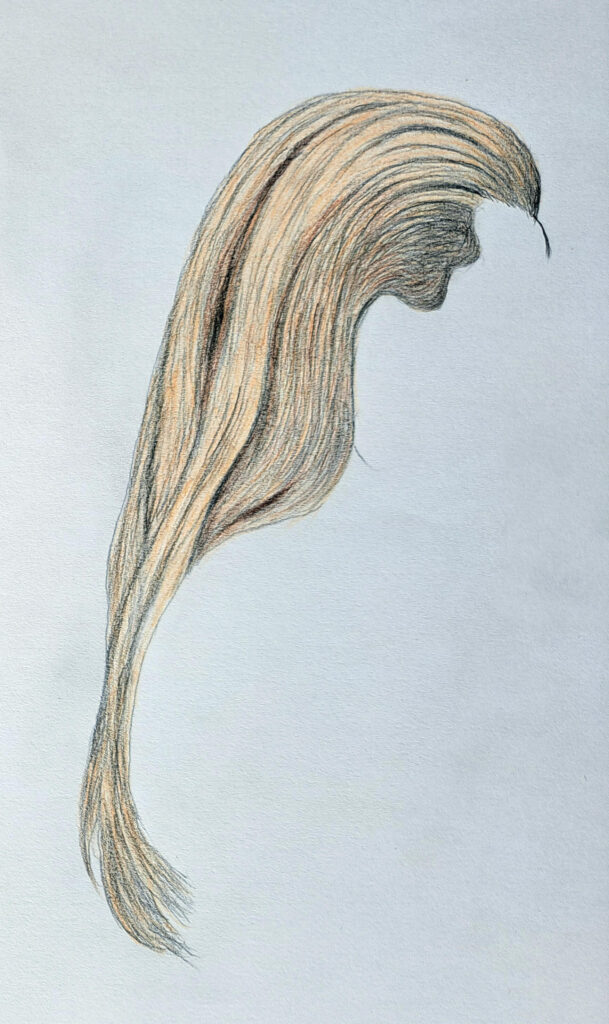
3. Add Depth with Darker Tones
Now it’s time to go darker. Choose richer shades to deepen your shadows; think burnt umber, sepia, or dark grey.
Use a layering technique to build up that depth without flattening the color.
The key is to keep your strokes in the direction of the hair flow and vary your pencil pressure. Lighter in the midtones, firmer in the shadows.
Fun fact: Studies on visual perception (like the ones by Margaret Livingstone at Harvard) show that our eyes are naturally drawn to edges and contrasts. That’s why nailing your shadows and highlights makes such a huge difference in realism.
4. Blend and Build Midtones
Here’s where your drawing really starts to come alive.
Add your midtones by layering more color in the areas between the darkest shadows and brightest highlights.
Use a burnishing pencil, colorless blender, or just layer lightly until the tones transition smoothly. Be careful not to wax up the paper too fast; you still want to add detail later.
I like to alternate colors in thin layers rather than pressing hard all at once. It gives a much richer finish.
5. Final Details and Highlights
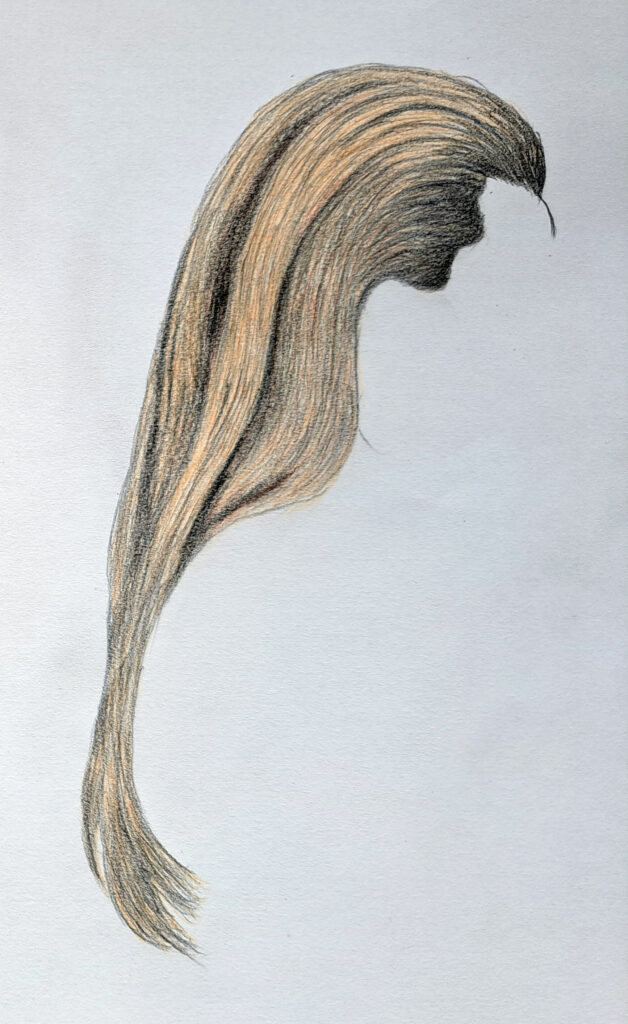
To finish, go back and redefine individual strands or tiny flyaways with a sharp pencil. This is your detail pass; think of it like sharpening a photo after editing.
For highlights, I either use a white colored pencil or gently lift color with a precision eraser. You can even scratch highlights into the waxy surface with a craft knife (very carefully!) if you’re feeling brave.
Pro Tip: Keep a scrap piece of paper under your drawing hand to avoid smudging. Colored pencil is notorious for turning your hard work into a blurry mess if you’re not careful.
Related Tutorials
If you want more tips on drawing faces, eyes, and portraits, check out;
- Learn How to Draw a Realistic Female Face (Front View)
- Tips for Drawing Realistic Female Eyes Using Graphite Pencils
- How to Draw a Smile with Teeth for Beginners
Alternatively, you can join my email community for updates. I share new tutorials and drawing challenges every week!
Conclusion
Drawing realistic hair isn’t about copying every strand.
Instead, it’s about understanding the flow, layering your values, and being patient.
Whether you’re using graphite or colored pencils, the same rules apply: light to dark, slow and steady, and always follow the hair’s movement.
And don’t beat yourself up if your first tries don’t look “perfect.” I’ve got sketchbooks full of hair that looks like straw, spaghetti, or worse. But each drawing taught me something.
You’ll get there too.
If you try these steps, I’d love to hear how it goes, or better yet, see your work!