
When it comes to drawing realistic portraits, it’s important to master major facial features such as the eyes, mouth, ears, and now, the nose.
In today’s tutorial, I will show you my two methods for drawing a realistic nose from the front view.
The good news is that anyone can use them to produce amazing results. Therefore, it doesn’t matter whether you’re a complete beginner or a pro.
Let’s begin:
Method 1: How to Draw a Nose using 3-circles
Step 1 – Draw three circles
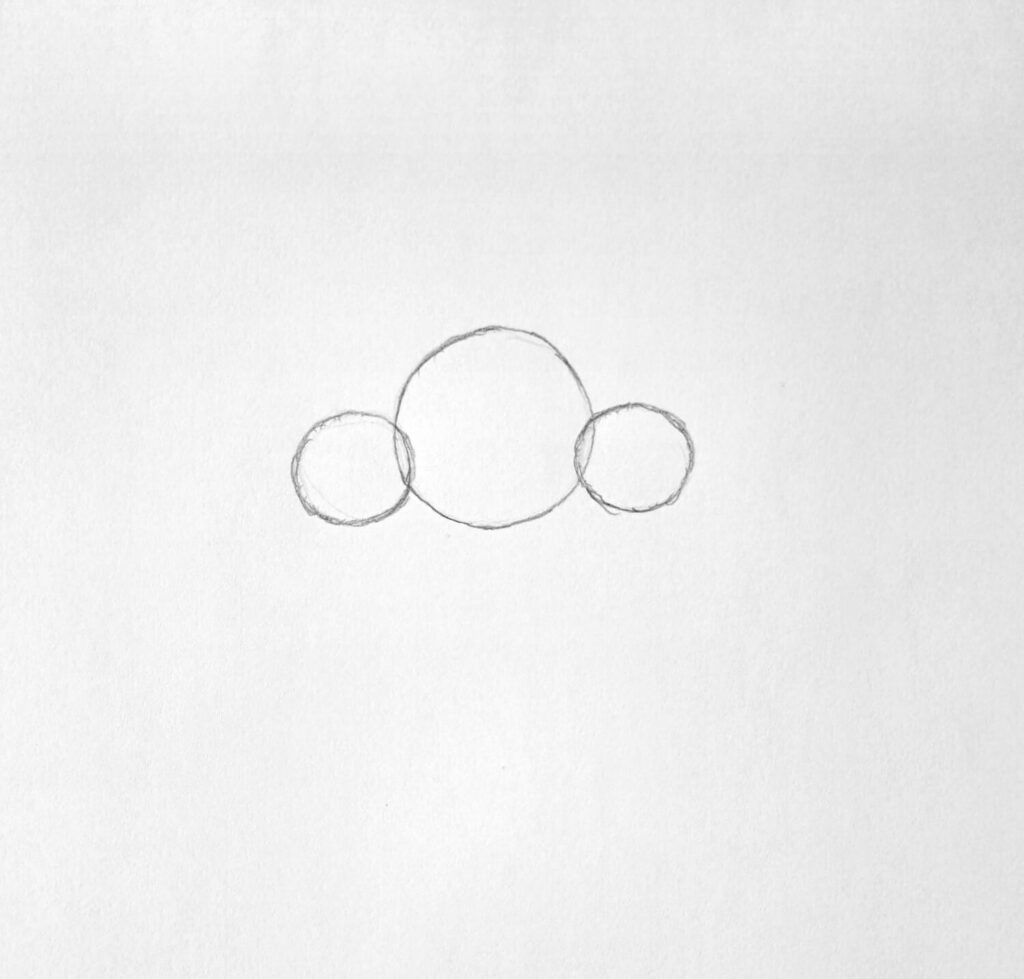
Draw one large circle at the center of the paper and two equal smaller circles on both sides as illustrated above. Make sure all the circles are on the same level. You can draw a straight line so that all the circles sit on the same level.
Preferably, use an H pencil so that they’re light but don’t have to be perfect.
Step 2 – Sketch the shape of the nose
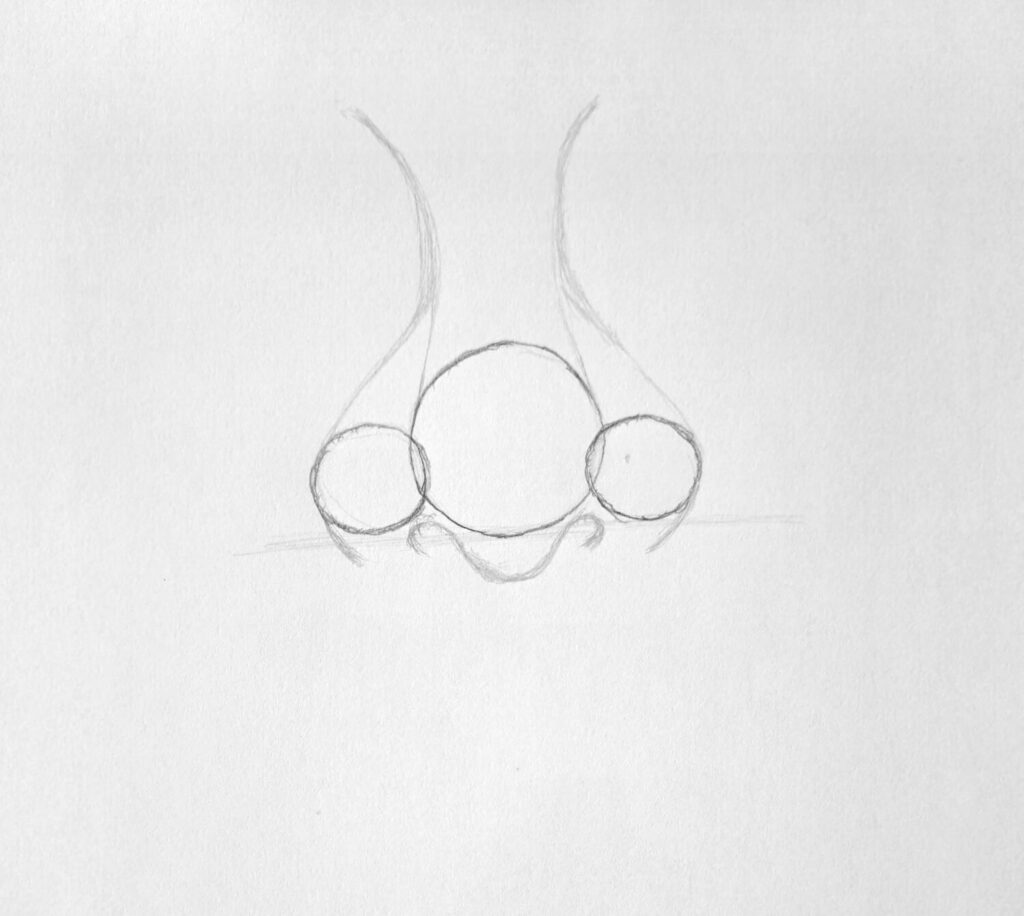
The nostrils will go near where the two small circles meet the large one. Sketch a slight protrusion for the tip of the nose just below the middle circle, and at the top, extend with two lines to form the bridge of the nose.
Sketch two curves on both sides to join the bridge as drawn above.
Step 3 – Complete the basic sketch
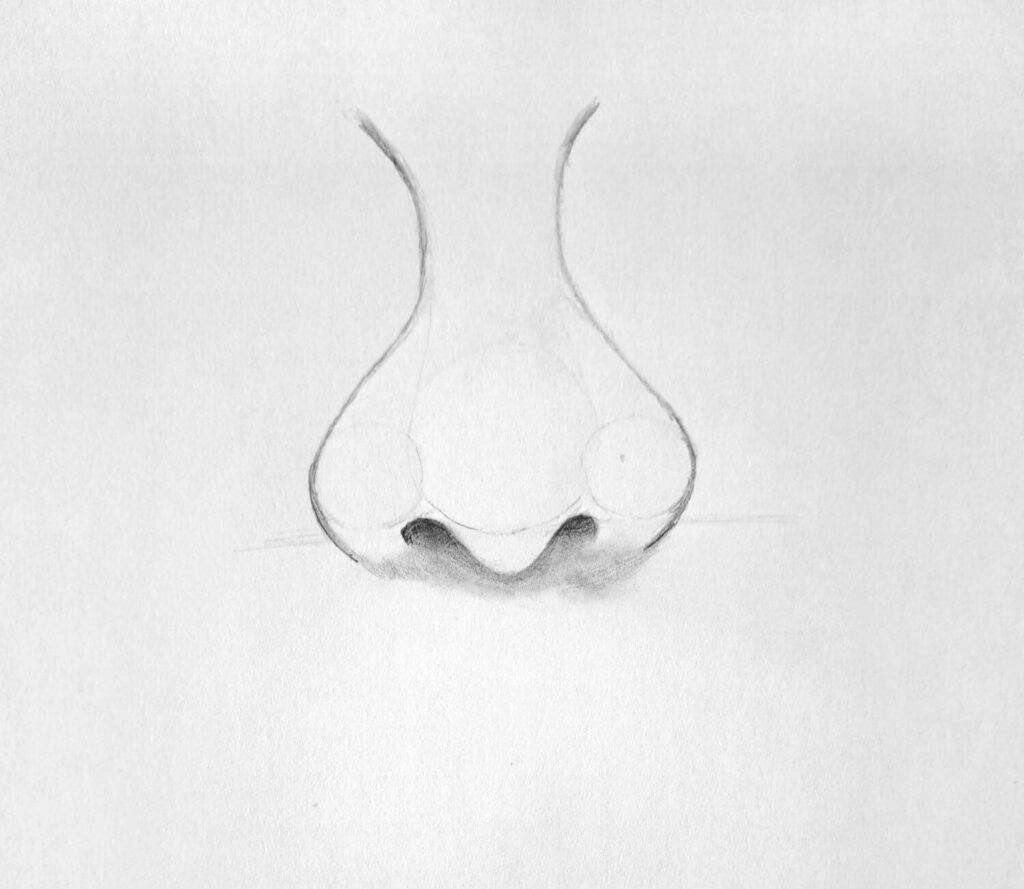
At this point, we no longer need the circles. You have two options: either to leave them and instead conceal them by shading over or erase them altogether. I prefer the former for a neat and clean look.
Then use an HB pencil to shade the nostrils as demonstrated above. Make sure there’s a slight cast shadow just below the nostrils. You can progress with shading in the next step or stop here if you’re satisfied with your sketch.
Step 4 – Basic shading
The goal of this step is to give the sketch volume and render the whole shape to create an illusion of a solid object. It’s also meant to create the midtones that we’ll subsequently build upon.
Use a light pencil and uniformly shade the whole nose. Depending on your chosen light source, you may want to shade one side slightly darker. Again, you may need to shade even light at the tip of the nose where there’s a highlight.
Study my drawing and see if you can notice those concepts.
Step 5 – Shadows and Dark Values
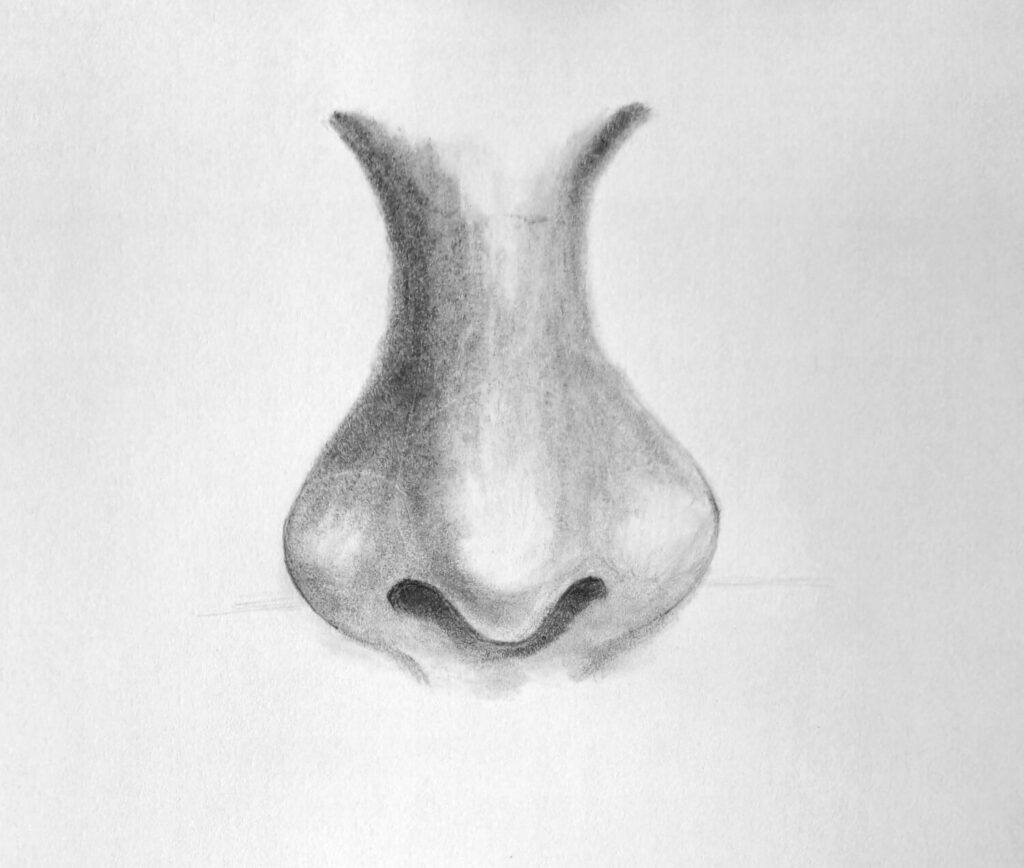
Remember, when it comes to realistic shading, it’s better to start light and increase the dark values in subsequent layers. Therefore, use a dark pencil, preferably 2B, to shade the nostrils once more to darken them.
Then, using the same pencil, continue shading the dark values on the side that receives the least light. Don’t forget to blend afterwards so that the drawing is smooth and uniform.
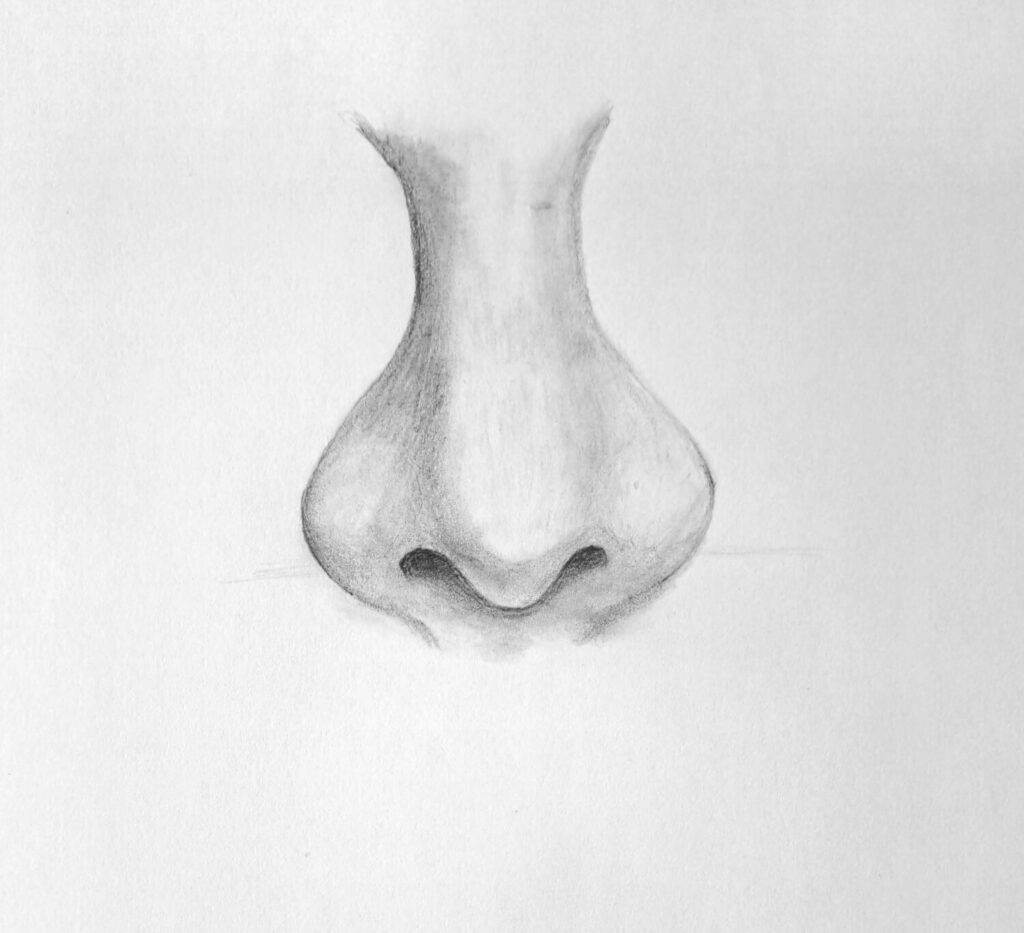
Step 6 – Complete the Drawing (Contrast and Highlight)
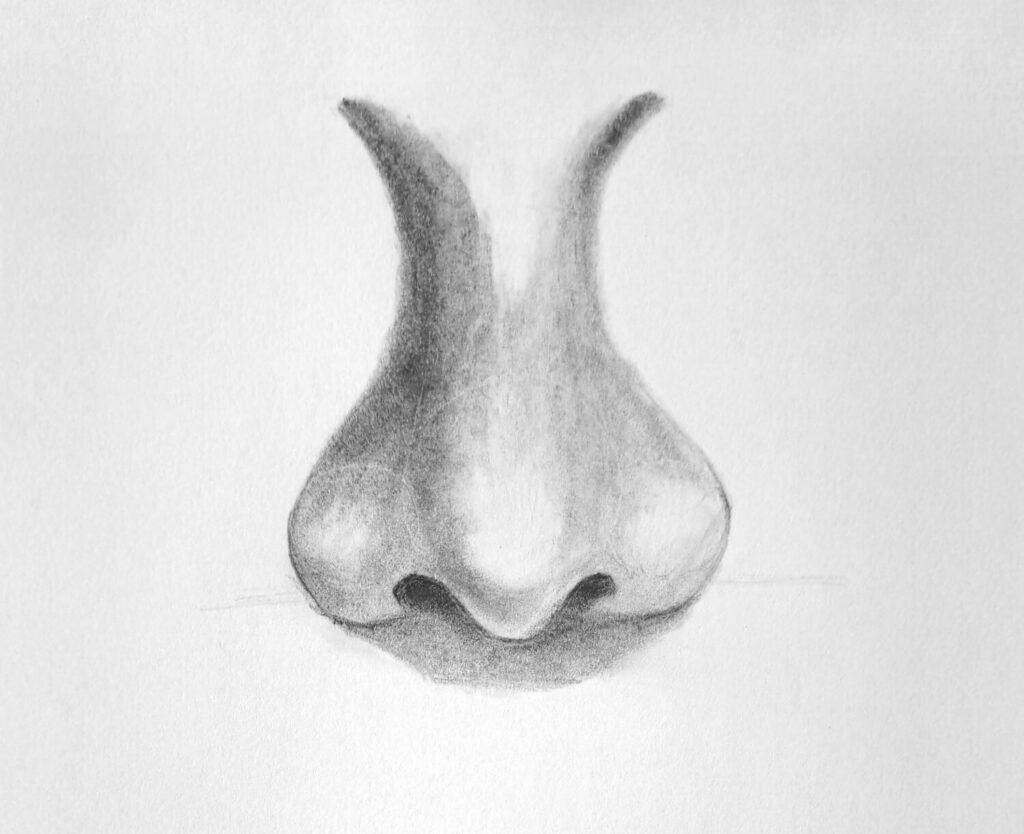
To complete the drawing, get a kneadable eraser and dab off extra graphite around the tip of the nose to brighten the highlight. Do the same around the bridge.
By so doing, you’re creating enough contrast between light and dark values, which makes the artwork ‘pop.’
Method 2: How to Draw a Nose by Shading
This is probably one of the easiest methods for drawing a realistic nose. I taught my daughter one afternoon, and she got hooked.
Within minutes, she was drawing and rendering some very believable pieces. It involves just three steps, but instead of pencils, you’ll need the graphite powder, a Q-tip, and an eraser.
If you don’t have ready-made graphite powder, you can scrape it from your pencil using the artist’s knife or a blade. Of course, you’ll also need a pencil, but we won’t be using it much. So, here we go!
Step 1: Rough Shading
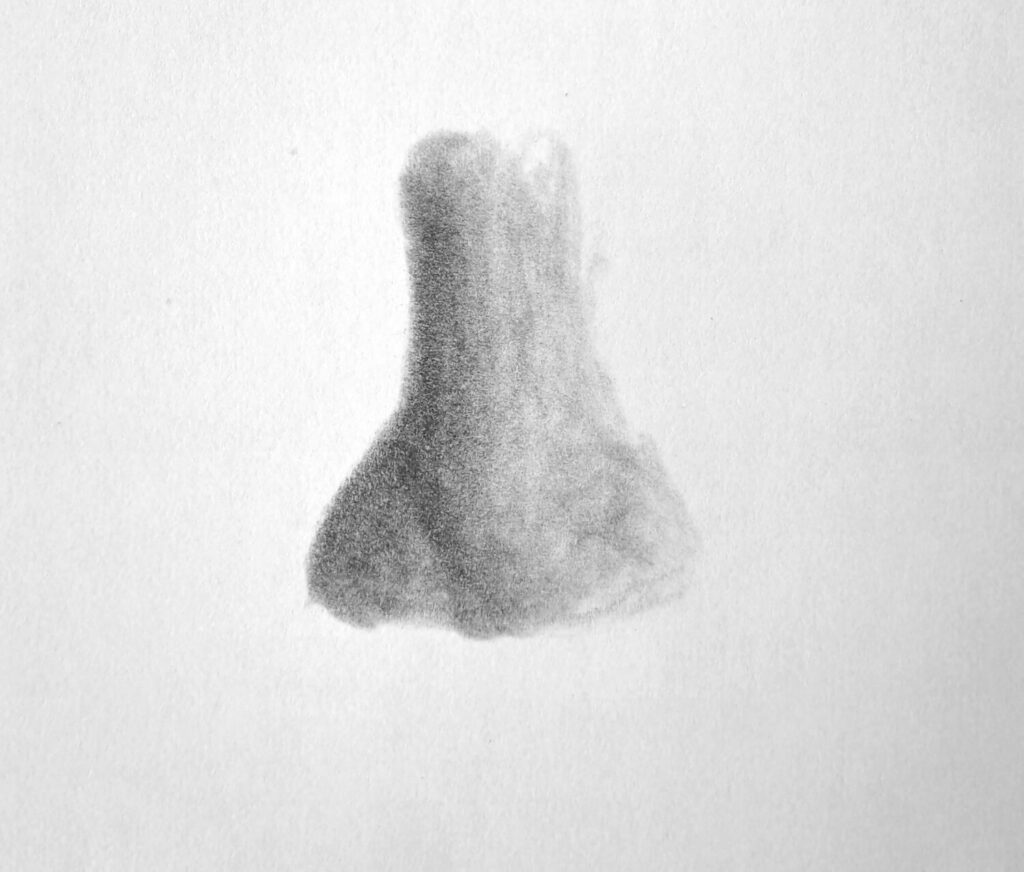
Dip your Q-tip in graphite powder and just shade something that looks like a nose. Don’t worry about how it really looks – just have fun with it.
It might also help to shade one side darker than the other. If you’re unsure, just study my drawing above and try to replicate it.
Step 2: Shaping the Nose and Nostrils

Use the pencil to shade the nostrils darker than the rest of the nose. You can also try to shape the nose slightly at this point (by shading).
Continue using the Q-tip to distribute the graphite uniformly.
Step 3: Highlight the Nose
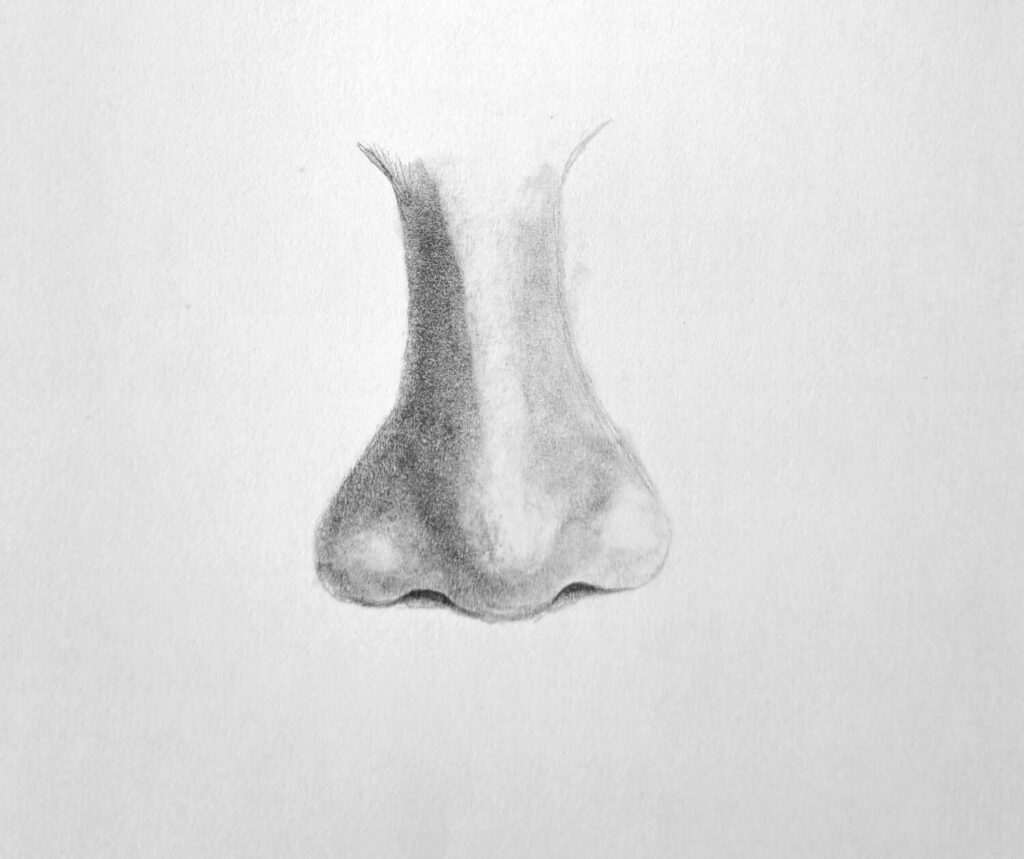
Now, the last step involves creating contrast by factoring in light. After deciding on your light source, use an eraser to dab off graphite from areas that receive and reflect light. Think of the tip of the nose, the bridge, and the side edges.
You can also darken the nostrils with a pencil and shade a little bit below for the cast shadow.
And just like that, you have a perfect nose drawing without having to sketch the outline first.
If you want to continue practicing drawing facial features, here are my most recommended tutorials:
- Steps to Draw an Ear
- How to Draw Realistic Front-view Lips
- How to Draw a Realistic Female Face
- Drawing Realistic Female Eyes
Conclusion
The human nose seems very easy to draw, but without the right technique, you’d be surprised how challenging it can get. However, the two methods you’ve learnt will help you to keep improving.
I hope you’ve enjoyed today’s tutorial. If you have, consider sharing with others, especially beginners.
I appreciate you!