I’m a big fan of apples.
Especially when I’m from the gym, I know they’re great energizers and nutritional, too. While I can’t say much about that, I can say for a fact that they taste great.
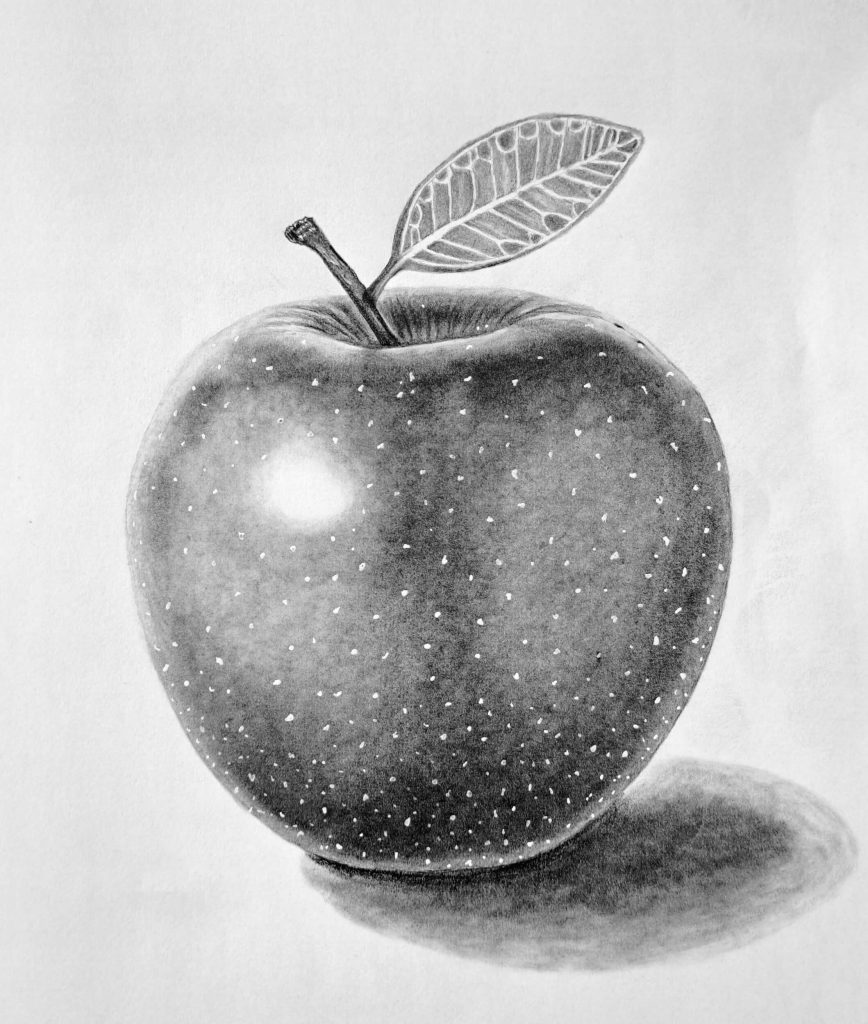
Besides, they make excellent drawing subjects. In today’s tutorial, I will share how to draw an apple as realistic as possible.
But before attempting this, you need some basics, including how to draw and shade a sphere. It will be so much easier for you that way. However, it’s not mandatory; you can follow the steps I’ve shared and still create a fantastic piece.
6 Easy Steps for Drawing an Apple Using Graphite Pencils
General sketch of the apple fruit
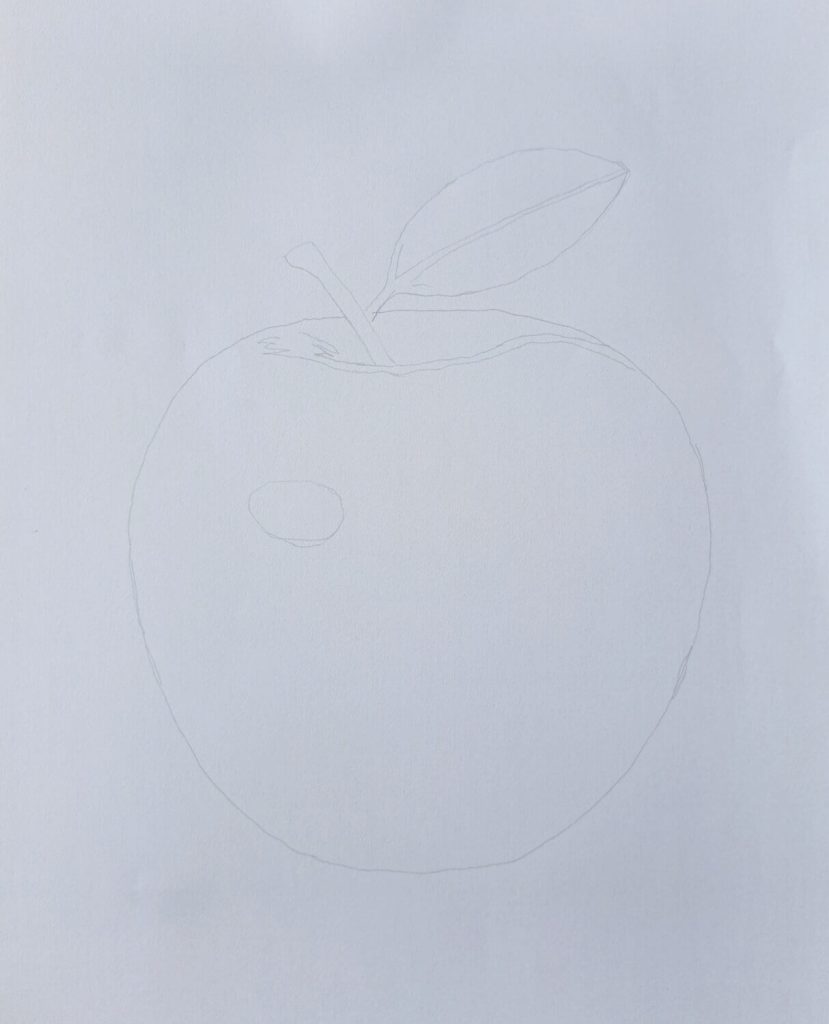
Sketch the apple’s general shape as shown on my diagram. Start by drawing a light, rounded shape—almost a circle, but slightly wider at the top and a bit flatter on the bottom using H2 or H pencil.
Next, we need to sketch more details to make our basic apple shape believable. Therefore, let’s start by sketching a small dent at the top for the apple’s stem area. This dent will also serve as our top highlight later on.
Then, draw a short, thin stalk (pedicel) from the apple’s top center adjacent to the highlight dent. Although optional, sketch a small leaf attached to the stalk. Rarely will a harvested apple have those leaves anyway.
Lastly, sketch a small circle on the left side of the apple – indicating reflected light. Again, depending on your light source, this could be anywhere, not necessarily on the left.
Basic shading of the apple
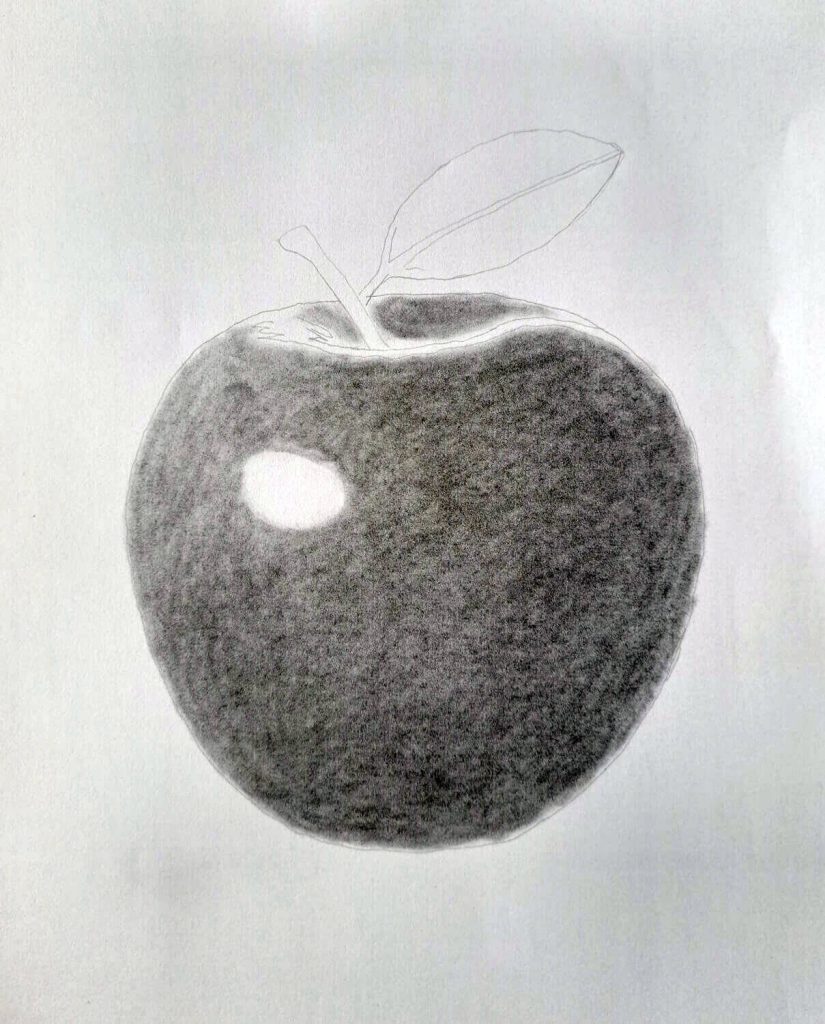
To give our drawing volume, we need to shade the entire surface except the designated highlight areas uniformly. I used an HB pencil to do the shading and blended it with a Q-tip. Go ahead and do the same.
Notice that I’ve left out the pedicel and the leaf. Let’s do that next.
Shading the fruit stalk (pedicel)
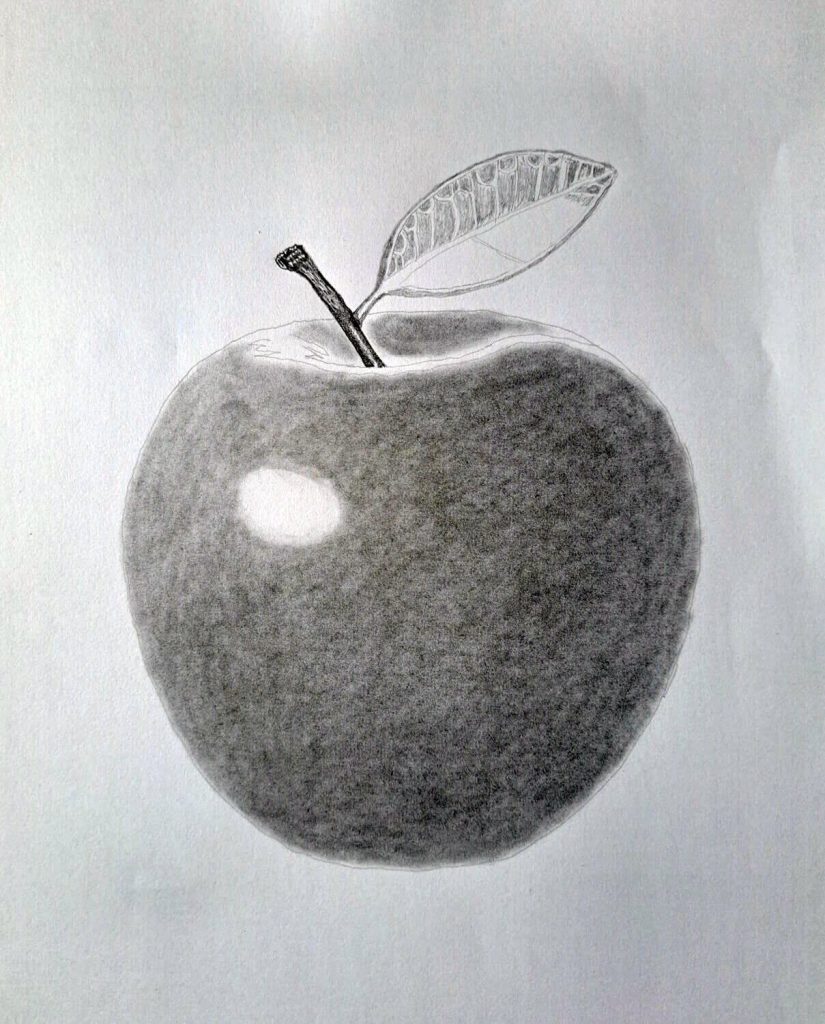
I wanted us to shade the fruit stalk (stem) separately as it requires a different approach. I’ll also explain briefly how you can shade the leaf.
But first, let’s start with the stem.
Use a dark and soft graphite pencil, preferably 6B, to shade the stem. To do this, create dark marks along the edges and shade lighter as you approach the middle from both sides. This will create a 3-D-like stem.
There are two approaches to the leaf. The first one is to uniformly shade the entire leaf using an HB pencil. Then, using a kneadable eraser – kneaded to a point, create small marks to represent the midrib and other veins.
Alternatively, sketch the midrib and veins and shade the remaining parts.
Advanced shading
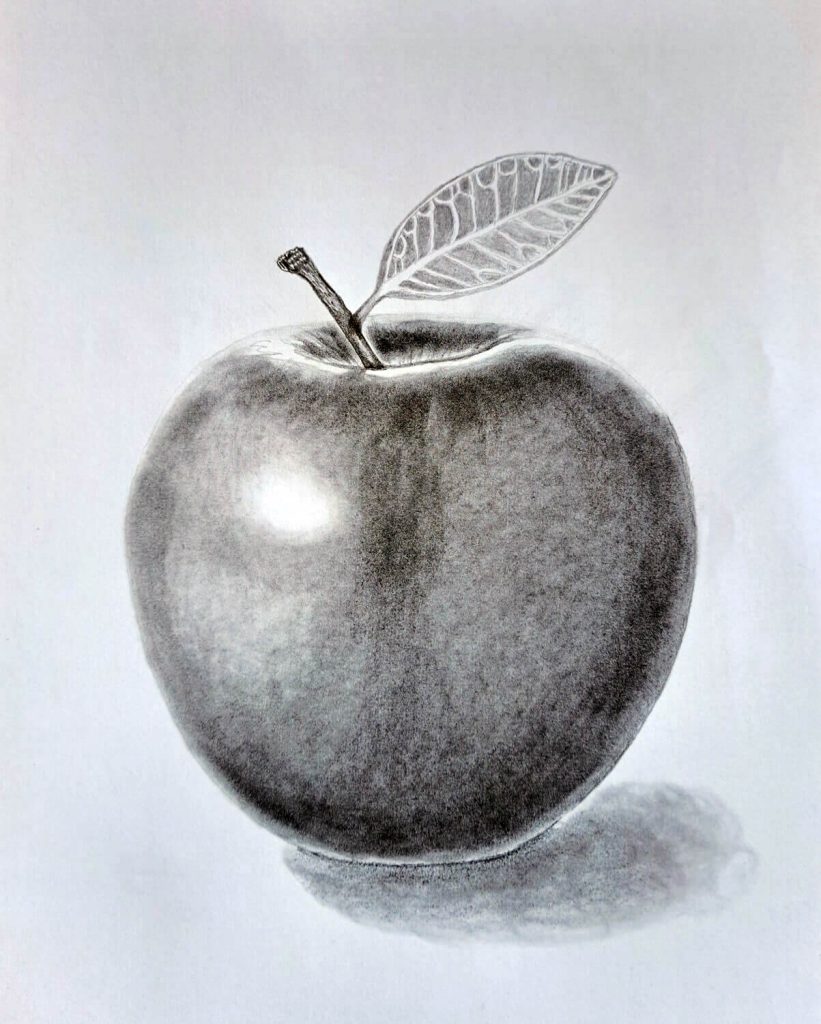
In my opinion, this is the exciting part. This is where we can make our drawings pop’ from the paper or whatever canvas you’re working on.
And it all boils down to understanding how light interacts with objects.
That said, get a 6B graphite pencil and shade darker all the areas perceived far from the eye, such as the base, sides, bumpy surface, and top of the apple, as those areas tend to curve away from your eyes.
Similarly, use a kneadable eraser to brighten areas perceived to be near your eye as they receive more of the light.
Creating the contrast
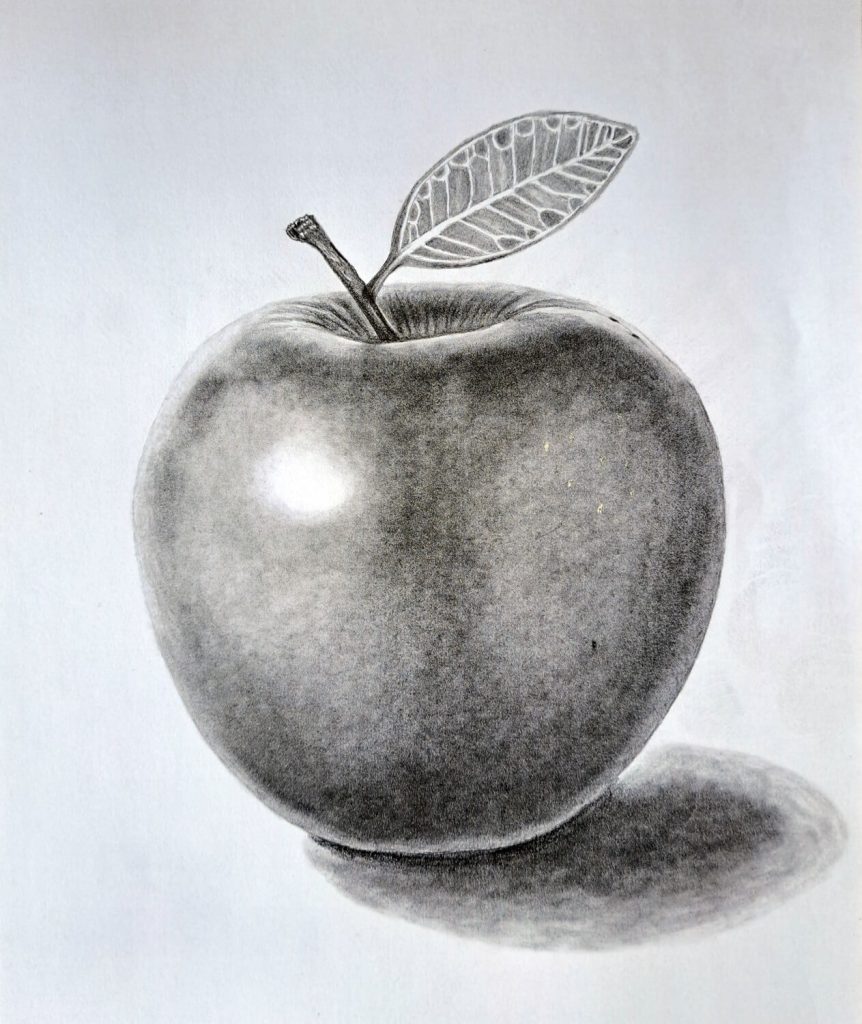
I always like to wind up my drawings by ensuring that they are crisp and sharp. While a blurry image may look seamless, it doesn’t have the same appeal visually.
For starters, you need to spend some time working on the shadow, get a well-sharpened pencil, and touch up the edges to ensure they aren’t bumpy or drawn outside the paper.
Ensure that there’s a good transition between the highlights and the shadows.
Final touches – Drawing the lenticels
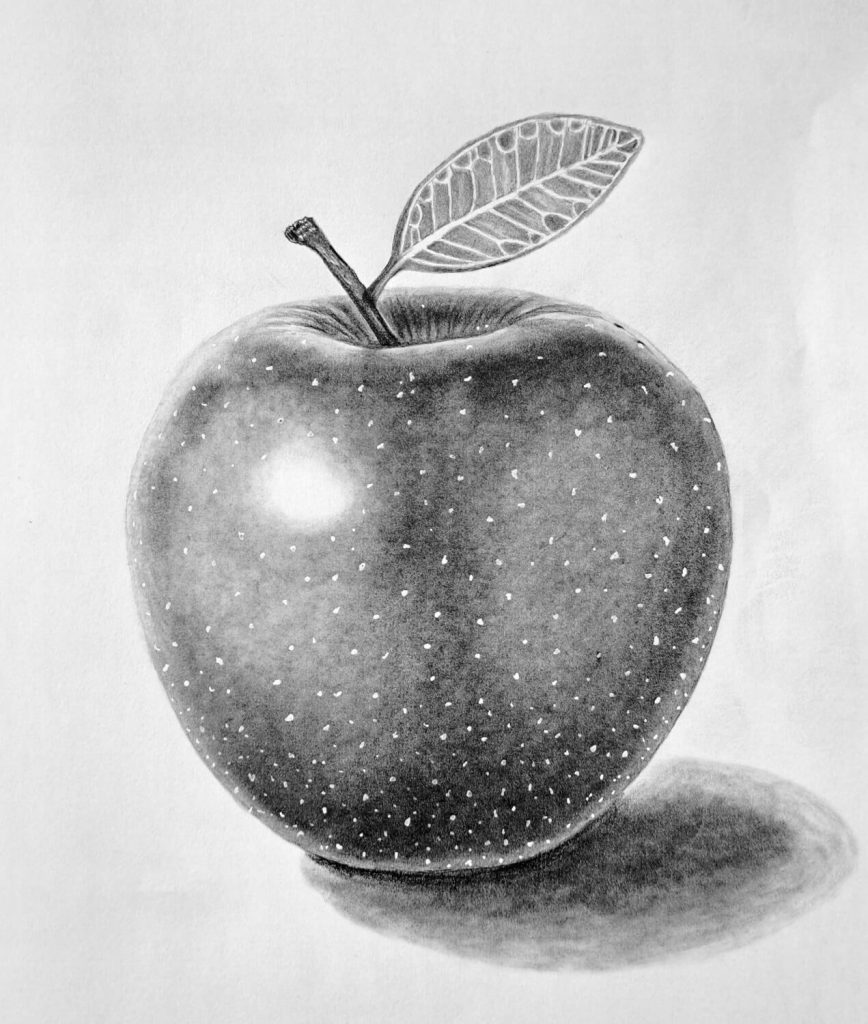
You’ve done so well up to this point.
While your apple fruit drawing looks as realistic as the original one, we can make it better. Call it icing on the cake.
Use a white Sakura Gelly roll to draw the apple’s lenticels. These are tiny spores often found on the surface of most fruits, including apples.
Here more tutorials on drawing fruits:
Conclusion
We’re done!
I hope you’ve enjoyed this tutorial and that it has helped you to learn how to draw an apple. If so, consider sharing it with your friends. I’d also like to see what you’ve created.
You can email me your artwork or share it on IG, tag me, and I’ll give you my feedback.

