When it comes to drawing animals, understanding the subject is more important than anything. Besides our usual home pets, a few other animals can come close to the horse.
They’re fascinating and stunningly elegant, which makes for a great portrait. Therefore, if you’re looking for summer art projects, consider drawing a horse as one of the many ideas.
With the help of this tutorial, you’ll produce a masterpiece in no time.
Observation to identify the foreground shape(s)
One of the fundamental aspects of drawing is mentally deconstructing the image you’re drawing into easily identifiable shapes. This skill is honed through dedicated study and meticulous observation of your reference.
Before drawing, I spend 30 minutes to an hour just looking at my reference photo.
Then, I focus on the most significant foreground part (in this case, the horse’s head) and determine the overall shape. I’ll keep repeating until I’ve stripped the reference to only shapes, as illustrated below:

Proportionality and measurement
If you want to draw a true representation of an image, you have to pay attention to proportionality and measurements. In other words, the distance between one part and the next. For instance, where the ears are in relation to the mouth, nose, eyes, and all other minor details.
Since it’s practically impossible or tedious to measure with a ruler or any measuring device, your best bet is to estimate as accurately as humanly possible.
First, you need a reference point, and everything else should be estimated based on that. Use the pencil to measure different aspects of your reference image and reproduce them on your drawing medium.
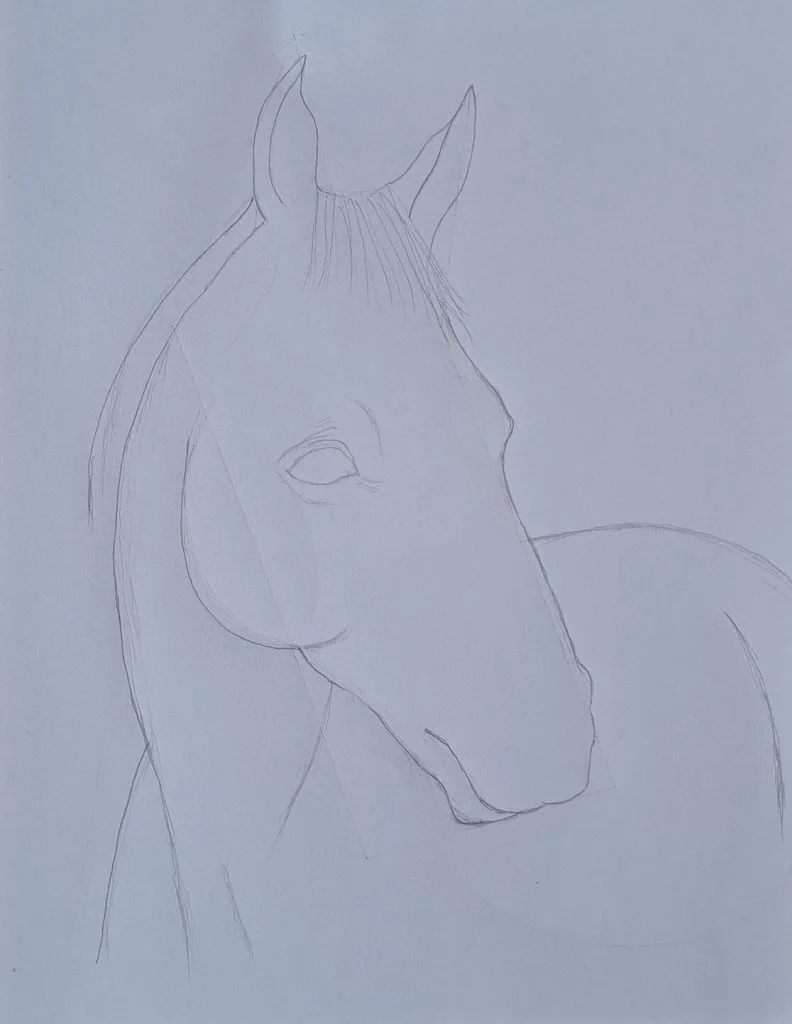
Rough sketch
At this point, we should be comfortable enough to begin sketching the horse. We’ve determined what goes where, the proportion, and the distance from each other.

Cleaning up plus final sketching
At this point, we have an idea of how the final sketch should look like. We can begin the final construction drawing with more confidence.
Once satisfied with the results, erase any unnecessary shapes and lines to clean up the drawing as illustrated below.
Sketching the details
As they always say, the devil is in the details.
While we’ve been working on the general outline, it’s time to sketch the necessary details to give the horse its identity.
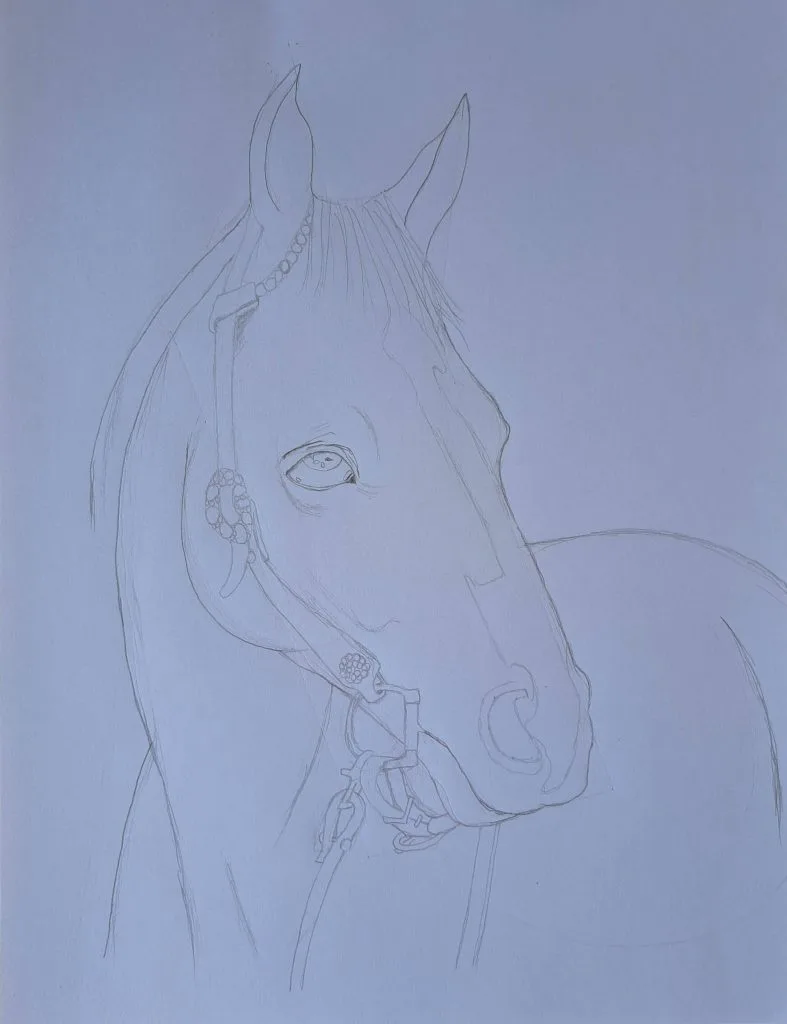
Drawing the horse’s eye
For the eyes, pay attention to the light reflection, core shadows, and the shape of the eye outline – which resembles an oval.
Besides, observe its location on the head—it is slightly above the center and almost in the middle axis from right to left. Because the horse is facing to the sides, only one eye is visible, but estimate the location of the hidden eye and draw the bump as well.
Nose and mouth
The nose resembles an inverted apostrophe, but there’s not much to the mouth; rather, it is a curved line. We’ll define it more prominently when shading.
While drawing the horse’s nose, pay attention to the white strip between the two noses and sketch it as well.
Mane and Forelock
Make a simple sketch of the mane using a well-sharpened or mechanical pencil with a thin lead. Observe the length and position of the mane and sketch accordingly.
Drawing bridle and the reins
Sketch the bridle that comprises the straps enclosing the head and cheeks, a pair of reins (in our case, only one side is visible), snaffle, and curb bits.
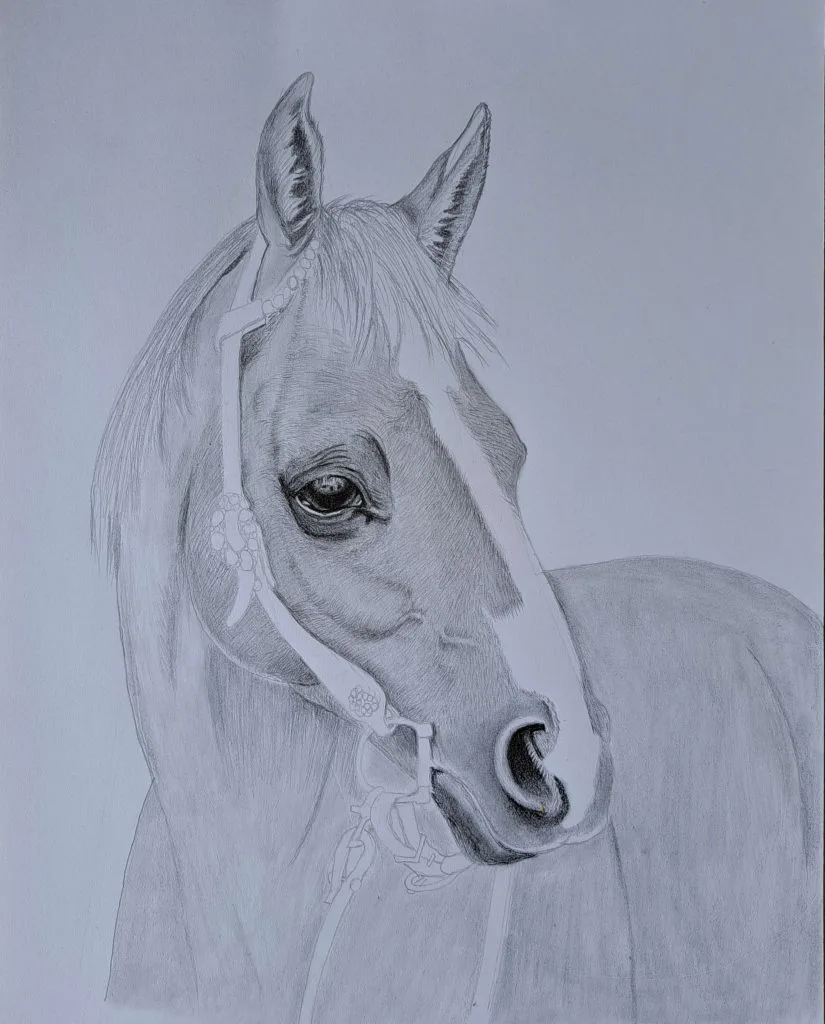
At this point, you should have a complete sketch.
Shading the details
If you’ve got to this point, congratulations!
Let’s transform our 2-D sketch into something more realistic with depth and volume. We’ll achieve this by shading with varying graphite scales.
We’ll use HB, 4B, 6B, and 8B pencils.
Shading the eyes

I always like to start by shading the darkest parts and gradually moving to mid-tones and highlights.
Shading the nose
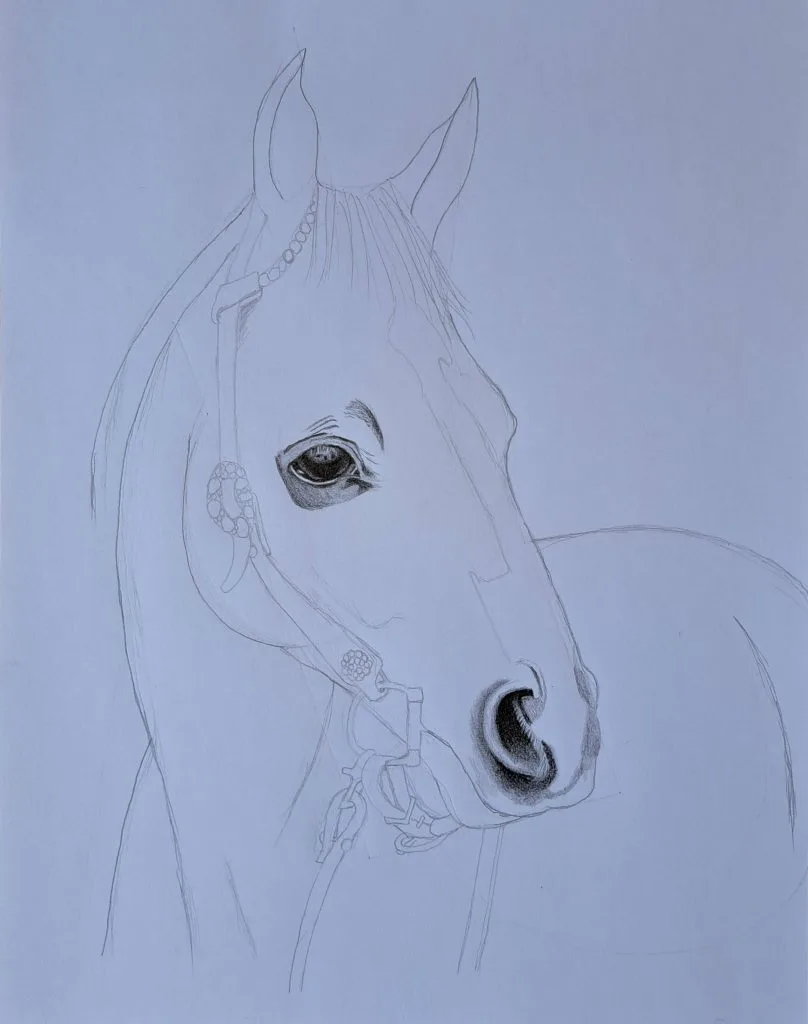
The nostril is darker at the top and brightens further down to create an illusion of depth. There’s also a ridge around the nose that bulges towards the viewer—shade it more lightly, preferably using an H-pencil.
Shading the ears

I’ve used a 0.5mm mechanical pencil to shade hair around the ears. At the center, I wanted it darker, implying depth, so I shaded the area using an HB pencil.
Lightly shading the mane.

Shade the mane with long pencil strokes before blending to achieve a softer feel. Once done, do the same for the forelock, which is the long hair between the ears that hangs down over the forehead.
Shading the mouth, face, and veins
Shading the mouth is pretty straightforward. For the facial coat of hair, shade it using short, tiny strokes using a mechanical pencil.
You can further create an impression of facial veins by alternating value scales, as illustrated below.
Shading the rest of the horse’s body

When shading, the general rule of thumb is to do an initial shade with a light pencil (H-range) uniformly across the entire drawing. Blend to distribute the graphite uniformly before adding other details like creases.
Since we’ve discussed enough about shading, repeat those steps and strategies to shade the whole body. Remember to use very short strokes.
Lastly, shade in the bridle and the reins.

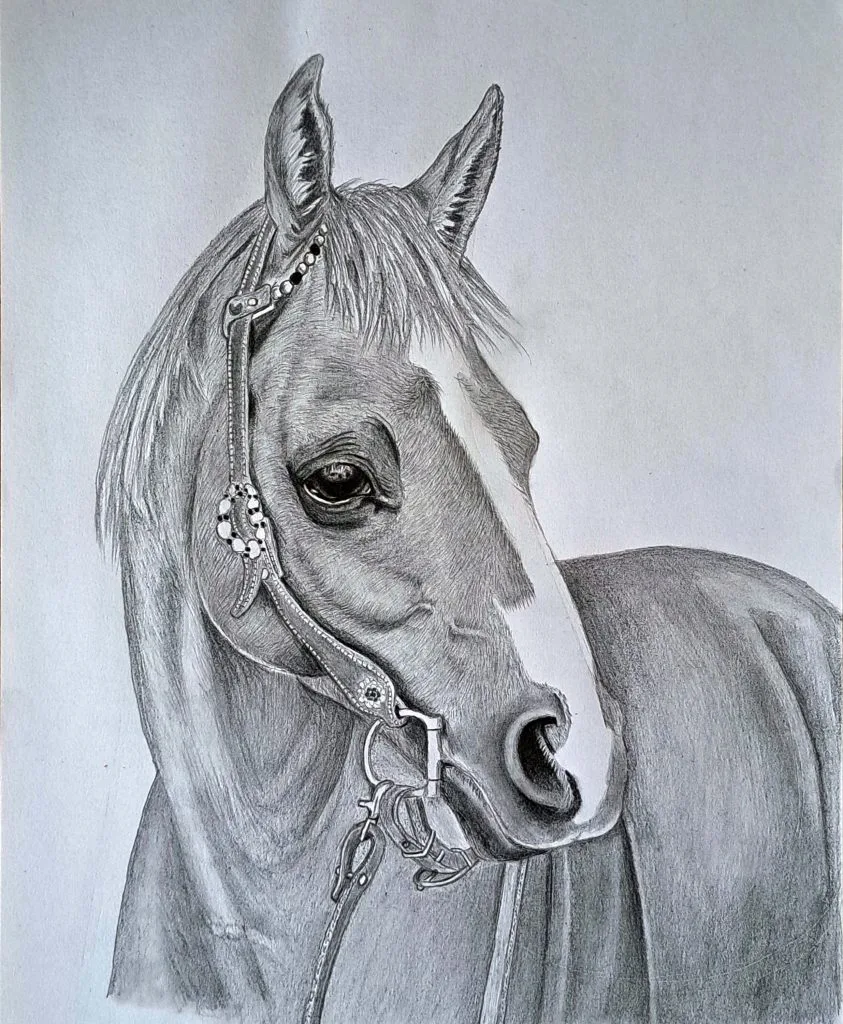
Final thoughts
I’d love to see what you’ve created! Please feel free to share by posting on social media and tagging #muusarthorse or email chris@muusart.com
You can also reach out if something is unclear or need more instructions.