If you didn’t know (of course you didn’t), I used to work in the floral industry several years ago. Including the breeding of roses, chrysanthemums, and alstroemeria. But none of those flowers had a bigger impact on my life than the tulips.
Their bold color and blooms are just mesmerizing.
Therefore, as an artist, I’m always finding deeper meaning in the usual and everyday items or things. Only then do these drawings make any sense. If you’re anything like me, you feel the same way, too.
So, let’s learn how to draw these gorgeous flowers using graphite pencils.
How to Draw Tulip Flowers Step by Step (Realistic)
If you prefer to watch instead of reading, the video is embedded below. However, you can scroll further down to continue reading.
Start by drawing a basic tulip sketch
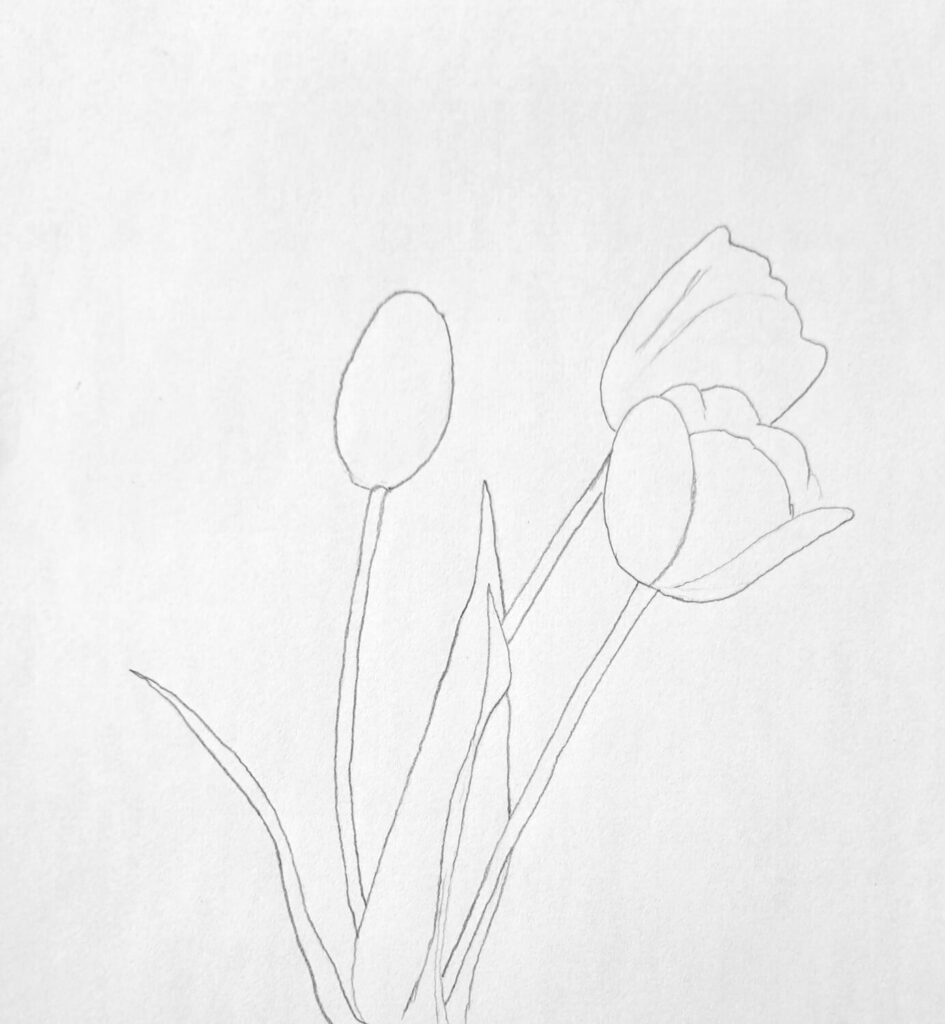
I always like to begin with a light sketch done with a 3H pencil. When sketching, I try not to press too hard because these hard pencils, while good at producing light sketches, are notorious for damaging the paper or canvas.
Besides, pressing create visible lines when shading, and we don’t want that.
It’s also important to sketch at least two Tulip flowers since they look better in a group. Personally, I prefer three (open flower, medium, and a bud) as illustrated above, but it’s entirely up to you.
Start by sketching the irregular flower petals, a slim stalk, and possibly some leaves. The leaves are not typical since they’re long and slender – pay close attention.
Note: There are times I advocate breaking down the subject into recognizable shapes before refining the sketch. While that works for complete beginners or casual sketching, it doesn’t necessarily produce realistic results. Hence, I always recommend observing a reference photo and drawing what you see.
After finishing the sketch, you have three options: stop there, begin coloring, or render with graphite pencils for realism. We’ll proceed with the latter.
Shading the first layer
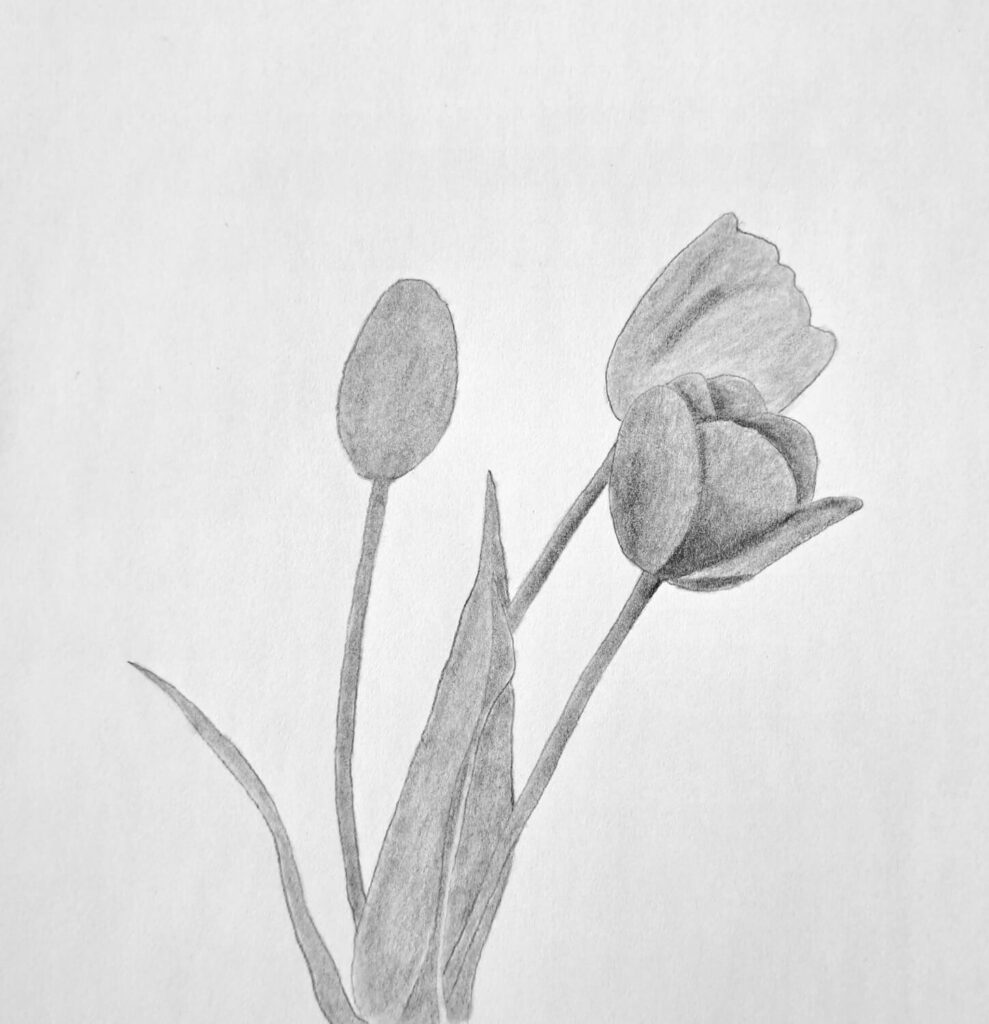
This is what I like to refer to as the basic shading. This is because it isn’t complicated, and you don’t have to make it so.
It involves using a single pencil, pressed uniformly across the entire drawing, and applying uniform strokes. The best shade is attained when the pencil is tilted with a free hand as opposed to vertically.
I prefer to use an HB pencil, but depending on the tulip color, I may switch to another pencil. For instance, and H or 2H for brighter tulip flowers.
You can also shade the stem and the leaves.
Defining values and shading the shadows
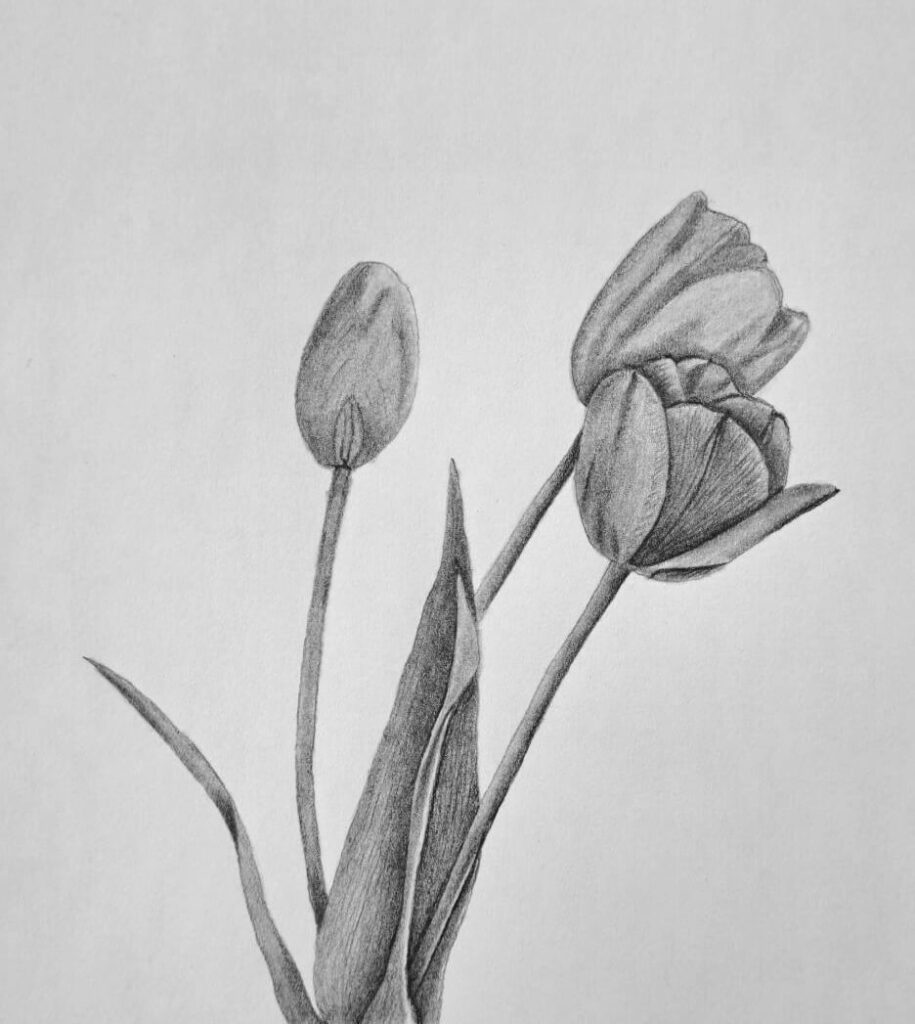
If you’ve read several of my other tutorials, you may have realized that I use the system to draw almost anything. And that involves always defining the value scales and shading the darks first.
Notice that it’s darker where the tulip petals overlap. Doing this correctly reveals to the eye which petals are at the front and which are at the back.
This trick alone helps your flower to have a three-dimensional effect.
Continue shading one side of the flower stalk/stem where light is obstructed and finish by carefully shading the leaves accordingly. Take a moment to observe my drawing above and ensure you’ve captured everything before you proceed.
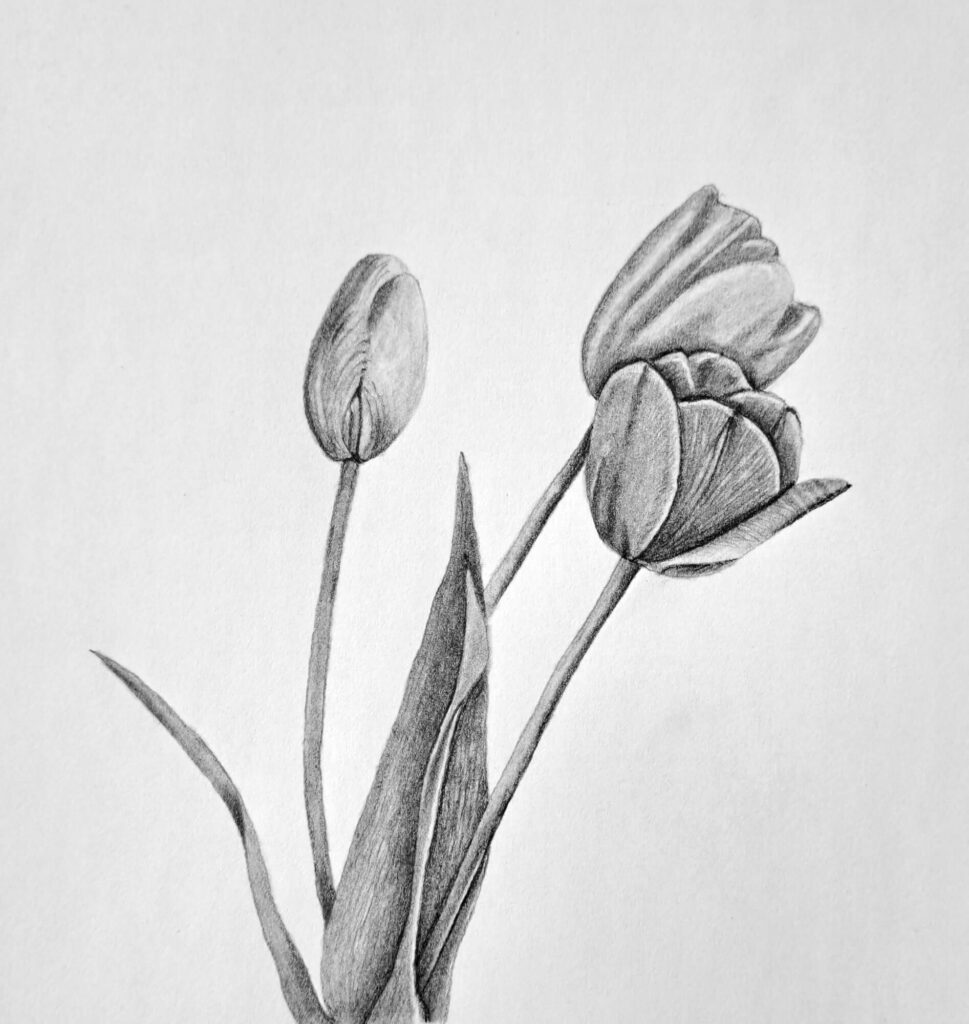
Finalize the Tulip Drawing with Highlights

At this point, you should be very proud of what you’ve created. But we still have one trick up our sleeve to transform the artwork.
Creating subtle highlights!
In the previous step, we covered the evaluation of value scales and decided to shade the dark values. Now we only need to focus on those light areas to create a smooth contrast. Pay attention to the tips of the petals, edges, subtle leaf veins, and partly the stem.
Use a pointy eraser to create all those highlights that reflect light.
Note: Create highlights with a lot of restraint; otherwise, too much and petals will appear shiny like glass. Besides, remember to soften them by blending the graphite with a stump.
If you’re interested, here are more tutorials on drawing flowers.
- How to Draw Cosmos Flowers
- How to Draw an Orchid
- Drawing Hibiscus Flowers
- How to Draw a Peony Flower
Conclusion
We’re probably not the first artists to be amazed by tulips, nor will we be the last. In fact, people have been illustrating these beautiful flowers since before 1700s.
The most noble one was done by Magdalena Bouchard in the late 18th century, shown below:

Source: MHS
I hope you’ve enjoyed reading through this tutorial, and I can’t wait to see what you create.