
Here’s another exciting tutorial on how to draw an orchid as realistic as you want.
In my experience, drawing an orchid realistically requires understanding its morphology. Besides, you’ll be able to focus on specific parts rather than the whole, making the whole process less daunting, especially if you’re a beginner.
Again, I’m not asking you to become a botanist. You just need to learn to look at one aspect of the flower at a time, draw that, and move to the next.
This post is about drawing a moth orchid, which is pretty common in most households. These orchids have two lateral petals (left and right) that are almost identical, a dorsal sepal (top), two lateral sepals (bottom left and right), and a mid-section comprising the column and labellum or lip, Etc.
In other words, representative drawing requires a clear understanding of the subject or its reference photo.
Convinced yet? I hope so:
If you haven’t, don’t worry because I’m going to show you in practice below.
How to Draw an Orchid Step-by-Step
Preparation
I always like to prepare adequately before I start drawing. This will minimize interruptions, thus ensuring I complete the drawing while still motivated.
You should do the same by creating space at your working table and getting your range of pencils (H, HB, and 6B), rubbers, blending stumps, a sketchbook, or a piece of paper.
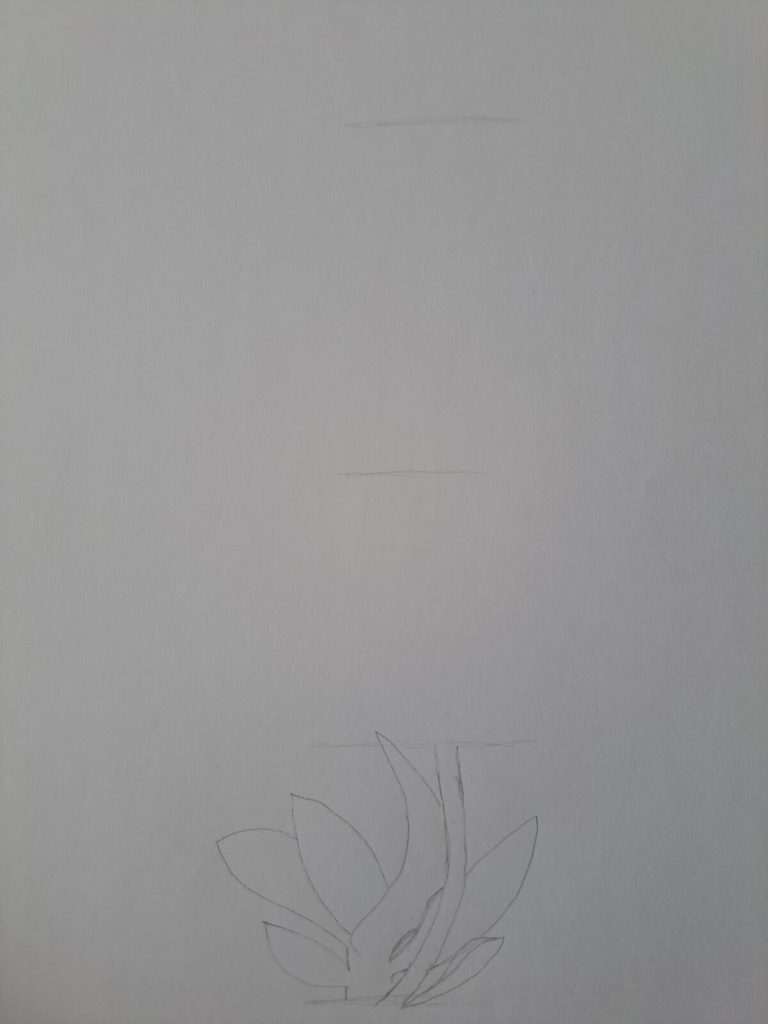
On the paper, decide where the leaves, the spike, and the flowers will be – mark those areas lightly with a light pencil (H). This will guarantee a proportion drawing later on.
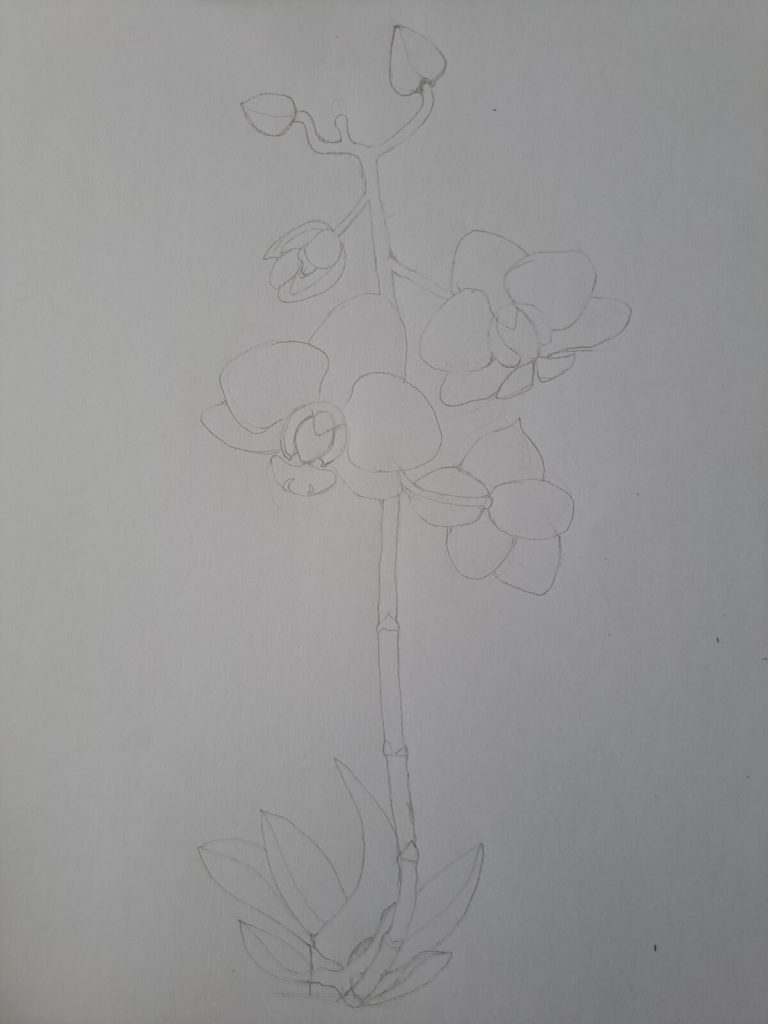
Sketching the orchid leaves
The leaves vary from one orchid type to the next. Some are elongated, some fleshy, and some are light. The best way to approach this is to have a reference photo to study.
I’m drawing mine a lit fleshy with medium size. They are relatively short, with a stem trunk where the flower spike or inflorescence will originate.
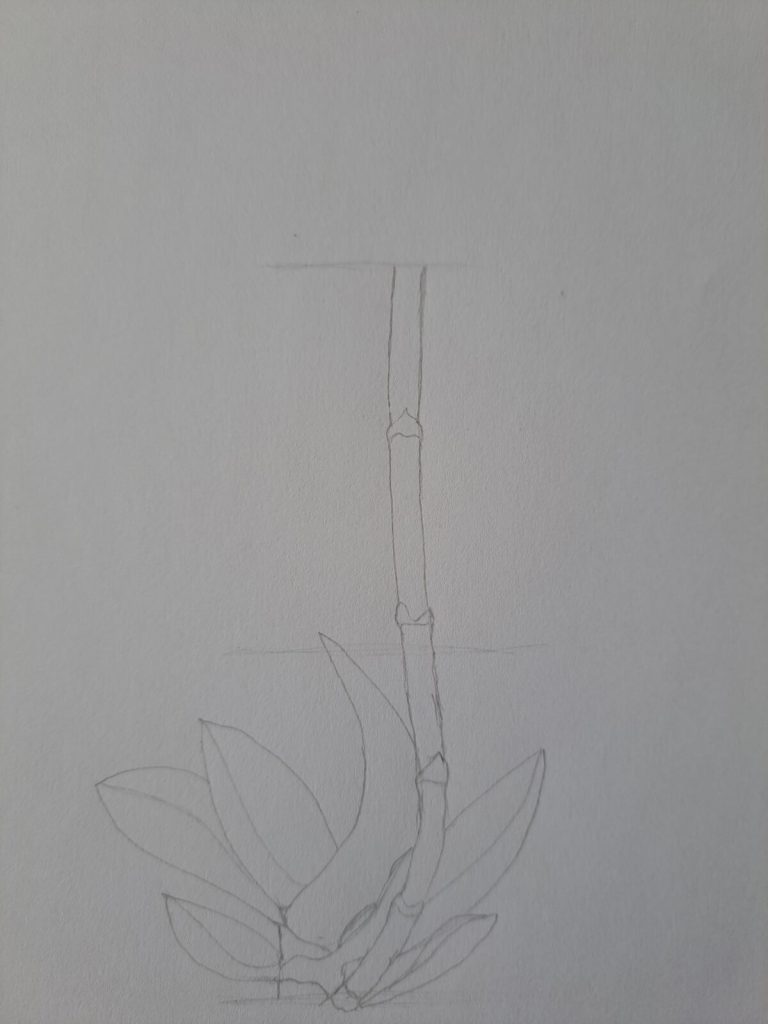
Sketching the flower spike
The spike is what some people erroneously refer to as the orchid stem. It originates at the base of the real stem and bears orchid blooms.
Draw the spike ensuring that it’s not too long nor too short – remember the marks you made at the beginning? You can see mine in the drawing below:
Furthermore, we need to sketch some nodes along the spike to avoid appearing as one long tube.
Drawing the orchid flowers
This is where the fun begins.
We want to add some flowers to the spike. To make it super realistic, we’ll draw front and back-facing flowers and semi-open and closed flower buds.
Back facing flower
In this case, we’ll draw a flower stalk in front and sketch the petals at the back. The dorsal and lateral sepals will be in the middle between the stalk and the petals, as shown below:
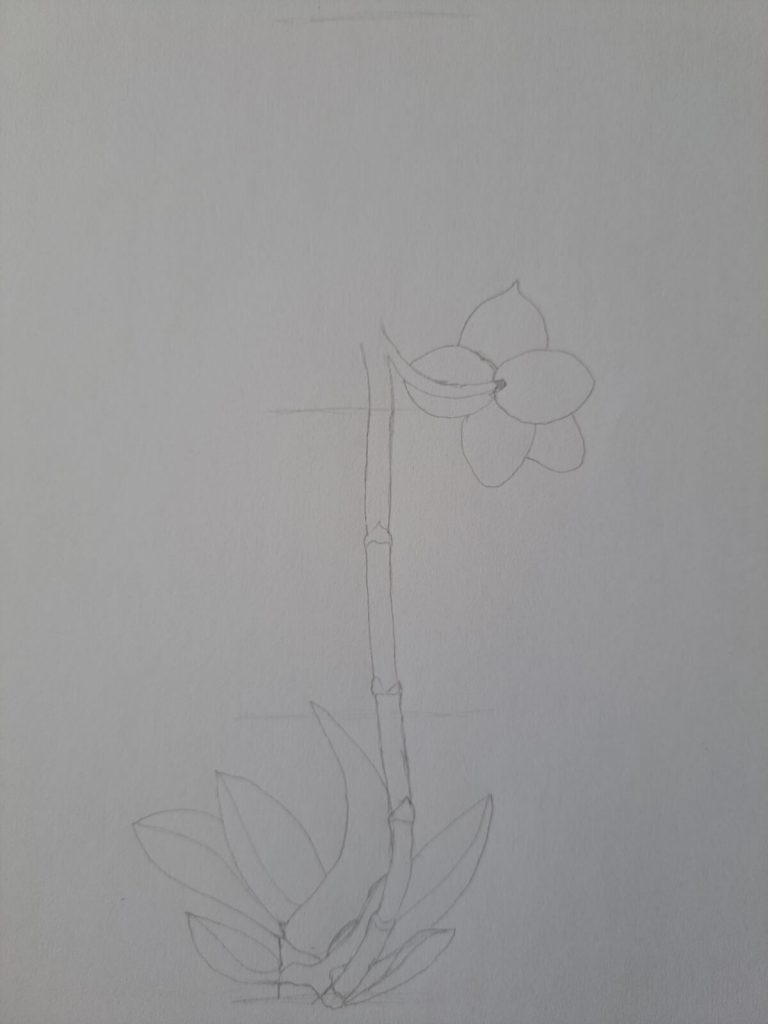
Drawing the front-facing orchid flower
Next, start by drawing a circle as shown below – this will be the position of the column and pollen. Proceed to sketch a small petal below the circle – this will be the labellum or the flower lip.
In orchids, the lip is the center of attraction that attracts pollinating insects.
Continue to sketch two almost identical petals on the right and the left. Add two more sepals just beneath the petals, and finish by drawing the dorsal sepal at the top of the flower.
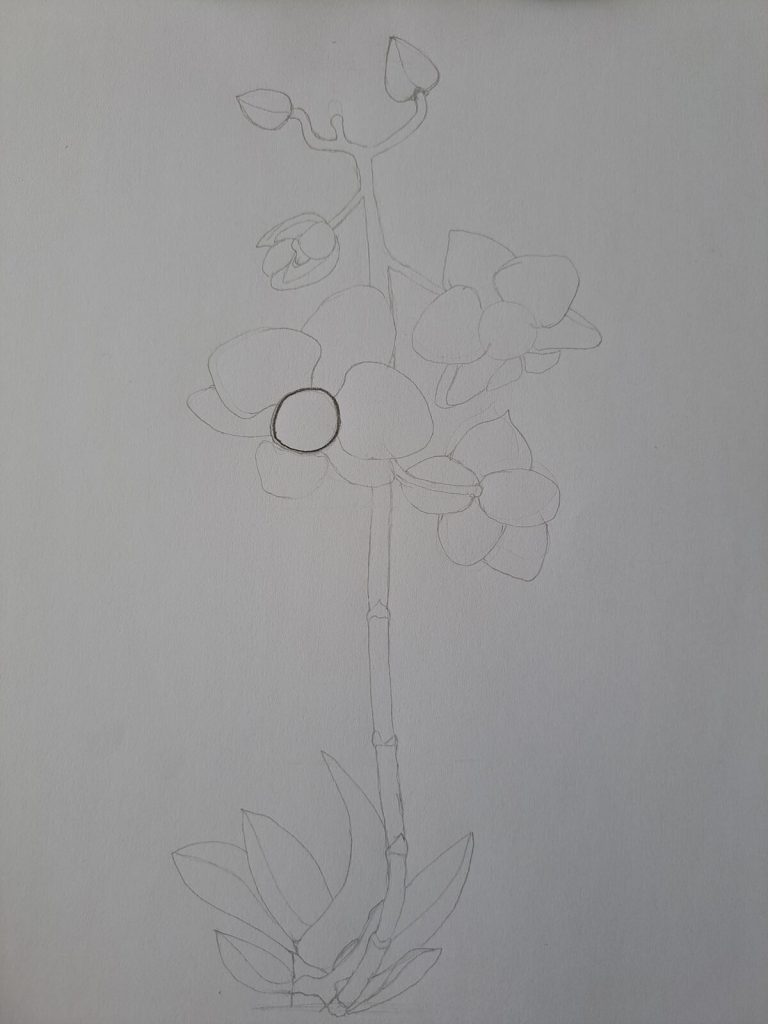
To draw another flower, repeat the process above.
I’ve also gone ahead and sketched a semi-open flower and added some flower buds. Make sure you do the same, and don’t forget to keep extending the spike until the position of the buds.
Sketching the flower column
Remember that circle we drew?
We need to add more details. On the sides are minute petals, and in the middle, we have an oval-shaped pollen holder sort of.
Go ahead and sketch those as shown below.
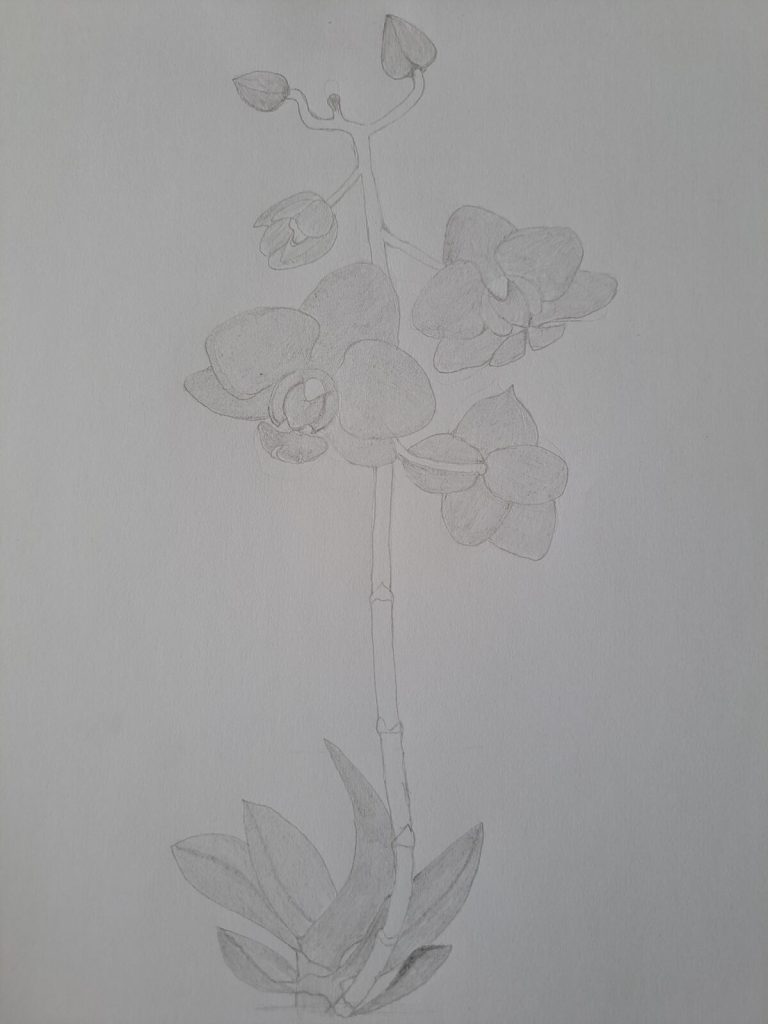
General shading
Take your H pencil and uniformly shade your sketch, starting from the buds, the flowers, and the leaves. As long as the sketch lines are still visible, you’re good.
Use any shading technique, preferably the hatching technique, and blend using a stump, tissue wrapped around your figure, or Q-tip to achieve a smooth shade.
As you can see from my drawing, I’ve left out the spike.
Detailed Shading
We need to start creating a three-dimensional piece by shading in more detail. Observe where the highlights are, as well as any shadows.
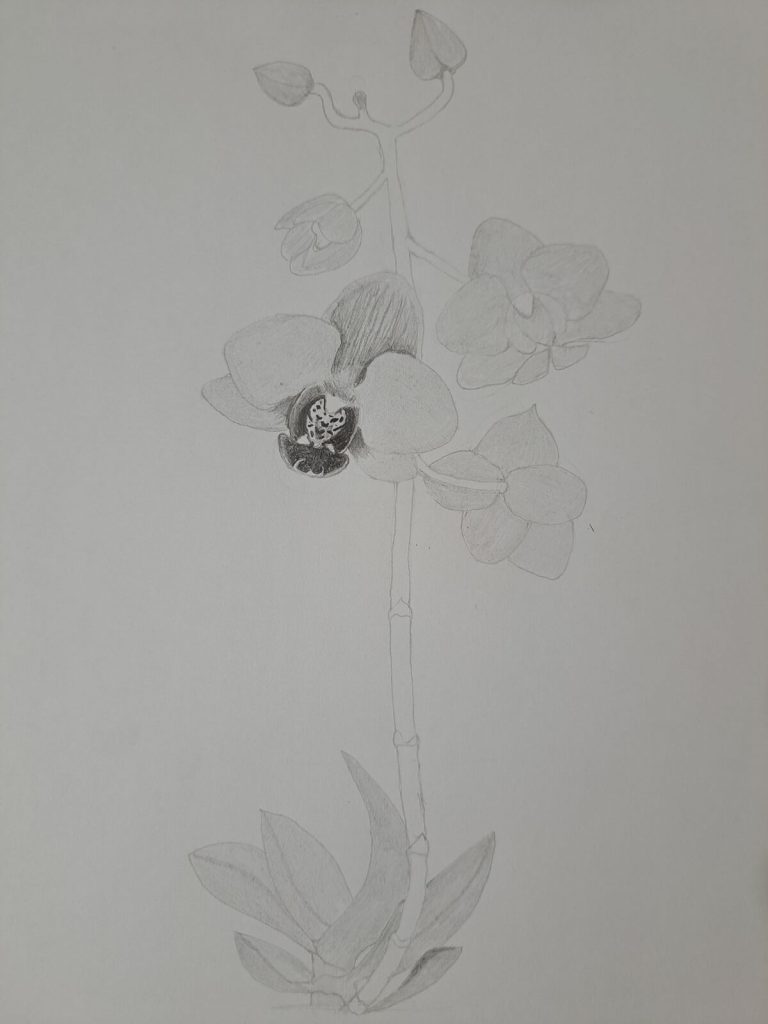
Then, get your 6B pencil to shade the areas around the column – these areas are generally hidden from the light. If it helps, you can print my final drawing and study it as you shade. Not that the lip is equally darker and shade accordingly.
Next, begin shading the dorsal sepal using an HB pencil.

Pay close attention to where sepal and lateral petals overlap. Since these petals are in the foreground, they’ll naturally cast a shadow on the dorsal sepal. Keep shading all the floral parts and move on to the next flower.

Pro Tip: when shading, make sure you make several subtle marks for petal veins. Also, leave out the edges or shade them lightly for better contrast.
Shading the flower spike
Until this point, we had not worked on the spike yet. And that’s because we needed to save it for last since it connects everything. Shade the entire spike except the nodes, which should remain white.
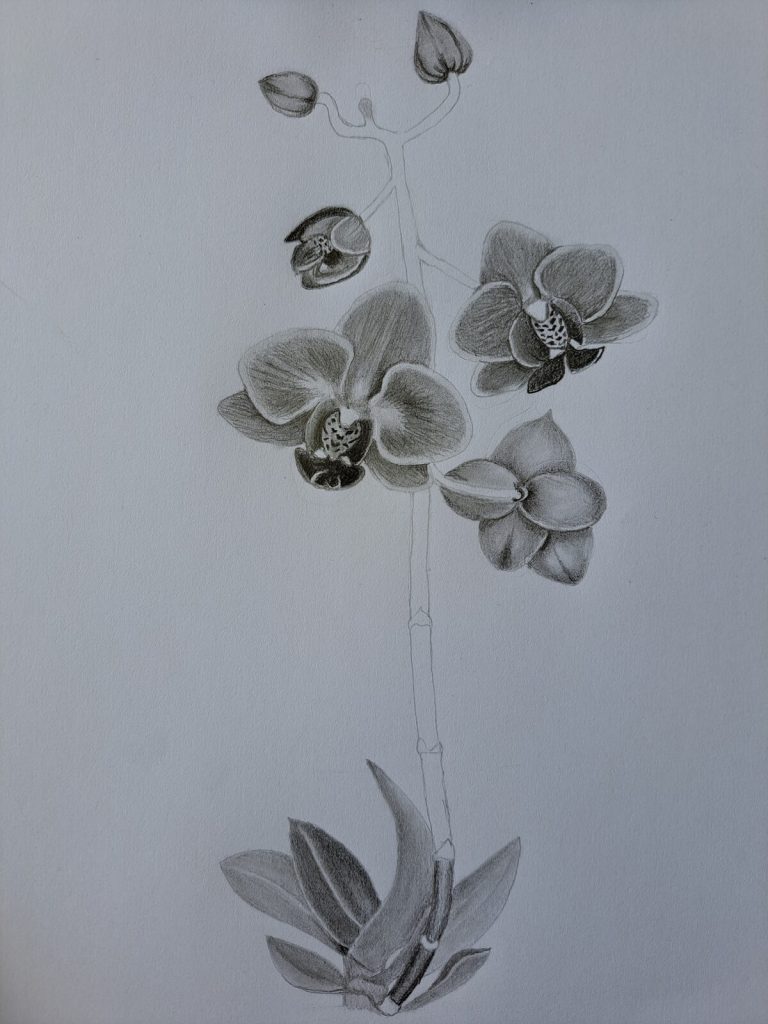
To create the illusion of a 3-D-like cylinder, I’ve shaded darker on the sides and left a bit of highlight in the middle – where light bounces off. Again, the spike is shadowy below than at the top.
To wrap up, blend the entire drawing in the same direction as you were shading it. Like the previous rose drawing, we need to ensure that flower petals appear as smooth and delicate as possible.
There’s a chance that some details will be smudged in the process. To solve this problem, get a kneadable eraser and pick out the excess graphite to brighten the highlights.
Get your HB and 6B pencils and redo the dark shadows and other important details such as pollen and veins.
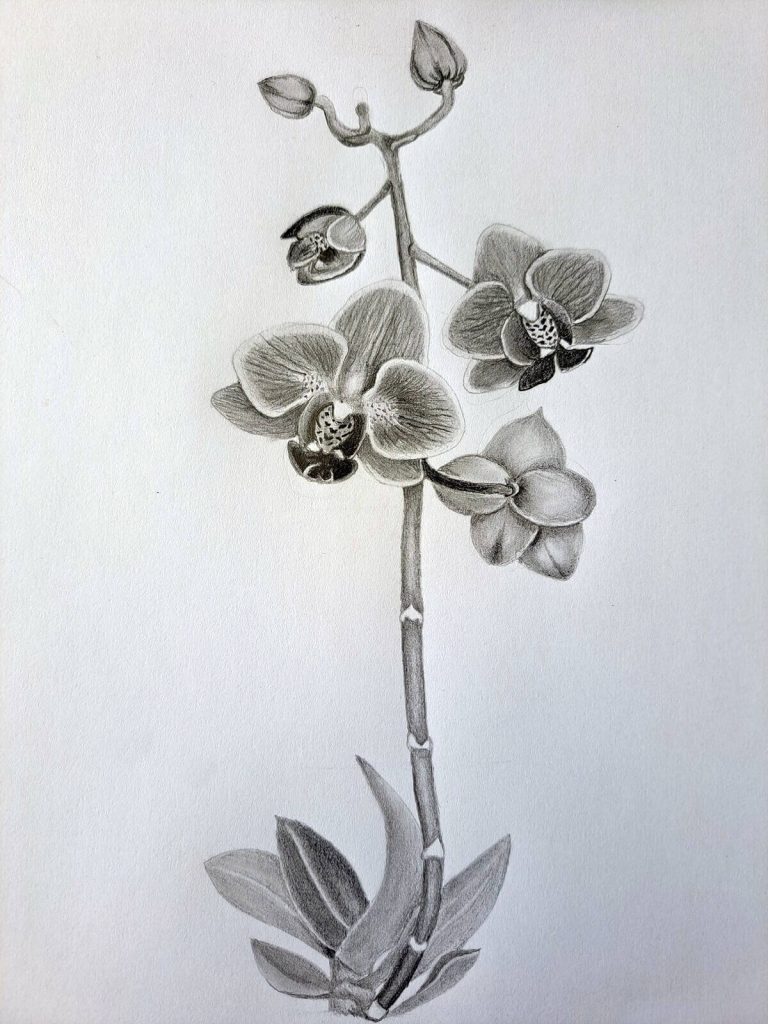
At this point, you should have a beautiful drawing of an orchid, like the one below.
Final thoughts
I hope you have enjoyed today’s tutorial on how to draw an orchid. If so, consider checking out other tutorials in my series on drawing flowers.
Above all, I’d love to see what you’ve created. Share it online and tag me #muusartorchid – It’ll mean the world to me.
Until next time, take care and keep creating!