
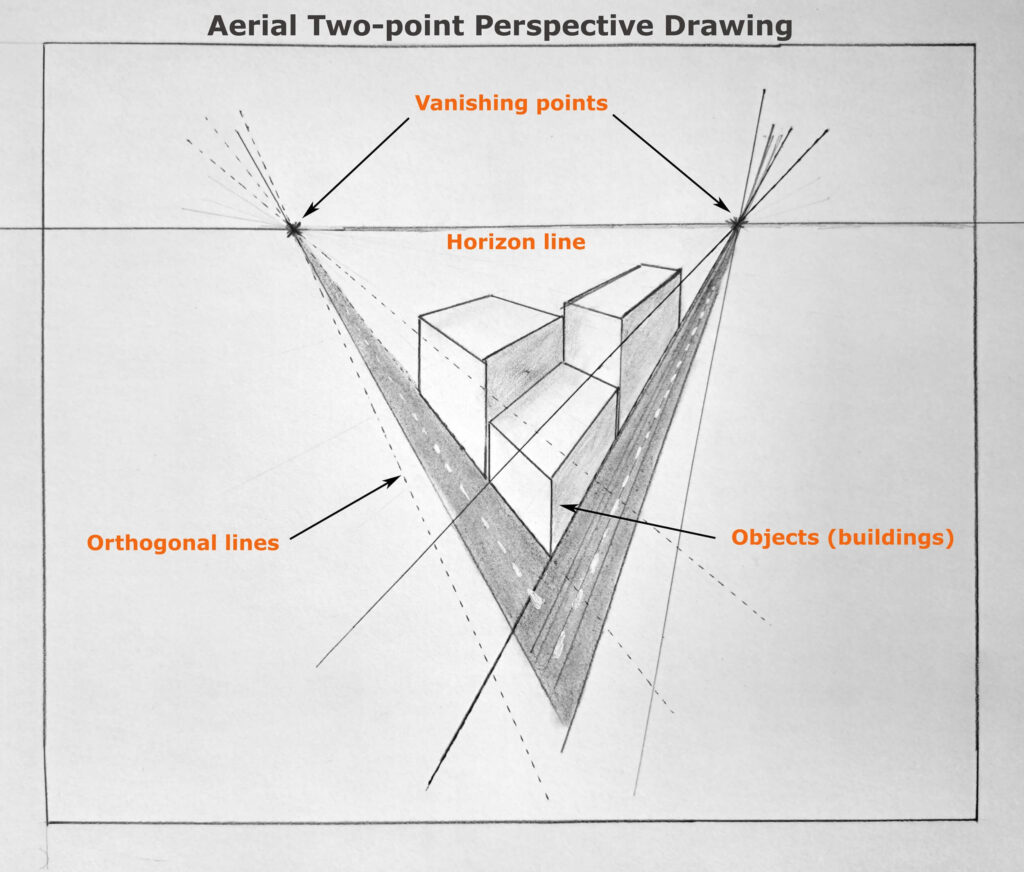
Stand at the corner of a building and look down the street. The corner itself stays upright, but the edges on either side seem to run away from you in two different directions. That everyday bit of visual trickery is the foundation of two-point perspective.
Linear perspective gives us a practical way to recreate that effect on a flat sheet of paper.
The system was developed and refined during the Renaissance, when artists began using geometry to create more convincing representations of three-dimensional space.
If you’ve already worked through my guide about One Point Perspective Drawing, you’ll recognize some of the basic ideas here.
We still have a picture plane, a horizon line, vanishing points, and orthogonal lines. The big change is that we’re viewing the subject from an angle, so the receding edges travel toward two vanishing points instead of one.
Studying two-point perspective will help any artist understand a logical and realistic way to sketch buildings, streets, furniture, boxes, and all kinds of objects in a scene.
Let’s begin:
Steps for Drawing in Two-Point Perspective
Step 1: Define the Picture Plane
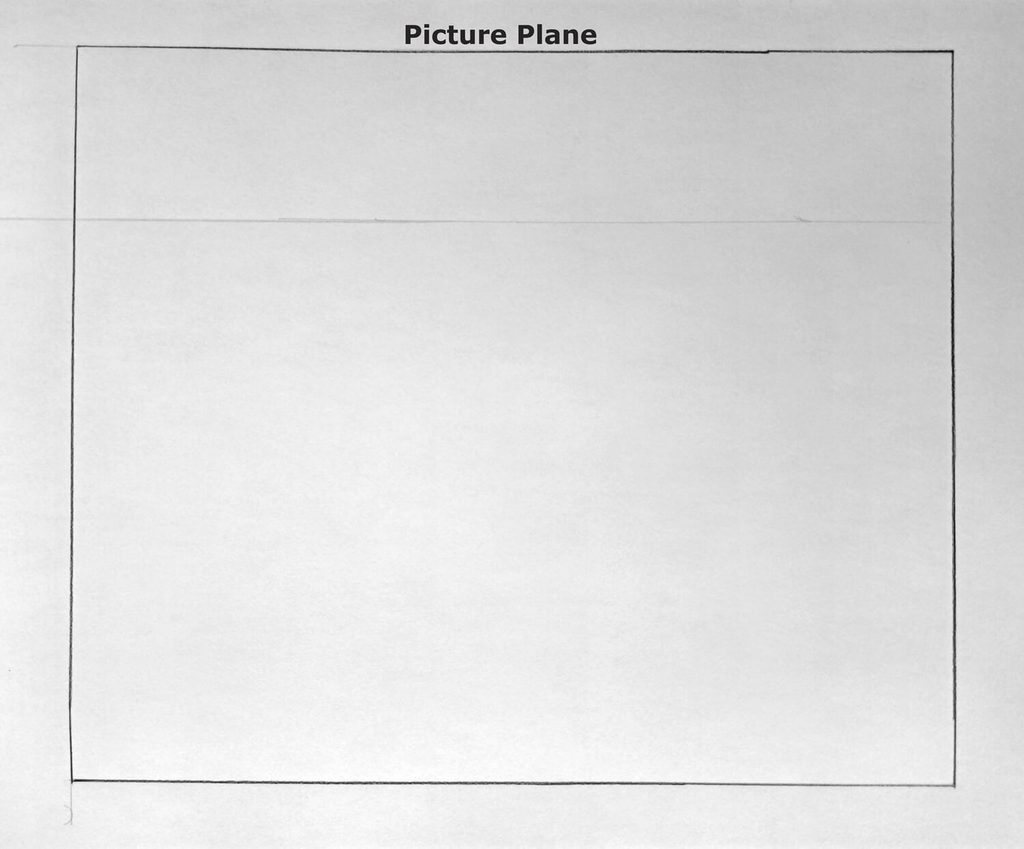
In a traditional drawing, the picture plane is simply the surface you’re drawing on. Your sheet of paper already acts as the picture plane, although you can also draw a rectangle or square to mark out the exact area of the composition.
Think of the picture plane as a window. Everything you’re drawing is being projected onto that window from the viewpoint of the observer.
The next thing to establish is the horizon line. The horizon represents the viewer’s eye level, so its position has a direct effect on how much of the top and side surfaces of objects you’ll see. In linear perspective, vanishing points associated with the ground plane sit on this line.
For this two-point exercise, draw the horizon as a straight horizontal line across the picture plane.
It can sit high, low, or somewhere near the middle of your composition. The position depends on the viewpoint you want. A lower horizon generally gives you a viewpoint that feels closer to ground level, while a higher horizon lets you see more of the upper surfaces of objects (aerial view).
Step 2: Determine Vanishing Points on the Horizon
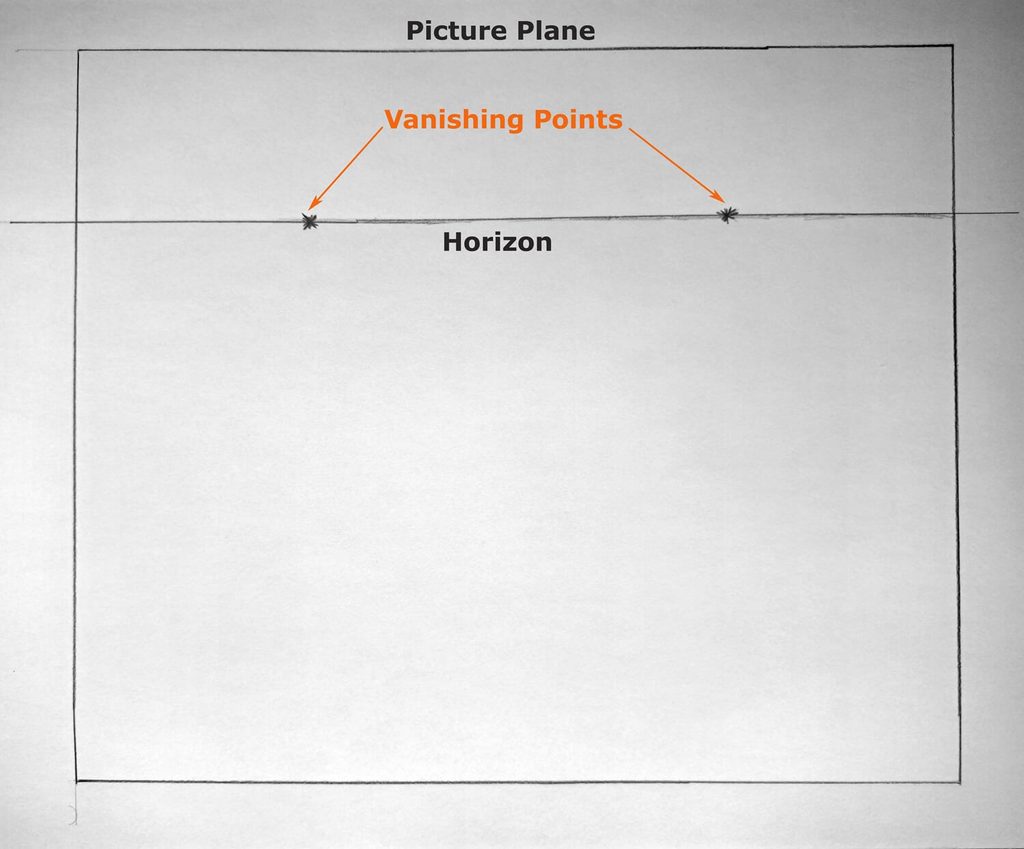
Now place your two vanishing points on the horizon line.
This is where two-point perspective differs most obviously from the one-point system. Instead of directing all receding lines toward one point, we divide them between two points, one on the left and one on the right.
Imagine looking directly at the corner of a rectangular box.
The vertical corner closest to you remains upright. The horizontal edges extending from that corner move away from you in opposite directions. One group recedes toward the left vanishing point, while the other recedes toward the right vanishing point.
That’s the basic structure of two-point perspective. The two sets of parallel lines appear to converge toward their respective vanishing points.
Place the vanishing points far apart on the horizon, ideally well outside the main subject. They don’t have to fall inside the picture plane at all. In many perspective drawings, putting them outside the page gives you much more natural-looking proportions and avoids exaggerated distortion.
If you put the vanishing points very close together, the lines rushing toward them have to change direction dramatically. A simple box can suddenly look stretched, twisted, or oddly wide. Move the points farther apart, and the same object usually settles down.
So don’t be afraid of vanishing points sitting beyond the edges of your paper. You can place them on an extended horizon line outside the picture plane and still use them perfectly well.
Once both points are marked, you’ve established the directional framework for the entire scene.
Step 3: Draw Orthogonal Lines
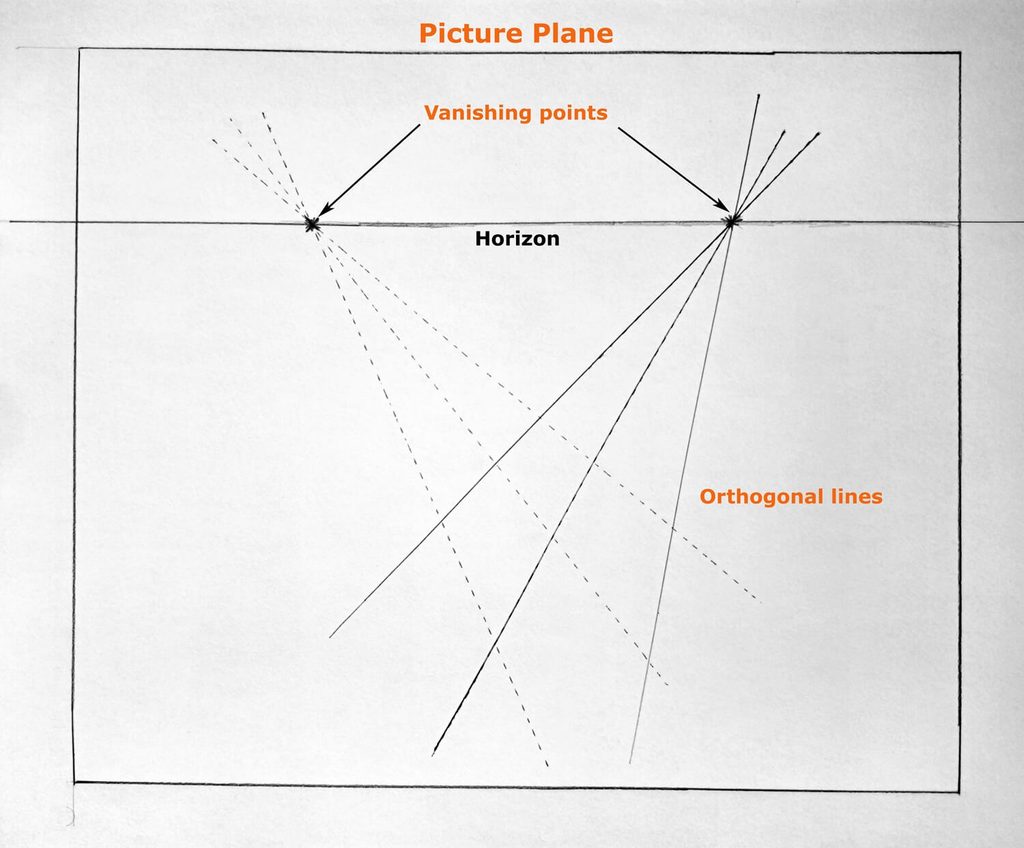
These lines serve as the connection between the vanishing points and the perspective system.
In essence, an orthogonal line is a construction line that recedes into space toward a vanishing point. In a two-point perspective drawing, you will use two groups of orthogonals, with one group heading toward the left vanishing point and the other heading toward the right.
Here’s the part worth remembering: don’t guess the angle of each receding line independently. Let the vanishing points do the work.
Every edge traveling in the same direction should aim toward the same vanishing point. If two edges are supposed to be parallel in the real object, they should share the same vanishing point in the drawing.
Another useful trick is to draw a vertical line between the two vanishing points to represent the corner of an object to be sketched later.
This gives you three useful directional rules to keep track of: lines receding to the left vanish at the left point, lines receding to the right vanish at the right point, and vertical lines stay vertical.
Step 4: Draw Objects in the 2-Point Perspective Scene
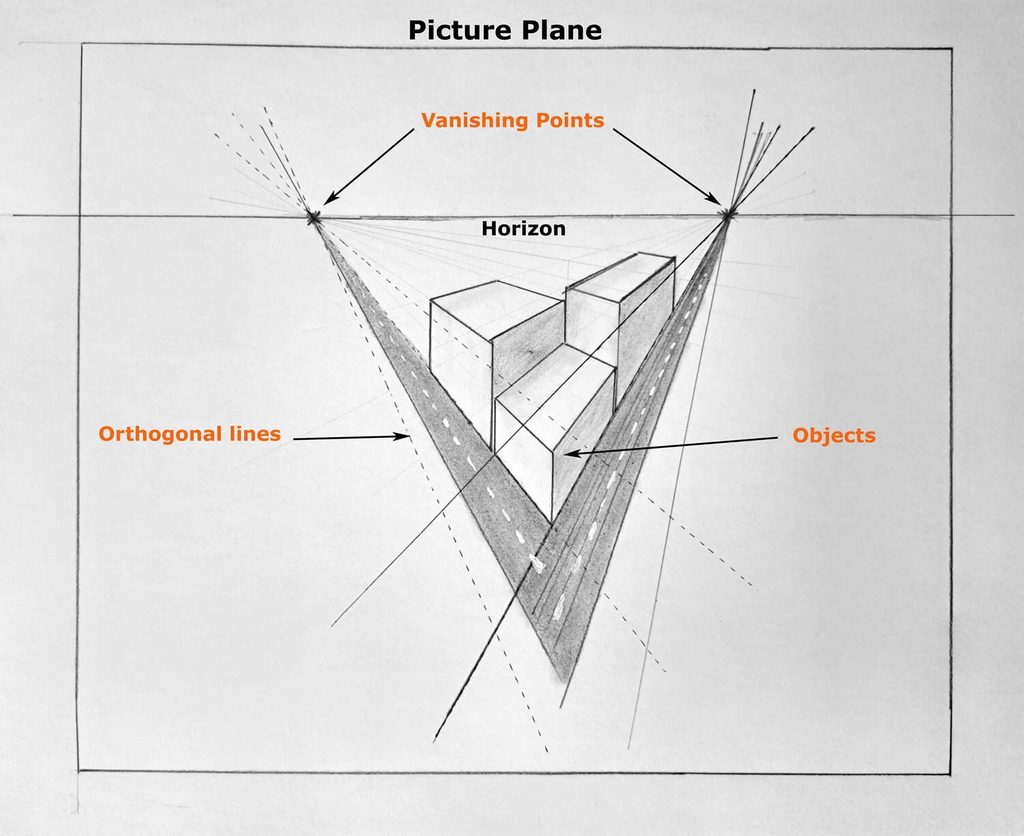
Now you can start building the actual object or scene.
The easiest way to understand this is with a simple box. Begin with the vertical corner nearest the viewer. From its top and bottom, draw orthogonal lines toward the left and right vanishing points.
Next, decide how wide and tall you want the visible sides of the box to be. Draw new vertical lines at those positions, keeping them parallel with the original corner.
Those new verticals intersect the receding lines and begin to form the box.
The trick is to construct the object from the perspective system rather than trying to draw its final outline by eye. Once the underlying box is correct, you can add doors, windows, roofs, shelves, signs, furniture, or other details on top of it.
This approach is useful with architectural scenes where a building might contain dozens of separate elements, but many of those elements still follow the same two vanishing points. A window frame, for example, obeys the same directional logic as the larger walls surrounding it.
You can also use the horizon line to understand where different parts of the object sit in relation to the viewer.
Objects or surfaces above the horizon may reveal their undersides depending on their orientation, while surfaces below it may reveal more of their upper planes.
The horizon therefore does more than provide a place for the vanishing points. It helps establish your viewpoint in the scene.
As the drawing becomes more complicated, continue checking every new edge against the appropriate vanishing point.
This is particularly important when adding repeated features. Suppose you’re drawing a row of windows along the side of a building. Their vertical edges should remain vertical, while their horizontal edges should follow the same perspective direction as the rest of the building.
The same principle works for bricks, roof tiles, paving stones, shelves, tables, books, and almost anything else with repeated straight edges.
And there’s another useful tip: sketch lightly before committing.
Keep the construction lines light, place the major forms first, and add smaller details later.
Step 5: Clean Up the Scene
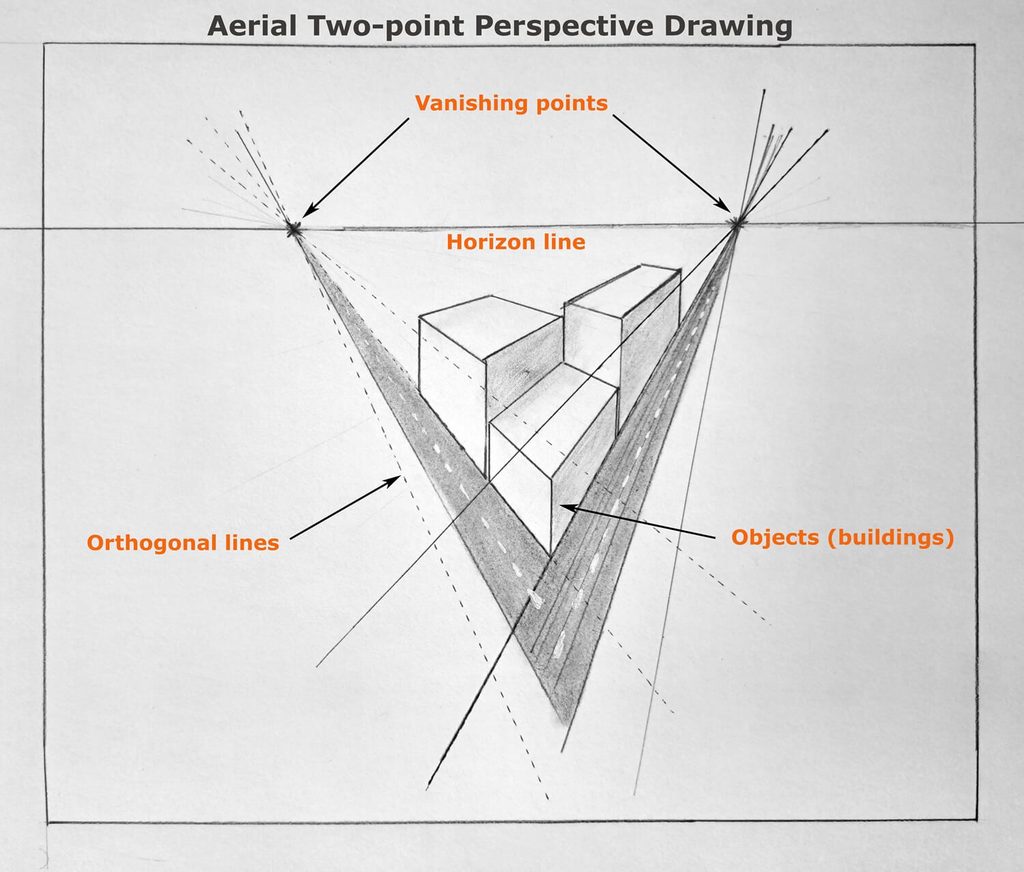
Once everything looks in order, it’s time to clean up the drawing.
Start by removing the lines you no longer need. Erase the orthogonals that extend through empty areas, along with hidden edges and any construction marks that don’t belong to the finished scene.
Work carefully around the important contours. Next, reinforce the visible edges of the objects.
At this point, your drawing should begin to separate into two layers. The faint construction geometry explains how the scene was built, while the darker final lines describe what the viewer can actually see.
It’s also worth checking your verticals. They should remain consistent with one another in a standard two-point setup. A vertical edge that suddenly leans can make an otherwise convincing building feel as though it’s about to fall over.
Real-Life Two-Point Perspective Scenes
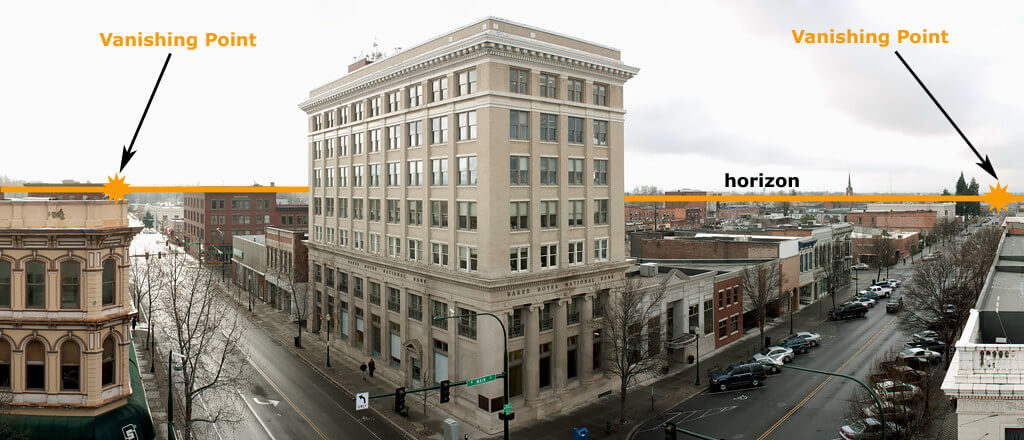
Once you understand the basic construction, you’ll start seeing two-point perspective almost everywhere.
A building viewed from one of its corners is one of the clearest examples (shown in the illustration above). The two sides of the building appear to recede in different directions, with each group of horizontal edges traveling toward its own vanishing point.
Street scenes work in much the same way. Stand near an intersection or look down a street from an oblique angle, and the edges of buildings, curbs, sidewalks, and other structures can establish two dominant directions of recession.
In the days to come, I’ll share a complete tutorial demo on drawing one of these complex scenes in perspective. Make sure to join my mailing list so that you won’t miss it.
It’s also worth checking the one-point perspective drawing tutorial.
Conclusion
Now, what I like to always do is try to observe two-point perspective in real life. When I’m walking on a golf course, I try to identify different perspectives for the fairways and holes. I suggest you do the same whether in town, in a park, or just studying photographs.
The more you internalize this study in you day to day life, the better you become at drawing realistic scenes in their appropriate perspectives.
I hope you’ve enjoyed today’s tutorial. Make sure to bookmark, save, or share so that you can always use it as a quick reference, and so can your friends.