
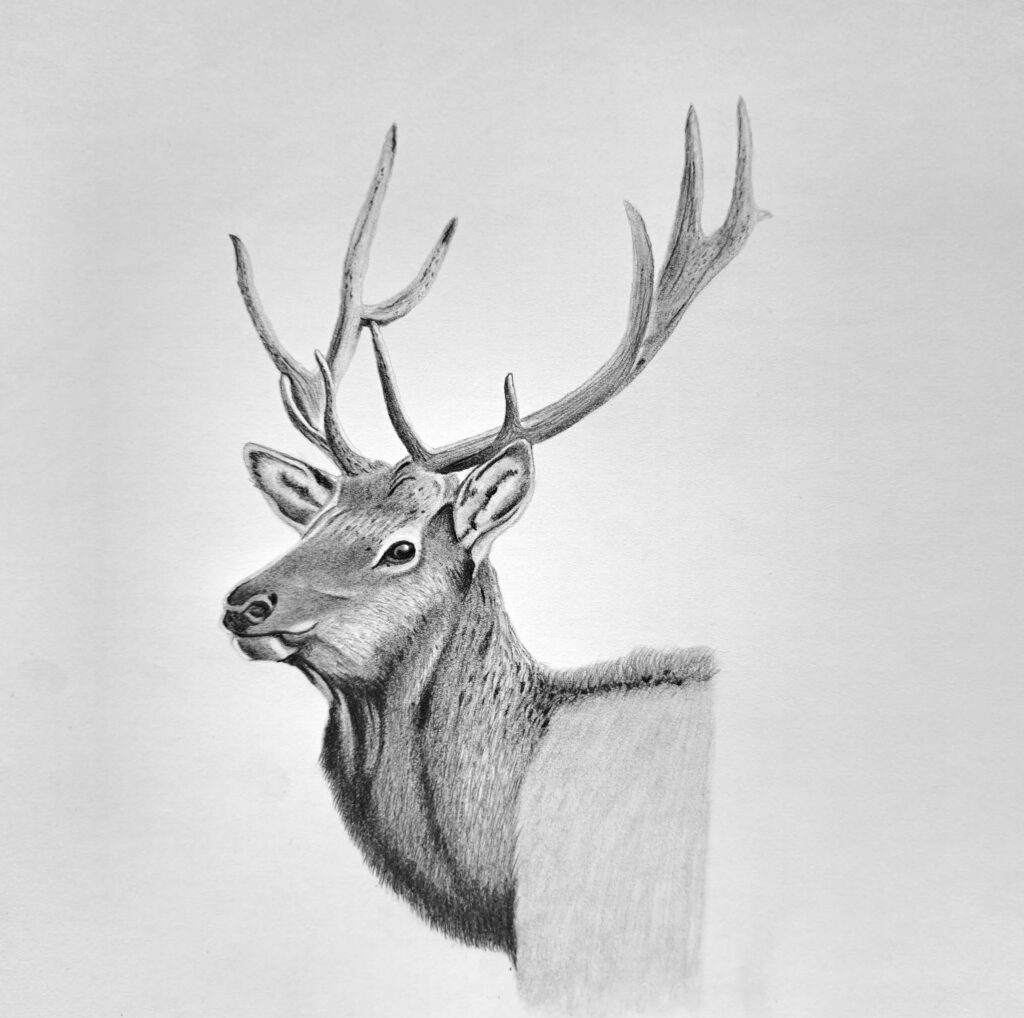
Also known as wapiti or American elk, elks are the largest members of the red deer (If you’re interested, here’s how to draw a realistic deer, which I did sometimes back).
But first, here’s a fun fact.
Did you know that elk bulls have antlers that can weigh more than thirteen kilograms (twenty-nine pounds)? What’s more fascinating is that the antlers can grow as long as 150 centimeters, equivalent to 60 inches.
That’s quite massive!
You may be wondering what the point of all this information is instead of just diving into the tutorial. For starters, you have to have a clear understanding of the subject. While I’ve focused on antlers, I’ve also studied everything about the animal.
Enough said.
Today we’re going to learn how to draw a Roosevelt elk bull, commonly known as the Olympic elk (Cervus canadensis Roosevelti), with graphite pencils. The good news is that anyone can follow along and produce respectable artwork even if you’ve never drawn before.
So, let’s get started:
5-Step Process for Drawing an Elk
Step 1: Sketching the Elk Outline
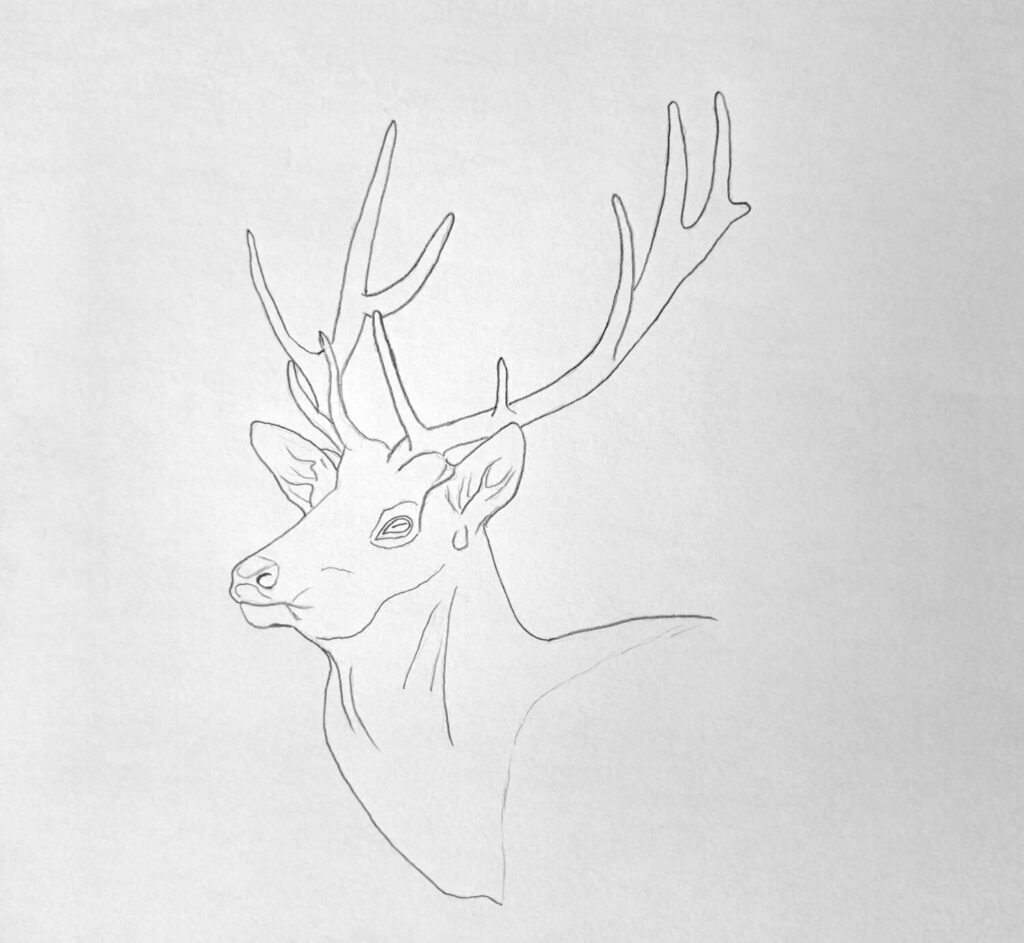
For this drawing, I’m focusing on the head and antlers, along with part of the neck and body. Since we’re working with a portrait-like composition rather than a full-body elk.
Therefore, the proportion of the head becomes especially important.
Sketching the Head and Neck
Start by lightly sketching the basic outline of the head. As always, keep your pencil pressure very light at this stage. You want the lines to be easy to adjust because this is the point where you’re still making decisions.
Look carefully at the shape of the skull (use a reference photo).
The forehead, nose, jaw, and cheek all contribute to the animal’s characteristic profile. If any one of these areas is too short, too narrow, or positioned incorrectly, the finished drawing can start looking off.
Next, establish the position of the ears and eyes.
The eye is particularly important because it gives the animal its expression and helps anchor the rest of the face. Don’t make it too large. A common beginner mistake is to draw animal eyes bigger than they really are because we’re naturally drawn to them as the focal point.
While at it, sketch a small detail where we’ll create a highlight by negative shading.
Next, observe the angle of the head.
Even a slight change in the tilt can completely alter the character of the animal. A head held high can make the elk appear alert and powerful, while a lower position can create a more relaxed or contemplative pose.
Once the head is in place, sketch the neck.
Bull elk have a thick neck, particularly during the breeding season, and the darker mane around the neck and head creates an important visual feature.
Sketching the Elk Antlers
Now comes the part that can make beginners second-guess themselves: the antlers.
Rather than trying to draw the entire rack from memory, look at the reference and identify the main beams first. Then add the individual tines. This approach keeps the structure organized and makes it much easier to maintain symmetry.
Remember that antlers are naturally branched structures.
Mature bull elk commonly have six tines on each side, although the exact shape and size vary with age and individual development. The points don’t need to look like they’re arranged with mathematical precision, but the overall structure should feel balanced.
Step 2: Capturing the Dark Values Across the Drawing
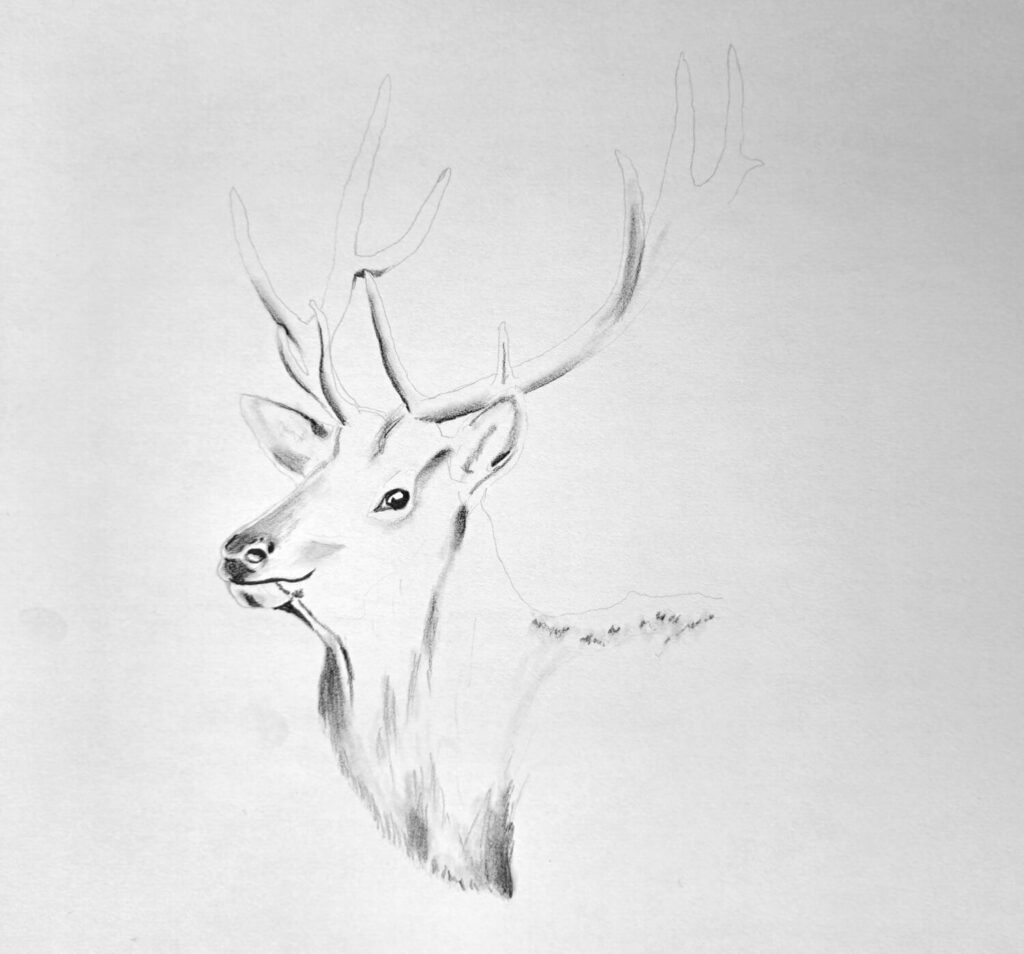
Once the outline is established, begin looking for the darkest areas of the reference.
This is one of the most important stages of the drawing because values create structure. Before thinking about individual hairs, you want to understand where the light is falling and where the shadows are deepest.
Begin with the areas that appear naturally dark on the elk.
These include parts of the eye, nostril, mouth, the deepest areas around the antlers, and sections of the dark mane around the head and neck. Depending on the lighting in your reference, you’ll also find strong shadows beneath the jaw and along the contours of the face.
Use a darker graphite pencil (HB – 2B) for these areas, but you still need to shade gradually.
It’s tempting to press hard and make everything dark immediately. You should try to resist that urge. Once graphite is heavily applied to the paper, it’s difficult to lift completely, and you may need those areas to become even darker later.
Step 3: Shading the Midtones
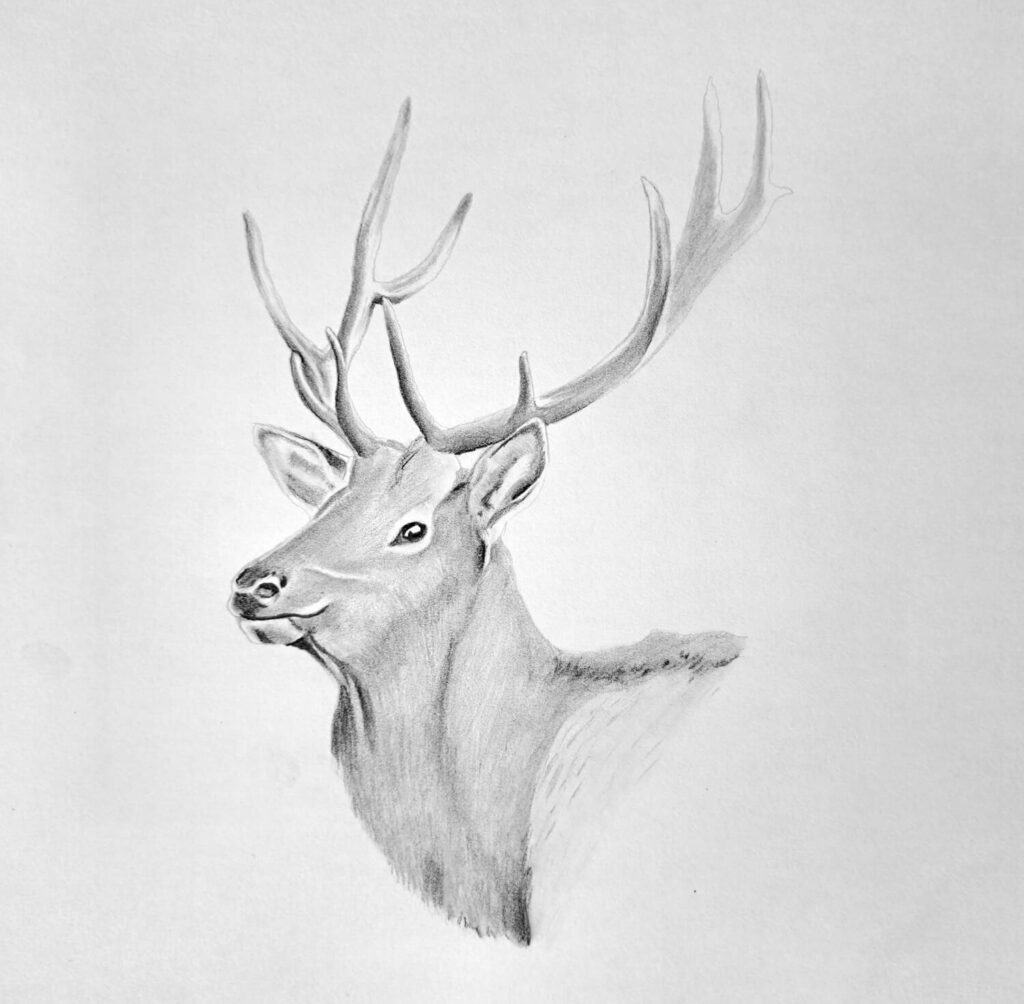
With the darkest values established, we move into the midtones. This is where the drawing begins to gain volume because you’re gradually moving from the deepest shadows toward the lighter areas.
Use a lighter graphite (HB) and pressure to build the tones slowly. Rather than covering everything with one uniform layer, vary the pressure and direction of your strokes to follow the form beneath the fur.
Also pay attention to the transition between light and shadow. Realistic surfaces rarely switch from black to white in a single step. There are usually several layers of value between them, and those gradual transitions are what help create a convincing sense of depth.
This is why I prefer to work from light to dark.
It’s much easier to deepen a light area than it is to recover a highlight that has already been covered in graphite.
Step 4: Adding a Second Layer of Dark Values
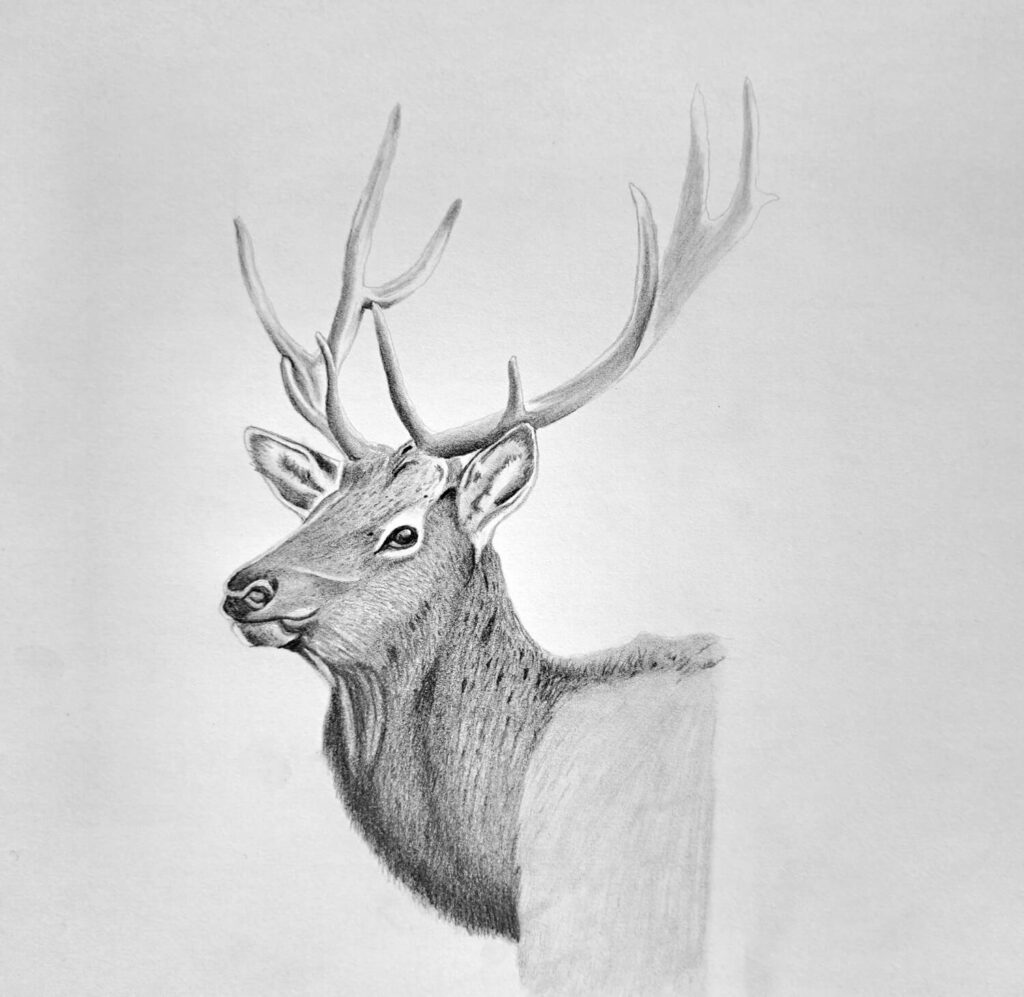
At this point, the drawing should already have a recognizable elk shape, but it may still feel a little flat. That’s why we need to revisit the darks.
I know, we already added the darks, but now we have a much better understanding of the drawing, and we can see where the contrast needs strengthening.
This second pass is about refining the relationships between the values.
You need to deepen the areas that need more weight, especially around the eyes, nostrils, mouth, underside of the jaw, and the darkest portions of the mane. Besides, strengthen selected shadows around the antler bases and other areas where forms overlap.
Make sure you don’t darken everything uniformly.
Because if every area receives the same amount of contrast, the drawing can lose its focal point. Instead, choose the areas where you want the strongest visual impact and reserve your darkest graphite for those locations.
The eye is a good example.
A small amount of deep, carefully placed graphite can make the eye appear glossy. A slightly lighter area left beside it can suggest a reflection, while the surrounding midtones help the eye sit naturally within the face.
The same principle applies to the antlers.
Antlers are hard, solid structures, so they need a different visual treatment from fur. Their edges can be sharper, their shadows more defined, and their surfaces more deliberate.
Step 5: Final Drawing – Creating Depth, Texture, and Contrast
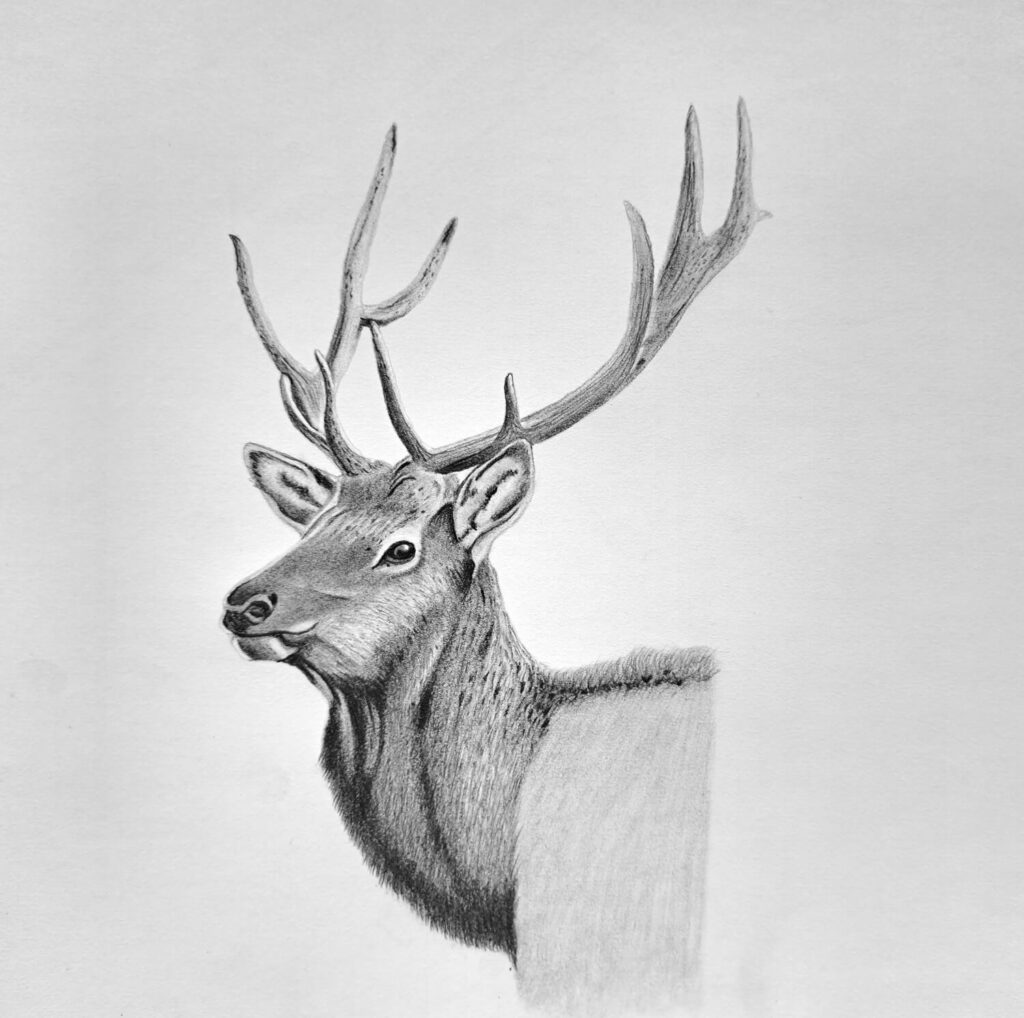
Now, it’s time to wrap everything together.
For most people, the drawing is good, but we can make it better by focusing on the texture. But here’s something worth remembering: texture is more convincing when it’s selective.
If you draw every single strand of fur with the same level of detail, the drawing quickly becomes noisy. Instead, concentrate the most detailed texture around important areas, such as the face, eyes, muzzle, and parts of the neck.
Use shorter strokes where the fur is fine and close to the surface.
For longer hair, especially around the neck and mane, you can use longer, flowing strokes that follow the direction of growth. The strokes should vary in length, pressure, and spacing.
At the same time, soften areas that shouldn’t compete for attention by blending using a point stump to avoid smudging.
The antlers deserve another careful look.
Because they’re such a dominant feature, it’s easy to spend too much time on them. Therefore, make sure the antler structure remains clear, but don’t let it overpower the face. The eyes and facial expression should still feel like the heart of the drawing.
There you have it!
You might also enjoy exploring my other animal drawing tutorials, including:
They’re great opportunities to practice different types of animal anatomy, fur textures, and shading techniques.
Conclusion
I hope you’ve enjoyed this tutorial as much as I enjoyed creating it.
If you have to forget everything, make sure to remember that the most important thing is to resist the urge to rush into the details or definitive shading. Instead, understand the underlying structure, observing how light interacts with the animal, and gradually building one layer on top of another.
Now, I only ask a simple favor, and that’s sharing this with just one person. Until next time, keep sketching, keep drawing.