
One of my most popular floral drawing tutorials is about how to draw cosmos flowers, which I did sometimes back. However, it focused on only using graphite pencils, which does a big disservice to such a colorful and vibrant flower.
Besides, some readers have kept asking my process for using colored pencils.
Now, instead of answering each individually, I thought it’s a good idea to do a color version of the cosmos flower drawing altogether.
Let’s begin:
How to Draw Cosmos Flowers using Colored Pencils
Line Sketching with Graphite Pencil
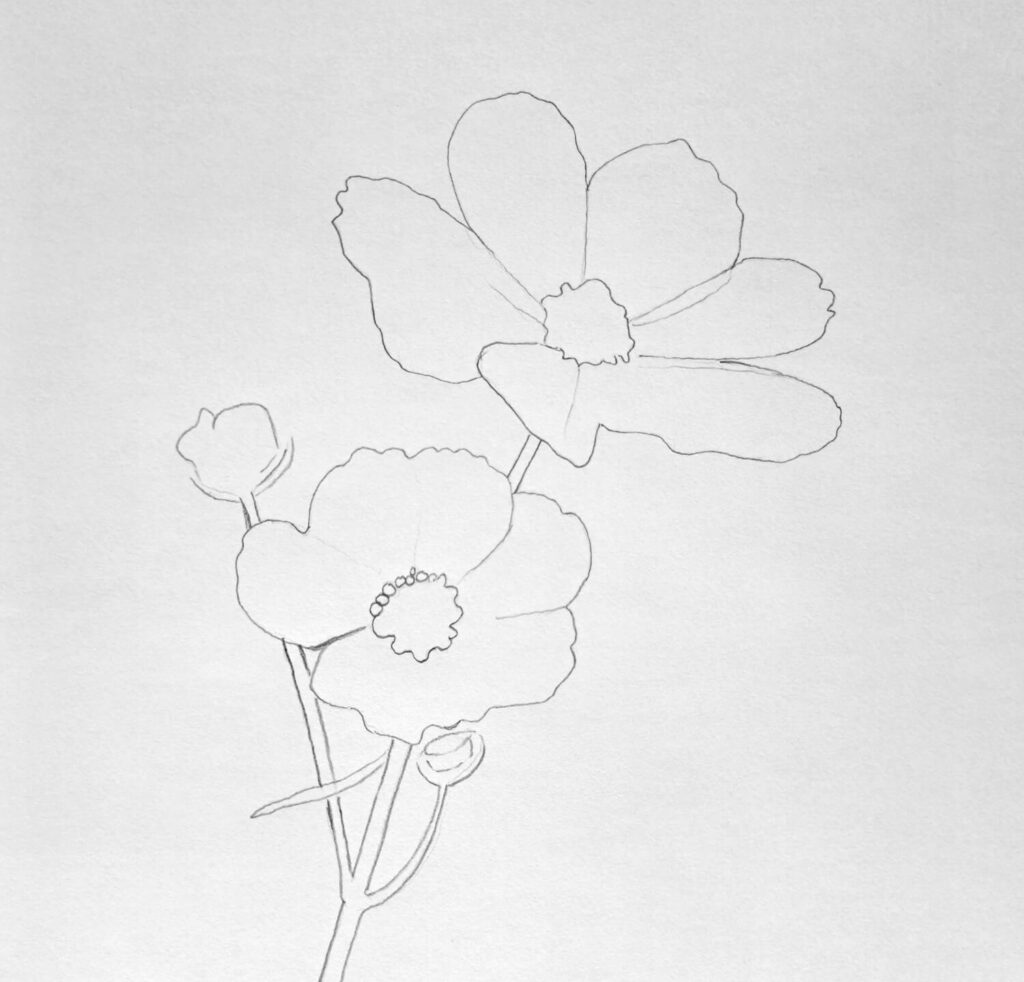
When sketching, use minimum pressure on the pencil and preferably use a pencil in the range of 4H to H. It becomes easy to erase without making a mess. Also, the petals are tender, and the distinct bold lines will look unrealistic.
I sketched mine with an HB pencil so that it’s visible on the screen. Otherwise, I’d drawn much lighter. I’ll have to erase some of it later on.
So, go ahead and draw the basic sketch, preferably several flowers and flower buds as I’ve done. It’s not necessary to draw distinct lines to separate the petals. That way, everything will look more realistic when we shade.
Basic Color Shading
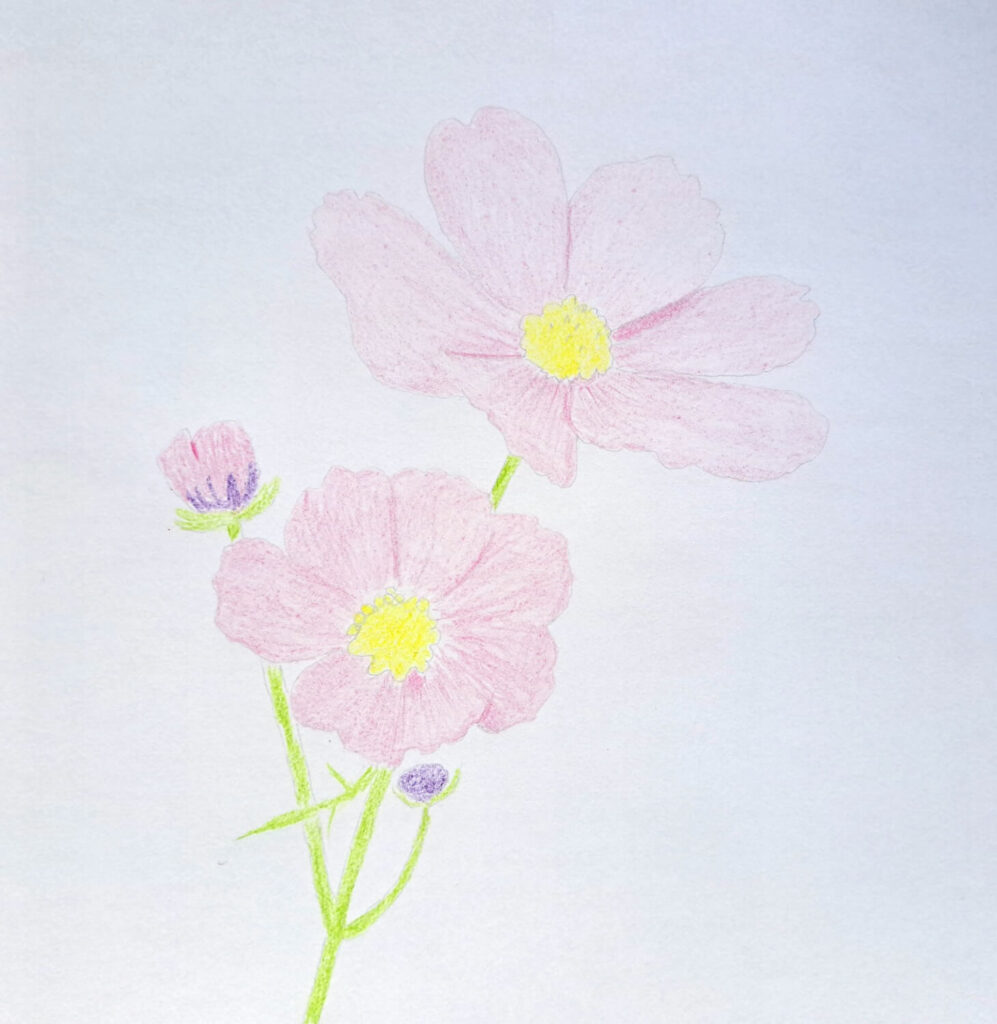
The next step involves giving the sketch form and volume. To achieve this, shade uniformly in a radiating manner (from the center outwards). Use a pink pencil for the petals and partly the buds, a yellow pencil for the center of the flower, and light green for the stems.
Notice that I try to have a stable hand for consistency in shading the color.
Remember that at this point we’re just applying color to the drawing without any specific details.
Shading the Flower Center
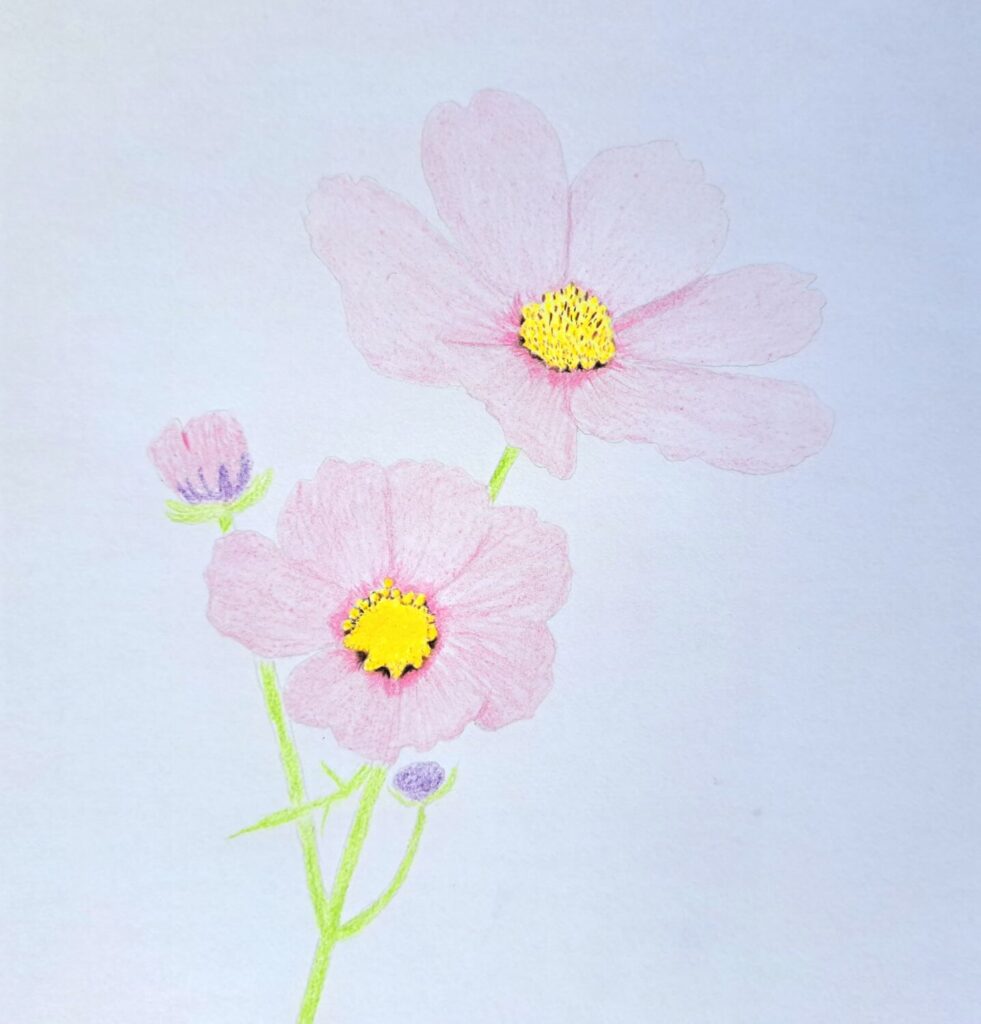
At the center of the cosmos flower are the reproductive parts, comprising the anthers, stigma, and pollen. It’s not our job in this tutorial to represent each of these organs, but at least portray some level of detail.
Begin by intensifying the yellow shade. Where possible, use the circular shading technique to create some round texture in the pollen. Next, use a brown pencil to mark out the filament/anthers as illustrated above.
Finally, a dark pencil, preferably a purple color, to shade the boundary between the center and the petals. This creates the illusion that the center of the flower is raised above the rest of the petals.
Coloring the Flower Petals
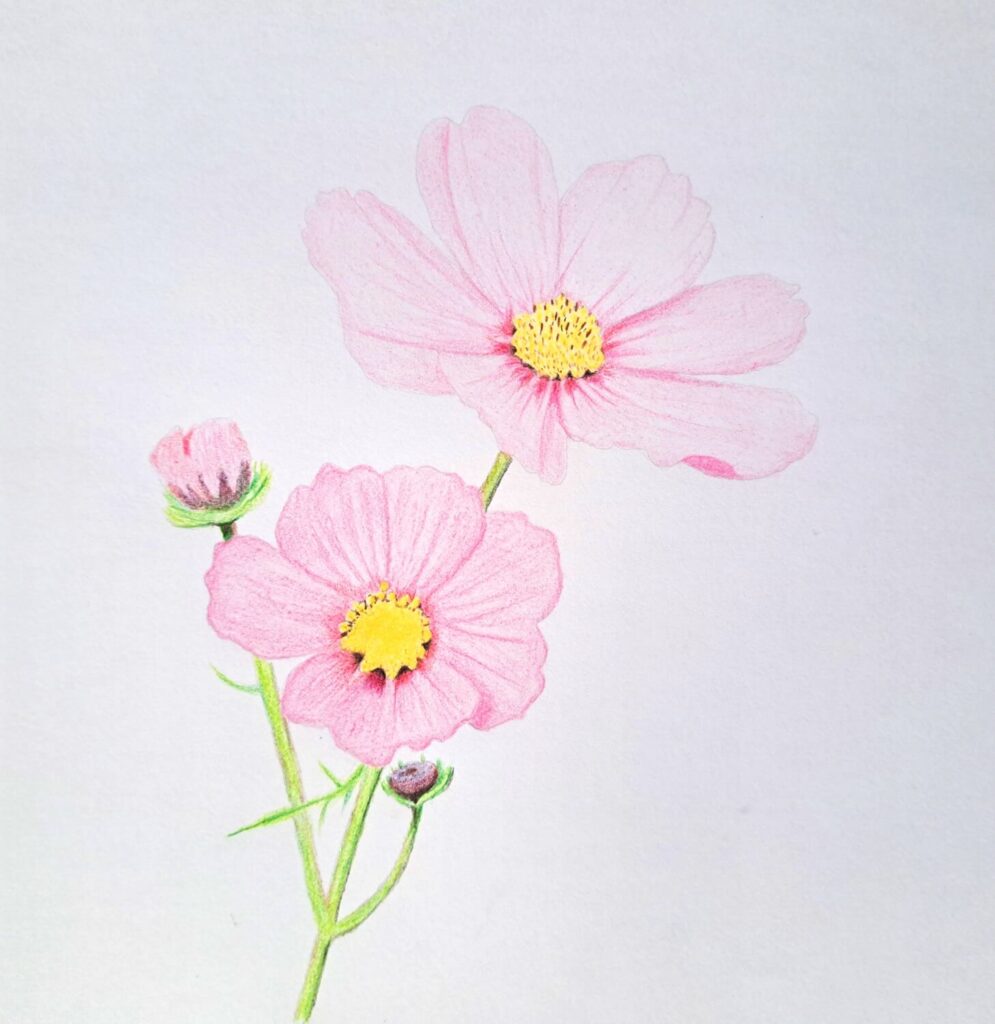
The goal of this step is to introduce the aspect of light interaction with the flower. Notice that the flower above is relatively lighter compared to the one below. Also, notice that the petal overlaps are darker and defined on the lower flower.
Therefore, to create a similar illusion, shade the lower flower petals with another layer, pressing a bit where the petals overlap. You can also darken the radiating lines around the center and let them fade outwards.
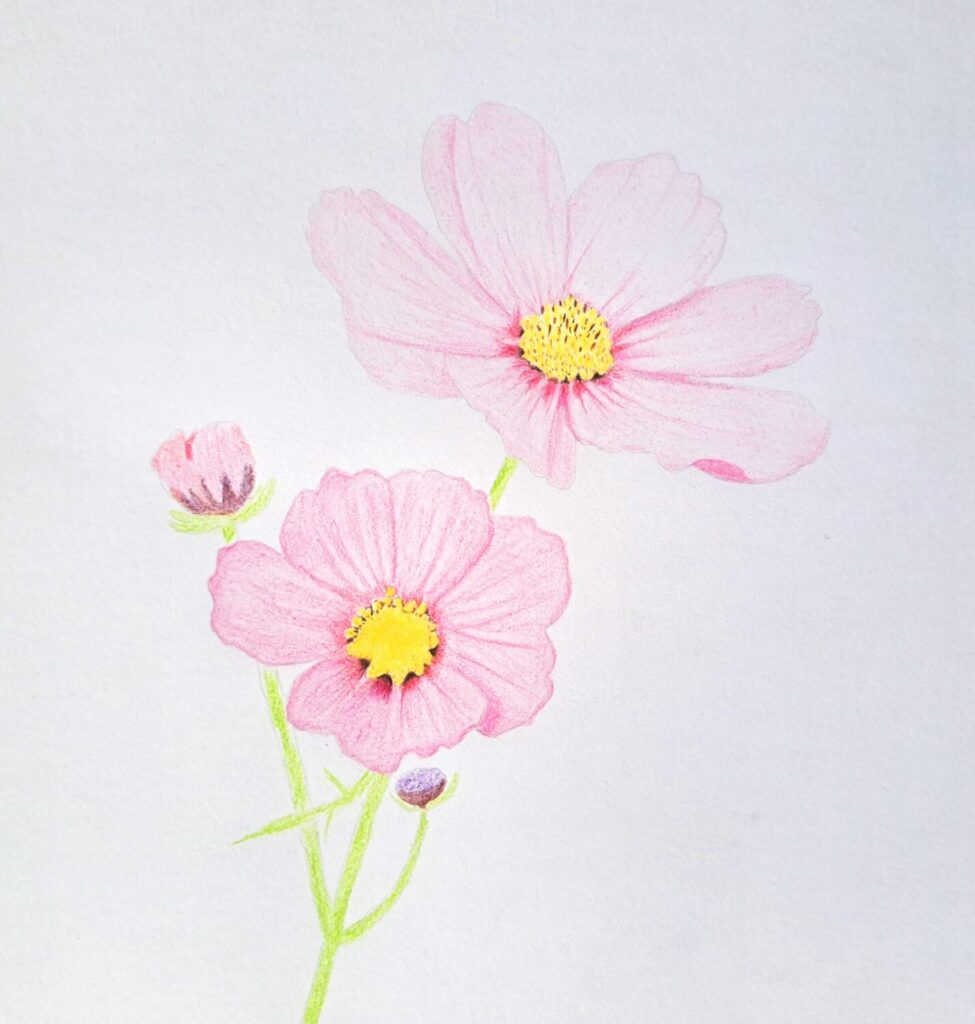
Make sure you take your time to shade because pressing too early may have an undesired effect on the petals’ realism. Once satisfied with the outcome, get a white pencil to banish some color, creating small strips of highlights.
Complete by Coloring the Stem and Buds
Up until now, the stems supporting the flowers have been quite flat and two-dimensional. It’s time to change that. Get your green pencil and shade one side of the stem facing away from the light source.
If you can recall, the base color or first layer was a light green. Shading one side with a green color automatically transforms the stem to pop from the paper, making it appear cylindrical.
But we can take it a step further by darkening that green with a touch of black or brown color at the furthest edge.
When looking at the flower stem, it’s easy to think that just a single green color will work in creating a realistic appearance. That’s further from the truth since you’ll have to combine a few shades of green to achieve the desired effect.
Also, the knowledge of shading cylinders will come in handy. I have a great tutorial for you to check out if you’re unsure. It’s in black and white (graphite), but the principles are the same.
To add some whistles and bells, make sure to also color the two flower buds. Notice two things: the back one is a little bit blurry since it’s away from your eye and out of focus, while the smaller one is clear and in focus.
Besides, unopened flower buds appear darker with a purplish shade compared to the open flower petals. Therefore, shade those accordingly.
If you want to keep practicing drawing with colored pencils, here are some more tutorials:
Conclusion
Over the years, I’ve learnt one important lesson when it comes to working with colored pencils. And that is, you haven’t mastered anything if you can shade the delicate flowers without heavy-handedness.
It’s simple, yet a small mistake can easily ruin your artwork.
Take up the challenge and see what else you can draw by using the same steps and techniques discussed in this tutorial, which I hope you’ve enjoyed.
Consider bookmarking, sharing, or even saving on Pinterest to help others find this guide.