
Think of any occasion, and flowers, specifically roses, come to mind. No wonder it’s regarded as the king of all flowers.
But then it depends on whom you ask.
As someone who has worked with roses from breeding, to propagation, to growing, harvesting, bunching, packing, and exporting to clients across the world, there’s no doubt in my mind that they are the G.O.A.T of flowers.
There’s no doubt, then, that they fascinate just about everyone on earth. From gardeners to florists, tattoo designers to botanists, and even us – artists. That’s because they are some of the best subjects to draw and paint.
Nothing is more satisfying than drawing and rendering those soft petals that fold over each other like crumpled silk and colors that shift from one to the next.
Besides, with tens of thousands of varieties and breeds out there, each having different colors and shades, they’re endlessly exciting to study and draw. In today’s tutorial, I share my five basic steps for drawing a rose with colored pencils.
How to Draw a Bi-colored Rose with Colored Pencils
1. Basic Line Sketch of a Rose
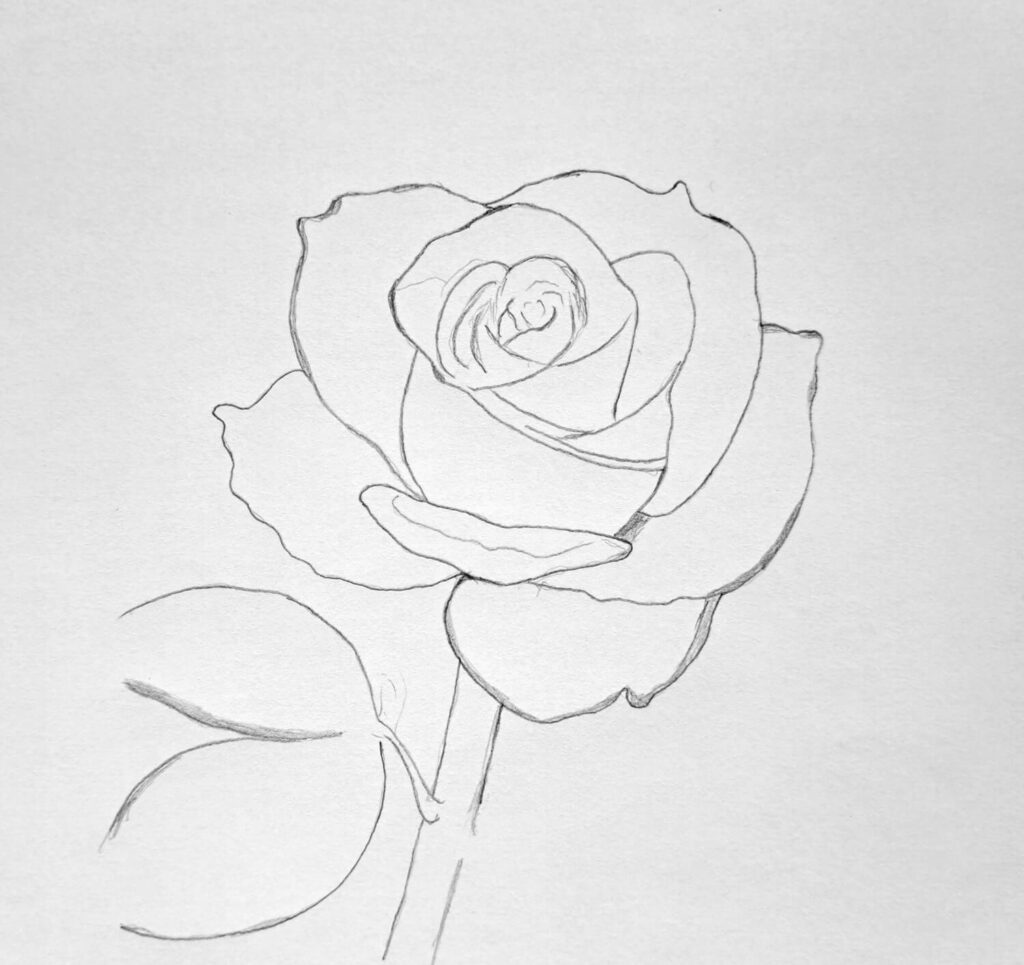
The first step is to begin with a basic line sketch. You can use a 2H, H, or HB pencil for sketching because they tend to produce lines that stay softer and cleaner.
Keep your pencil pressure extremely light here since colored pencil doesn’t hide heavy graphite very well, especially under lighter pinks or yellows. Don’t be deceived by my sketch above. I made it bolder on purpose so that it can be visible on screen.
After all, before coloring, I had to dab off the excessive dark outline.
When sketching the rose, I like starting with the center of the rose instead of the outer petals. The middle usually looks like a loose spiral or a folded ribbon. From there, I slowly build outward, adding larger petals as the flower opens up.
If you want all the details, check my earlier tutorial on drawing a rose using graphite pencils.
2. Coloring the First Layer
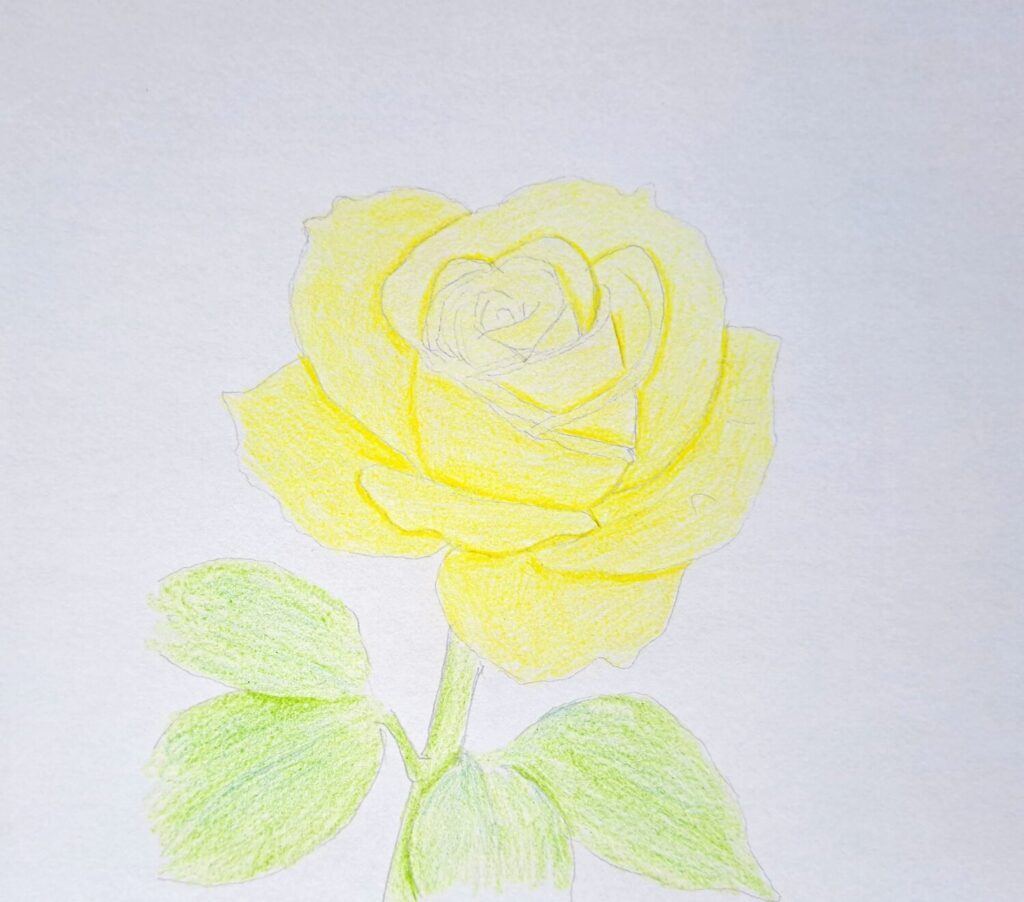
When it comes to working with colored pencils, layering is of utmost importance. But even before you begin, use an eraser, preferably a kneadable one, to dab off the sketch outline.
I know in the previous step you used a light pencil to sketch, but you can always go lighter. If you’ve noticed, we’re drawing a yellow-orange bicolored rose. Therefore, the basic layer is predominantly yellow.
Therefore, start by shading the petals lightly with a yellow pencil. Again, it has to be very light since it’s just the first layer. Most beginners will just go dark at once, which is a mistake.
In general, roses rarely contain just one flat color. Even classic red roses often hide oranges, purples, cool blues, and warm yellows inside their petals.
That’s why reference photo beforehand is so important.
While coloring, try to use small circular strokes during this stage to prevent harsh streaks and create smoother coverage. When done with petals, do the same with a light green on the leaves and stem.
Always remember that light layering is one of the key foundations of realistic colored pencil work because it preserves the tooth of the paper for subsequent layers.
3. Coloring the Rose Petals

At this point, we need to make the petals shine and pop like fire. Begin by studying how the petals fold and overlap.
Using the yellow pencils, darken the overlap areas. Once done, get an orange pencil and shade around the petal edges. Focus on one section at a time, building orange shadows and highlights slowly. Jumping around too much makes it harder to keep the lighting consistent.
One trick that helps tremendously is varying edge softness. Some petal edges should appear crisp where light hits sharply. Others should fade softly into neighboring petals.
Lastly, notice that the orange shade is not a complete block of color. Instead, I’ve used subtle short strokes from the edges and fades towards the yellow. Try to replicate the same.
4. Coloring the Stem and Leaves
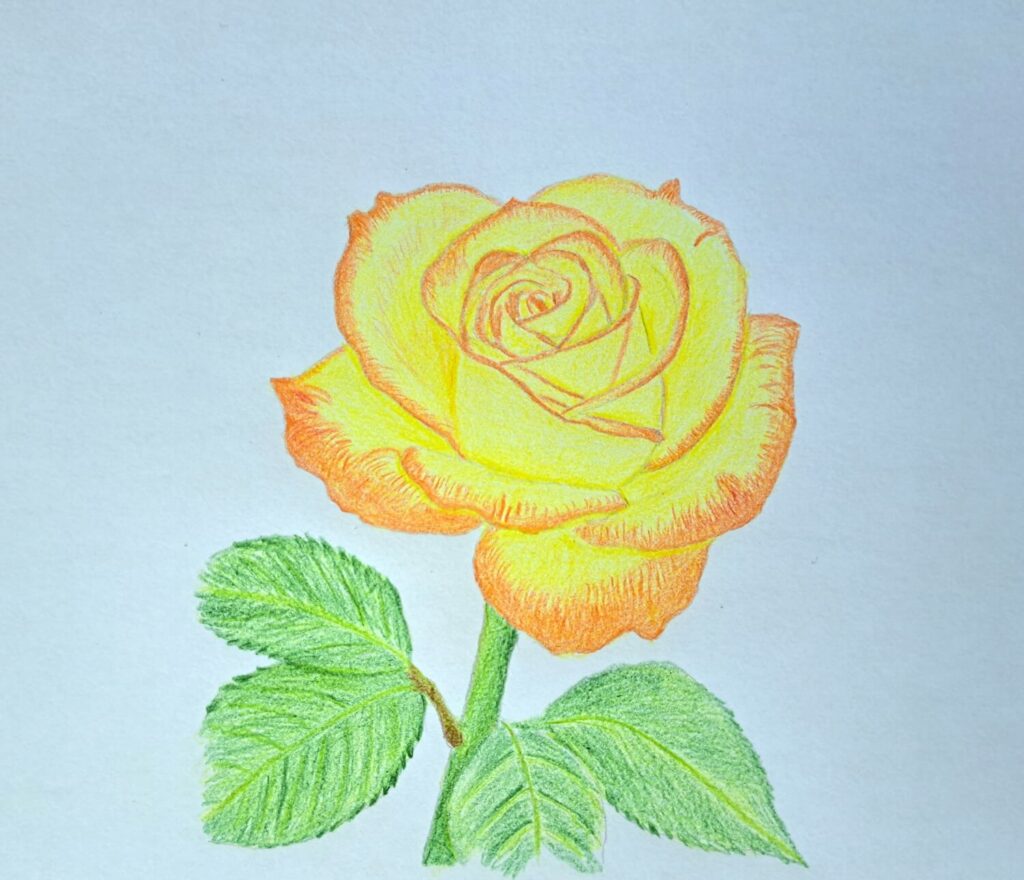
Realistic-looking petals are one part of the equation. The next part is nailing the coloring on the leaves and stem.
Start with a mid-tone green first, then slowly deepen the shadows around the veins and undersides of leaves. Adding touches of brown or dark blue into the shadows can make greenery feel much richer.
Again, the aim is to build on the initial layer, interchanging a dark and light green. You can take this opportunity to color the leaf edges to appear serrated.
5. Completing the Bicolor Rose Drawing
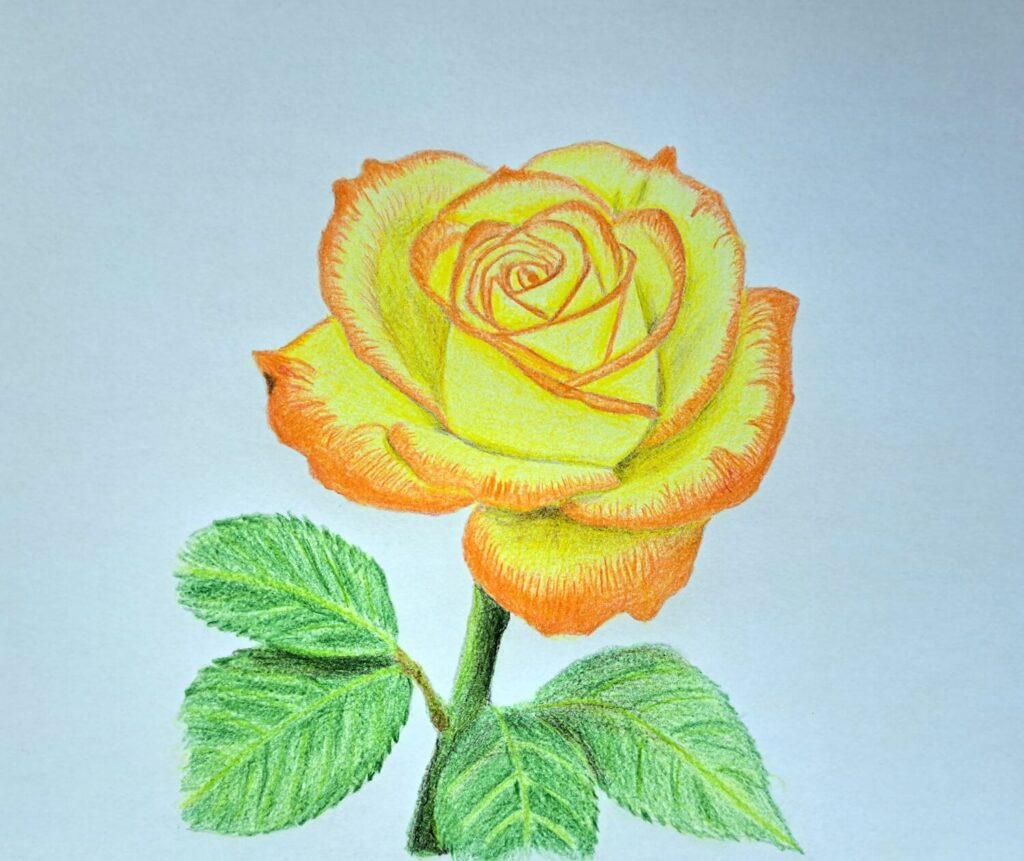
So far, so good. You have a beautiful bicolored rose. As the final step, we take it from good to great by making all the colors more intense. We also need to make shadows appear more prominent to increase the contrast.
Be cautious, though, because most shadows in flowers contain color, not pure blackness.
Besides, if your rose shifts from yellow to orange, or white to red, avoid creating a hard dividing line unless the reference actually shows one. Most bicolor roses contain gradual color transitions where pigments softly bleed into each other.
Once happy with the petals, move to darken the leaves.
Most newbies use one generic green for everything and everywhere. In contrast, rose leaves usually contain multiple greens at once, warm olive tones, cool blue-greens, yellow-greens near sunlight, and darker forest tones underneath.
Other finishing touches may include soft burnishing for smoother petals, deepening cast shadows, and cleaning smudges around edges.
Here are other tutorials about drawing realistic flowers:
- How to draw an orchid
- How to draw a cosmos flower
- Lily flower drawing
- How to draw a daffodil with colored pencils
Conclusion
You’ve done your best. And now you just need to let it go!
Remember, you can never really finish a drawing. There’s always something more you can do to improve, hence stop when you’re happy with the results.
I hope you’ve enjoyed today’s guide and found it insightful. Don’t forget to save on Pinterest so that it becomes a handy reference for when you need it.