I’m always excited every time I sit down to draw. It’s refreshing, to say the least.
While some of the stuff I draw ends up on this blog, most remain in my office or sketchbook. This was one of those projects that I did a while ago but decided to share with you after the fact.
Drawing simple items such as leaves is the best way to practice your craft.
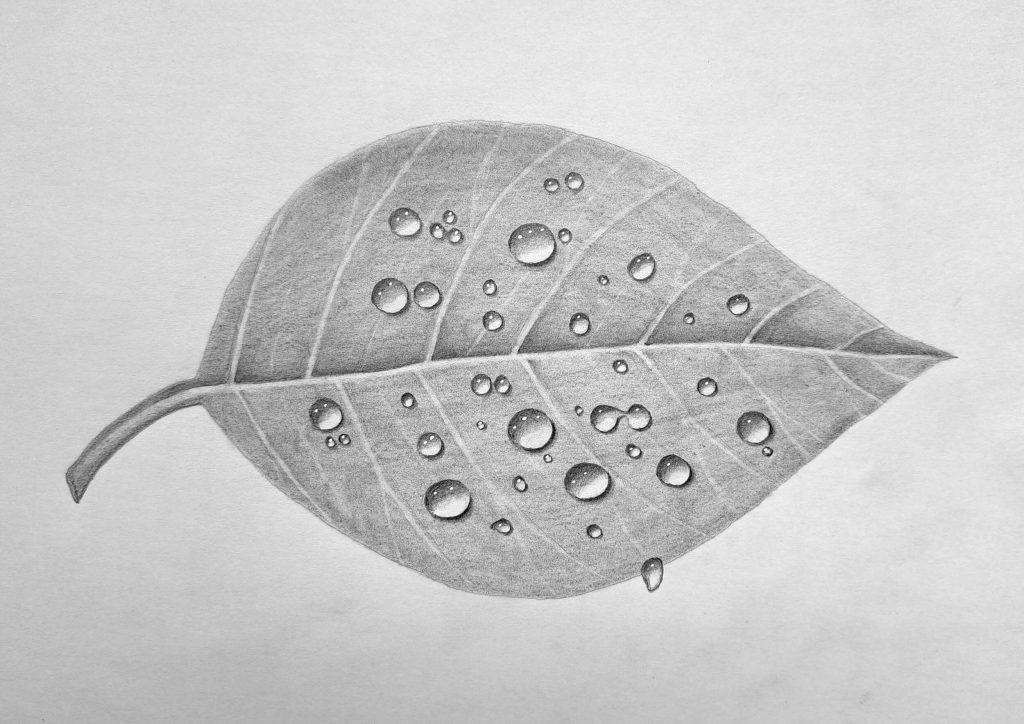
But in today’s tutorial, we’re going to take it a notch higher by drawing realistic water droplets on the surface of the leaf.
Besides, I’ve included an illustration for each step so that you don’t miss anything.
Let’s begin:
A Step-by-Step Guide on How to Draw a Leaf with Water Droplets
This is going to be a two-part process. In the first part, we’ll draw the leaf as realistic as possible and in the second part we’ll draw the water droplets just as you can see in the timelapse video above.
Part 1: Drawing the Leaf
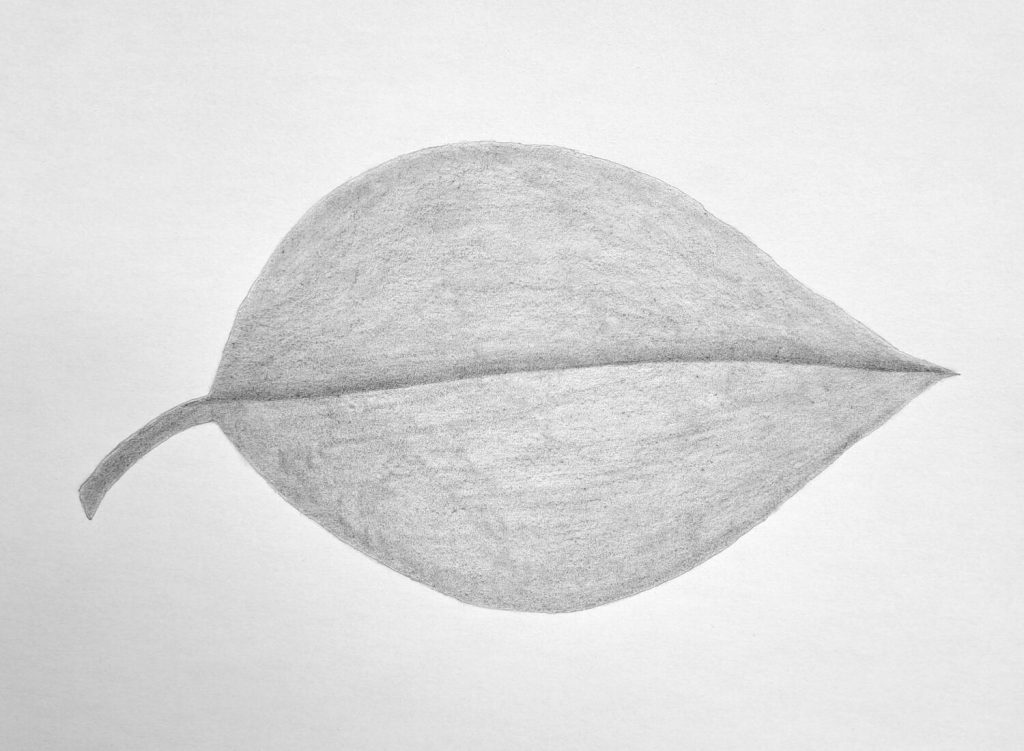
Sketch the shape of the leaf.
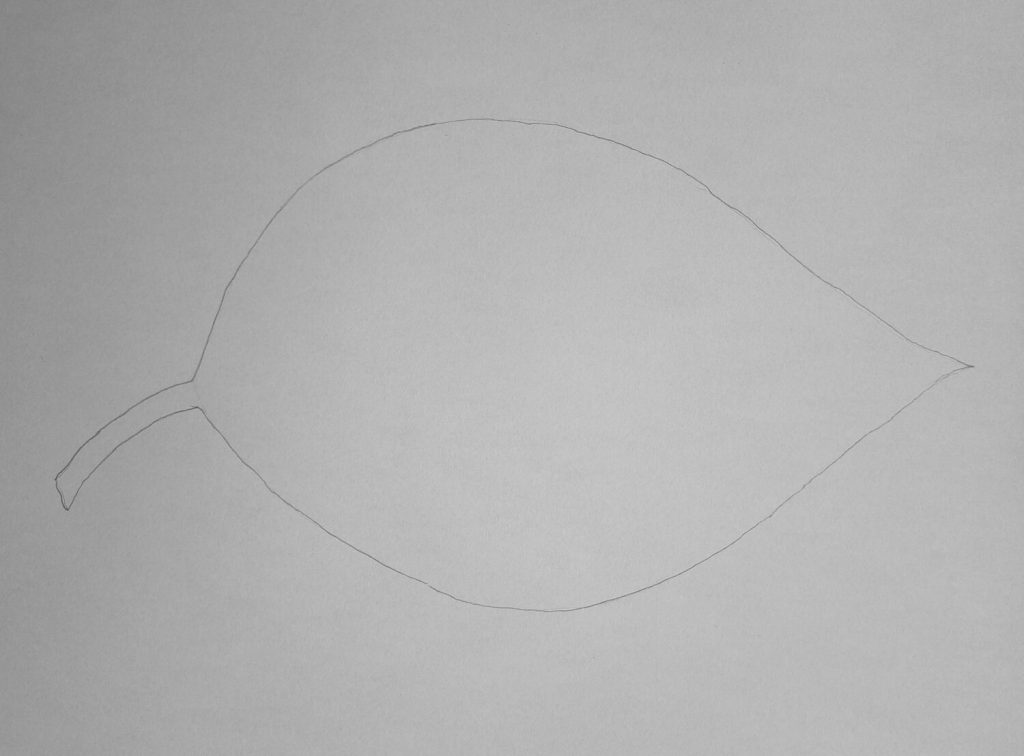
Let’s start by drawing the shape of the leaf. If you want, you can copy mine but you’re also free to draw any leaf form or shape. You can decide to draw one with a pointy tip otherwise known as lanceolate/linear or a traditional one like we have.
If you want more inspiration on different kinds of leaves, check out this document on plant structures.
My point is, you can never go wrong here. In fact, you don’t even need a reference photo although it will help later on once you begin shading.
Remember to sketch lightly with an H pencil.
Shading the leaf
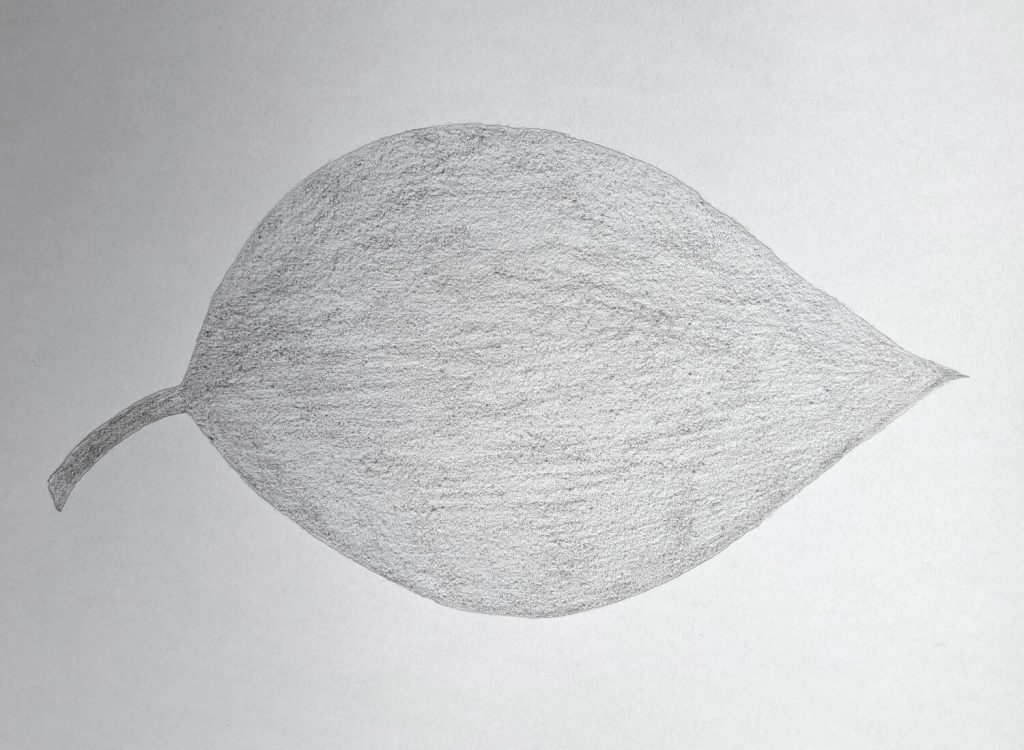
Next, fill the whole leaf area with graphite. Here, you have two options. Apply graphite powder with a piece of tissue or shade using an HB pencil. I’ve used the latter.
If you decide to go my route, make sure that you’re doing it consistently. You don’t want to press the pencil hard in one area and softer the next.
Try to keep it uniform.
If you have a large area to shade, try to shade with a free hand from the elbow which is much faster than when the hand is resting on the paper.
Blend to smoothen the shade.
The next step is to smoothen the graphite on the leaf surface so that it doesn’t appear too grainy.
You can use a Q-tip (like I did), or wrap a tissue around your finger and use it to blend. For the edges, use a stump which is more precise to avoid graphite going over your drawing.
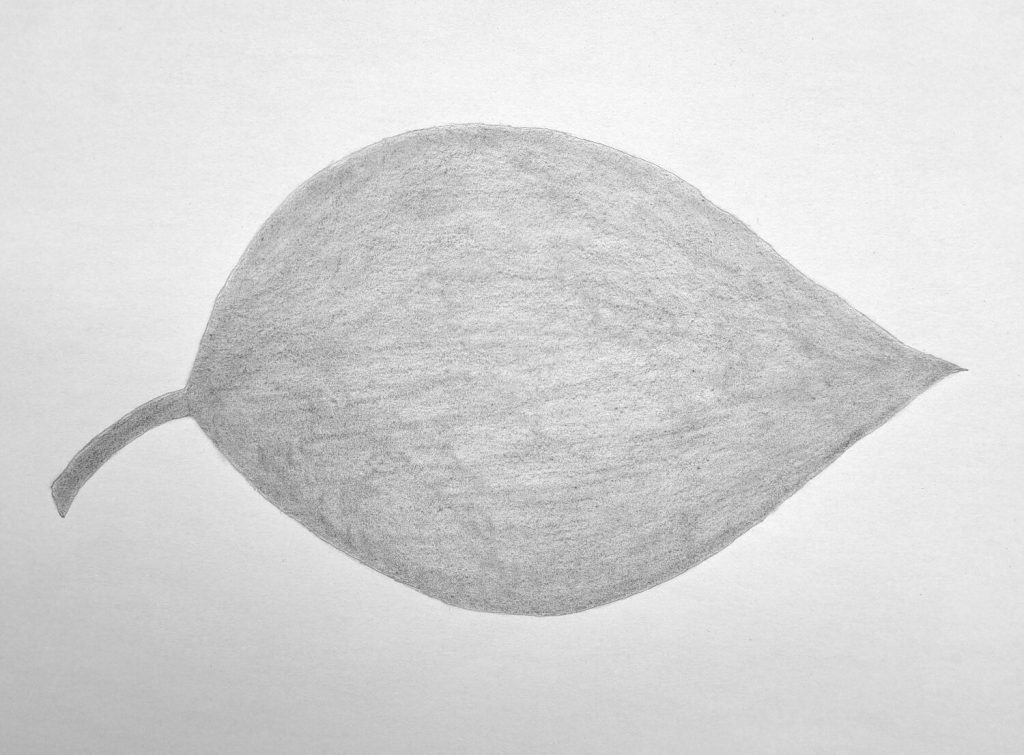
Divide the leaf into two.
From the illustration above, you can see that my leaf sketch is divided into two equal parts. You can achieve this by shading a little bit darker in the middle using an HB pencil.
When dividing the leaf, try to imagine a light source slightly top left and shade accordingly. The most important thing to remember is that, don’t make it a line. Instead, study my sketch and try to replicate it.
Draw the leaf’s midrib and veins.
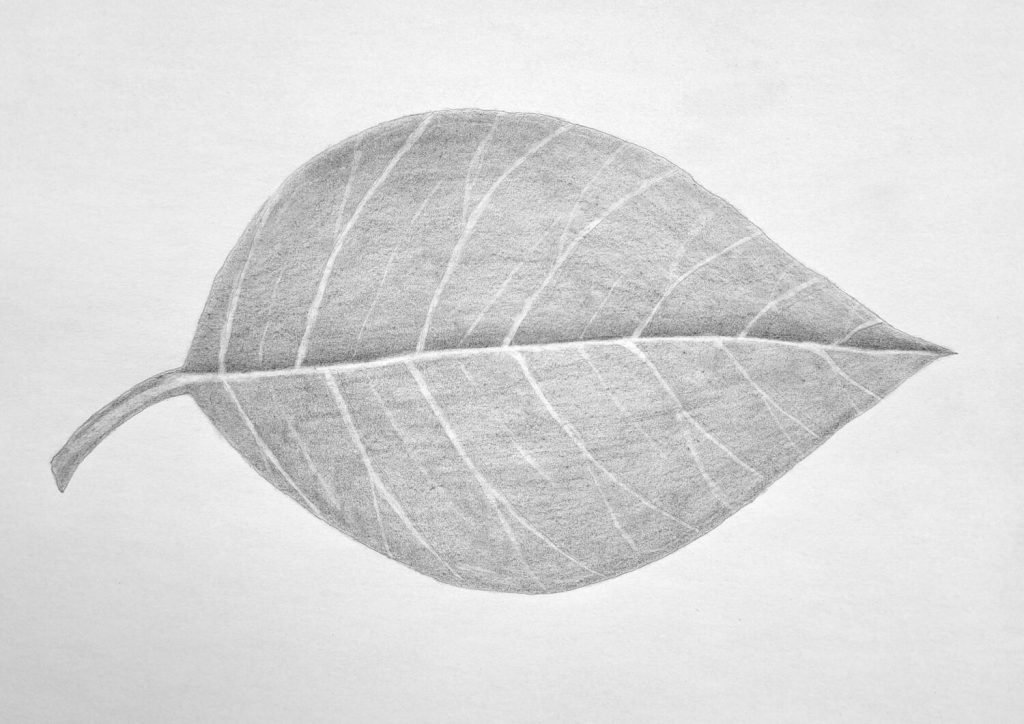
Do you know what I used to do when it came to drawing the leaf’s midrib or veins? I could get a pencil and draw them in black. That’s what most beginners do.
However, if you think about it, these structures are slightly raised above the leaf surface. Hence, they’re brighter than the rest of the leaf.
Therefore, it’s more about erasing than drawing. You can achieve this by using a kneadable eraser, kneading it to a point, and then start erasing below the dark line we shaded earlier. This will be the midrib. Also, note that it becomes even slimmer towards the tip.
Repeat the same for the leaf’s veins.
How to draw a leaf: Finalizing
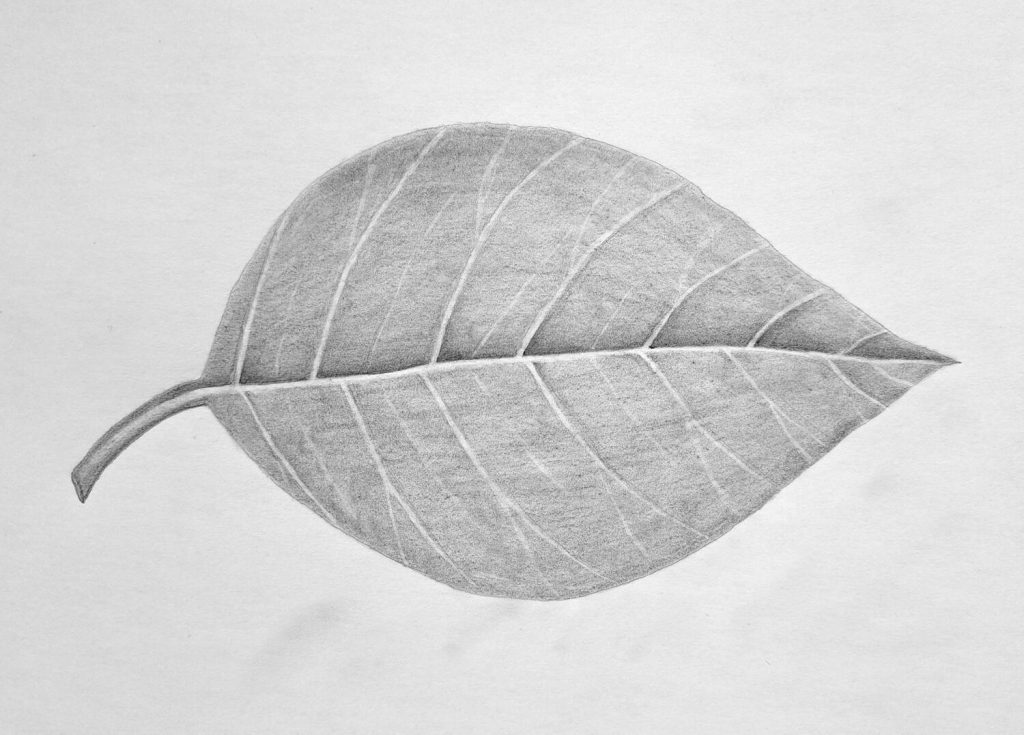
This last step before we begin drawing water droplets involves creating more contrast. Use an HB pencil to shade along the upper part of the midrib and around the veins.
Try to keep it as subtle as possible.
You can also keep erasing those lines a bit more for enhanced visibility. However, there’s a caveat. Don’t overdo it cause the veins are not necessarily white. If for whatever reason they’re too bright, blend lightly with a stump.
Part 2: Drawing the water droplets
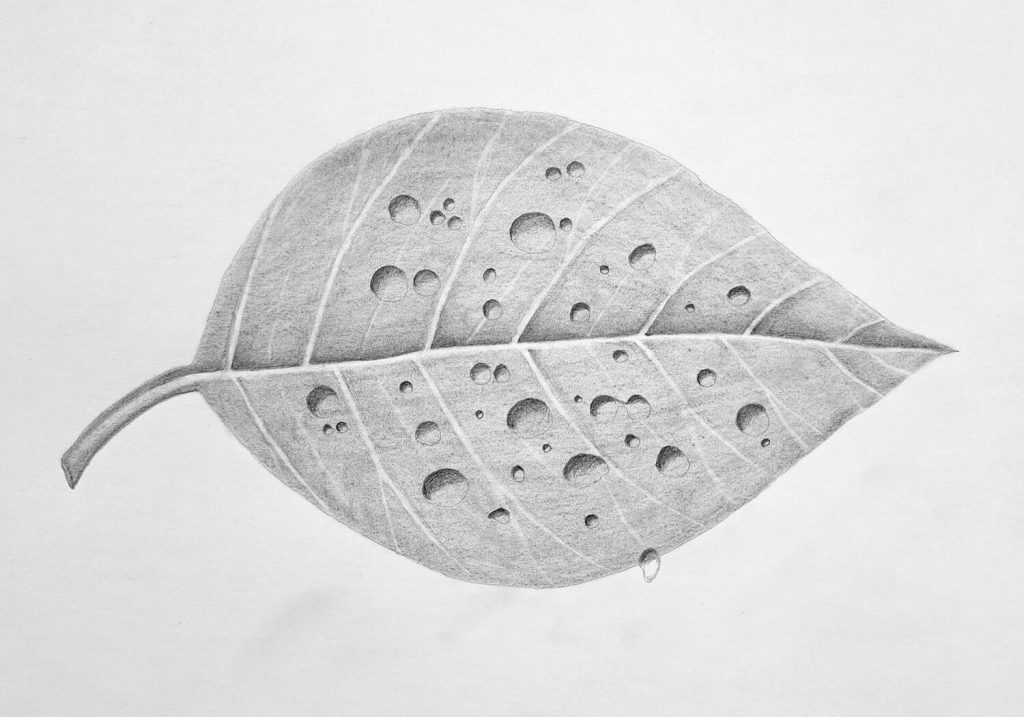
Sketch the water droplets.
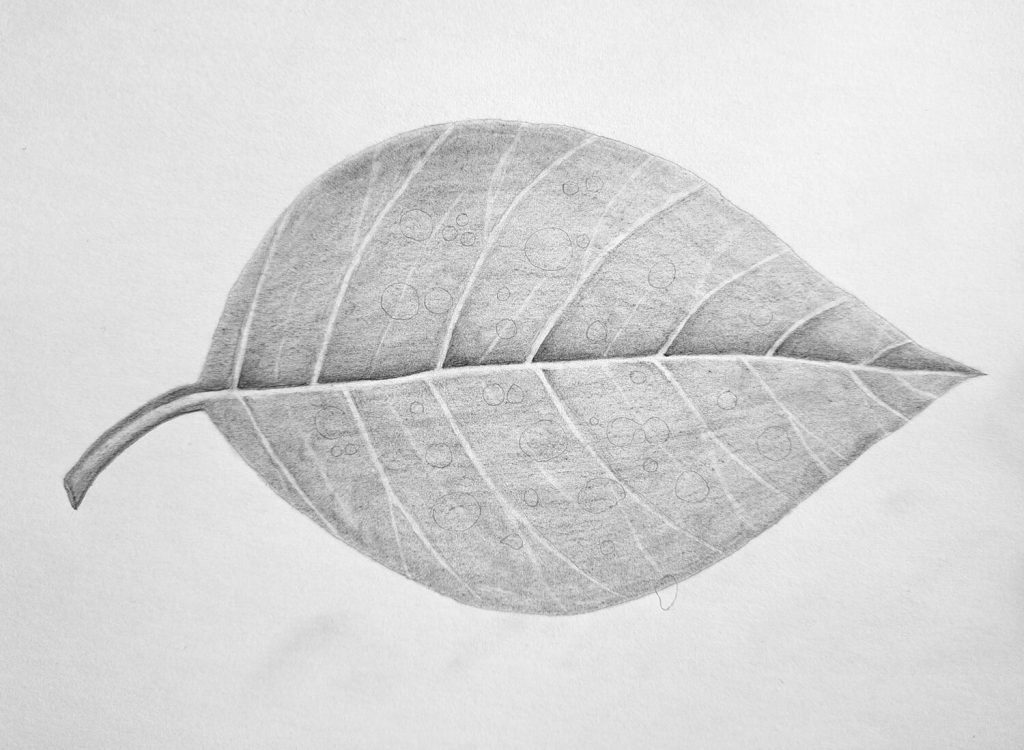
Now, begin sketching the water droplets on top of the leaf. Create as many droplets as you wish but make sure you vary their size and shape for extra realism.
Also, remember to sketch lightly using any pencil in the range of 4H-H. As long as they’re visible to you it’s all systems go.
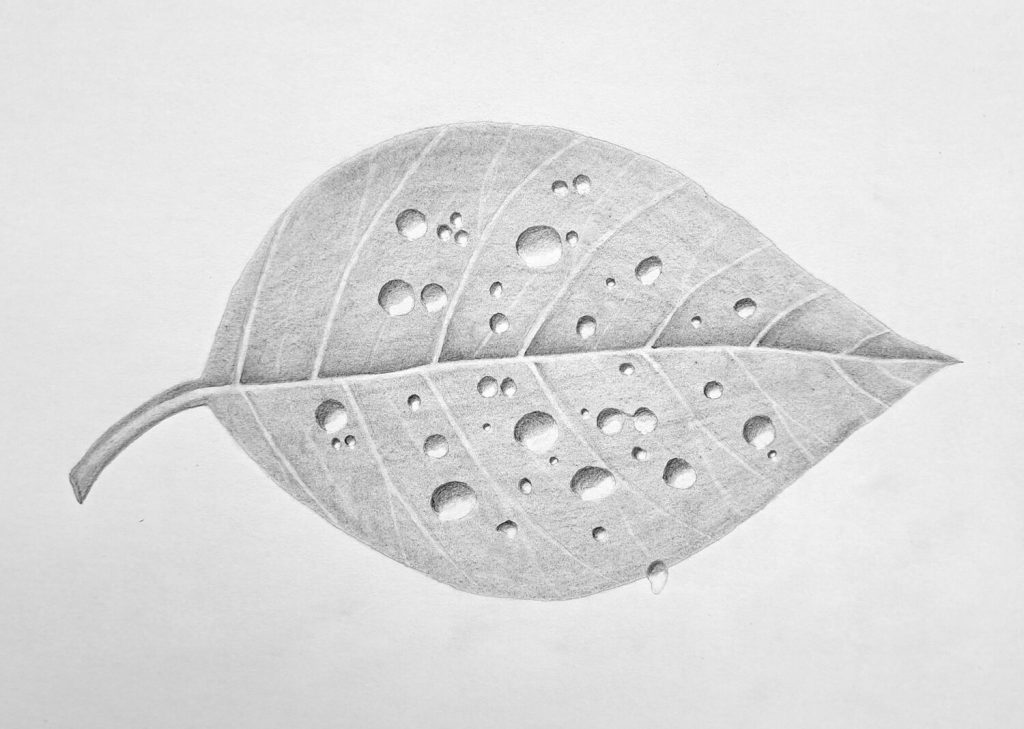
Shade the top part of the droplets.
This step involves shading those droplets uniformly with an HB pencil. Remember our source of light is slightly to the top left. Therefore, we’re shading the top left of all the droplets.
Note that the shade begins darker and lightens as we move towards the bottom right.
Do the same and blend with a stump as soon as you’re done.
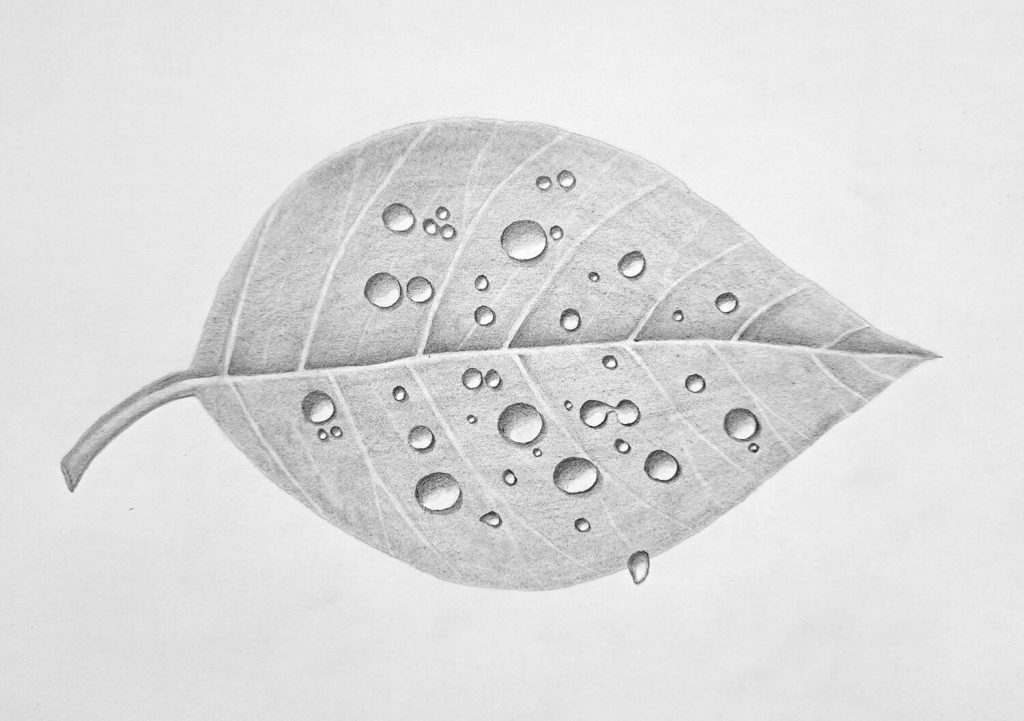
Erase the bottom part of the droplets.
At this point, begin erasing the bottom right part of the droplets to create highlights. You can use any manual eraser of your choice for extra control or a battery-powered eraser if you’re adventurous. Make sure you don’t erase too much.
In my illustration, I used a combination of a kneadable eraser for small droplets and a battery eraser for large droplets.
Draw the shadows
Happy with the progress, yet?
Good.
Now, let’s create the cast shadow right below the highlights using either HB or B pencil. The cast shadows will be displayed in the lower right part under the droplets.
Again remember to create a gradient transition meaning that immediately below the droplets is darker and lightens as you shade away from the droplets. Don’t forget to blend after shading to smoothen the surface.
Final water reflections

By the time we’re on the previous step, our drawing should appear more believable and life-like. But to make it pop, we need to add tiny water reflections on the upper shading of the droplets.
You can use a kneadable eraser but the reflections will appear rather dull. Hence, if you have a white Gelly roll you can use it to create the marks and that’s it!
Other relevant tutorials to check out
This tutorial has even more applications. For instance, it will come in handy when drawing the following (of course, minus the water part):
Drawing orchid flowers – a bit of leaves included
Drawing roses and all kinds of flowers requires an understanding of drawing and rendering leaves realistically.
Conclusion
There.
Simple and easy to follow steps but the results are amazing.
I hope you’ve been able to follow along and that you have amazing artwork. Part of the process of becoming is sharing with others even if you don’t feel confident enough.
And I’m here to cheer you on supposing you share your work with me. Just remember to tag #muusart or follow my socials below and DM me.