
Drawing a realistic lion is a thrilling artistic challenge that allows you to capture the raw majesty of one of nature’s most iconic creatures. Lions, known for their strength, grace, and expressive faces, are a perfect subject for artists who want to hone their skills in capturing realism.
Interestingly, the mane of a male lion is not just for show.
It serves as a symbol of dominance and health, with darker, fuller manes often indicating a stronger, more desirable male.
The fine details—like the texture of the fur, the intensity of the eyes, and the power in its posture. This fascinating detail can add depth and storytelling to your artwork.
In this step-by-step guide, I’ll break down the process of drawing a lifelike lion, from sketching its basic structure to adding the intricate details that bring it to life.
Whether you’re a beginner or an experienced artist, these steps will help you gain a deeper understanding of animal anatomy, lighting, and texture while producing an awe-inspiring portrait of this magnificent beast.
Drawing a Lion Step by Step (Animal Realism)
Sketching the basic structure of a lion
When it comes to basic sketching of a complex piece such as a lion, I’m always a proponent of breaking the whole task into recognizable shapes such as drawing the oval head, a triangle nose, etc.
However, in my experience, this approach rarely produces realistic results. So, I’d recommend one starts with simple stuff that you can use that technique. The alternative is to use the grid method which I’ve used before to sketch a dog and a cat or take a stab at freehand.
Regardless, you still need to study the subject or reference image before you begin sketching. Once you begin, try to understand or even estimate with your pencil where everything goes, in relation to the other features.
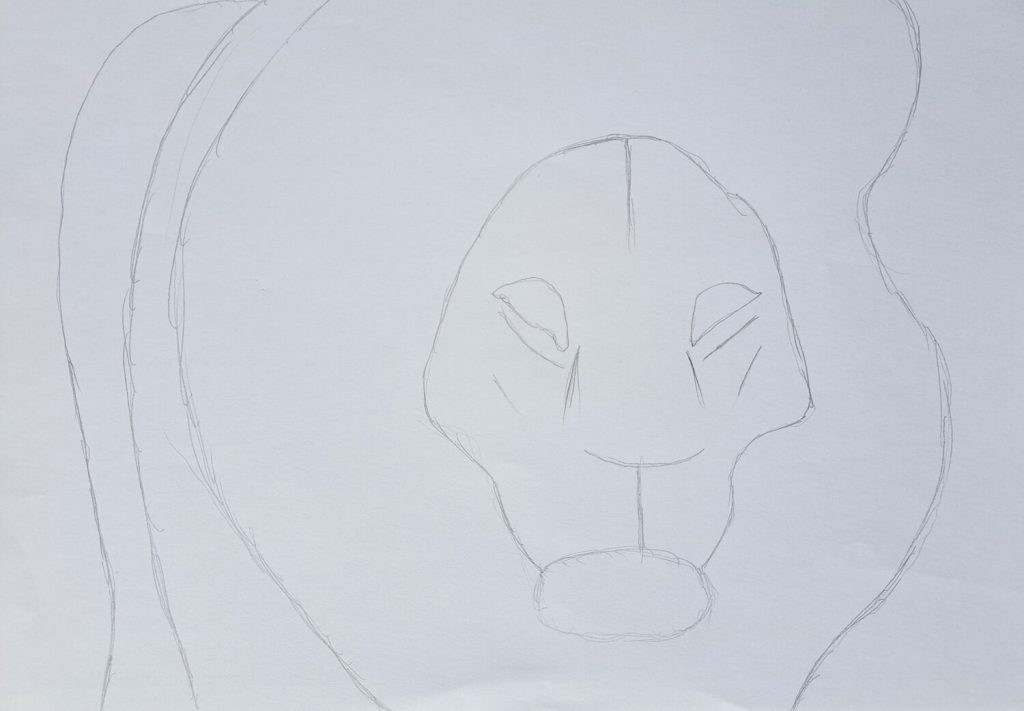
Back to this tutorial, you’ll notice that our subject is slightly facing to the sides. If we make a mistake of introducing symmetry, we’ll end up with a mediocre sketch. Pay attention to the two vertical lines I’ve sketched to divide the lion’s face. One side is slightly bigger than the other.
Then, I sketched the mouth, nose, and eye locations before sketching the face boundary. At this point, you can also sketch the outline of the mane and part of the body.
When sketching always remember to use light pencil strokes. Any pencil in the range of 4H-H is ideal. Also, don’t be afraid of making mistakes since you can always erase as much as possible.
Sketching the facial features
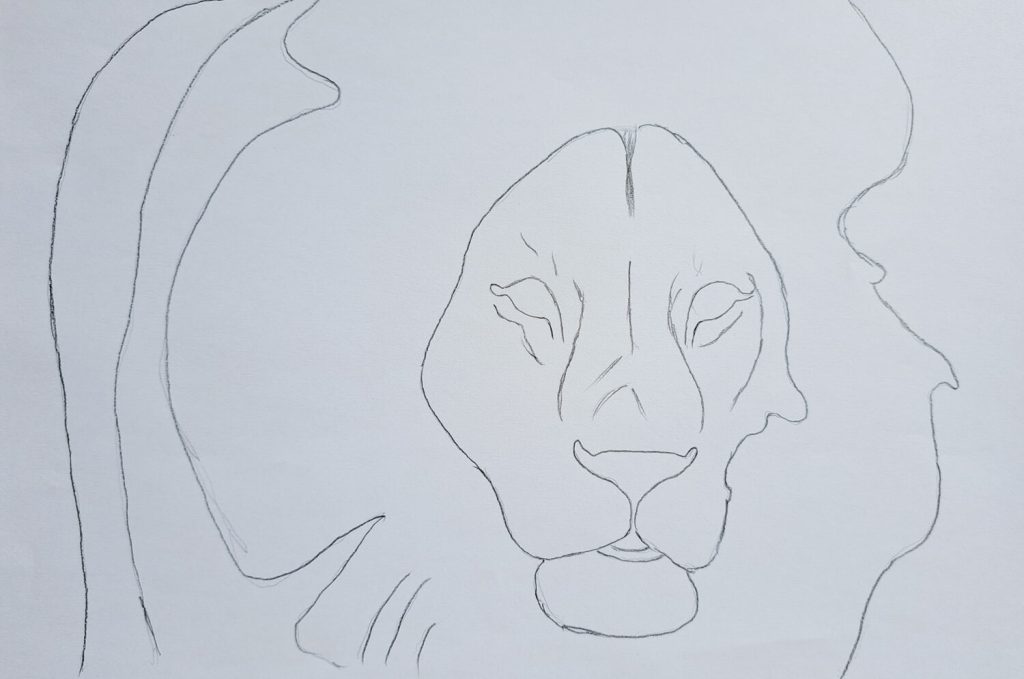
Once the structure is in place, we can begin drawing other vital features starting with the almond-shaped eyes, the bridge of the nose, and the nose. The nose is shaped like a triangle with the top corners tapering upwards.
Together with the mouth, they resemble a wide wine glass.
You can continue to refine the mane a bit by increasing the curviness of the lines.
Sketching all the lion’s details
Before we proceed further, let me mention that first two steps have been all about well defined lines and boundaries. While it’s a good practice to begin that way, it becomes a challenge once we begin shading.
This is why it’s always recommended to sketch as lightly as possible.
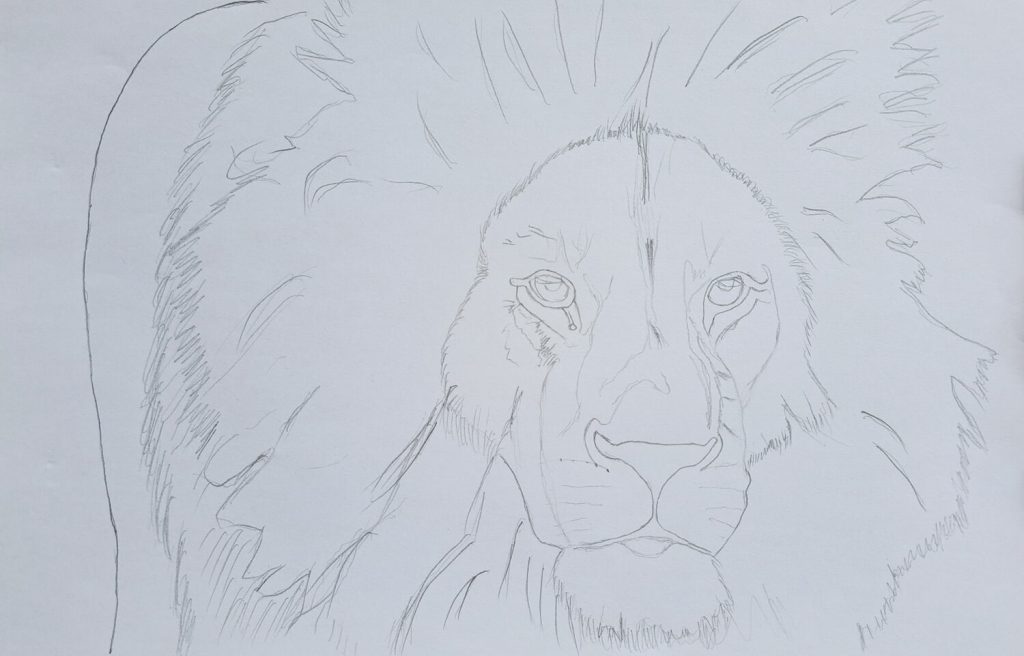
That out of the way, I had to erase most of those lines partially before embarking on this step. I always like to start with the eyes. I begin by sketching the highlights, the shadows, the reflections, and the rest of the face and define the mane even further.
This guarantees that once start shading and rendering the image, we won’t miss any important detail that gives our subject its identity.
After this step, you should have a complete and realistic sketch of a lion. If not, then you have to go back to step one and start over. Otherwise, no amount of shading can salvage an otherwise mediocre sketch.
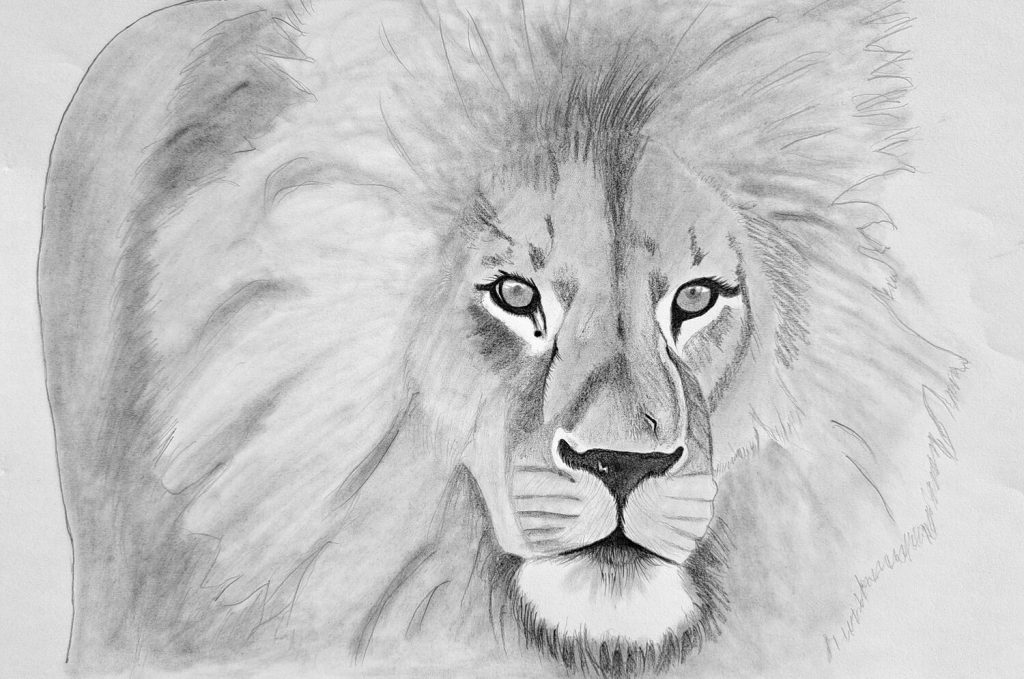
Basic shading and blending
The hard work is over. Now, we kickstart the fun part – shading. I say this cognizant of the fact that not everyone has the patience to shade and render a complete piece without giving up.
Besides, the patience required, shading brings a good sketch to life which is why most people find it quite satisfying.
Basic shading involves, applying graphite to eradicate the whiteness of the paper and create volume. My go-to method is using a Q-tip to apply graphite powder onto the sketch. This is not only fast but it blends nicely at the same time.
Notice that I left the eyes, nose, and lower jaw untouched.
Shading the eyes, nose, and mouth (8B Graphite Pencil)

My best advice is to take your time rendering this step. If for whatever reason you’re feeling fatigued, take a break and come back to it fresh and relaxed.
This is because, if you mess up here, all the work you’ve done up to this point will be rendered worthless. Especially when it comes to shading the eyes and around them. Each lion has a unique pattern around their eyes.
Besides, you need to pay attention to the shadows, reflection, and midtones in the pupil and shade accordingly.
Continue by shading the nose and the mouth as well.
Shading the lion’s face
First, identify the most visible shadows around the face and their location in relation to other features such as the eyes. Get a soft pencil and shade uniformly. In my case, I used a 6B pencil and blended it with a Q-tip.
Don’t worry about rendering the facial fur just yet. We’ll get to that later.
Shading the mane
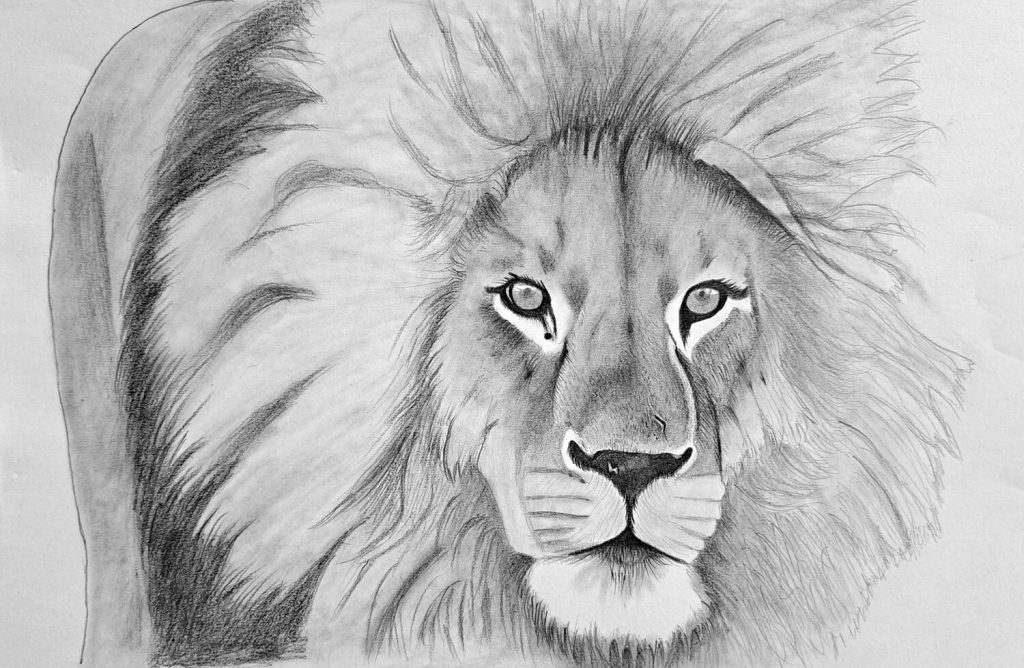
The lion’s mane is quite intricate with countless long strands of fur. We can’t shade each individually. Hence, we’ll shade them as a group.
Remember, as you move away from the face, the mane gets longer. You can shade this using long strokes that curve naturally. To achieve the best results, use a mechanical pencil with 0.5mm lead.
Also, remember to blend to give them that softer touch.
Advanced shading
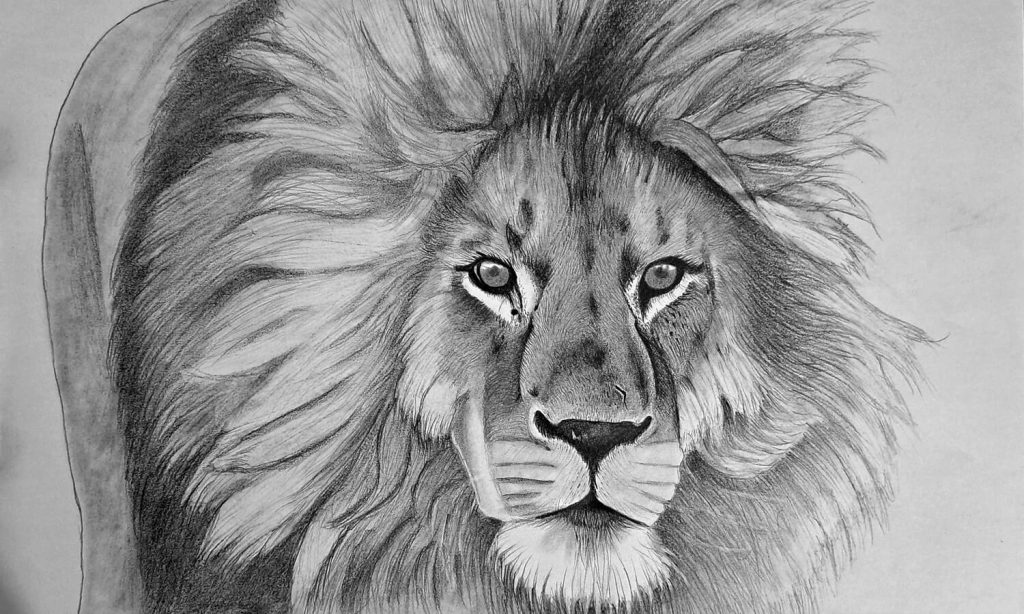
It’s to time build up more fur on the lion’s face. Use short precise strokes paying close attention to the general direction. Some are growing downwards while others grow upwards.
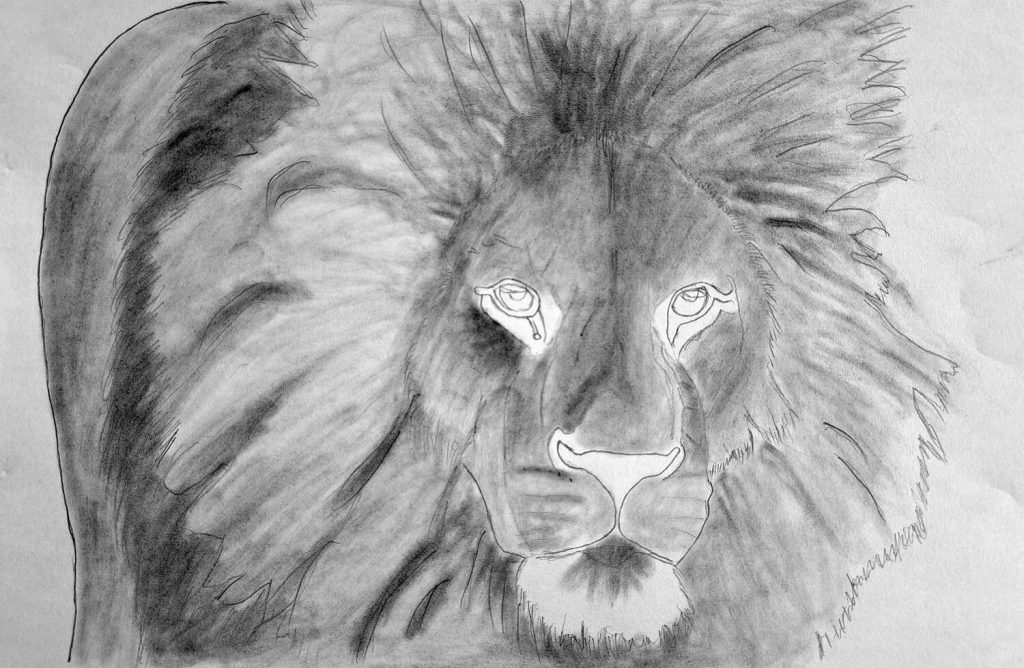
Also, shade the lower jaw with light strokes that darken around the mouth. Keep adding the fur on the mane as well as the entire face as you blend. Once you’re satisfied with your results, get a kneadable eraser and work through the main highlights to brighten them.
Shading final details including the whiskers

This step involves shading the whiskers which are mostly white. I used a combination of kneadable eraser and a white Gelly Roll.
To finalize, I shaded the background black using a medium Pitt charcoal. This step is entirely optional but I thought it would be nice to have a black background so that our lion drawing can pop.
I hope it does!
Conclusion
Drawing a realistic lion is a rewarding journey that requires patience, attention to detail, and a steady hand.
By breaking down the process into manageable steps—starting with refining the structure, adding intricate features, and finally, shading with care—you can transform a simple sketch into a lifelike masterpiece.
Remember, practice is key, and the more you observe and replicate the lion’s anatomy, textures, and expressions, the more your skills will improve.
Keep challenging yourself, embrace the learning process, and soon you’ll be able to capture the majestic power and beauty of the lion.