
In most American homes, Thanksgiving brings people together in a way that few traditions can, and turkey is always at the center of that celebration. In fact, according to a recent survey, 87% of people eat turkey with their holiday meal.
The significance of these birds cannot be ignored.
If you’re interested in learning how turkey became so popular on Thanksgiving, here’s an interesting read.
All the sideshows aside, we’re going to learn how to honor these magnificent birds by drawing them using graphite pencils.
In today’s definitive guide, you’re going to learn how to sketch a turkey from simple shapes to a life-like bird through easy shading techniques.
Easy Steps for Drawing a Realistic Turkey Bird
Part 1: Basic Line Sketching
Sketching the Turkey’s Body
I’ve recently realized that my audience is diverse, ranging from complete beginners to advanced hobby artists. For this reason, I intend to keep switching my sketch teaching methods to suit most of you.
Further, I know that when it comes to sketching, I’ve recommended using the grid method several times, but I realize not everyone is familiar with the technique. In such cases, using recognizable shapes remains my most beginner-friendly technique.
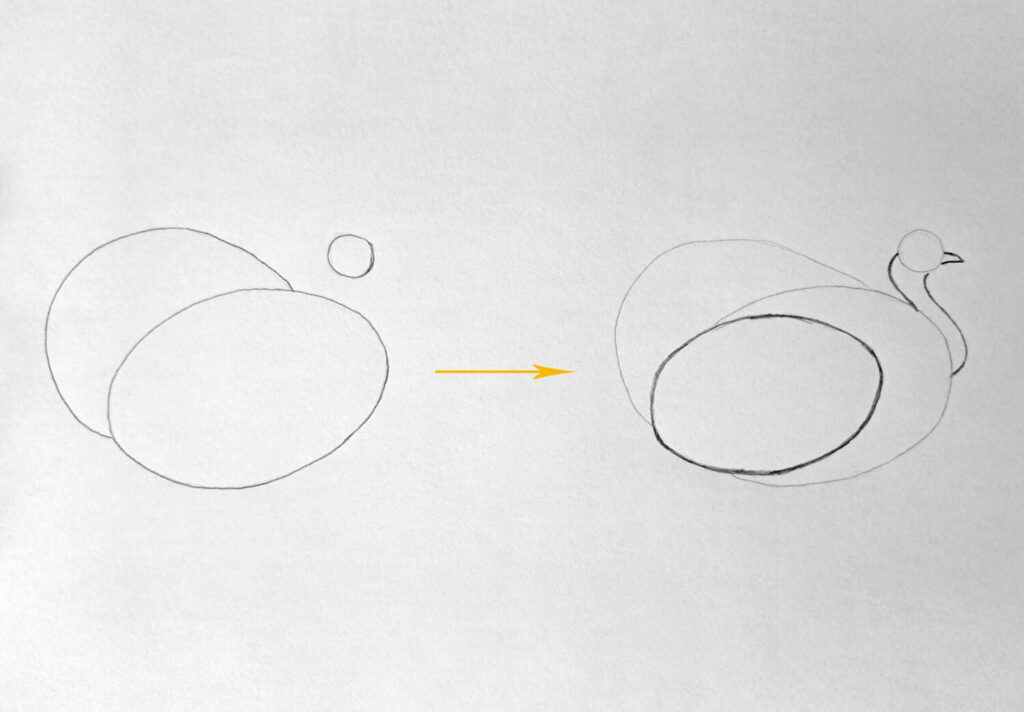
Therefore, to sketch the turkey, begin by drawing a small circle for the head, two ovals stacked together as shown on the left side of the diagram.
Next, add a third oval and connect the neck (two curved lines), and a beak as shown on the right side of the diagram above.
Just like that, and you’re done with step one.
Sketching the Tail, Wing, and Feet
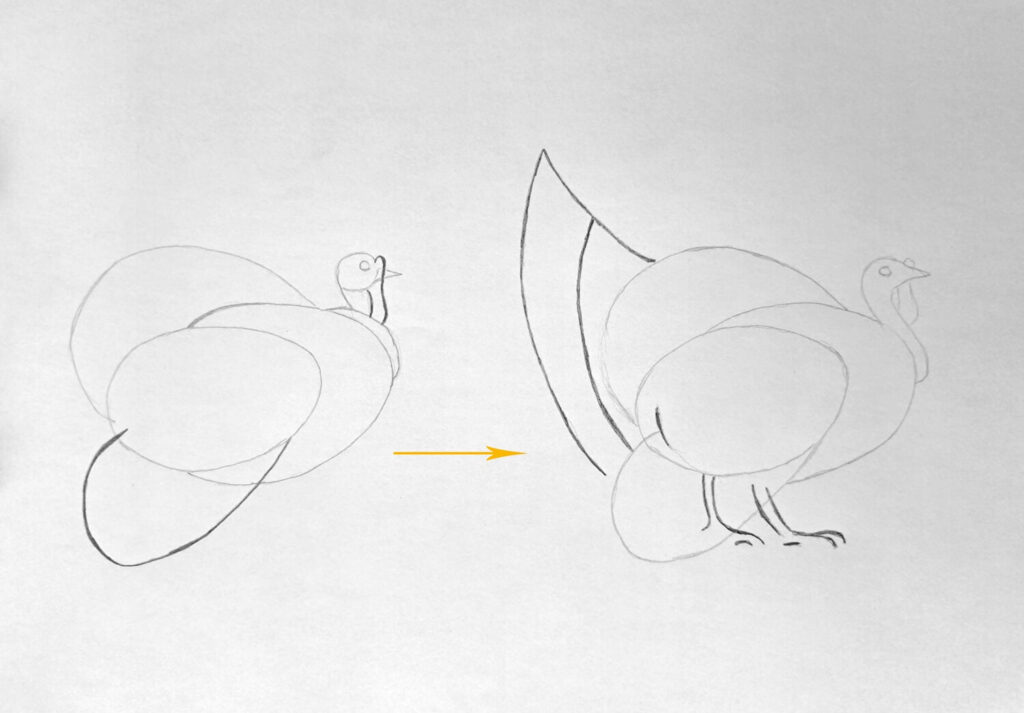
Next, sketch a half oval to resemble the side wings before drawing a snood. For context, most poultry birds have a comb-like structure on top of their heads. The turkey, however, has a fleshy growth from the base of the beak known as the snood. The snood is longer in males and hangs down over the male turkey’s beak.
You can then proceed to sketch a rough guide for the feet and the tail wing, as illustrated above in my sketch.
At this point, you may notice that the sketch is beginning to take shape, even though all we’ve done is stick together a few oval shapes to guide the drawing.
Drawing the Feather Details
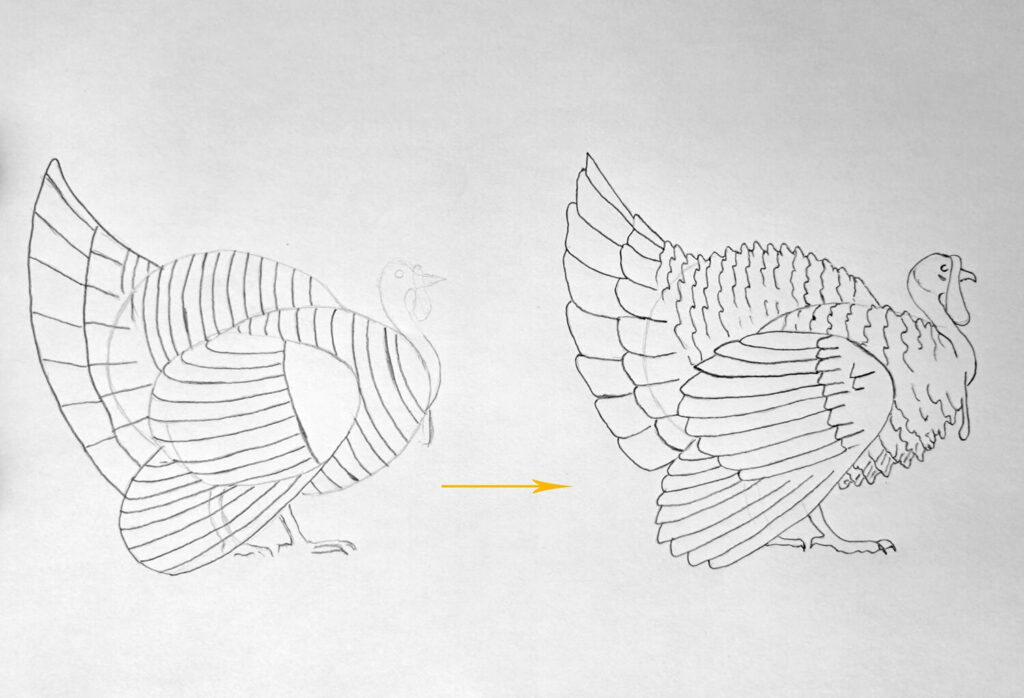
To complete the sketch, we need to capture the elaborate feather patterns by drawing curvy lines to represent the direction and movement of different kinds of feathers on the turkey’s body.
The first illustration on the left only has lines, but I’ve introduced curves in the one on the right to represent the random nature of the feathers.
Feel free to refine your sketch and ensure you have everything complete, including the feet, the eyes, the snood, wings, tail, and the beard (a tuft of long, bristle-like fibers attached to the breast in male turkeys).
Part 2: Shading for Realism
Shading the Feather Shadows
The first step in shading is to block in all the darks early on so you don’t miss those details later. Get a soft pencil, preferably 2B, and shade all areas that receive limited light.
You can start with the turkey’s eye and around the wattle (area between the beak and the neck).
Repeat the same for the pattern on the tail as well as the body feathers. You can also shade the toes and the pattern on the wings. If you’re unsure of which areas to shade, just observe my drawing illustration and follow along. Better still, get a well-lit reference photo and observe how light interacts with the subject.
Shading the Feather Midtones
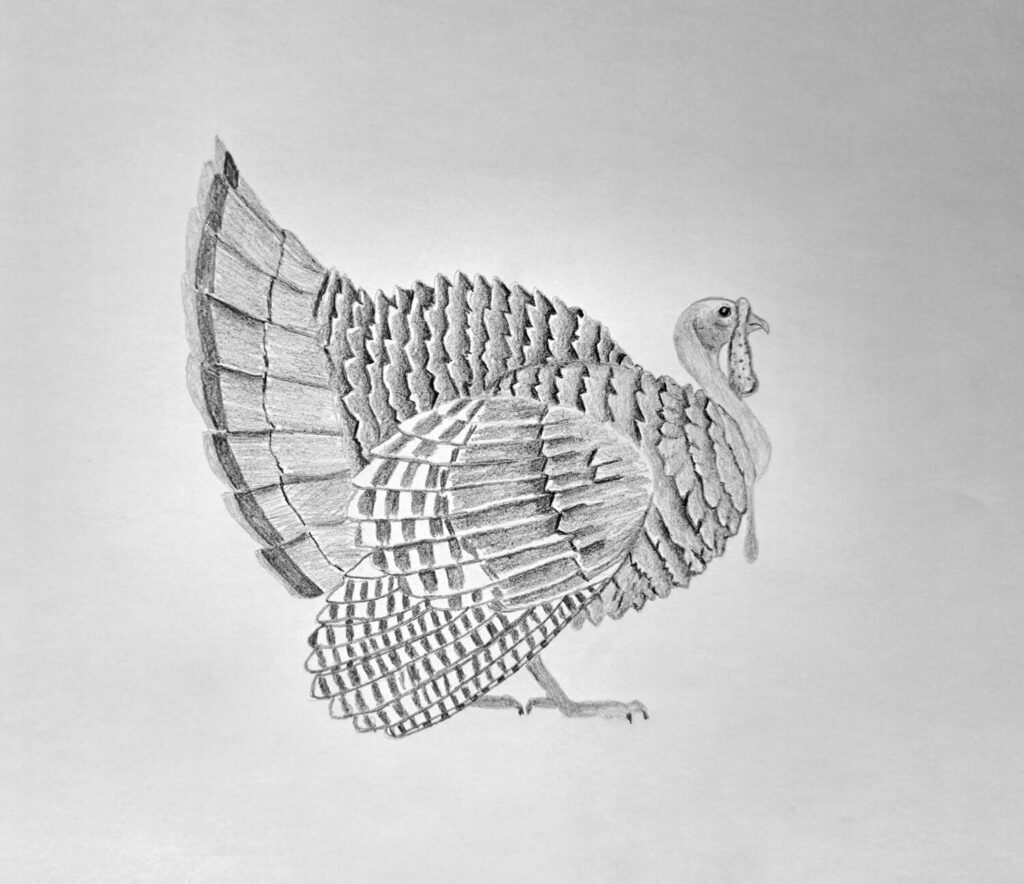
Notice that the drawing has extreme values – one too dark and the other almost white. To begin the process of building realism, we need to shade the midtones to bridge the gap.
Using an HB pencil, shade the rest of the turkey’s body as uniformly as possible. Feel free to use any shading technique of your choice, but personally, I prefer a combination of hatching and circulism.
The key is to cover the whole drawing completely except for the wings, which have the black and white pattern. By the end of this step, you should have a life-like artwork, but if you observe closely, you’ll notice that it looks rather blurred and dull.
That’s what we should address next.
Complete Drawing the Turkey
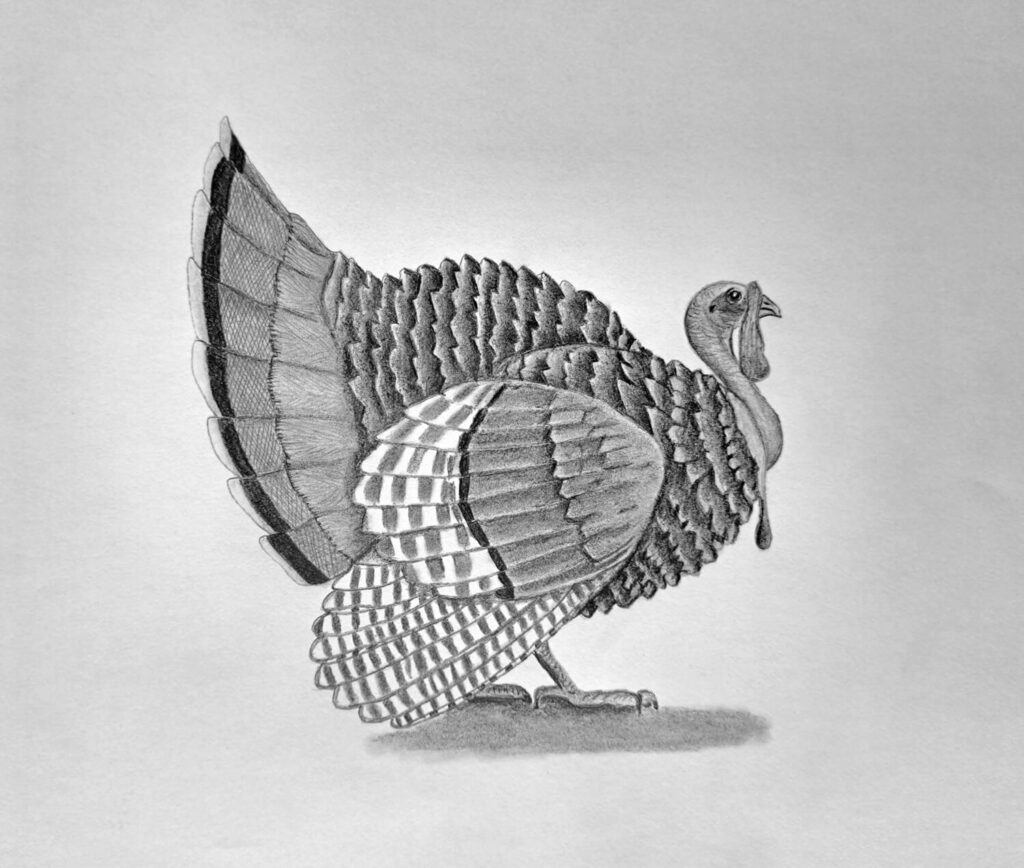
To finalize the drawing and make it sharp instead of blurry, we need to increase the contrast between the extreme values.
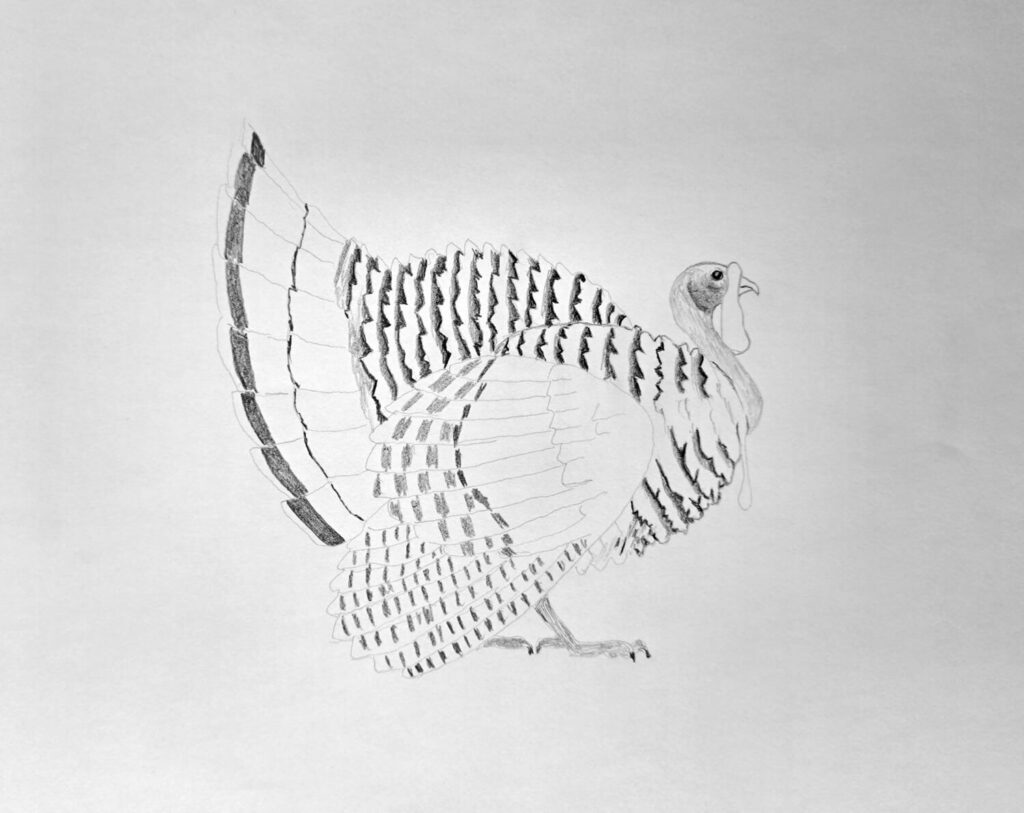
We achieve that by making sure that the shadows are dark with sufficient transition and highlights are well defined. Use a 4B pencil to darken all the shadows where the feathers overlap, the eye, scales on the feet, and the dark pattern on the wings and tail.
If you observe the tail, you’ll notice a clear pattern of fluffiness and a rattan-like pattern. I’ve used a mechanical pencil (0.5mm lead) to shade using a combination of hatching and cross-hatching.
Complete the drawing by adding some texture on the bird’s neck, shading the nostril, and the ear. While at it, don’t forget to shade the ground so that the bird does not appear like it’s floating in the vacuum.
Once done, ensure you blend using a stump and clean out any unnecessary graphite using an eraser. In case you’d like more drawing tutorials like this one, here are my top recommended guides:
- How to Draw a Feather
- Drawing a Realistic Bird
- Drawing a Parrot
- Drawing a Realistic Owl
- How to Draw a Golden Eagle
- How to Draw a Penguin
Conclusion
You’ve just read how to draw a realistic turkey in easy-to-follow steps. Whether you’re a complete beginner, a hobby artist like me, or an advanced pro-artist, this guide has been able to inspire you to create your own stunning artwork.
From using simple shapes to sketch to shading, blending, and contrasting. I hope you’ve found it helpful.
Now, I only have one favor to ask in return: share with others whether it’s your resulting work or this tutorial. Whichever way, I’m glad to have you around, and make sure to explore other resources on this website to further hone your craft.