
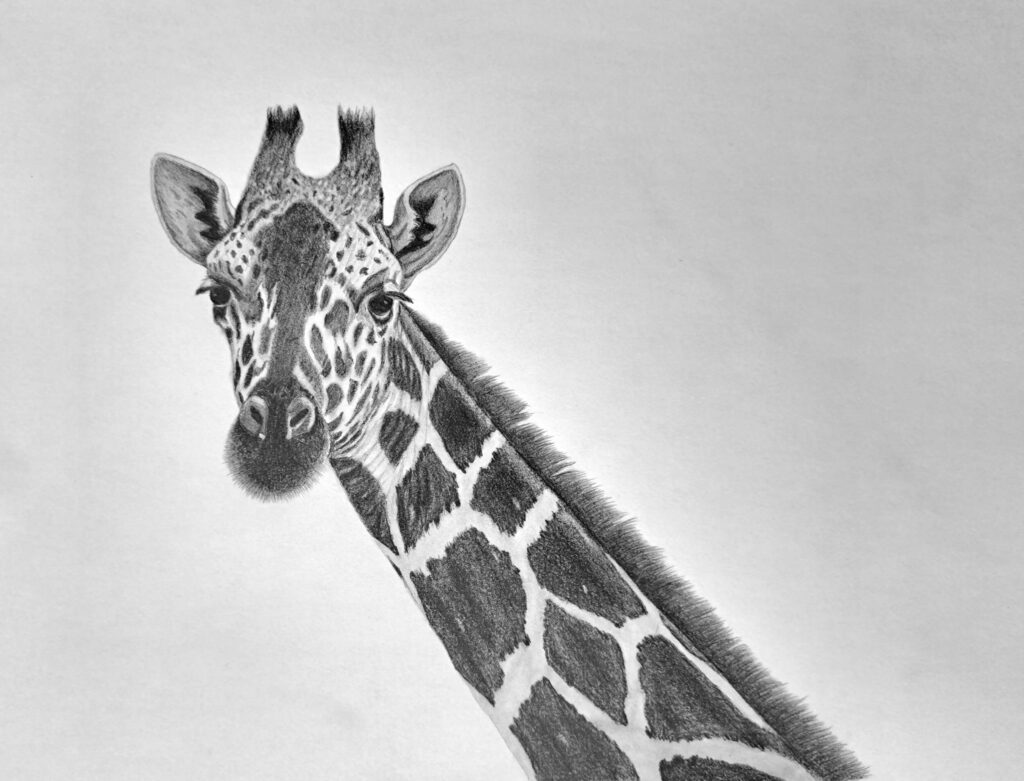
Imagine looking at a giraffe in front of you. What do you see? If you’re like most people, you’ll see a tall spotted animal with an unmistakable long neck.
Now, here’s the interesting part: A giraffe’s neck contains the same number of vertebrae as a human neck (Seven).
Can you believe that?
It sounds impossible when you’re staring at an animal that can peer through second-story windows and strip leaves from trees most creatures can’t even reach. But that strange mix of elegance and awkwardness is exactly what makes giraffes so fun to draw.
They’re all angles, curves, shades, spots, and textures, all of which explain why beginner artists often avoid them.
In this guide, I’ll walk through the full process of drawing a realistic giraffe’s head and neck, from the first outline to the final shading and contrast. Whether you’re using graphite pencils, charcoal, or colored pencils, the structure stays mostly the same.
Let’s get started:
How to Draw a Realistic Giraffe’s Head and Neck
What You’ll Need
- 2H, H, or HB pencil for sketching
- 2B, 4B, or 6B for shading (Depends on how dark you want your drawing)
- Kneaded eraser
- Blending stump or tissue
- Smooth drawing paper
Don’t worry about expensive supplies. Plenty of artists create stunning wildlife drawings with basic pencils and printer paper (like I’ve done).
Outlining the Giraffe
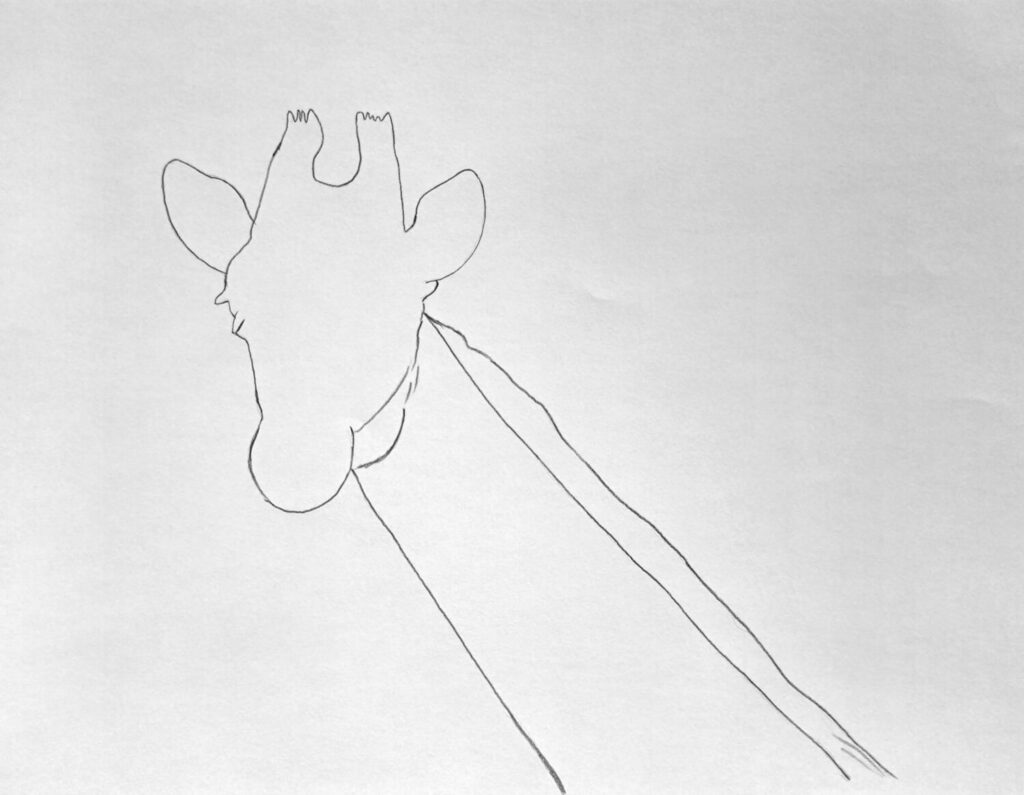
Begin by lightly sketching the outer contour of the giraffe’s head and neck while observing your reference closely.
Sketch the outer parts of the ears and ossicones, those horn-like structures on top of the head. Continue drawing the shape of the head and the muzzle. Again, I’m just focusing on the outer shape of my reference photo.
Next, sketch the neck using two long, flowing lines, plus a third for the mane. Lightly define the mane running along the back of the neck.
Remember, this is where many giraffe drawings gain or lose realism. The neck shouldn’t stay the same width from top to bottom. Give it your best!
Completing the Line Sketch
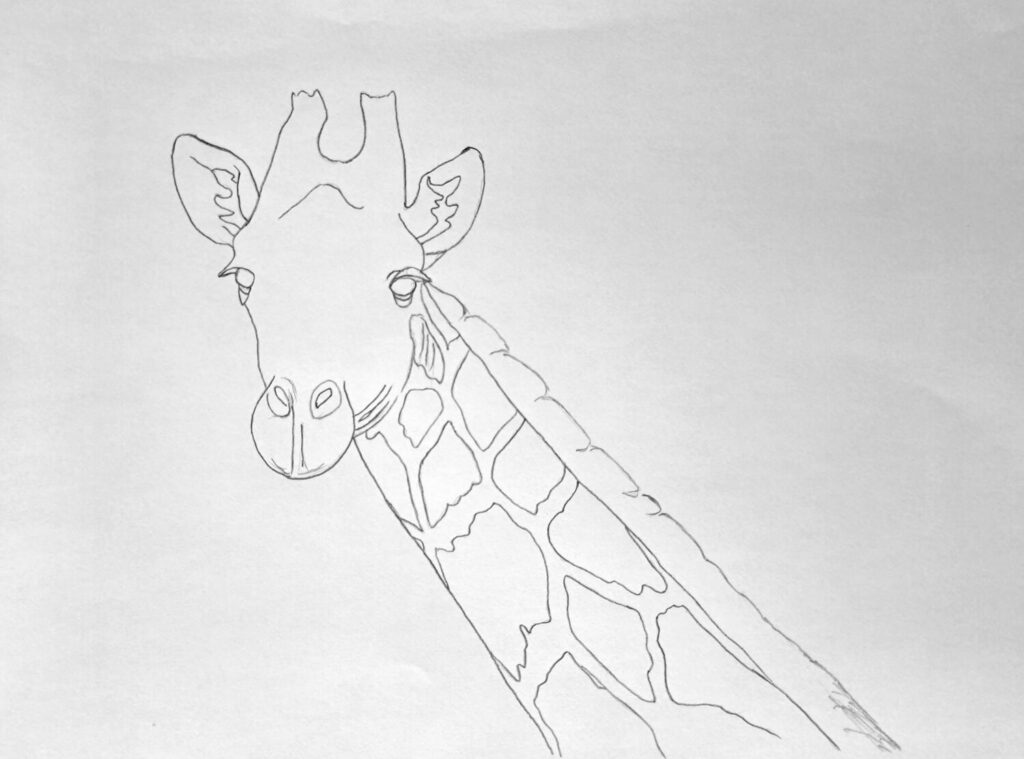
Once the outline has developed, start placing the ears, ossicones, eyes, eyelashes, and nose in their correct positions. Giraffes have fairly large eyes that sit high on the face, which gives them that gentle expression people instantly recognize.
Once the major features are in place, begin refining the details (you can add as much or as little as you wish).
Sketch the wrinkles between the head and the neck and adjust the curve of the muzzle. Define the ears more with openings. Add the nostrils and eye placement.
As you refine the sketch, pay attention to line weight too. I always prefer to use light markings for my sketch because I don’t want them to get in the way of shading.
You can also sketch spot patterns on the neck with light pencil strokes. Besides, the shape of the mane along the back of the neck should stay soft and irregular.
Basic Shading for Volume
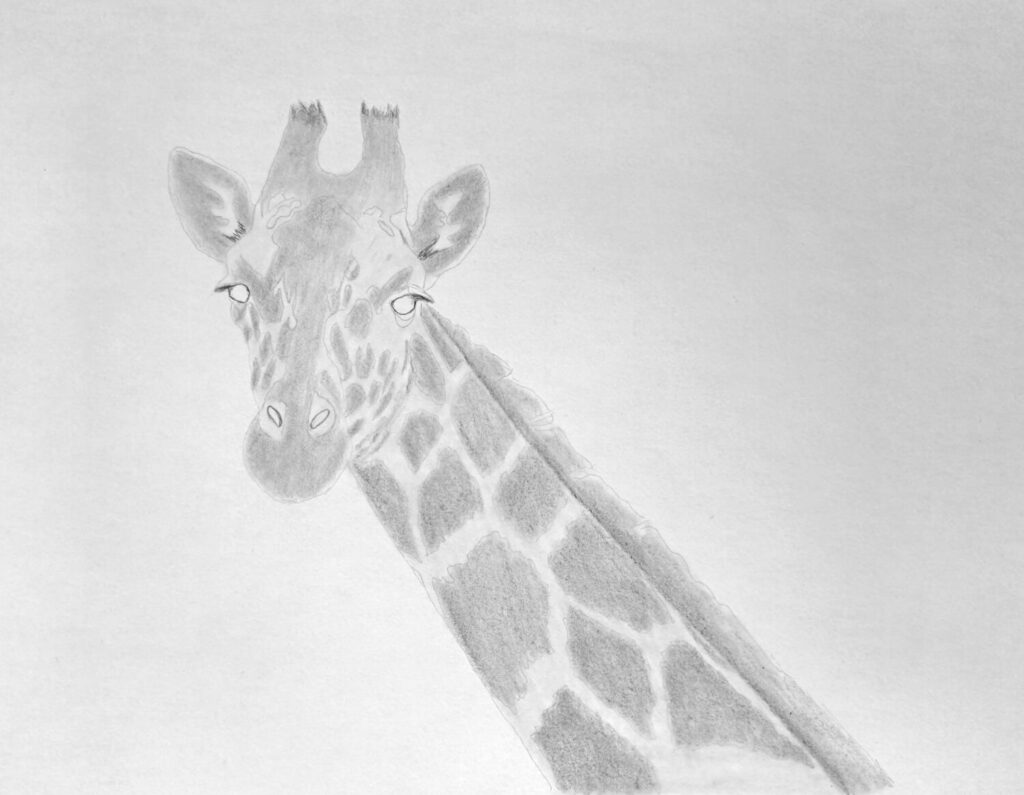
Here’s where my tutorials defer with most out there. When shading the first layer, I don’t begin by establishing the main light source or deciding where the light is coming from at this point.
Here’s why:
Making that decision forces me to commit too early. Instead, we just want to cover the whole sketch with light graphite, and an HB pencil does an amazing job here.
Start with soft, broad shading across the neck and face using light pressure. It’s easier to darken graphite later than to erase heavy shading.
Again, only pay attention to spot marks, the muzzle, ears, ossicones, and the neck pattern as illustrated in my drawing above.
Once happy with shading, carefully blend to attain a smoother shade. It’s alright to lightly blend through the whites a bit; it makes it different from the rest of the paper.
Shading the Giraffe’s Face (Eyes, Ears, and Nose)
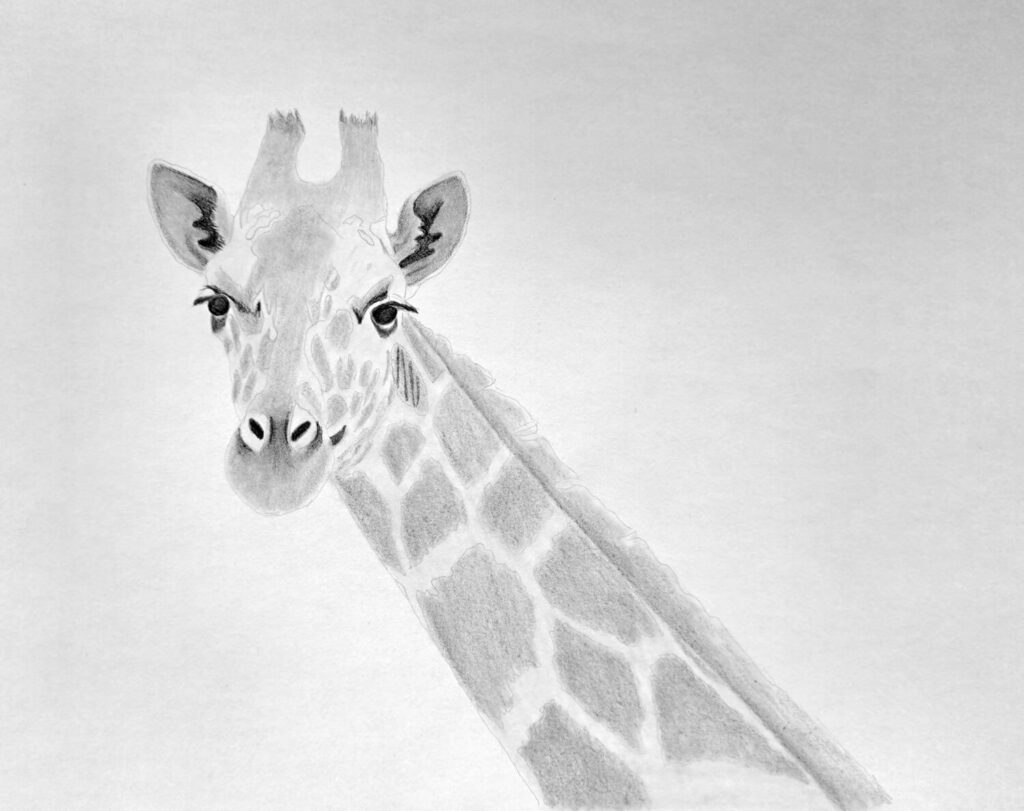
This step captures the emotional aspect of the giraffe, which in most cases is captured by the eyes. Therefore, it’s always a good idea to begin with those. To start, get a 4B pencil and darken the cornea gradually and build shadows around the eyelids.
Giraffes usually have long eyelashes too, especially visible in close-up references.
With the same pencil, do the same for the ears, darkening their openings. Inside the ears, there’s usually fine fur catching light differently from the outer edges. Using slightly directional pencil strokes helps suggest texture without drawing every individual hair.
Now move to the nose and muzzle.
Shade the nostrils with a dark and soft pencil before shading the muzzle lightly with an HB pencil.
Initial Shading of the Giraffe’s Spots
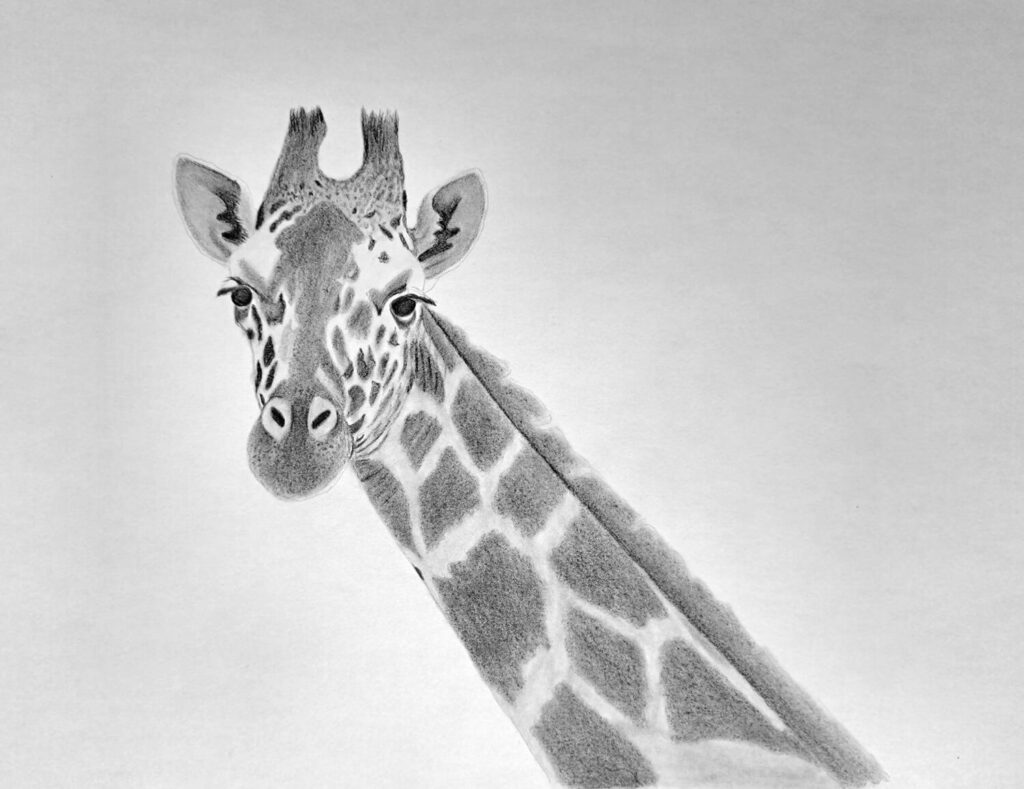
Giraffe spots are fascinating because no two patterns are exactly alike. In fact, for years, researchers have even studied giraffe spot patterns to identify individuals and examine genetic traits.
In a way, they function almost like human fingerprints.
But when drawing them from memory, simplicity is everything. Alternatively, try to replicate what you can observe from the reference.
Since we had already sketched them, it’s time to shade them gradually.
Also, remember that spots wrap around the form of the neck and face. Remember, this is just the initial stage because we’ll add texture later on in the final step. For now, shade the spots on the face, neck, mane, and blend.
If you’re in doubt, just study my drawing above and see if you can identify the process behind the illustration.
Complete Giraffe’s Drawing: Contrast, Light, and Shading
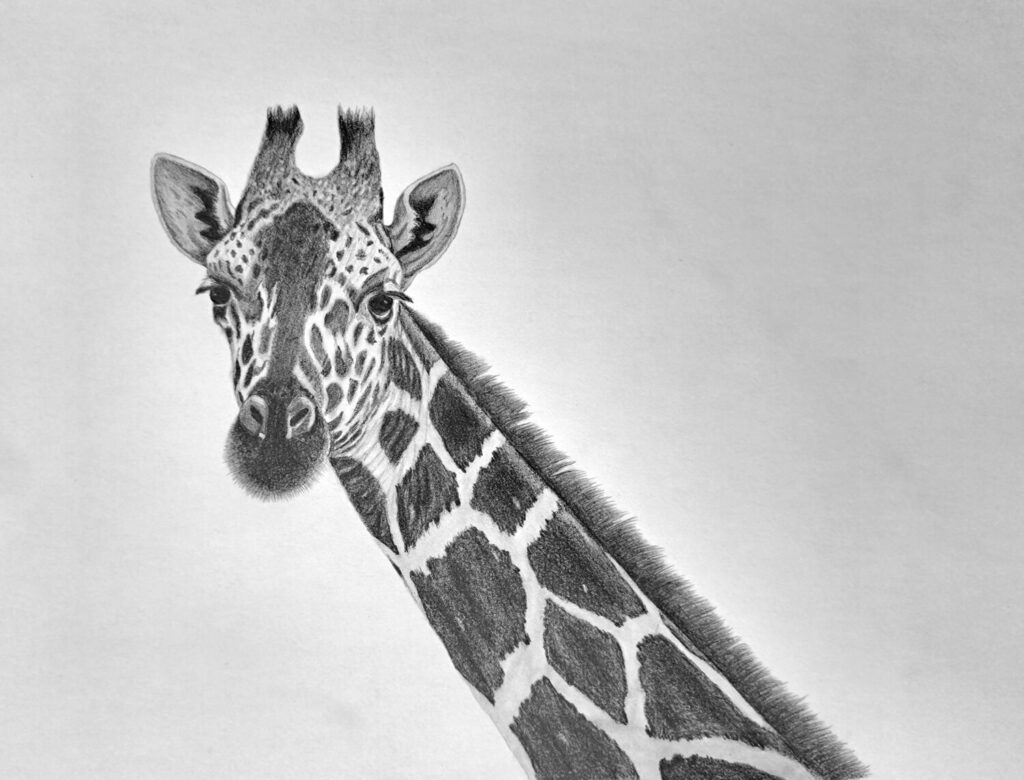
As the final step, we have to wrap everything together perfectly. We achieve this by carefully observing the relationship between different value scales. But most importantly, the contrast between dark and light values.
To begin, darken deep shadows around the eyes, under the chin, and between overlapping forms. Then lift highlights gently with a kneaded eraser, especially along the nose bridge or upper neck where light naturally hits.
You should also erase a small highlight in both eyes so that they appear shiny and a bit teary. The area around the nostrils appears leathery-like, so shade with a lighter pencil and blend.
Next, move to the neck, starting with the mane. Use a 2B pencil and create repeated short strokes to render the fur.
Lastly, move to spot pattern which aren’t just blocks of color. Instead, they often have soft edges and subtle tonal variations, especially where the fur catches the light. Add subtle texture marks to suggest fur direction.
Here are more recommended tutorials for you to try out:
- A Step-by-Step Tutorial on How to Draw an Elephant
- Easy Step-by-Step Tutorial on How to Draw a Realistic Deer
Conclusion
Nature doesn’t have any shortage of inspiration, and every day I learn to appreciate that fact. Giraffes are not only the tallest mammals on earth, but a constant reminder to always hold our heads up, even in the worst of circumstances.
And as artists, to reach our wildest dreams and aspirations.
Beginning with grabbing a pencil and a piece of paper or a sketchbook, and begin drawing something, a giraffe preferably.
I hope you’ve enjoyed today’s guide to drawing a realistic giraffe and that you’re going to follow through and see what you achieve. Of course, you can always save on Pinterest for later.
All the best!