I’m always fascinated by nature’s gift to humanity, flowers. But the calla lily is on another level. For starters, it’s among the world’s unique flowers because its flowers don’t consist of the same series of petals as other flowers.
Instead, unlike most flowers, a calla lily doesn’t have layers of petals arranged around a center. What many people mistake for a petal is actually a modified leaf called a spathe, which wraps around a central spike known as the spadix.
This unusual structure gives the flower its elegant, trumpet-like shape and instantly recognizable shape. Depending on the cultivar, its pristine color further enhances its beauty and charm.
No wonder, it’s a popular choice for weddings and, of course, a drawing subject.
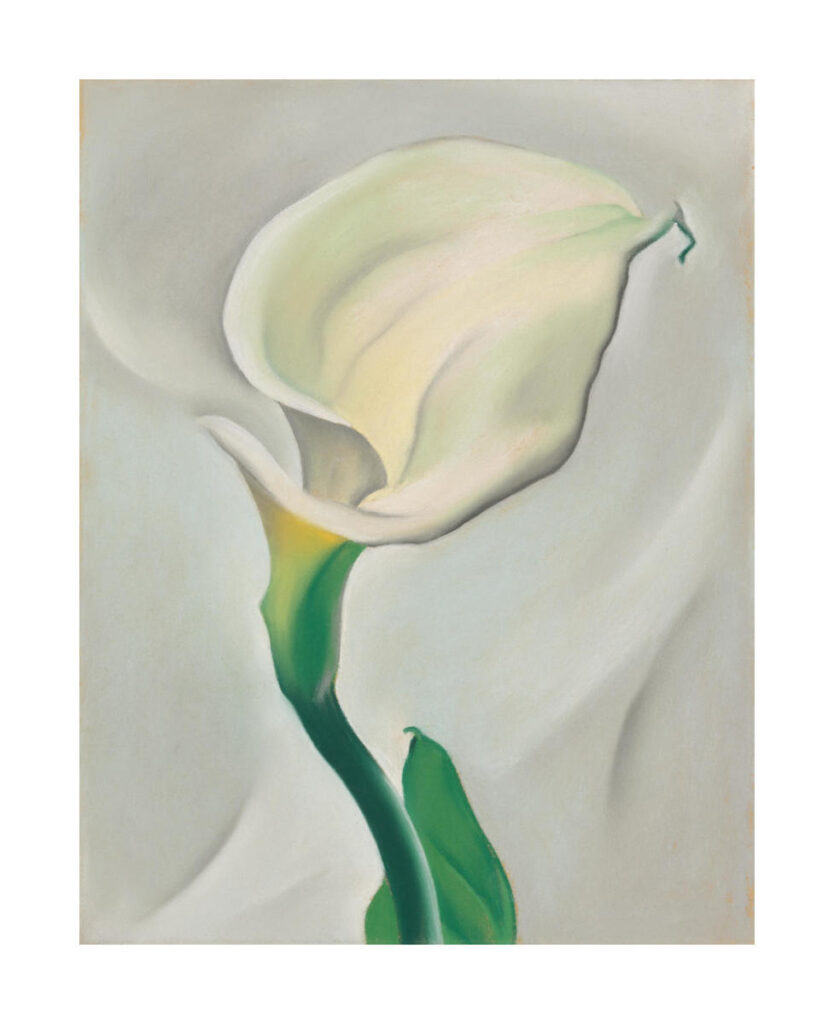
In fact, by the 20th century, calla lilies had become popular in the United States and a fixture in American art. This is evident in the work of Georgia O’Keeffe, who painted several famous works depicting close-up portraits of the flower.
Today, I’m excited to share my simple 4-step process for drawing a calla lily with graphite pencils. Follow along.
How to Draw a White Calla Lily Flower
Before starting, gather a few basic supplies:
- H or HB pencil for sketching
- 2B and 4B pencils for shading
- Kneaded eraser
- Drawing paper
- Blending stump or tissue (optional)
Sketching the Calla Lily
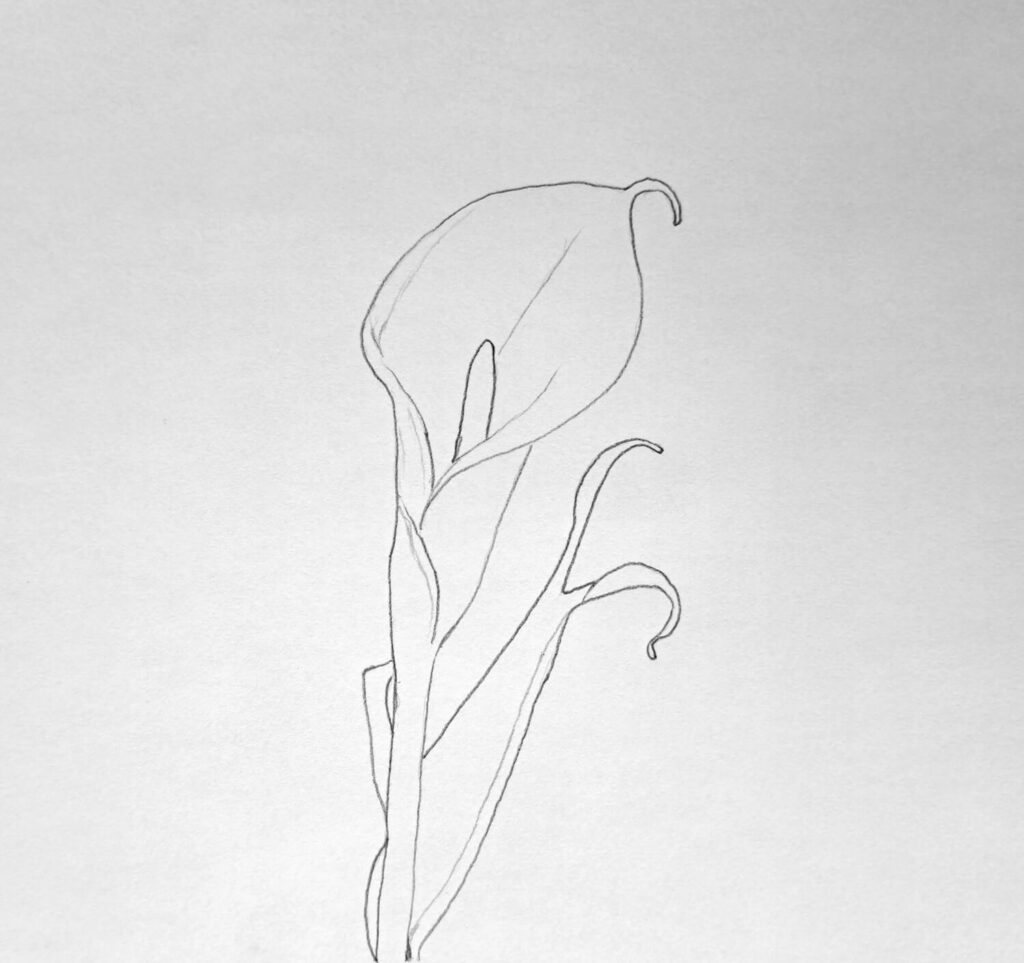
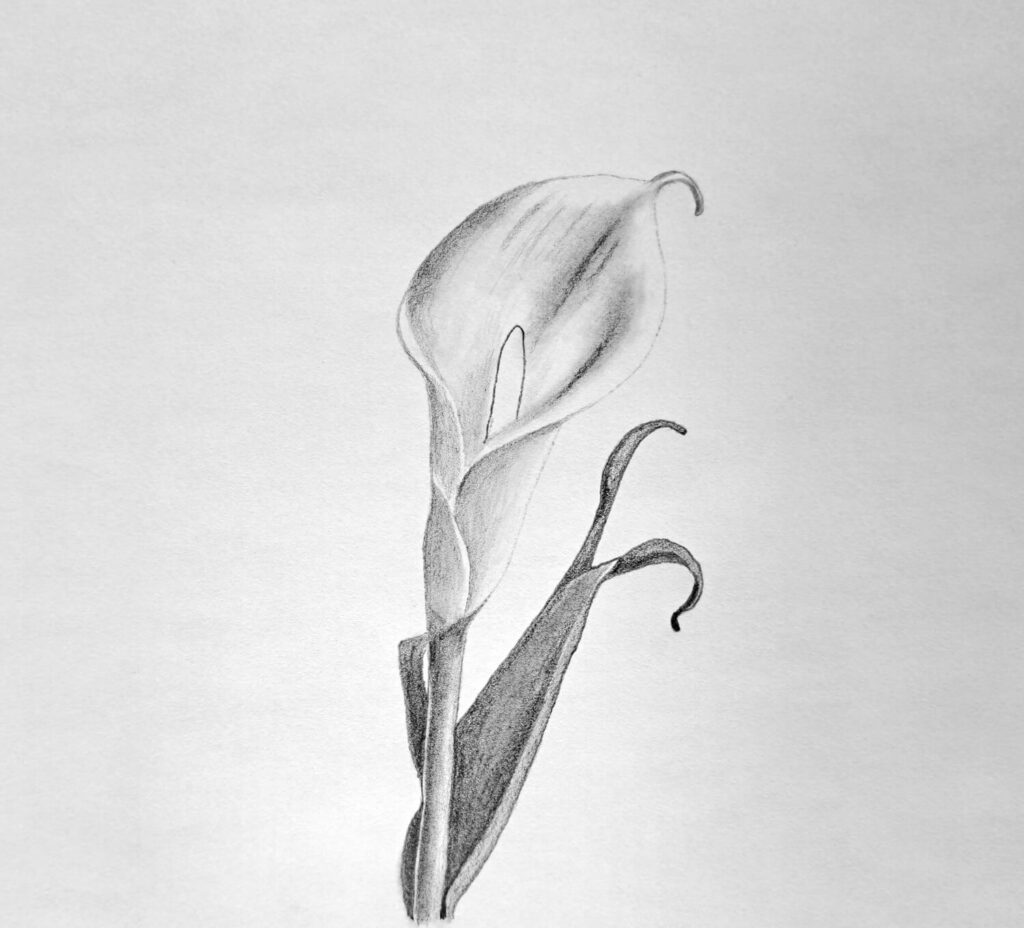
The first step is creating a light outline of the flower. Begin by sketching the overall shape of the bloom. Pay close attention to the sweeping outer edge of the spathe. One of the reasons calla lilies are enjoyable to draw is that their forms flow almost like fabric draped in a gentle breeze.
Keep your pencil pressure light during this stage. These initial lines serve as a guide, and you’ll likely make adjustments as the drawing develops.
Next, draw the inner fold where the spathe curls inward. This overlapping section creates much of the flower’s visual interest, so take your time studying the curves and angles.
Finally, sketch the spadix, the central spike emerging from the flower’s center. Since the spadix acts as a focal point, placing it accurately helps establish the flower’s proportions. The stem and the leaves can follow thereafter.
Light Shading
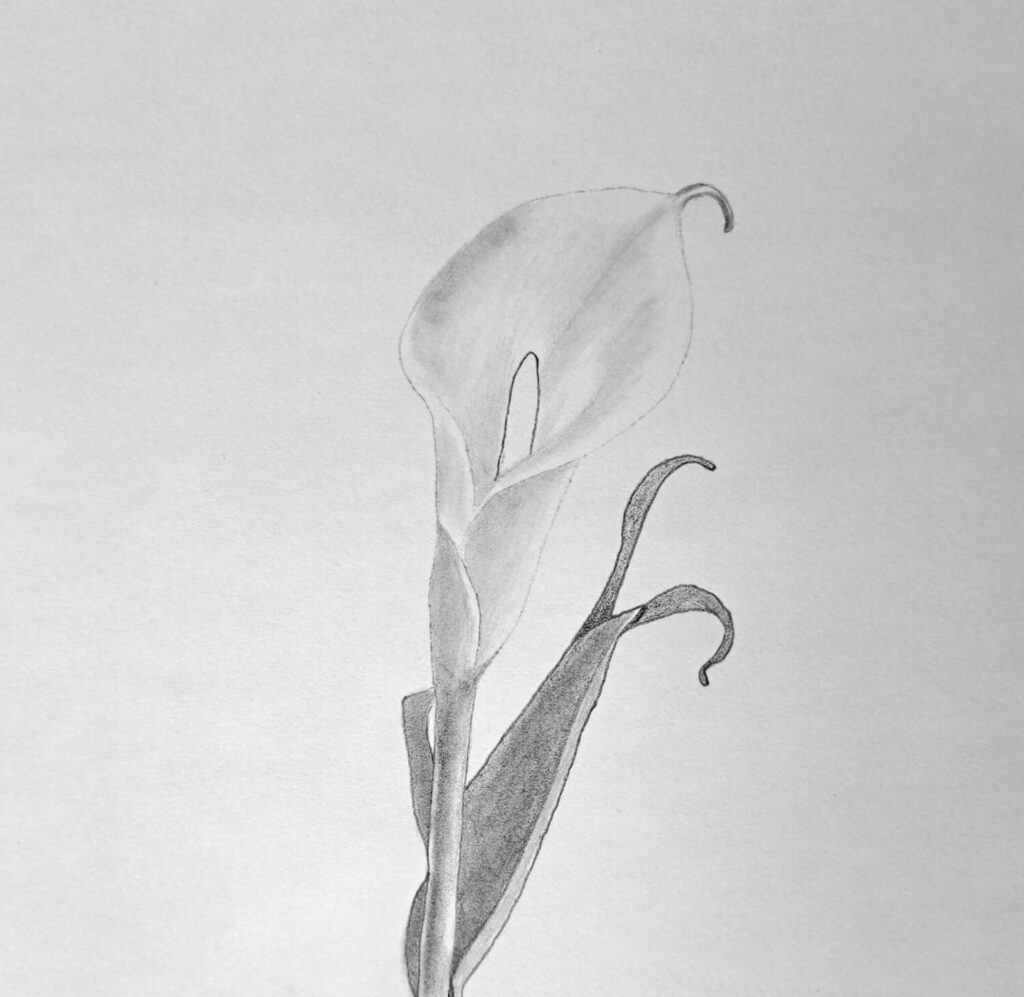
Once the outline looks like your reference, begin adding light shading across the flower.
Using an HB or 2B pencil, identify the areas receiving less light. Apply soft, even layers of graphite rather than pressing hard. Building value gradually gives you much more control later.
The calla lily’s white surface can be deceptive. Many beginners assume a white flower should be left mostly blank. In reality, white objects often contain some of the most delicate and beautiful shadows in a drawing.
Look closely at the folds of the spathe. Notice how the curved surfaces create subtle transitions between light and shadow. These gentle shifts are what make the flower appear three-dimensional.
Adding Depth to the Drawing
With the basic values established, it’s time to strengthen the shadows and create more depth.
Focus on the areas where the spathe overlaps itself. These locations typically contain darker shadows because less light reaches them. Increasing the contrast here helps separate one form from another.
As you darken the shadows, maintain smooth transitions into the lighter areas. Abrupt changes can make the flower appear flat or stiff. The goal is to create the soft, flowing appearance that calla lilies are known for.
This stage often transforms the drawing dramatically. The flower begins to lift off the page, and its sculptural qualities become much more apparent.
A useful technique is to compare shadow shapes rather than individual tones. Ask yourself: Which area is darker? Which edge appears softer? These comparisons often lead to more accurate results than trying to assign exact values.
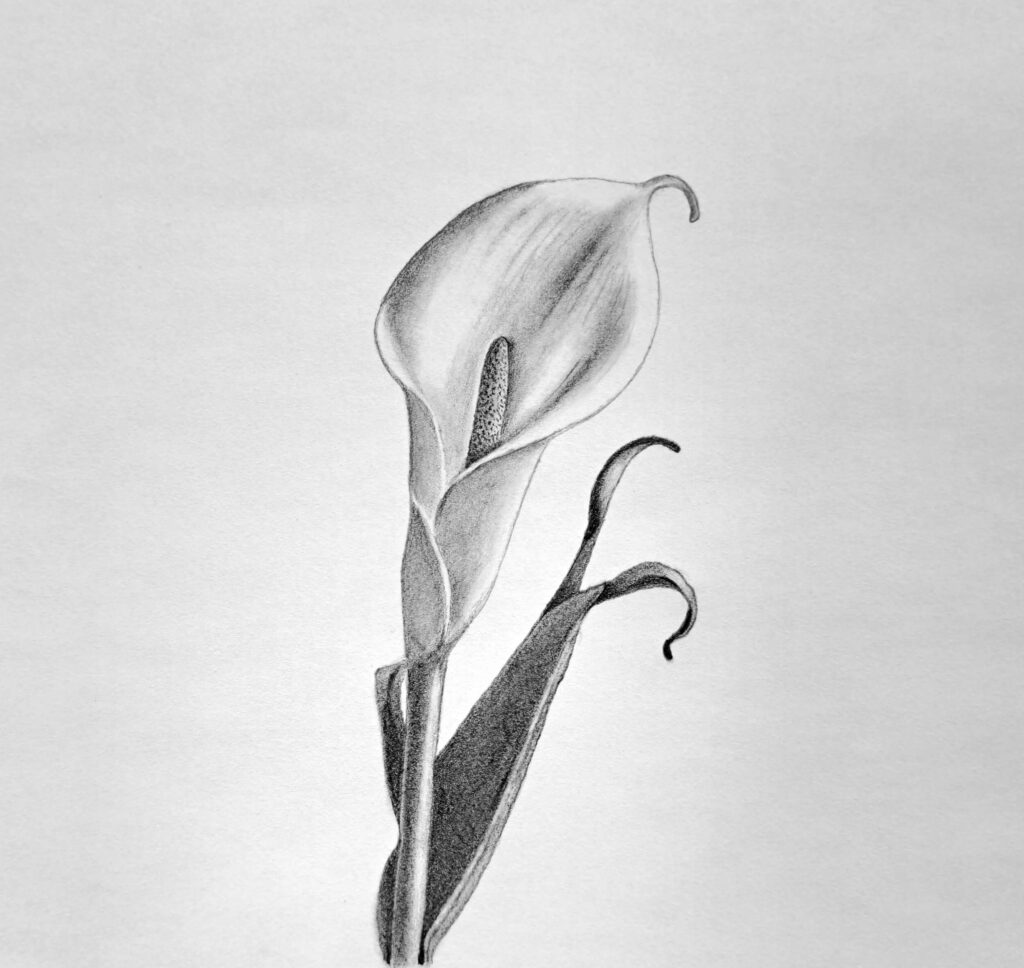
Complete Calla Lily Drawing: Shading the Spadix

To complete the calla lily drawing, start by shading the spadix. Although it’s a relatively small feature, the spadix plays an important role in the composition.
It draws the viewer’s eye toward the center of the flower and creates contrast against the lighter spathe.
Apply a slightly darker value to the spadix than the surrounding petals. Depending on your reference photo, you may notice subtle texture along its surface. Small marks and variations in tone can suggest this texture without requiring excessive detail.
Then, look for opportunities to deepen shadows, soften transitions, or brighten highlights. If necessary, use a kneaded eraser to lift small highlights along the curved edges.
These bright accents can help emphasize the silky texture of the flower while adding texture.
To correctly shade the stem, you need to have an understanding of shading cylinders. Lastly, make sure there’s a good balance between the dark and light values on the leaves. Once you’re satisfied with the values and details, your calla lily drawing is complete.
However, you shouldn’t stop here. Below are my top recommended tutorials to keep practicing:
- How to draw a rose with colored pencils
- Drawing tulip flowers
- How to draw a hibiscus flower
- Drawing a petunia flower
- How to draw a daffodil with colored pencils
Conclusion
Remember, this guide is part of my series on drawing common flowers. Make sure to check it out, where I combine drawing with both color and graphite.
I hope you’ve enjoyed this tutorial about my four-step process for drawing realistic calla lily flowers. If you’ve been inspired, always consider sharing with at least one person, but most importantly, share your work for constructive criticism.
Alternatively, you can bookmark or save on Pinterest if you don’t have the time to follow along and come back whenever you’re ready.