One of my most popular tutorials is about drawing an adult Weimaraner dog, which I did several years ago. However, I’ve had several people ask me how they can draw a realistic puppy. After all, who doesn’t love puppies?
They’re more adorable, and their playful nature just melts even the toughest of hearts. But what I really love about them as drawing subjects is the fact that they are very expressive. You can read a ton of emotions by looking at their face.
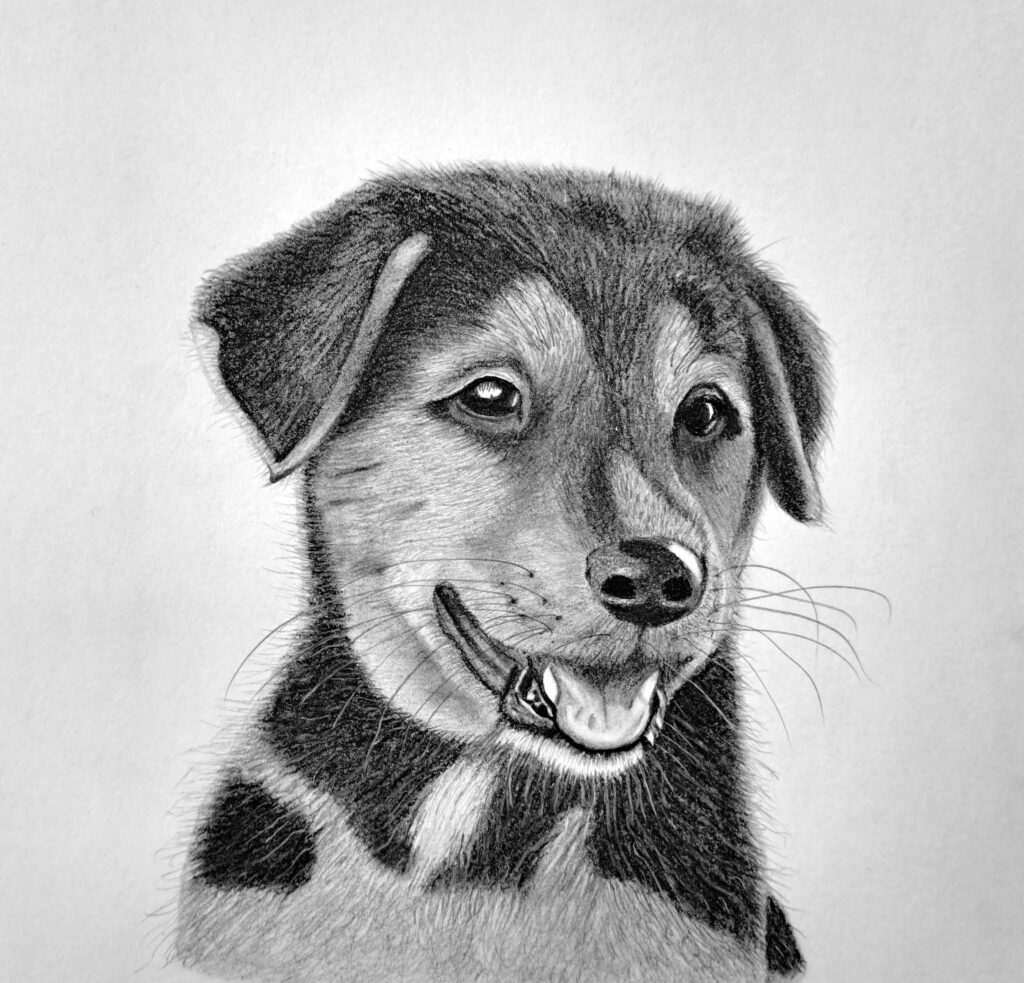
Being able to capture those emotions in your artwork is just bliss. That’s why in today’s guide, I’m excited to share my simple process on how to draw a puppy.
I hope you’ll enjoy it as much as I did, drawing and preparing this tutorial for you.
Let’s dive in.
What You’ll Need
- Reference image (copyright-free) – Pixabay or Pexels
- A ruler to create the grid, or anything to help you draw straight lines
- A paper of your choice or a sketchbook
- Sketching pencil (3H – H)
- Mechanical pencil (thin lead)
- Shading Pencils (HB – 2B)
- Pitt Charcoal (Medium – Soft) for extra dark values
- A kneadable eraser and white medium pastel
How to Draw a Puppy Step by Step with the Grid Method
Sketching using the Grid Method

The grid method is by far the easiest way to draw realistic subjects, even if you’re a complete beginner. In fact, professional portrait artists use a slight variation of this very method. The reason it’s simple is that it allows you to concentrate on the sum of the parts instead of the whole.
Meaning, you only get to focus on one box of the grid at a time.
So, get your ruler and create a grid on the reference image, and then replicate the same grid on your drawing paper. Next, begin sketching what you can see in each box.
You’re free to start at any point, and while at it, make sure to enjoy the process. Try to sketch the puppy’s nose, eyes, and mouth as precisely as you can. If you get this right, the rest of the drawing becomes extremely easy.
Completing the Sketch
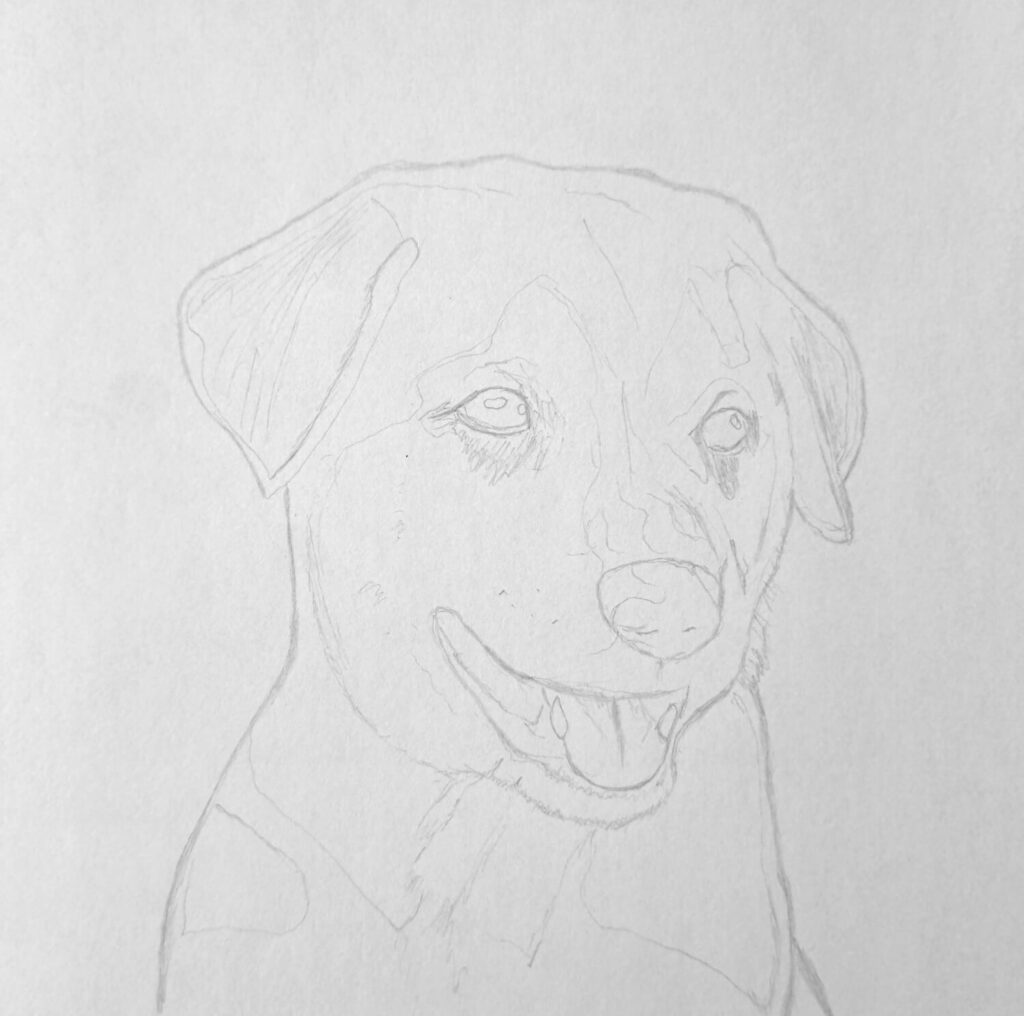
When using the grid method, the trick is to have those boxes as light as possible. That’s why I always recommend using a hard pencil with light graphite. If you got that right, this step will be a breeze because you now need to erase the whole grid.
Some experienced artists do not even bother erasing because they can conceal those lines by subsequent shading.
However, for the majority of us, it’s a great idea to just erase them. After cleaning up, some details may get erased. You can restore them by refining your sketch, redrawing some lines, and erasing others. Keep comparing your sketch to the original reference and adjust accordingly.
Also, sketch out all the areas that will require attention when shading, specifically areas with dark values.
Remember, after this step, you won’t have another opportunity to correct glaring mistakes. If you’re happy with your complete sketch, proceed to shading.
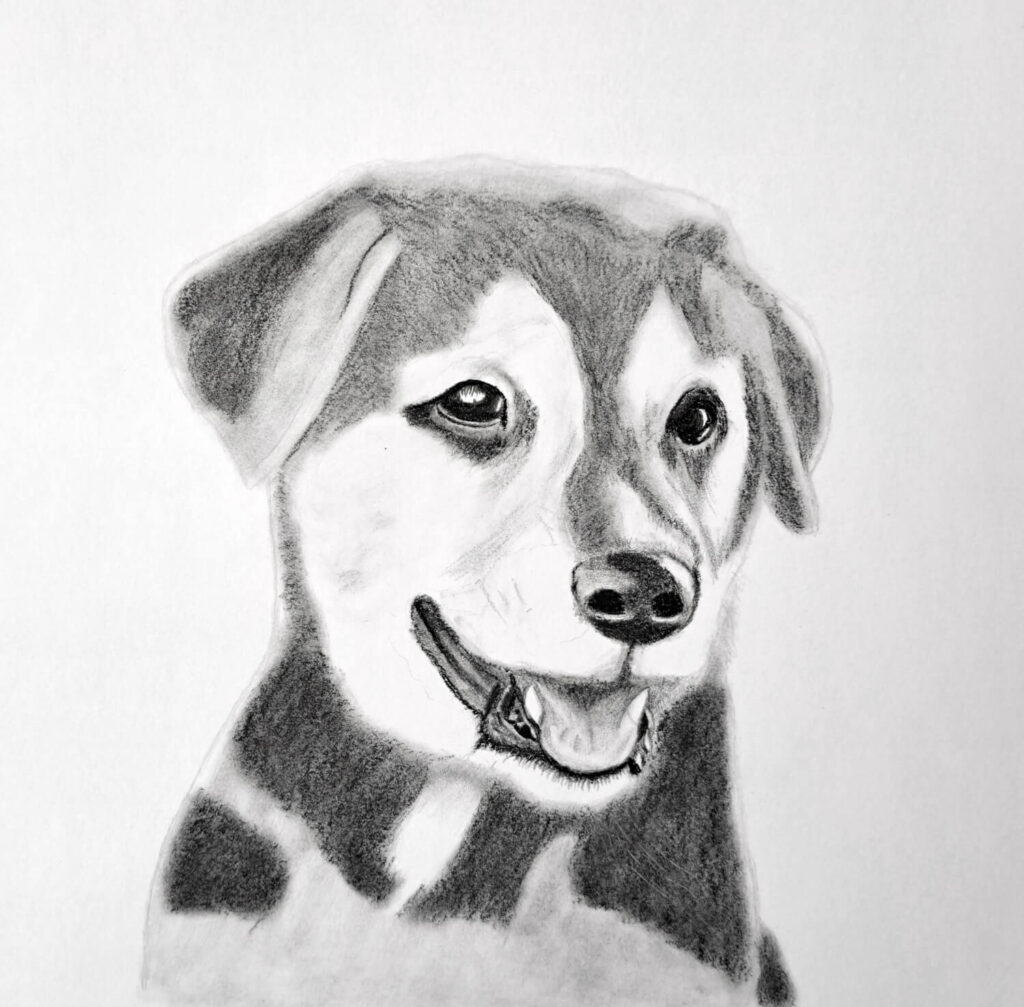
Shading the Puppy’s Nose & Eyes
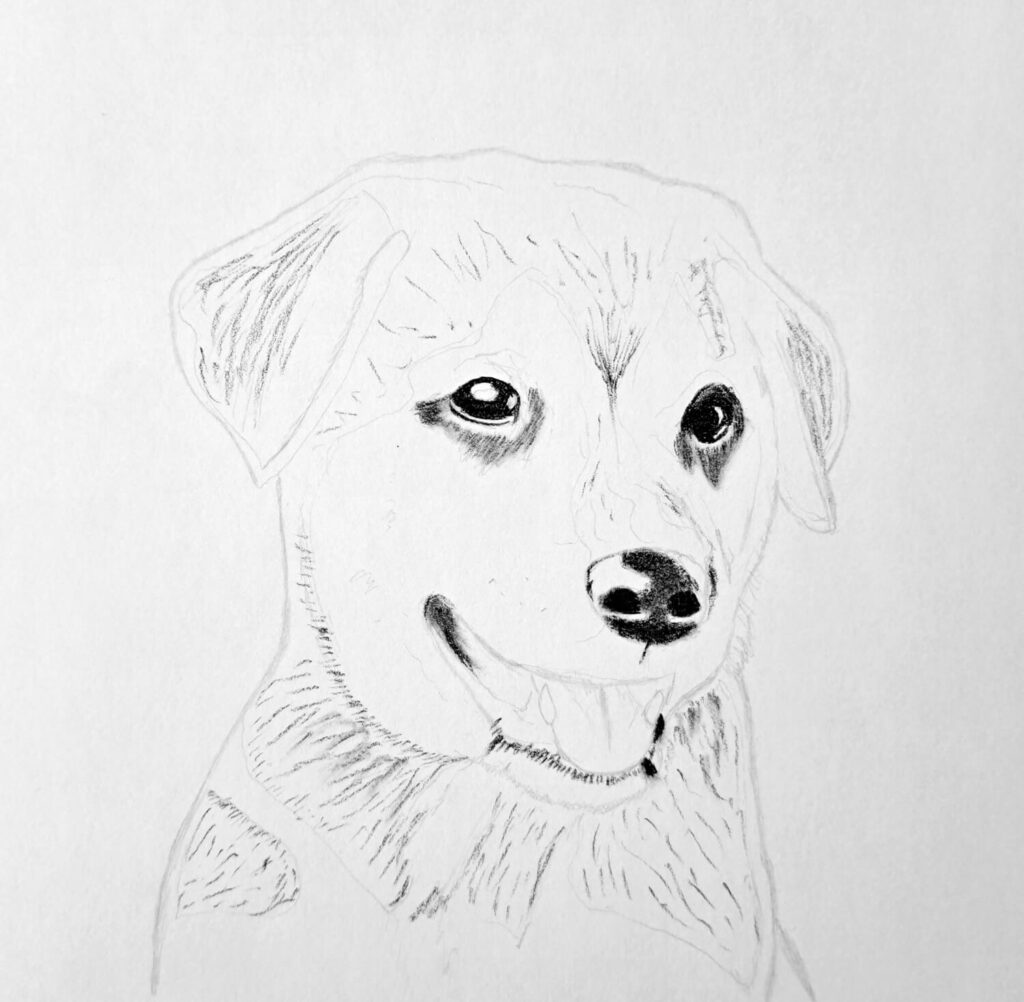
At this point, begin shading those puppy eyes. Get your Pitt charcoal and shade inside the eyes while leaving the highlights untouched. Depending on your reference, you may have at least two highlights in each eye.
The first one creates an illusion of glossiness like that of a glass, and the others highlight watery eyes near the corners.
Do the same for the nose. Notice that from my illustration drawing, I’m only shading the darkest values around the eyes, nose, and partly the mouth. We’ll keep refining them as we progress.
Shading the Mouth & Tongue
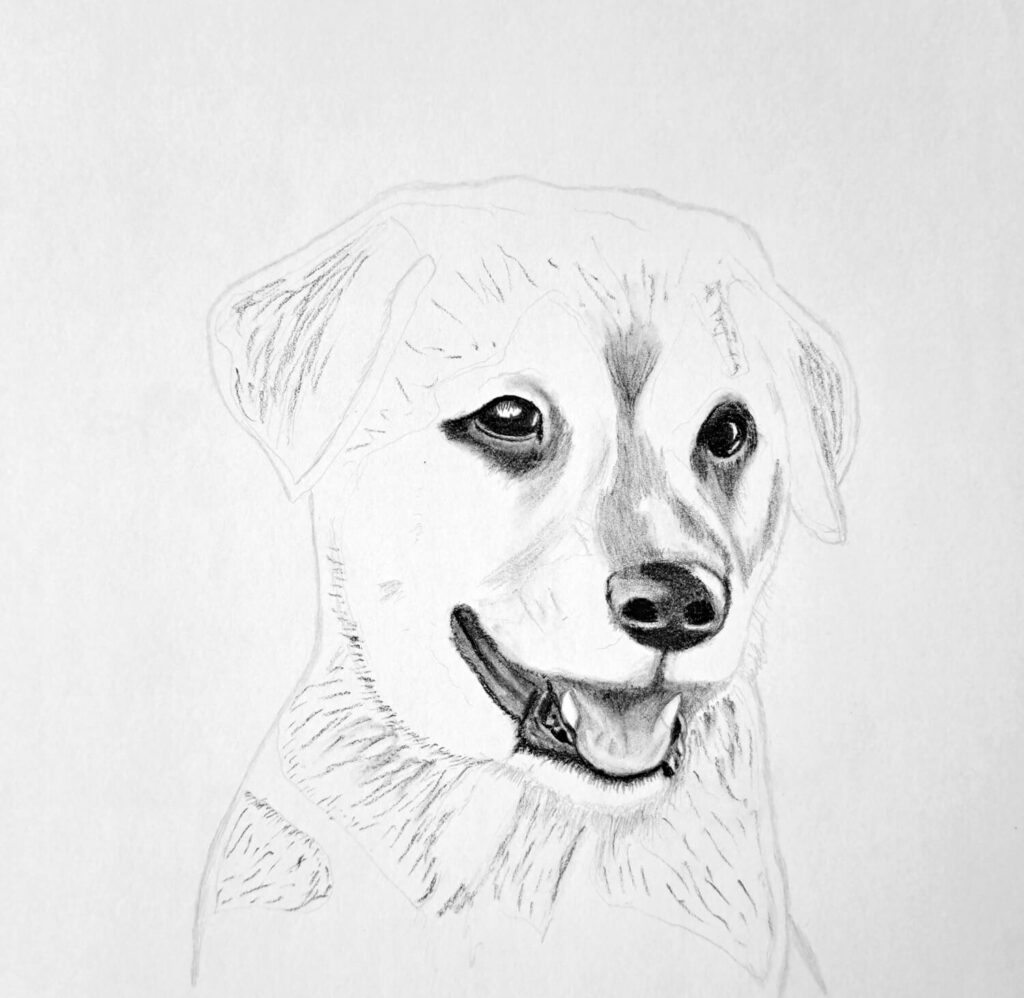
In this step, we’re going to shade around the open mouth, tongue, and the two canine teeth. Now, the dog’s mouth has several notable components, but the gum is quite unique in my opinion. It has quite a contrast and is shiny.
That’s where you should begin shading using a 2B pencil and then blend. Next, get a kneadable eraser and dab off unnecessary graphite to create the illusion of the shine. Also, shade the tongue, which is darker at the base and gets lighter towards the tip.
Leave the canine teeth unshaded.
If in doubt, study my drawing above and try to replicate what you can see.
Shading Dark Values – Face & Body
This step involves giving the drawing some volume by shading all the dark values you can spot on the reference photo. Start with the head, the ears, the bridge of the dog’s nose, and the body.
Use the soft Pitt Charcoal so that you achieve those dark shadows. It’s alright to use a soft graphite pencil like 6B or 8B, but in my experience, they leave behind unsightly shine afterwards. Therefore, charcoal seems to do the trick for me.
Remember, you’re just blocking in those shades and then blending. Nothing more.
Shading the Fur
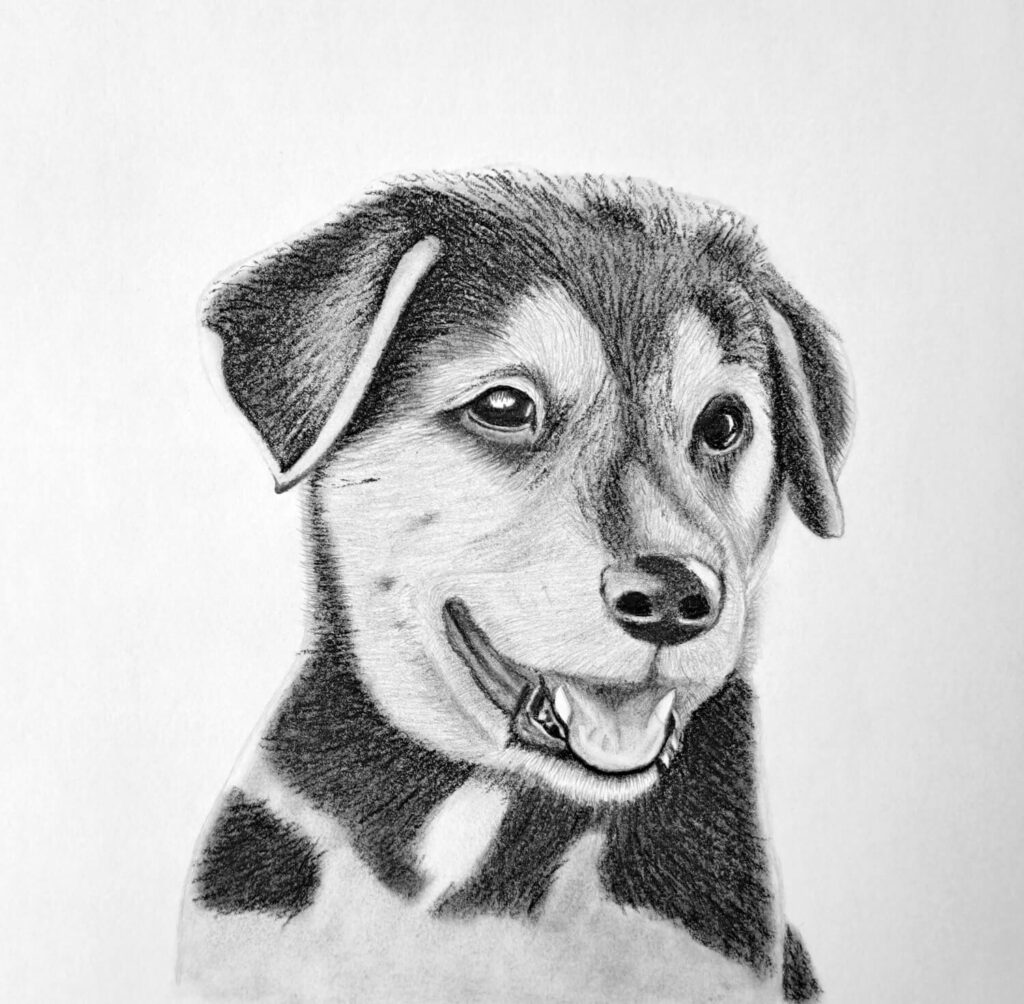
Using short strokes, begin building the fur to make the puppy’s body texture more realistic. How long or short the strokes are depends on the part of the body.
For instance, the head requires shorter strokes than the rest of the body.
If you want to learn how to draw and render the fluffy and furry texture, check out this video.
Deepening the Texture of the Fur
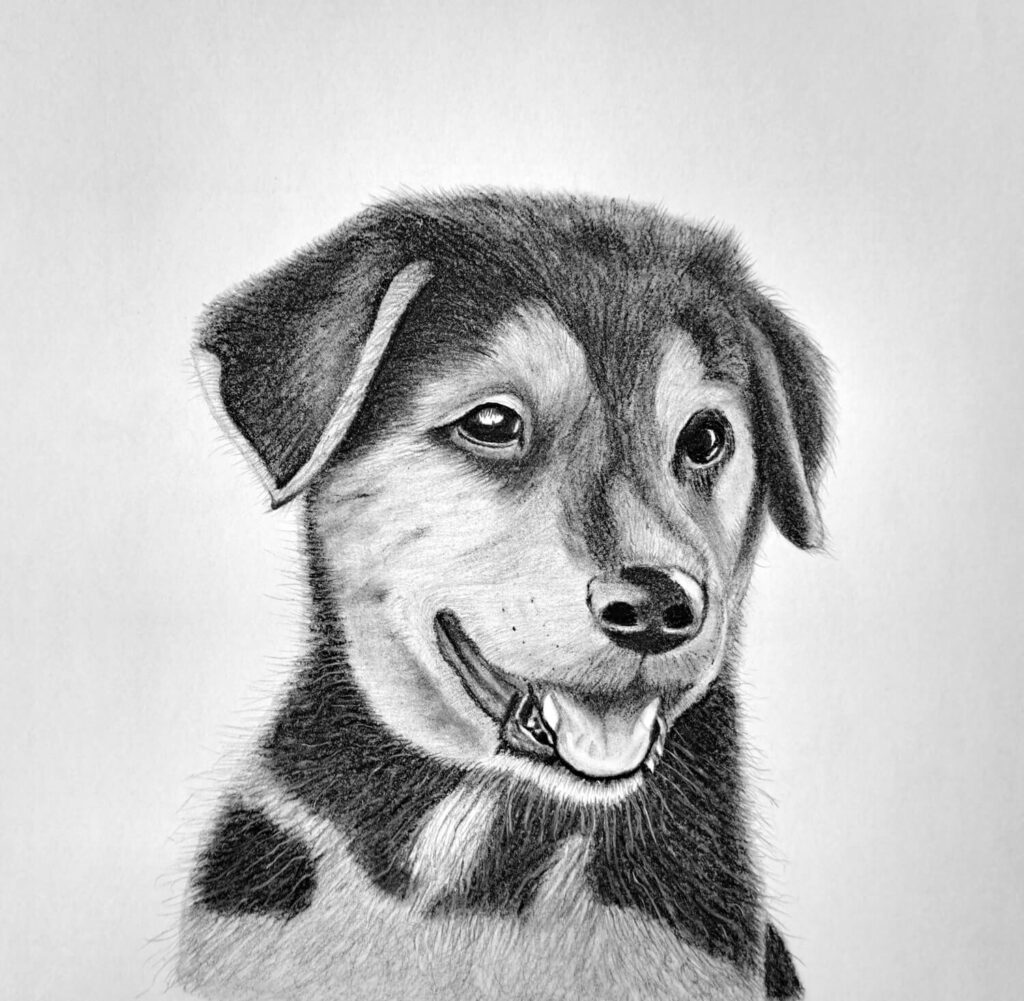
To create the rich texture of the fur, we need to incorporate the dark and light strands. Begin by using the mechanical pencil to create long strokes of fur on the puppy’s body. Alternate with a sharpened charcoal pencil.
But instead of smooth shading, we’re aiming for strokes, enough of them to build form and volume. Next, use an eraser kneaded to a point, and create some marks on the black shade background. Alternatively, use a white pastel to create the strokes.
Completing the Puppy’s Drawing

To complete this artwork, you need a few more finishing touches, like the whiskers, refining the fur, creating sufficient contrast, and cleaning up the outline.
You can use the black mechanical pencil to sketch the whiskers and dab extra graphite or charcoal with an eraser for the areas that need a bit of brightness. Take a look at the eyes and blend slightly along the edges except the highlights.
Since the dog’s face around the nose and eyes are all near your view, these areas need to be sharper than those away from you. Therefore, touch up the fur with a few more bold strokes.
Below are some more recommended tutorials for drawing and shading texture:
- Winter texture drawing challenge
- Drawing a photorealistic glass of water
- How to draw a single feather
- How to draw and shade an ice cube
Conclusion
There you have it!
I believe that you’re proud of what you’ve achieved. Drawing anything that requires precise rendering of texture to make it realistic is by no means an easy task.
But here you are.
If you’ve enjoyed today’s tutorial, please consider sharing it with your friends on Facebook or save to Pinterest so that you can always find it easily.
I hope you’ve been inspired!