
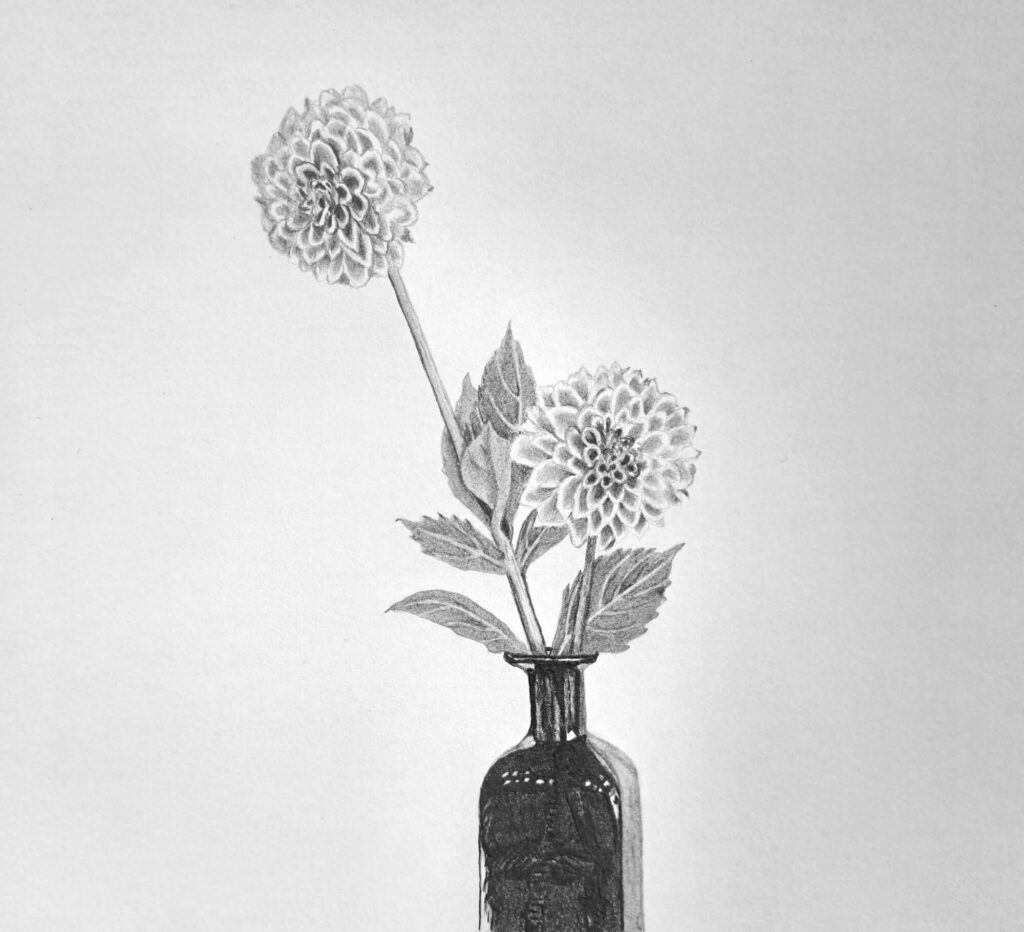
I’m one of those artists who enjoy observing and drawing botanical illustrations and florals.
But even better than drawing is the realization that each plant is unique, with its own amazing background stories.
Dahlias, for instance, have a wide variety of cultivars.
Some cultivars have broad, neatly arranged petals, while others have hundreds of narrow, tightly packed florets.
Botanically, these structures are made up of individual florets, with the outer ray florets creating the familiar petal-like appearance.
All these features and layered structures give us the much-needed drawing challenge in form and texture. The glass vase brings another challenge because you need to suggest the shape and reflections.
In short, you have to create an illusion of various materials (glass, leaves, petals, stems) all at once.
If this excites you as much as it does for me, let’s break it down:
Drawing Dahlia Flowers and a Glass Vase
Sketching the Flowers and Vase
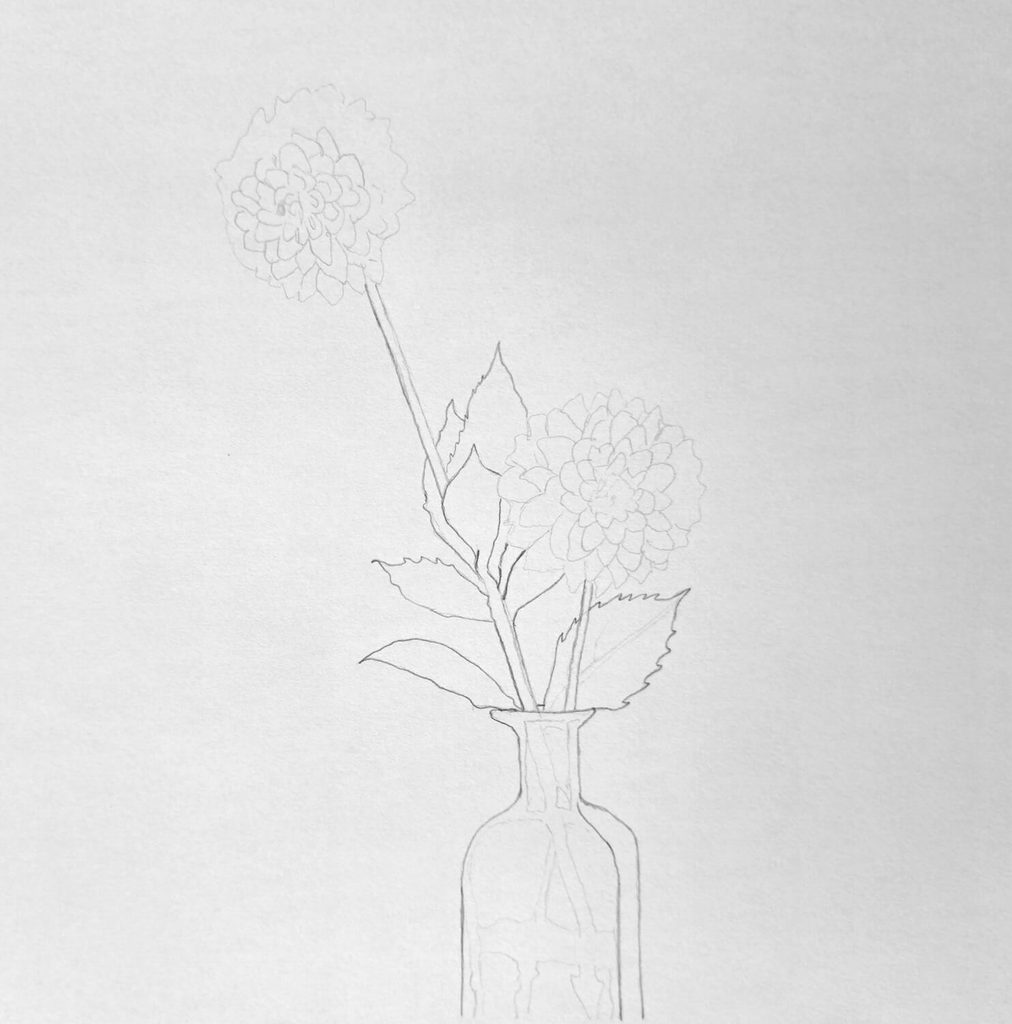
Begin by establishing the overall arrangement. Lightly mark the positions of the two flower heads, paying attention to their sizes, angles, and distance from each other.
One sits considerably higher than the other, so getting their relative positions right will help maintain the balance of the composition.
Use loose circular or oval shapes to establish the flower heads, then mark their centers. These will serve as guides when adding the individual petals. Next, sketch the stems and leaves, following their natural directions and noting where they overlap.
Finally, outline the vase, including its narrow opening, slender neck, sloping shoulders and broad, almost squarish base.
Check the proportions against the flower arrangement, making sure the vase is wide enough to support the stems visually. Keep your construction lines light so they don’t interfere with the shading later.
Shading the Flower Petals
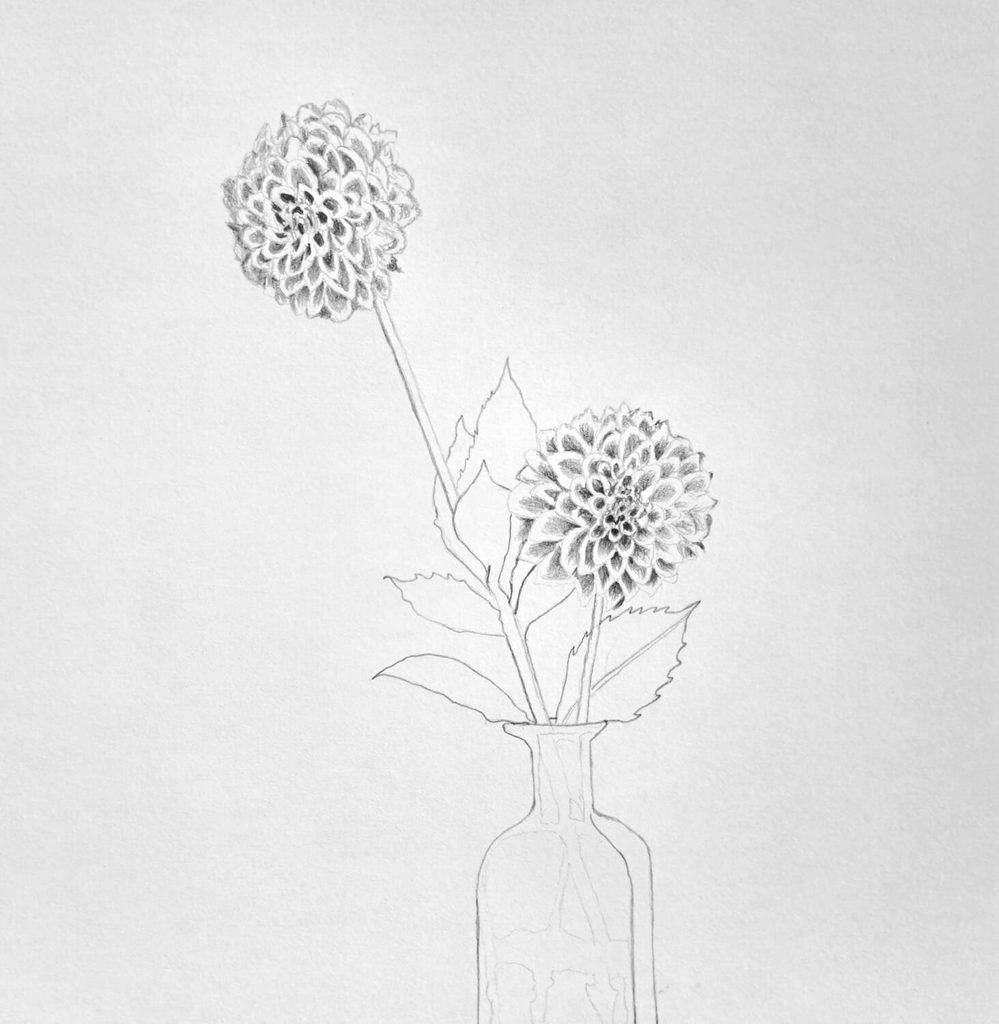
Shading the Darks at the Center
The centers of the dahlias contain some of the smallest and darkest details in the drawing. Their closely packed florets create numerous little pockets of shadow, which give the flower heads much of their characteristic depth.
Start by identifying the darkest spaces between the inner petals. Use short, controlled pencil strokes to shade these recesses, following the circular arrangement around the center.
The areas where petals overlap will generally need darker values because less light reaches them.
Vary the pressure as you work. Some spaces will be almost black, while others will have softer grey tones.
Leave the raised surfaces of the tiny petals lighter to maintain their separation. These small contrasts are important because shading the entire center too heavily can make the individual structures difficult to distinguish.
Shading the Whole Flower
With the darker center established, work outwards towards the larger petals. Follow their individual curves and pay attention to how they overlap.
Each petal should have its own pattern of light and shadow, depending on its shape and position.
Begin with a light layer of graphite, then gradually build up the darker values along the folds and underneath overlapping petals.
Leave the exposed surfaces lighter, particularly where the petals face the light source. This contrast will help give them a curved, three-dimensional appearance.
Look closely at the different petal shapes. Some curl inwards, forming small shaded pockets, while others spread outwards with broader, relatively flat surfaces. Adjust your strokes accordingly, using darker shading around the curled edges and softer transitions across flatter areas.
Continue around the flower, working through the layers rather than trying to shade everything at once. Pay attention to the outermost petals, where irregular edges and subtle shadows help define the flower’s overall shape.
Apply the same approach to the second dahlia, taking its viewing angle into account. Its petals have a slightly different arrangement, so follow what you see in the illustration rather than repeating exactly the same shading pattern.
Shading the Stem and Leaves
Uniform Shading of the Leaves, Shading the Cylindrical Stem
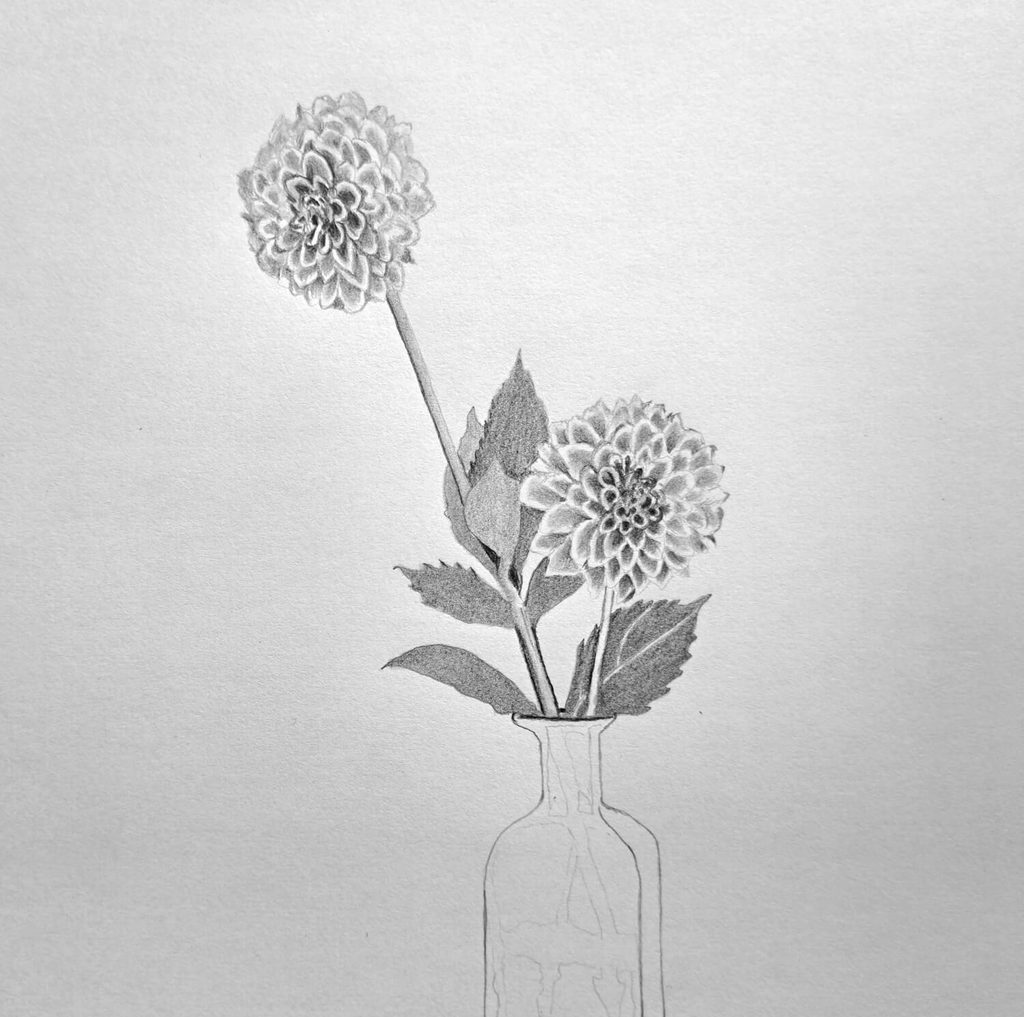
Start by applying a uniform layer of graphite to the leaves. Work within their outlines, following their elongated shapes and taking care around the serrated edges.
Keep the shading reasonably even at this stage, as the finer details will come later.
The leaves in this arrangement are relatively dark, so build up a moderately strong base tone. You can leave small areas slightly lighter to help retain some variation, but avoid introducing too many individual veins before the underlying shading is established.
Next, shade the stems.
Think of each one as a slender cylinder, with a darker side and a lighter strip running along its length. Use strokes that follow the stems’ direction rather than shading across them.
Gradually deepen the shadows where the stems meet the flower heads and the leaves to give the overlapping parts more definition.
Adding the Details (Midrib and Leaf Veins)
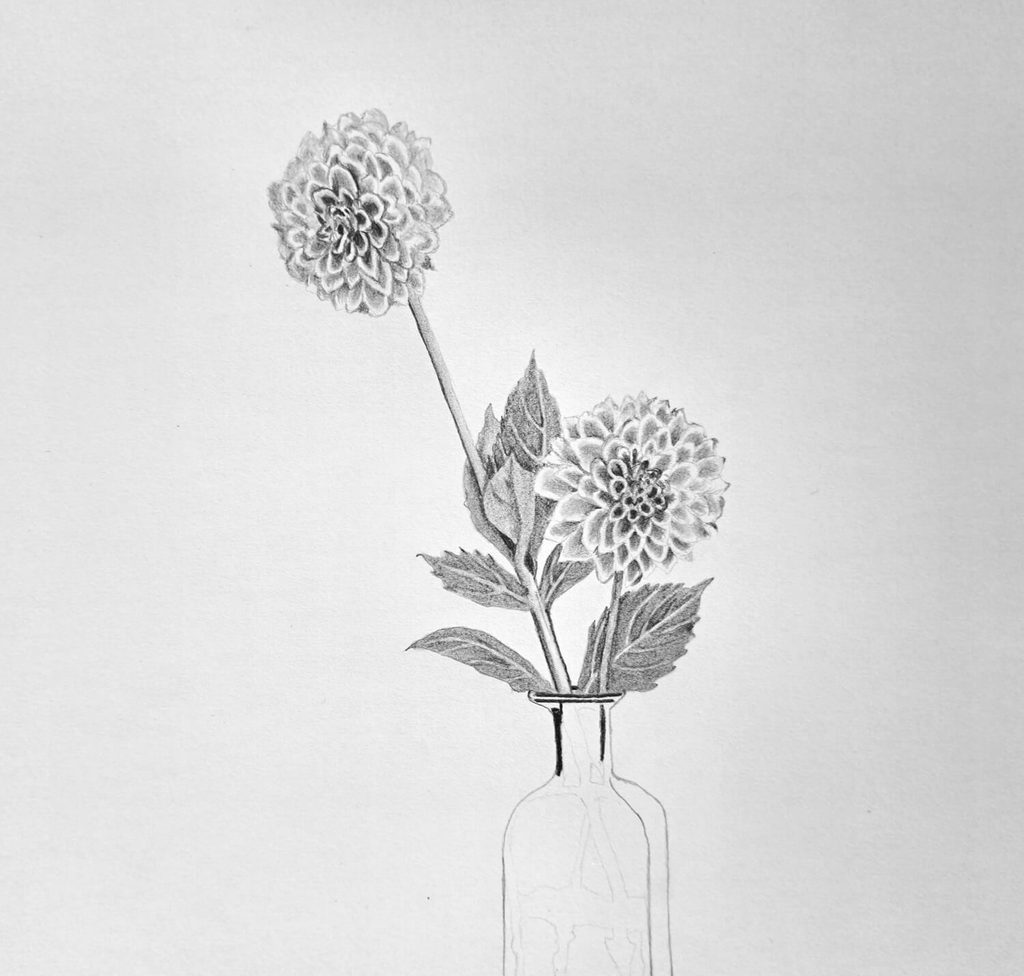
Once the leaves have their base shading, add the midrib and smaller veins. Start with the central vein, following the natural curve of each leaf. It should be more prominent than the smaller veins branching away from it.
Use pointy kneaded eraser strokes to draw the secondary veins, directing them towards the serrated edges. Vary their length and darkness slightly, as the veins won’t all be equally visible.
Pay close attention to how the veins meet the midrib.
Rather than drawing a series of isolated lines, make them appear connected to the central structure of the leaf. Keep some of the markings subtle so they blend with the underlying graphite instead of sitting on top of it.
Here’s an interesting tutorial on how to draw a leaf with water droplets.
Drawing and Shading the Glass Vase
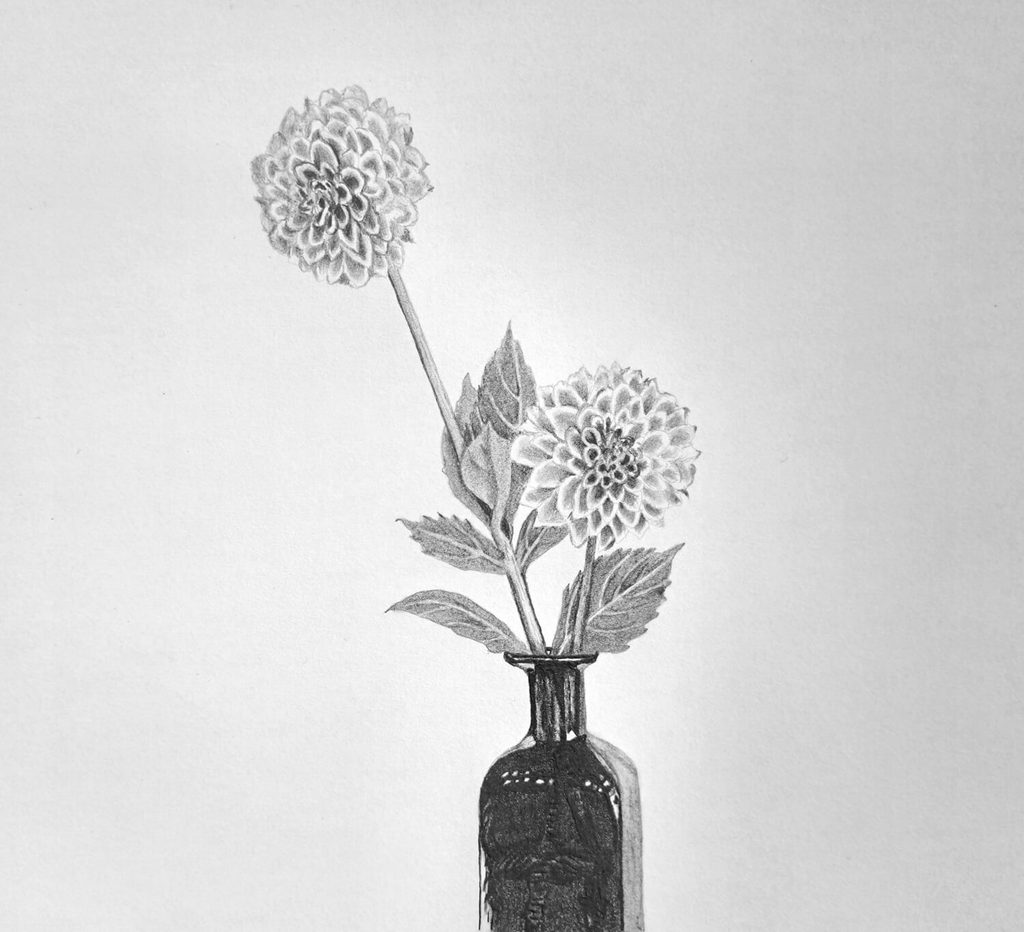
The vase is considerably darker than the flowers and leaves, so this stage involves building up deeper graphite values while preserving the small highlights that suggest its smooth, reflective surface.
Start with the narrow neck and opening. Shade the rim and the inside of the opening quite darkly, taking care to retain the distinction between the rim and the stems emerging from it.
Work down the neck, using long, controlled strokes to establish its dark surface. Leave a few narrow lighter strips along the sides to suggest reflected light.
Move towards the shoulders, where the vase gradually widens. Build up the graphite to create a rich, dark tone, following the change in shape as the narrow neck transitions into the broader body.
The curved shoulders catch some reflected light, so preserve the small lighter patches visible around this area.
For the broad base, apply a relatively even layer of dark graphite, gradually strengthening it until it becomes one of the darkest areas in the drawing. Pay attention to the almost squared-off shape, keeping the sides reasonably straight while allowing for the slight curves along the edges.
The reflections are what make all the difference.
Notice the small bright spots across the upper body and the lighter strip along one side.
Preserve these areas by working around them as you shade. Where necessary, use a clean eraser to lift graphite and restore the highlights. These small variations will help suggest the polished surface of the glass.
Finally, check the overall tonal balance.
The vase should have a much deeper value than the flower heads, but retain enough variation to show its neck, shoulders, and broad base as distinct parts of the same object.
I have some similar tutorials on how to draw a wine glass and how to draw photorealistic glass of water. Make sure you check them out if you need more practice.
Conclusion
I hope you’ve enjoyed this easy tutorial on how to draw realistic dahlia flowers in a glossy vase. Now, I understand that sometimes it doesn’t matter how much you practice.
The resulting drawing or artwork will almost always look nothing like the reference. If you’re one of those people, don’t forget to check out the guide on why your drawing looks off. It will help you figure it out, I promise.
If yours is good to go, don’t forget to share with the world and, most importantly, spread the word about this tutorial.
Whichever way, keep drawing!