Are you an aspiring artist looking to hone your drawing skills? If so, then why not try your hand at drawing a realistic tiger?
Drawing tigers can be tricky, but with the right guidance and practice, you’ll be able to draw one in no time!
In today’s post, we will provide step-by-step instructions on how to draw a realistic tiger. We’ll go over all of the basics from sketching out the shape of the animal to adding details like fur and stripes.
With this guide, you’ll soon have a stellar finished piece that is sure to impress. And if you’re easily bored by text, I’ll embed some video tutorials for you to watch. So grab your pencils, kneadable eraser, blending stump, and a piece of paper, and let’s get started!
Sketching using a grid method
This is a great way to get the proportions just right for your drawing. To start, lightly draw a grid with equal square measurements on the reference photo.
Count them and take note of their number both vertically and horizontally. Lightly draw a similar grid on your drawing paper. Preferably, use a 4H pencil since we’ll erase these later on.
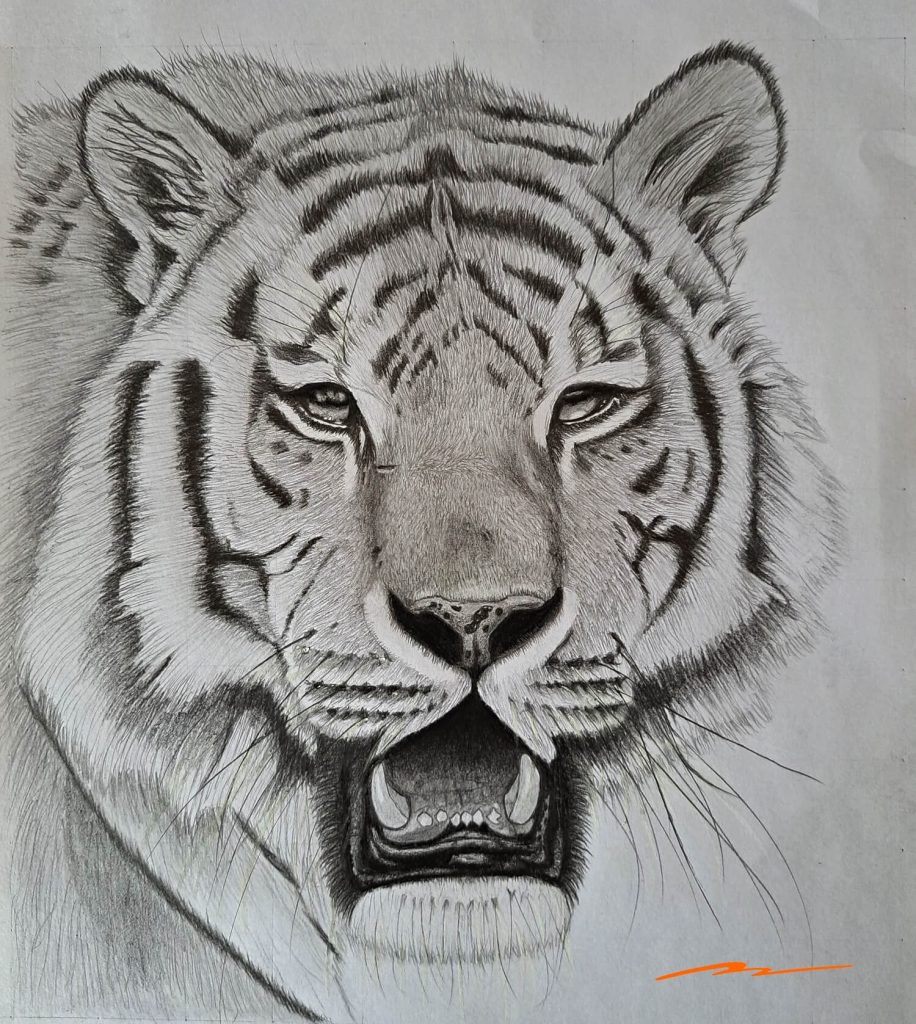
You’ll then use this grid to sketch out a basic outline of the tiger’s body parts — head, eyes, ears, nose, mouth, and canine teeth.
By doing so, you’ll know exactly where every part is located on your grid – which makes drawing a complex image so much easy – since you only need to focus on one square at a time.
How to Draw a Realistic Tiger Step by Step
Step 1: Sketch Lightly Using a 4H Graphite Pencil
Once you have your grid drawn, sketch out the basic shapes of the tiger using a 4H graphite pencil. This means that you should make sure to draw lightly — as this will help to ensure accuracy and precision.
Be sure to follow the reference photo closely when doing this. As you go along, take note of any details such as the tiger’s stripes, fur pattern, and facial features.
Step 2: Continue to Add as Many Details as Possible
Here, no detail is too minor to leave out. Pay attention to the shadows and highlights that are present in the reference photo, and replicate them as faithfully as you can on your own drawing.
Keep working up the details until you’re happy with how everything looks. You may even want to take a break between steps to make sure that you don’t miss anything!
Step 3: Begin to Sketch the Eyes
We’re still taking it lightly with a hard pencil. Make sure that you get the placement of the eyes correct. Draw them in the middle of the head, and make sure they’re symmetrical.
The irises should be small and circular (again, use your reference photo for guidance).
Feel free to add a thin layer of fur around each eye if it looks too empty—this will give the drawing more depth.
You can also use a darker mechanical pencil to make the eye outline bolder while paying attention to light reflection.
Here’s the video of everything we’ve discussed up until this point.
I’d recommend you watch and check if you’re on track.
Step 4: Sketch out the Nose, Mouth, & Teeth
You need to pay attention to the pattern on the nose. Also, check the nostrils and ensure you draw them darker. Next, you need to sketch the tiger’s muzzle and the area where the whiskers emanate from.
Draw the mouth area and all the other details including the canine teeth.
Double-check to make sure all the facial details are where they’re supposed to be. If you’re satisfied, you can move to the next step.
Step 5: Erase the Grid
The purpose of the grid was to guide us to capture all the most important details as accurately as possible.
Therefore, once you feel like you have a good idea of the outline of the tiger, erase any extra lines that are no longer needed.
Do the best you can in erasing all the guidelines. However, don’t get into the temptation of trying to delete every single line. Shading will conceal the remnants for you later on.
Again, here’s the video embed of all the steps so far:
Step 6: Start Shading the Eyes for Realism
Now that we have a good foundation to work off of, let’s start adding the shading.
Start with the eyes — focus on adding realistic reflections, which will make the drawing much more lifelike. Use a kneadable eraser to pick out graphite and emphasize the reflections.
You can also use shading to create depth and emphasize the fur pattern around each eye. Use a soft pencil like 8B and use a blending stump to evenly distribute the graphite to make all the values seamless.
Step 7: Continue Shading the Fur
Use a sharp pencil like a mechanical pencil 0.5mm, and make short strokes around the nose to build on the fur.
Remember, as you move away from the nose to the rest of the head, the fur is relatively longer. Hence shade accordingly. Continue adding fur to the rest of the head to build a dense coat of fur.
Step 8: Increase the Contrast
Continue darkening the tiger’s stripes using a soft pencil (8B) to increase the contrast between values.
You can also add more fur to the areas that need it and use a blending stump for any patchy realms.
Finally, if you think certain areas are too dark, don’t be scared to lighten them up with an eraser (optional).
And here is the video embed of all the steps we’ve gone through.
More Tutorials about drawing animals
- How to draw a cat
- How to draw a Weimaraner dog
- How to draw a realistic lion
- How to draw a koala
- How to draw a wolf
- Drawing a realistic deer
- Drawing a realistic elephant
Conclusion
That’s it!
We have successfully completed a realistic black-and-white sketch of a tiger. I hope you enjoyed learning this new skill. It’s truly satisfying to watch your drawings come to life as you continue shading and bringing in more details.
In the meantime, if you’re looking for more tutorials, check out our YouTube Channel.